|
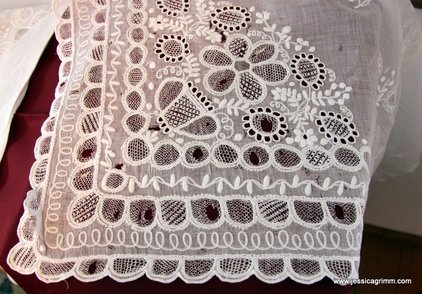
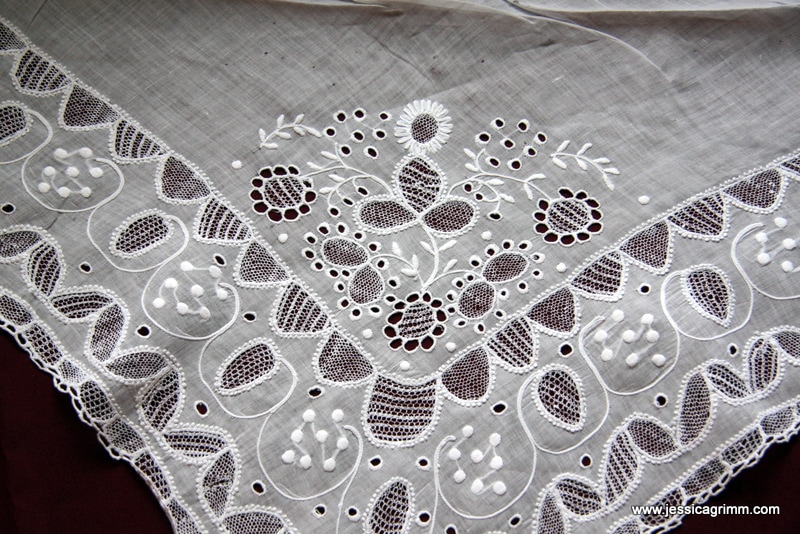
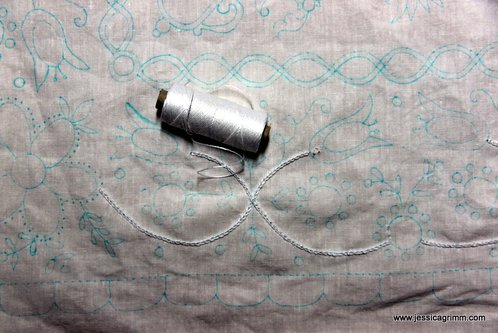
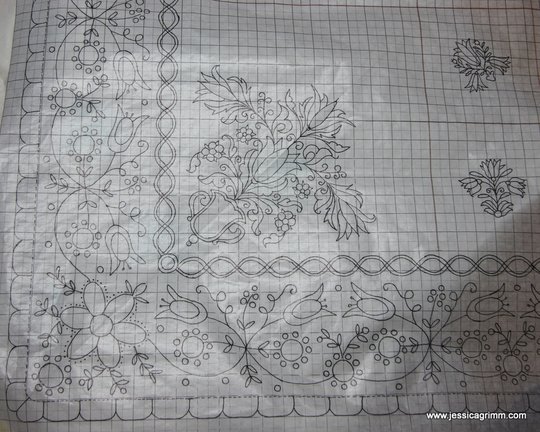
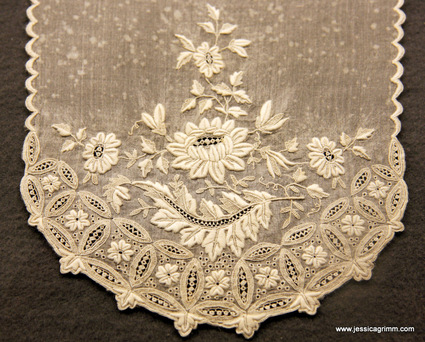
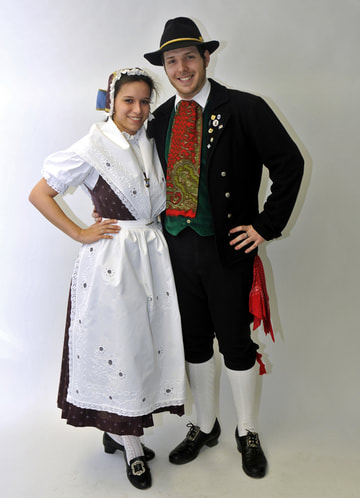
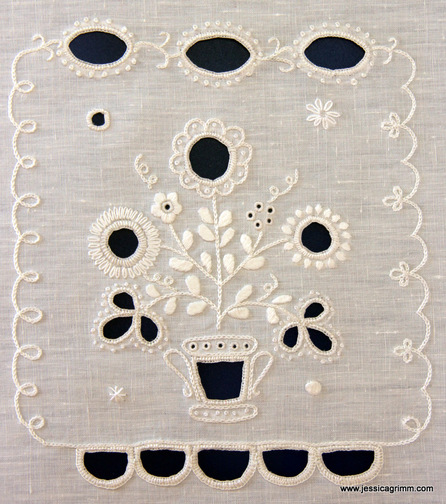
My first encounter with Silesian whitework embroidery was when I attended a short course with Elisabeth Bräuer at ArtTextil. When you have been following my blog for some time, you might remember the small sampler with surface embroidery and needlelace I made then. During this course we used materials that are readily available, but not necessarily historically correct nor good options when working this type of embroidery. So, when Michael (a former RSN-student of mine) enquired if I would join him for a private course with Elisabeth Bräuer, I said yes. An excellent opportunity to work a bigger piece with linen thread on linen fabric. A first for me! The historical pieces in the pictures above (left an apron and on the right a scarf) were stitched on very, very fine 'Schleier-Leinen' or veil linen. As far as I know, this type of linen is now completely unavailable (it is NOT batiste!). But please, do put me right AND out of my misery when you know of a source! To stitch, the young women and soon brides-to-be, used linen thread of various thicknesses. Now if all linen threads you ever encountered where these horrible threads produced by DMC, then you probably don't like the prospect of stitching with linen thread! Neither did I. However, since Yvette Stanton has done such incredible research on Early Style Hardanger and has tested various brands of linen threads, I took the plunge and ordered a selection of Bockens Knippelgarn and Goldschild thread. And I LOVE them! Yes, they are a little stiff and require more 'work' when pulled through your fabric. However, their texture and slight sheen combined with your pristine linen fabric is to die for. So, what will I stitch? Well, not a table cloth as suggested by my dear teacher. You can really scare the pyjamas out of me by proposing table cloths. I am not old enough for that kind of embroidery yet. Table runners ok, table cloths taboo. As one of my other passions is folk costume, I really wanted to stitch an apron. Slight problem: my ancestors came from Thuringia and not from Silesia. This means I will hunt the shops for a very plain, probably blue, linen (yes, as you might have guessed, I am a sucker for linen!) Dirndl. My crisp white embroidered apron will look fab on it! Traditionalists are probably not going to be very happy with the prospect of me doing a bit of 'cultural-folk-costume-crossing'. Me not bothered a bit. Because, I have come to the understanding that the 'frozen-in-time' folk costumes we see today are just that: frozen in time. Whereas, when they were still 'alive', they used to evolve. Through migration in all its forms, new ideas were embraced and adapted. Historical events would have had their influences too. How did I tackle my apron design? I knew I wanted tulips. They are both a well-known aspect of folk art and happen to be quite abundant in my native Netherlands. Firstly, I started out with a historical Silesian apron design which featured a tulip border. I did however swap one of the needle lace bands for a different one. Then I did a search on the internet for 17th century Dutch polychrome tiles featuring tulips. Mixing and matching them into my corner design of a vase with tulips. I also used two tile designs as my 'Streublümchen' or scattered flowers. Yep, they are scattered over the rest of my apron. When I was finally happy with my design, I taped it onto my working table. Taped the linen fabric (Weddingen Kettgarnleinen) on top and started tracing with an aquatrick marker. A lot of tracing; the design measures 140 x 87 cm! But, I cheated a bit and did only one half. Just in case the ink starts disappearing as it takes me too long to stitch.
As all the surface embroidery is stitched in the hand, it is going to be the perfect project to unwind with at the end of the day! I can almost see me in my new attire! Can you too? Sorry, it never happened as I did not finish this project.
12 Comments
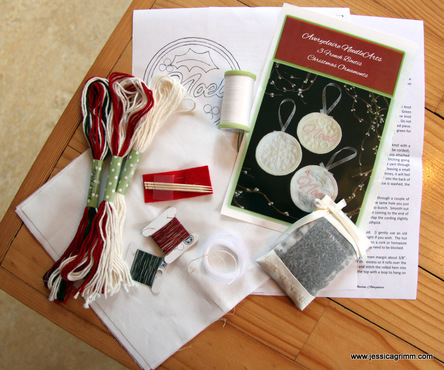
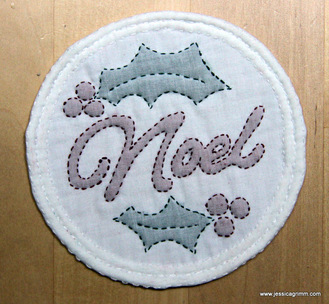
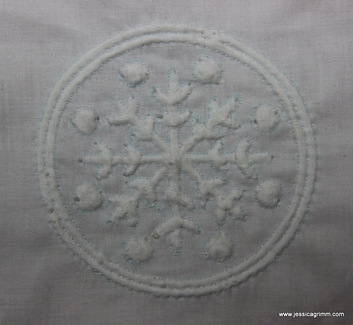
Being the grand-daughter of a German economic refugee comes with an innate suspicion of the French and anything French. So when each summer all our fellow Dutch countrymen clogged up the Route Soleil to holiday in France, the Grimms went East. However, since a few weeks, I've come to like something typically French... Oh, dear! It all started quite innocent with me coming across an embroidery blog. I added it to my Feedly reading list and was treated to lovely Boutis embroidery. Of course I knew that Boutis embroidery originated in France. But what harm can it do to read a blog about it? Well, as things go, after a while reading about it wasn't enough. I started to wonder if I should try my hand at this particular elegant form of white-work. The hack with the Grimm's family values! And so I ordered my Boutis Christmas Ornaments kit from Averyclaire NeedleArts. The kit soon arrived and it contains everything in abundance to make the three ornaments. And since Karen, the woman behind Averyclaire, added a cute lavender sachet, everything smells so nicely. For those of you new to Boutis, it is a padded embroidery technique using two layers of very fine cotton batiste. This creates a lovely contrast between the 'see through' areas and the padded elements. Added bonus: although the cording (padding) needs to get used to, the whole stitching doesn't involve complicated stitching. When you can do running stitch, you can do Boutis. I started with the Noel and Holly ornament. Doing all the running stitches didn't take long and it was fun to do too. Once I figured out that the cord only fills the channels between the running stitches when you double your thread, they were no problem at all. The berries were no problem either. But how do you cord such a 'weird' shape as the holly leaf. Never daunted by anything embroidery, I decided to stuff them as much as I liked. Since I wasn't a 100% sure that's the way it's done, I contacted Karen via email to check. She was super-fast in answering my question and yes stuffing them to your hearts content is indeed what you do. We also chatted a bit about the right approach to filling the snowflake. It's the design I like the most. Here you see a picture of all the cording done. You can see the large holes in the fabric at the back through which you pull the cording. They do vanish quite well after soaking in water.
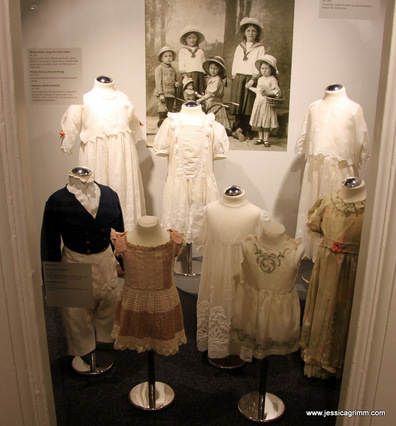
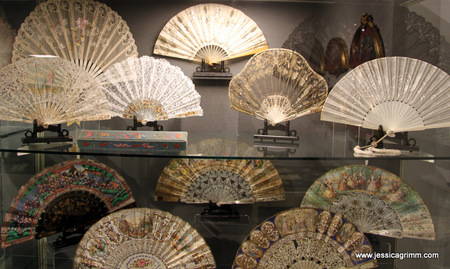
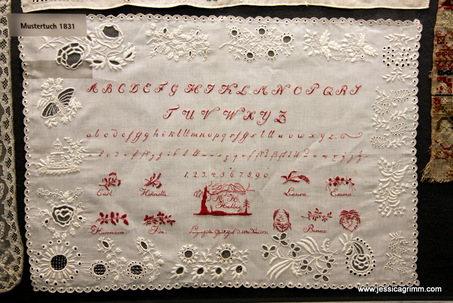
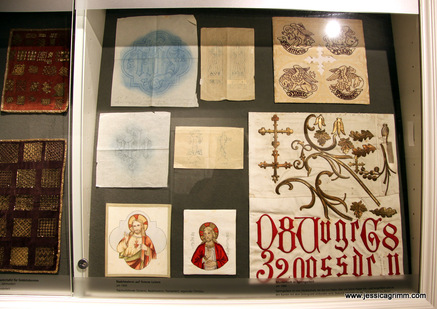
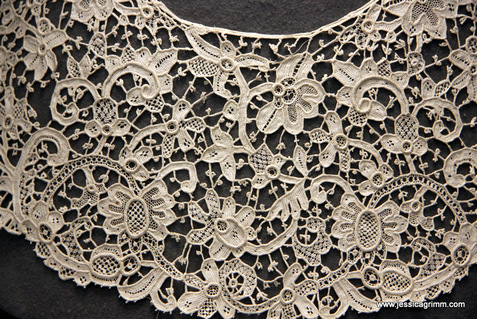
All in all it is an elegant new white-work technique that I would like to pursuit more. And since Karen mentioned that she will bring out more kits and instructions in the future, I will get ample opportunity to do so! Just one thing remains: How do I tell my family? P.S. Dear French readers if you feel that I should try other typical French things in order to start to like you even more, then please leave your suggestions below! It is also okay to poke fun of either the Dutch or the Germans or both in your comments below :). Autumn has truly arrived in this part of the world. No more summer dresses or breakfast on the balcony. Alas, the rainy weather is perfect for a little stitching. Or, for coming with me on a virtual trip. Pour yourself a cup of tea, raid the biscuit tin and enjoy! Since a couple of months, Mindelheim boosts a textile museum housed in the spectacular building of the Jesuit College. Being such a new museum, the whole collection is excellently lit by LED-technology. Not only can you actually see the individual stitches, you can even take decent pictures. And that's exactly what I did as the museum is so new, they don't sell a catalogue. The textile museum starts with a nice timeline display of fashion. Then there is a room with fashion accessories like fans, bags and gloves. Many of which sport some form of embroidery. Past the fashion displays, you land in a set of small rooms filled with different types of embroidery and (needle)lace. The museum collection is tilted heavily in the direction of whitework and lace. Not a bad thing at all, just something to keep in mind. Another display has a number of exquisite samplers. And then there is a nice little display filled with silk embroidery and goldwork. Especially the samplers and the unfinished work is really practical if you want to study this particular technique. Intersperced between the displays, are single works of embroidery. Some of really high quality, others more of the leisurely type. There are also a number of Chinese embroideries on display. After the embroidery displays, you'll enter the lace rooms. There are fantastic (and huge!) examples of needlelace. They even have a large cupboard with drawers where smaller items are stored. Pulling out the different drawers is very rewarding. So many excellent pieces. And some of the pieces even have a royal connection!
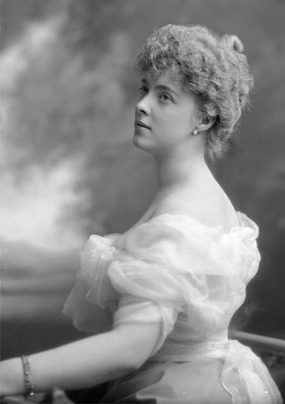
If you are ever in the area, do visit this gem of a museum. You can even bring your menfolk as the archaeology museum and the art museum are housed in the same building. Still afraid that they might bore themselves? Store them at one of the many cake shops lining the streets of this medieval town! On Friday I had my second, and unfortunately last, lesson in Silesian whitework with Elisabeth Bräuer at ArtTextil, Dachau. As I had prepared all the surface stitching on my sampler, I could now fill the holes with needle lace using cotton crochet thread #80. I am used to work my needle lace quite dense. However, Hirschberg needle lace is worked very open. My first attempts were clearly too dense, then invitably some became too open until I finally arrived at something in the middle. As our stitching afternoon with Mrs Bräuer wasn't long enough to try out all the different types of needle lace, I struggled quite a bit with the drawings and discriptions she had given us (see previous post for a link to a PDF on Mrs. Bräuer's website). Some parts came out four times and even the fifth final version isn't quite right. So, I really hope Mrs. Bräuer will hold another course in the future! This is what my finished sampler on Bielefelder Kettgarnleinen looks like: Let's explore the history of the Hirschberg needle lace a bit. This particular type of needlelace started to emerge around 1856 in the Hirschberg valley. Due to the continental system under Napoleon (1805-1813), the linen weavers in this area prospered as the British competition fell away. However, when trade functioned normal again, British linen had become much cheaper due to the fact that the process had been mechanised as a result of the Industrial Revolution. To provide the linen weavers with a different source of income, lace schools were opened where girls would be taught Venetian needle lace. One of these schools was established by Fürstin Daisy von Pleß. She was born in 1873 at Ruthin Castle in Wales. She married Fürst Hans Heinrich the 15th of Pleß, wealthiest heir in the German Empire, in 1891. Although at first she didn't really like the primitive life in Germany, she became very popular with the local people. She instigated many projects to help women, children and the disabled. She was at the center of high society before the Great War and her extravagant lifestyle and family scandals were all over the tabloids. She was well aquinted with Kaiser Wilhelm II, King Edward VII and the Queen of Rumania.
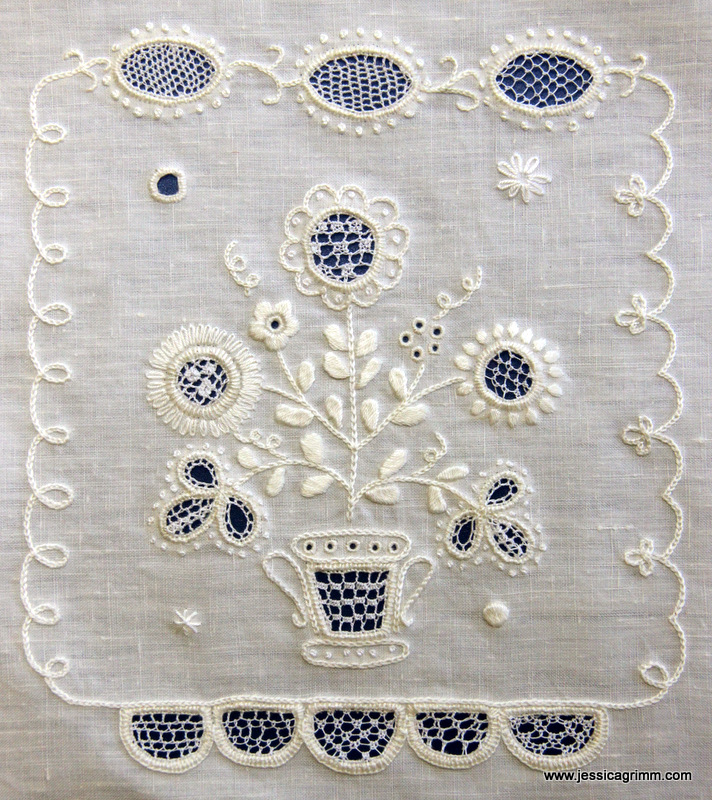
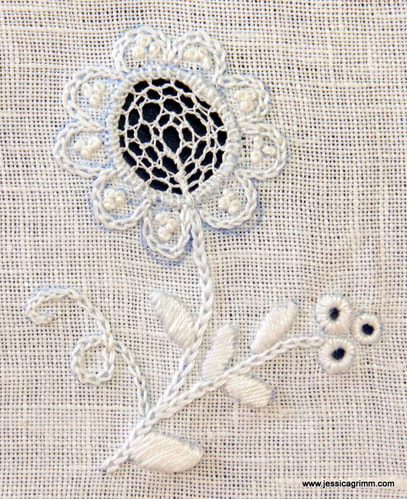
Sadly, it all didn't last. Due to the war, she had to leave her new home in Silesia. And although she was met with a lot of dispise due to the fact of her British nationality, she worked as a nurse and took care of wounded soldiers. After the war, she divorced her husband. As a result of chronic medical conditions and social isolation, she died lonely and poor in 1943 in Waldenburg (now Poland). Last Friday, I attended a course on Silesian whitework by Elisabeth Bräuer at ArtTextil in Dachau. This particular form of whitework was practiced by the German population of Silesia, which after the second World War became part of Poland. Those Germans that had not fled for the Russian army, were expelled by the new rulers and fled into Germany. They brought with them their cultural heritage and folk costumes. The linen apron worn on feast days and for other special occasions was richly decorated with whitework and needlelace. On Friday, we started by practicing the surface stitches with cotton a broder (#16 - #30) on a scrap of linen. This particular form of whitework only uses buttonhole stitch, satin stitch, french knots, chain stitch and eyelets. As with for instance Richelieu, parts are cut out and the rim is strengthened with buttonhole stitch. The order of work is a little different though. You start by outlining the design line with a double row of closely worked running stitch. Then you make cuts in the middle and you turn the unwanted fabric flaps under. The edge is then fastened with not too closely worked buttonhole stitch. Any unwanted fabric bits still protruding on the back, are then cut off. The so formed holes are then filled with needlelace using crochet yarn #80. There are about 19 different forms of this needlelace. However, only five different patterns were ever used on one apron. I presume that using more would result in an unbalanced and unpleasing design. The needle lace consists of differently worked buttonhole stitches and is anchored in the previously worked buttonhole rim. The aim is to create a very open lace. This results in a striking contrast between the surface stitches done in a thick type of thread and the lace being worked very open in a thin type of thread. I must confess that I find this contrast not very esthetically pleasing. One of the things I had to come to terms with was the very different technical aspects of working the surface stitches. I am a stabber and I don't sew my embroidery stitches. And I am simply too old to change :). It always takes me a while to translate the demonstrated 'sewing' into 'stabbing'. Furthermore, I am used to outline with split stitch before I cover with satin stitch. Silesian women used running stitch. Since I wanted to learn this particular type of embroidery, I went with it. But it wasn't a success. My leaves aren't as crisp as they normally would be. Another technical improvement I would make, concerns the cutting of the fabric. I would outline with one row of closely worked running stitch, then cut and then secure the unruly flaps of fabric with my second row of running stitch. This prevents the fabric pieces from being caught up in the subsequent buttonhole stitching. This is how far I have come preparing for coming Friday which sees the second part of our course when we will learn to do the different Hirschberg lace patterns. I will tell you all about it in next week's blog post. Would you like to try your hand at this particular form of whitework? No problem. Elisabeth Bräuer has kindly published the instructions on her website. Do browse through the different articles, although they are all in German, they do have lovely pictures of embroidered Silesian folk costumes.
This weekend another chapter was added to my pursuit of learning Appenzeller whitework. Let me introduce you to the Möggler. The Möggler is a filling stitch used in drawn thread work. As always, cutting out threads makes your fabric weaker and is therefore left till the end. In this particular case it meant that I had to finish all the Blatten areas (padded satin stitch), seeding and my Löchli (eyelets). And then disaster struck. Had I only paid head to Trish's good advice: Embroidery forever, housework whenever. I made a wrong move whilst cleaning the bathroom and since then my left shoulder has been sore. It is getting better, but I can't use my left arm for longer than about 30 mins. when stitching. Oh, pooh. This meant that the above is not perfect as I simply didn't have the time to take stitched areas out that weren't up to my usual standard. On the other hand, this is a sampler and a lot of the designs have repetitive areas. So I just strived to do better on the next element. And I can see myself progress nicely in this particular part. The other thing I had to come to terms with was the Spengen (padding). The Appenzeller way of padding is a really wild one. Or that's at least how I perceive it. For starters, there is no split stitching the contours of the element you want to pad. Then there are no neat alternating layers of satin stitches. The embroideress just bangs in stitches until she has reached a satisfactory amount of padding. In the process, she takes care to have only a minimum amount of thread on the back (this saves thread when adding the satin stitches as they have to go around less 'bulk' on the back). This was not for me. As, due to an eye condition, I live in a 2D world, I have no way of telling when this 'satisfactory amount of padding is reached' and, more importantly, if the result is even. No even amount of padding, no smooth satin stitching on top. So, I reverted back to the 'orderly' way of padding and am a much happier bunny now. What did I add? Four areas of drawn thread work in the tulip-like flower heads. For each tiny area, I cut two threads and left three threads standing. In both directions. Every other 'hole' was filled with a Möggler using a thread approximately half the thickness of the thread used for the satin stitches. As the filling area is of irregular shape, it was a bit of a puzzle to put my Möggler in. And as the final flower head was worked at the end of the day with the light fading, I will have to do it again sometime in the future. In two weeks' time, I will attend a four-day course with Verena in Appenzell. I've decided to focus more on these filling stitches. Using them in tiny irregular spaces was a big challenge as you never come into a comfortable rhythm. So next time, I will start a sampler with neat rectangles. Want to try your hand at the Möggler? Have a look at Luzine Happel's website on Schwalm embroidery. The same stitch is known as Rosenstich in Schwalm whitework and is also used in Hardanger embroidery. Here is the step by step explanation in german and in english. And for those of you coming to visit, you are now greeted by a shining sign. Hope to see you soon!
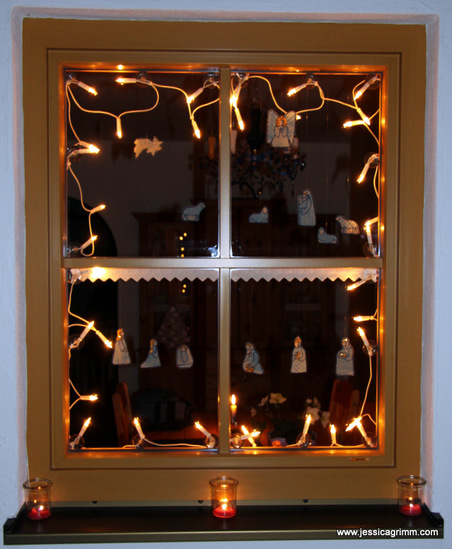
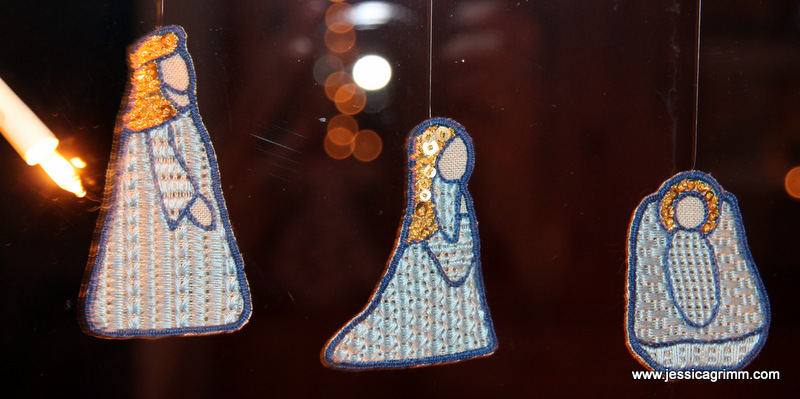
Many people visited the opening, with mulled wine and mince pies, of our Advent window yesterday. During the four weeks of Advent, each evening a decorated window is opened somewhere in Bad Bayersoien. Although refreshments are only served at openings, you can visit the windows until the 10th of January. This year, my window also contains a star, two new sheep and an angel. I hope to add a few new figures each year. Ox, donkey and at least one camel for the Magi are next on my list. It was lovely to hear all the praise for my husband's designing skills and my stitching. I apologise for the poor photo quality; the window is extremely difficult to capture. Above you can see the Holy Family stitched in a combination of traditional Schwalm white work techniques and goldwork embroidery. If you click 'Nativity' in the categories list on the right, you'll see past blog entries on the making of these figures. They are easy to stitch and the technique can be used to stitch a whole variety of figures. Easter Bunny window anyone? This will be my last blog entry for 2015. Don't worry, I'll be back in 2016! It has been a good year for me, my husband and our two dear cats. The later wracked a few things in the house and killed off a large proportion of the local fauna. Their raffinesse at combining mischief with looking adorable is unsurpassed. Me and my husband very much enjoy thinking up new embroidery designs. You will have the pleasure of seeing two new ones in the first blog post for 2016! This year I made new friends, both personal and through stitching. I very much enjoy the interaction with you, dear reader, through my blog, via email and when I teach. I treasure these pleasurable encounters. After all, blessed memories are the greatest treasure of all, don't you think? Merry Christmas & Happy New Year!
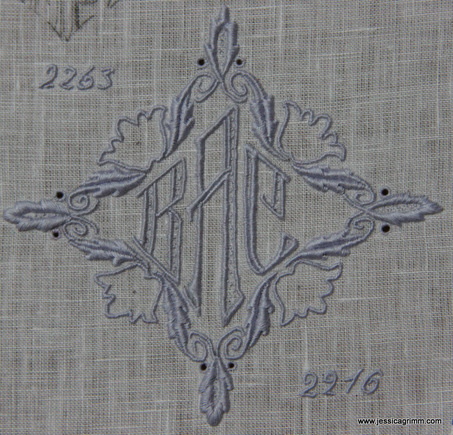
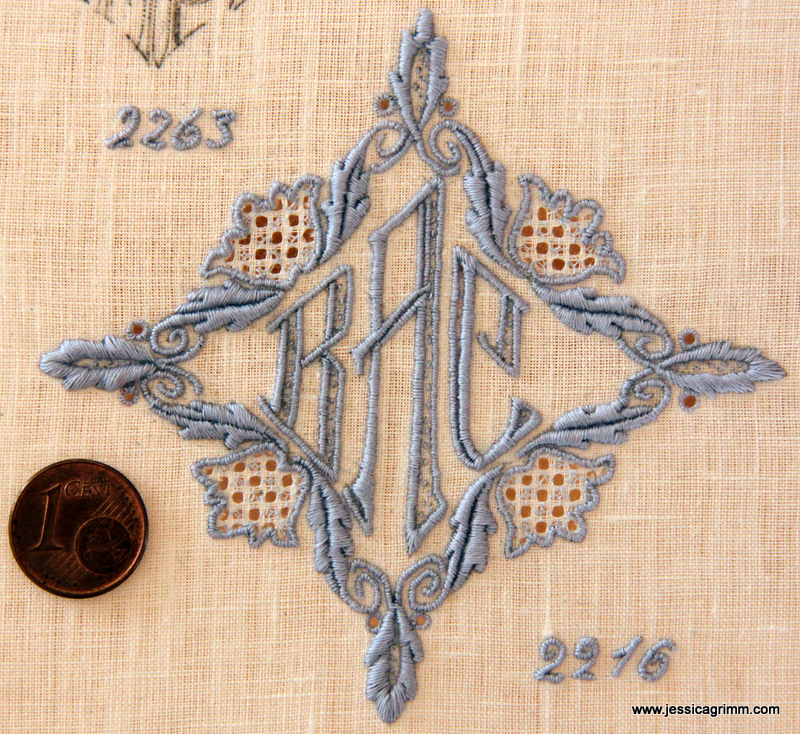
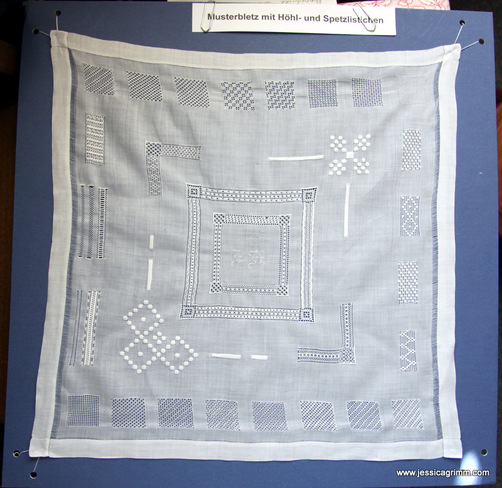
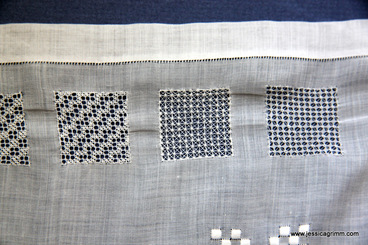
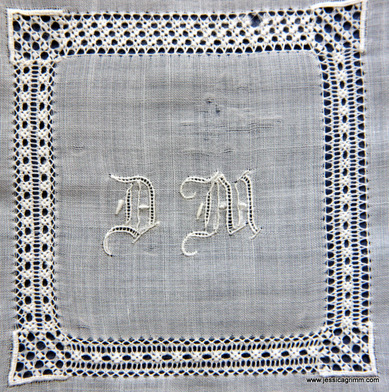
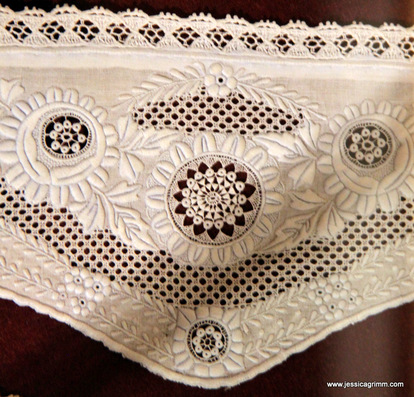
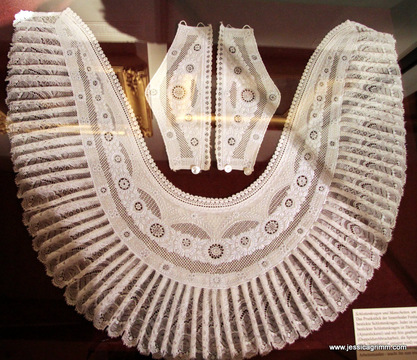
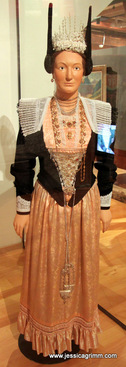
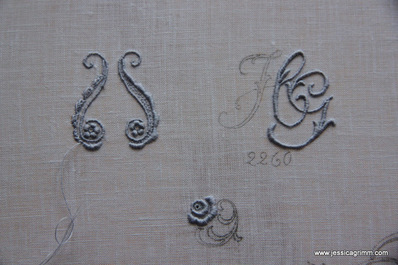
Last week, we examined the basis of Appenzell embroidery: padded satin stitch. This week, we'll have a closer look at other major components: Höhlen or drawn thread work, Lääteli or pulled thread work and Spetzlistiche or needle lace. This sampler, made by Martha Ackermann and part of Verena Schiegg's collection, mainly shows pulled thread work. First, the outer line of the design area (in this case squares) is worked in padded satin stitch. Next, threads are taken out from the back to open up the fabric. For instance, every fourth vertical and horizontal thread is cut and taken out. This 'canvas' is now filled with stitches with a thread as fine as the fabric threads. Here is a close up of some of the filling stitches. Today, only about twenty stitch patterns are still in use. However, the Appenzell Museum (well worth a visit!) has a sampler with 124 different patterns. Unfortunately, without taking it apart, it is impossible to tell how these were made. Some patterns are similar or equal to those used in Schwalm embroidery. You can find more on this whitework technique very suitable for beginners on Luzine Happel's blog. Do you see the ladder-like structures in the above monograms? These are called Lääteli and are a form of pulled thread work made with hem stitch. Finally, the creme de la creme of Appenzell embroidery is formed by the Spetzlistiche: very fine needle lace. See the filled roundels on the above cuff? That's the stuff. The outer line of the design element is worked in padded satin stitch. Then the fabric is cut away carefully. Buttonhole stitches are worked over the padded satin stitch to clean up the border. Now a piece of lace is formed by anchoring threads into the buttonhole stitches. Nowadays, Appenzell embroidery can still be seen on the festive folk costumes of the region. Collar or Schlottechrage and cuffs are elaborately embroidered.
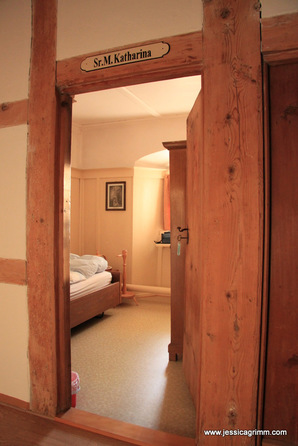
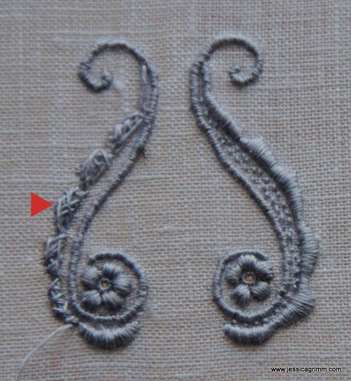
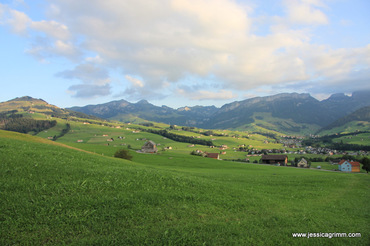
That's all for now folks. Back to packing the last bits needed for the show in Osnabrück at the end of the week. Hope to meet many of you there! My three days learning Appenzell embroidery with Verena Schiegg were very special. I learned a lot, both embroidery-wise and teaching technique-wise. As three days are not nearly enough to conquer any new embroidery technique, I am certain to return soon to Appenzell in Switzerland. For those of you who haven't seen the video in last week's post, I highly recommend it as it gives you an understanding of Appenzell embroidery in its historical context. But first things first. As most of you are probably aware of: Switzerland is expensive! So me and my friend Luise needed a cheap place to sleep. Luckily, Luise had been before and new just such a place: nunnery Maria der Engel in the centre of Appenzell village. The late 17th century nunnery has seen very little modernisation. The last Capuchin nuns left in 2008. Since then the nunnery is run by a small group of dedicated women. They mainly cater for pilgrims on the Camino de Santiago. Below is a picture of my cell. Do follow the link to their website for more pictures of this truly special place. From Maria der Engel, it was only a short walk up the hill to Verena's home. She has a cosy room on the second floor of a traditional Swiss house in which she teaches. Verena teaches individuals and small groups for a fee of 110 Swiss francs per day. This fee is comparable to that of the Royal School of Needlework. Appenzell embroidery uses a limited number of surface stitches combined with drawn and pulled thread work and a form of needle lace. As I am an absolute novice in fine white work, I decided to start work on a surface embroidery sampler. It is in essence a page from a catalogue. Prospective customers could choose their design from such a catalogue and have it stitched. Several different stitchers would work on the piece, each with her own field of competence. This is the result of three days stitching. Verena had transferred the pattern onto the linen with the help of a Stöpfel (pricking), charcoal powder and a fixative. The Stöpfel is made with a machine and forms a separate craft not executed by the stitcher. The holes need to be fine and quite close together in order for the powder to form a continuous line to stitch on. An art in itself. One of the characteristics of Appenzell embroidery is the use of light blue cotton yarn of different thicknesses. My particular sampler will be stitched with a #55. However, the finest threads are about #160 used for the needle lace parts. Unfortunately, both the very fine linen we stitched on and the special threads are very hard to come by nowadays. As Appenzell embroidery was made for export, it was important to be economical with time and materials whilst still achieving a masterpiece. This becomes apparent when taking a closer look at the Spengen (padding technique) used under the Blatten (satin stitches). These produce long stitches on the top and small stitches at the back. In this way, thread is saved with the padding itself, but also during the later satin stitching as there is no bulk on the back for the satin stitch to also go around. You'll see the padding stitches in the picture above (red arrow). Each and every bit of the above design is padded with at least two threads before being satin stitched. Only exception: the tiny little eyelets forming the hearts of the flowers. To give you an idea of size: the above stitched area is only 28x32 mm! Part of the design is filled with tiny seeding. Getting a smooth finish and keeping the sheen on the thread will be beyond my grip for a while. This only comes with practice. From tomorrow onwards until Sunday, I will be stitching at the Pilatus Haus in Oberammergau again. This will give me plenty of time to make a good head start with my sampler. I will leave you with a picture of the beautiful alpine surroundings of Appenzell. If you are interested in learning this very fine white work technique, do contact Verena. There are no books from which you could learn the typical Appenzeller way of stitching. In addition, the materials are very hard to come by and are either old left overs or especially made for Verena. Before embarking on learning such a fine embroidery technique do keep in mind that you'll need very good eyesight, diligence and a patience butt to sit on!
Hope to see you next week for more on the pulled and drawn thread work and the needle lace involved in Appenzeller embroidery. Happy stitching!
In a few hours, I will leave for Switzerland. Together with a friend, I will go to Verena Schiegg in Appenzell. Verena is one of only a handful of people who teach the very fine Appenzeller Whitework. I am so looking forward to the coming days! Will tell you all about it next Monday. In the meantime, for all of you not familiar with this type of whitework embroidery, here's some background information.
Hand embroidery as a way to earn a living dates back to the early 19th century in this rural alpine area near St. Gallen in Switzerland. Times were hard and hunger was either present or never far away. Talented people of either sex and children started to earn a little extra by stitching handkerchiefs, collars, christening robes, shawls and the like as home workers. The older pieces use fine chain stitches to stitch out the patterns. After only a decade or so, satin stitch took over. The products were highly valued and exported to France and the United States. The decline set in the third quarter of the 19th century with the introduction of embroidery machines. However, some very delicate work couldn't be done with a machine. Finely embroidered handkerchiefs, dresses, men's shirts and bed sheets were still highly valued around the turn of the century. Finely worked pieces were the stars of national and international exhibitions with young embroideresses demonstrating their skill. The Second World War led to the final demise of this type of home work. Export opportunities broke away and after the war, fashion had changed and Appenzeller embroideries were no longer 'hot'.
For those of you who haven't seen the documentary 'Fleiss auf Weiss' (Diligence on White), do click on the video above. Flash forward to 54 minutes for English spoken commentary.
And last but not least, a very warm welcome to all my new readers who signed up after last week's blog post was featured on Mary Corbet's Needle 'n Thread on Friday! It is amazing to think that Appenzell will soon be known in Australia, Argentina, Canada, Colombia, Denmark, France, Germany, Guatemala, Gabon, Morocco, New-Zealand, Netherlands, Portugal, Romania, Spain, Tanzania, United Kingdom and the United States. |
Want to keep up with my embroidery adventures? Sign up for my weekly Newsletter to get notified of new blogs, courses and workshops!
Liked my blog? Please consider making a donation or becoming a Patron so that I can keep up the good work and my blog ad-free!
Categories
All
Archives
April 2024
|
Contact: info(at)jessicagrimm.com
Copyright Dr Jessica M. Grimm - Mandlweg 3, 82488 Ettal, Deutschland - +49(0)8822 2782219 (Monday, Tuesday, Friday & Saturday 9.00-17.00 CET)
Impressum - Legal Notice - Datenschutzerklärung - Privacy Policy - Webshop ABG - Widerrufsrecht - Disclaimer
Copyright Dr Jessica M. Grimm - Mandlweg 3, 82488 Ettal, Deutschland - +49(0)8822 2782219 (Monday, Tuesday, Friday & Saturday 9.00-17.00 CET)
Impressum - Legal Notice - Datenschutzerklärung - Privacy Policy - Webshop ABG - Widerrufsrecht - Disclaimer



 RSS Feed