|
My first encounter with Silesian whitework embroidery was when I attended a short course with Elisabeth Bräuer at ArtTextil. When you have been following my blog for some time, you might remember the small sampler with surface embroidery and needlelace I made then. During this course we used materials that are readily available, but not necessarily historically correct nor good options when working this type of embroidery. So, when Michael (a former RSN-student of mine) enquired if I would join him for a private course with Elisabeth Bräuer, I said yes. An excellent opportunity to work a bigger piece with linen thread on linen fabric. A first for me!
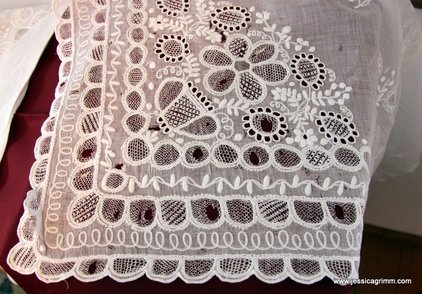
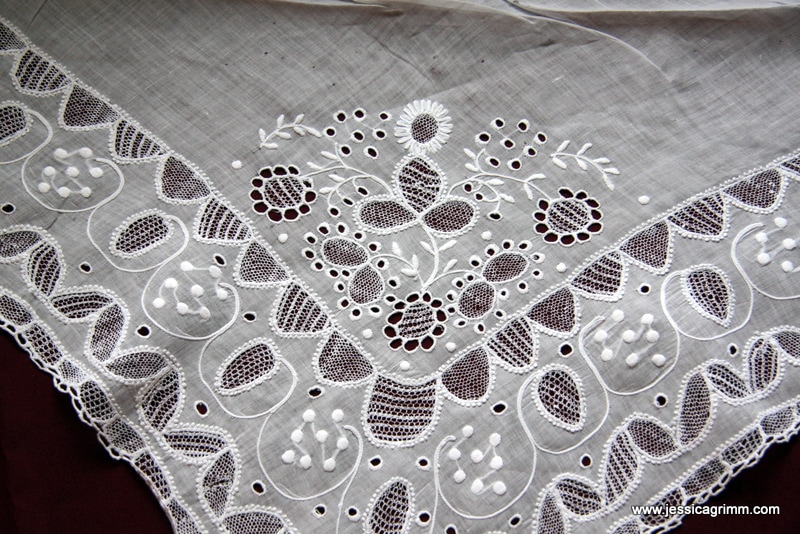
The historical pieces in the pictures above (left an apron and on the right a scarf) were stitched on very, very fine 'Schleier-Leinen' or veil linen. As far as I know, this type of linen is now completely unavailable (it is NOT batiste!). But please, do put me right AND out of my misery when you know of a source! To stitch, the young women and soon brides-to-be, used linen thread of various thicknesses. Now if all linen threads you ever encountered where these horrible threads produced by DMC, then you probably don't like the prospect of stitching with linen thread! Neither did I. However, since Yvette Stanton has done such incredible research on Early Style Hardanger and has tested various brands of linen threads, I took the plunge and ordered a selection of Bockens Knippelgarn and Goldschild thread. And I LOVE them! Yes, they are a little stiff and require more 'work' when pulled through your fabric. However, their texture and slight sheen combined with your pristine linen fabric is to die for. 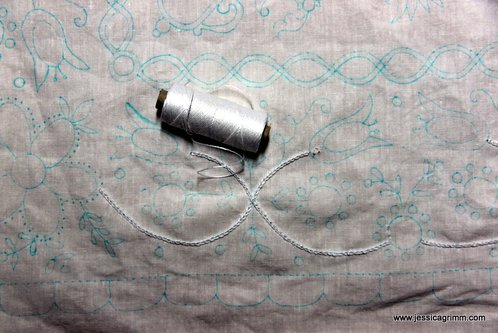 Silesian whitework with Hirschberg Lace So, what will I stitch? Well, not a table cloth as suggested by my dear teacher. You can really scare the pyjamas out of me by proposing table cloths. I am not old enough for that kind of embroidery yet. Table runners ok, table cloths taboo. As one of my other passions is folk costume, I really wanted to stitch an apron. Slight problem: my ancestors came from Thuringia and not from Silesia. This means I will hunt the shops for a very plain, probably blue, linen (yes, as you might have guessed, I am a sucker for linen!) Dirndl. My crisp white embroidered apron will look fab on it! Traditionalists are probably not going to be very happy with the prospect of me doing a bit of 'cultural-folk-costume-crossing'. Me not bothered a bit. Because, I have come to the understanding that the 'frozen-in-time' folk costumes we see today are just that: frozen in time. Whereas, when they were still 'alive', they used to evolve. Through migration in all its forms, new ideas were embraced and adapted. Historical events would have had their influences too. 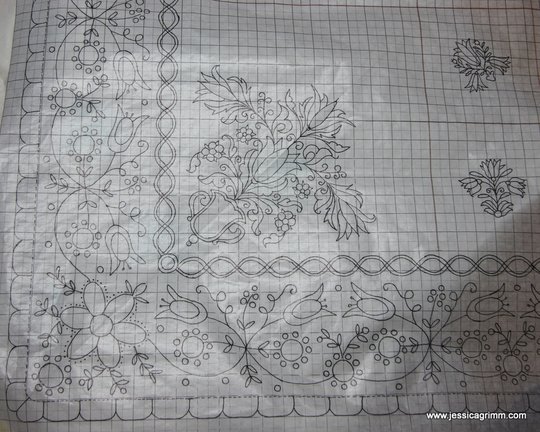 Silesian whitework with Hirschberg Lace How did I tackle my apron design? I knew I wanted tulips. They are both a well-known aspect of folk art and happen to be quite abundant in my native Netherlands. Firstly, I started out with a historical Silesian apron design which featured a tulip border. I did however swap one of the needle lace bands for a different one. Then I did a search on the internet for 17th century Dutch polychrome tiles featuring tulips. Mixing and matching them into my corner design of a vase with tulips. I also used two tile designs as my 'Streublümchen' or scattered flowers. Yep, they are scattered over the rest of my apron. When I was finally happy with my design, I taped it onto my working table. Taped the linen fabric (Weddingen Kettgarnleinen) on top and started tracing with an aquatrick marker. A lot of tracing; the design measures 140 x 87 cm! But, I cheated a bit and did only one half. Just in case the ink starts disappearing as it takes me too long to stitch.
As all the surface embroidery is stitched in the hand, it is going to be the perfect project to unwind with at the end of the day! I can almost see me in my new attire! Can you too? Sorry, it never happened as I did not finish this project.
12 Comments
As promised last week, this week we check in with my goldwork project St. Laurence. If you are relatively new to this blog, do check out earlier posts on the project. 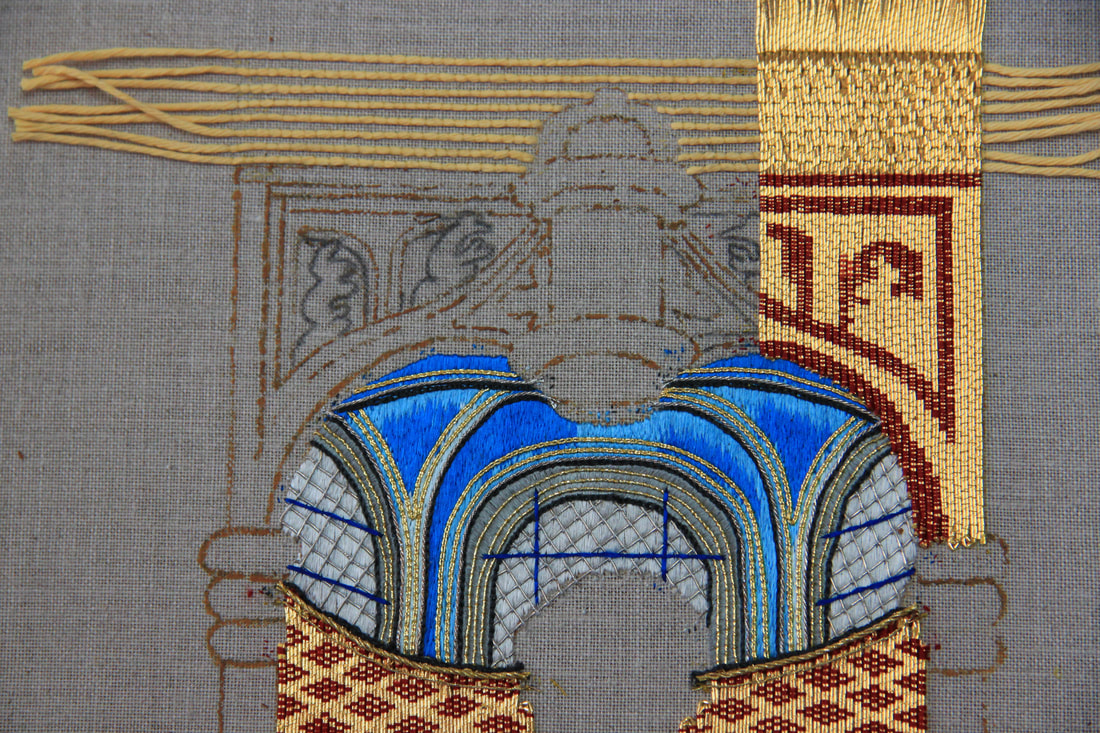 Background recreated orphrey of St. Laurence I've done a bit more work on the background, as you can see in the picture above. More or nue and a bit of basket weave at the top. I am still using Japanese Thread #8 and Chinese flat silk for the coloured couching and Pearsalls filoselle silk for the 'gold-coloured' couching. Once all the or nue is finished, I will apply more and different goldwork threads on top to create the details in the canopy screen (sorry, can't find a better description for it). I hope to be able to show you that in my next progress report in about a month's time. 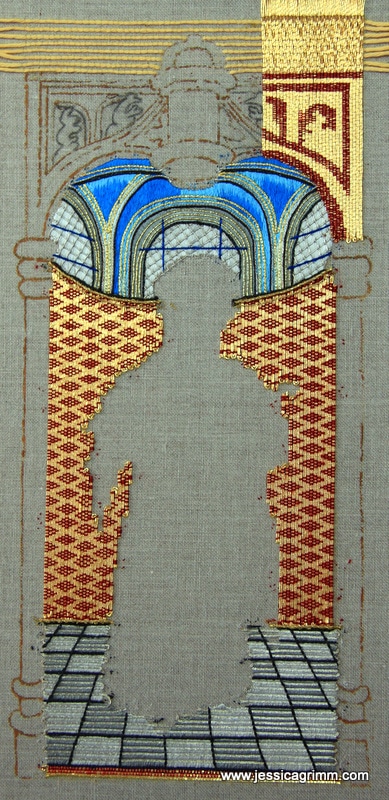 Background recreated orphrey of St. Laurence 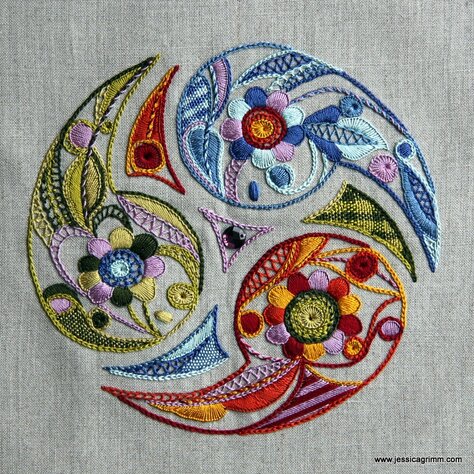 Glazig embroidery pattern by Pascal Jaouen As life tends to come between me and my threaded needle, I've roped you all in to keep me on track of this year's resolution to embroider more. How? you might ask. Simply by blogging about project progress each month. The thought of letting you, my dear reader, down, spurs me on immensely! First up, are my French embroidery projects: the colourful Glazig embroidery kit by Pascal Jaouen and the Boutis white work kit by AveryClaire. My goal was to finish them both before today. Unfortunately, I wasn't able to accomplish them both. To no fault of my own. Not only where the instructions of the Glazig kit very meagre, so was the amount of thread accompanying the kit. I have nearly finished, but not quite. I still need to do the last of the weaving in the red 'fire' bit. This is the first time ever I have run out of thread in an embroidery kit. As this kit is stitched using Au ver a soie silk perle, you really want to be able to use many short lengths as the thread is so prone to wear. This is actually what the instructions tell you to do. Even so, I would have preferred to re-stitch some parts as the thread has really suffered. However, I could see half-way through the project, that the threads were probably not going to be enough, so I didn't. On another note, silk perle is an ultra-slippery thread and some stitch combinations really require practice. Again, not possible with the amount of thread provided for in the kit. One way around this would be to substitute the silk perle with cotton perle. Overall, this expensive kit just doesn't deliver. Apart from the meagre instructions and the lack of materials, the work drawing and the picture of the finished embroidery do not quite meet up. Furthermore, the way certain single-stitch areas are pre-printed onto the fabric means that you can't completely cover the ink with your stitching. Needless to say, I have emailed Pascal Jaouen two weeks ago to ask him to send me some more thread so that I can finish my project. So far, I haven't heard back... And I never would! 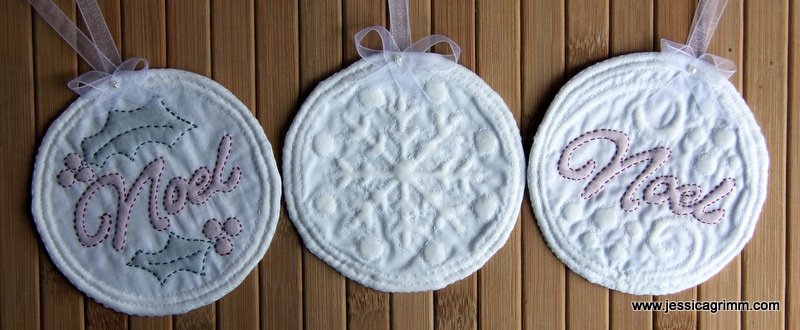 Boutis embroidery pattern by AveryClaire NeedleArts What I was able to finish, were these stylish Boutis ornaments by AveryClaire. I enjoyed my foray into this elegant white work technique immensely. And I have so much spare thread left, that I could stitch up some more :). I might just do that before next Christmas. In the meantime, I'll keep an eye out for further kits by the very talented Karen of AveryClaire!
Next week, we'll check in with St. Laurence to see how he is doing. Hope to see you then! As many of you may remember, I started Tricia Nguyen's 18 month online class last year: Cabinet of Curiosities. The aim of this course is to learn almost all there is to know about 17th century embroidered caskets and then to design and stitch your own. Last year, I completed lesson one and two and then LIFE interrupted and I had to put the project on hold. Since the village shop is now up and running and I've taken the decision to quit volunteering 'here-there-and-everywhere', 2017 will be the Year of the Casket. 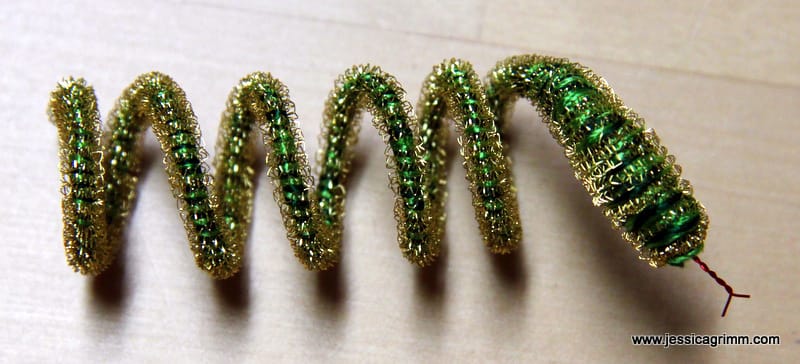 Bullion snake A short recap of what I had done so far in 2016. I picked a theme for my casket. Ever since I was given the historical novel De Leeuw van Vlaanderen of de Slag der Gulden Sporen by my parents, I've read it and re-read it many times. It is highly romantic and not too historically correct. Think Ivanhoe by Sir Walter Scott. I had also picked the casket shape I wanted to embroider. As I am not in a hurry and want to live to at least a 120, I picked the largest one on offer: the double casket. I also made this nice chap: a bullion snake. They were common 'toys' found in the caskets. 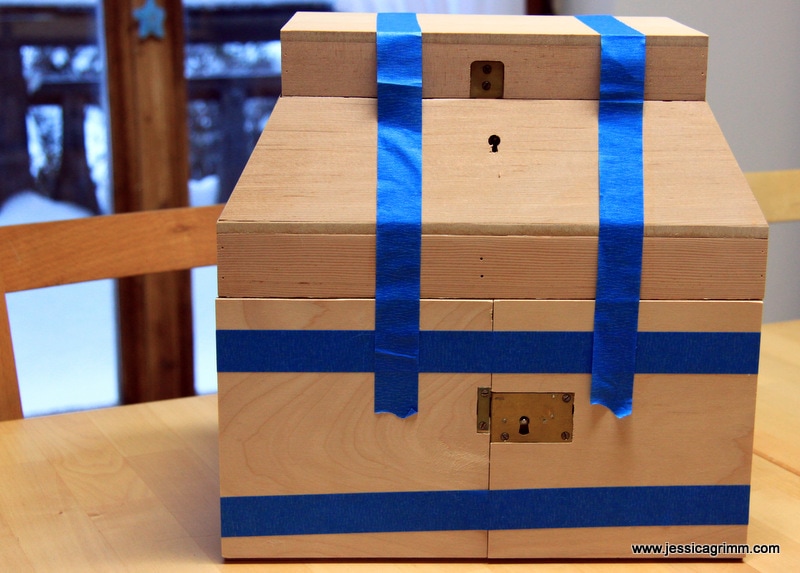 Casket model Cabinet of Curiosities Then late in 2016, Tricia published a series of articles on her blog about 'casket-decision-making'. Apparently, caskets can be used as URNS. Now that's an interesting idea. As most of you probably know, I am a trained archaeozoologist and love to play with bones! A common misunderstanding is that, when you are cremated you end up all ashes as by magic. Oh no. They'll put your burnt remains through a grinder to create these perfect uniform ashes. Not so in ancient times. Our ancestors respected our individuality and had a heart for future archaeologists. Burnt bone remains are a treasure trove of information. With a bit of luck, your burnt remains can still tell if you are a boy or a girl, your ethnicity, how tall or small you were and if you had any bone-related pains and aches. Fascinating stuff, don't you think? As you might have guessed by now, my casket is going to be my urn. No worries, I am in no hurry to try it out anytime soon. But I must admit, I start to chuckle any time I start thinking about my memorial service in 2098 :). So how do I proceed now? It is time to start designing my casket. There are many panels which I can fill with scenes out of the novel. So far I am thinking: hunting scene, maid Mechteld & knight Adolf van Nieuwland, mortally wounded Adolf van Nieuwland, Count Gwydde and his knights in front of Queen Joan I of Navarre and the battle scene. In order to do that, I started listening to the audiobook version as found on Librivox. This is a great source of free audiobooks in over 30 languages. Perfect to listen to when you are stitching. When I listen to each chapter, I have a notepad to hand to jot down any major characters, the place of action and other tiny things like the flora and fauna the author mentions. I can then easily compose a panel design with the historical motifs Tricia has provided. I will also ask my husband to tweak them a little here and there to make them unique. As I might have inspired some of you with my casket-turns-urn idea, I do want to make sure my urn turns out truly unique!
Note: I am currently not working on this project! Want to keep up with my embroidery adventures? Sign up for my weekly Newsletter! |

Want to keep up with my embroidery adventures? Sign up for my weekly Newsletter to get notified of new blogs, courses and workshops!
Liked my blog? Please consider making a donation or becoming a Patron so that I can keep up the good work and my blog ad-free!

Categories
All
Archives
July 2024
|

 RSS Feed
Contact: info(at)jessicagrimm.com
Copyright Dr Jessica M. Grimm - Mandlweg 3, 82488 Ettal, Deutschland - +49(0)8822 2782219 (Monday, Tuesday, Friday & Saturday 9.00-17.00 CET)
Impressum - Legal Notice - Datenschutzerklärung - Privacy Policy - Webshop ABG - Widerrufsrecht - Disclaimer
Copyright Dr Jessica M. Grimm - Mandlweg 3, 82488 Ettal, Deutschland - +49(0)8822 2782219 (Monday, Tuesday, Friday & Saturday 9.00-17.00 CET)
Impressum - Legal Notice - Datenschutzerklärung - Privacy Policy - Webshop ABG - Widerrufsrecht - Disclaimer