|
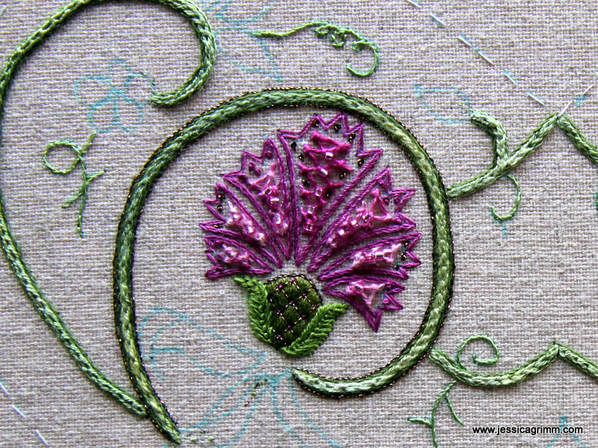
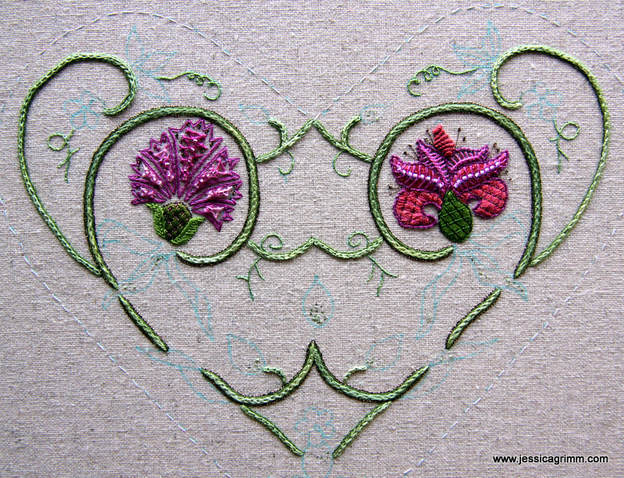
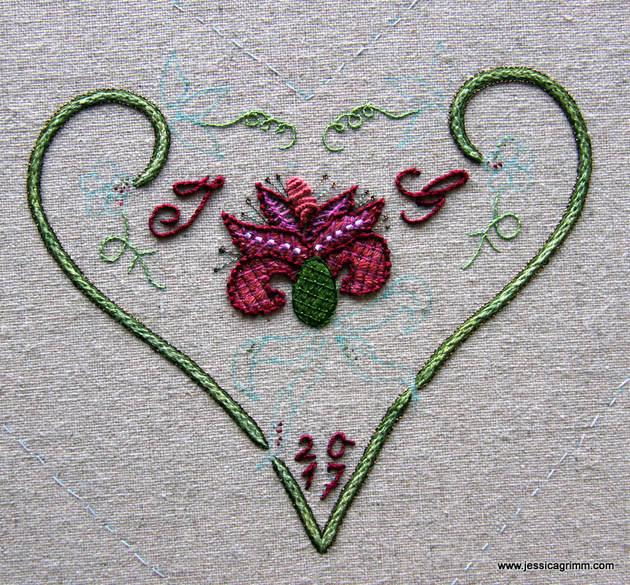
This time we are going to talk about the two big pink flowers in the big hearts. Now, since Janet Granger has published two excellent thread substitution lists on her blog, I'll concentrate on the actual stitching. Do visit Janet's blog as it is a really good read and personally I can't wait for her to start the actual stitching! First up was the carnation. And the first stitch called for was the beaded diamond stitch. Never heard of it. But the step-by-step photographs provided in Inspirations were excellent and I soon mastered this stitch. It is quite pretty with the beading. However, as the space is limited in the lower petals, it all becomes a little crammed. I am especially proud of my padded satin stitch calyx covered with a tiny trellis. I love this stitch combination and the threads used (silk and metallics). As I am severely allergic to fishbone stitch, I swapped it for fly stitch on the flanking petals. You see, it is ok to push yourself to learn new things. But, you'll find that there are certain stitches that give you the creeps. In my case: fishbone stitch. And it is perfectly ok to swap stitches in a design devised by somebody else! Oh, and once I completed the carnation and compared it with Carolyn's original, I spotted a further difference. My petals do not touch the calyx. Then I checked the line drawing of the pattern and saw that this is indeed different from Carolyn's piece. Personally, I quite like the separation and will leave it. However, if you don't like it: pay heed before you start stitching. Next up is the lily. Quite straight forward stitching with Vandyke stitch (one of my favourites!), satin stitch and fly stitch. The largest lower petals were covered with satin stitch using two strands of silk. The instructions advice you to follow the petal-curve with your stitches. However, as this is a rather small area and you are working with a double strand, it is a bit hairy. Therefore, I stitched the second lily on the back heart with a single strand and the result is a lot smoother. Note to self: only ever execute satin stitch with a single strand :). And then I hit a block. Oh dear. I ran into cable plait stitch. Another unknown stitch to me and this time I could not make heads or tails from the step-by-step instructions. So what does an embroidering damsel in distress do? Well, certainly not call for a handsome, but rather big-boned knight with zero-knowledge of embroidery stitches. Instead one consults Mary Corbet's excellent how-to-video on cable plait stitch. Then one grabs a thicker thread and a spare piece of cloth and practices. Then one finally returns to Strawberry Fayre and continues to stitch. Do I like cable plait stitch? Yes!, or at least when I stitched it with perle #8 on 40ct linen. Even when closely spaced. Do I like it as an outline on the lily petals stitched with Gütermann silk? Not so much. The thread is so thin and the subsequent stitches so tiny, that the braid-like appearance is lost to the naked eye. Another annoyance was the thread itself. Gütermann silk breaks a lot with this stitch. Instead, I have opted for coral stitch with a slightly thicker thread (Soie Perlee #384 by Au ver a soie) on the other lily. I liked this thread and its colour so much, that I also embroidered my initials and the year with it. I think my overall impression so far with Strawberry Fayre is that it is basically crewel embroidery on the scale of fine whitework. This is by no means a mistake or displeasing, but it does mean that most of my young-at-heart-but-with-older-eyes readers will need to use a magnifier for the whole project. In comparison, I liked the Home Sweet Home project better as, at least for me, thread choice and stitches were better. I would love to hear your thoughts on this! Please do leave a comment below. Next time we are going to check in with this project, the leaves and the beaded flowers will make an appearance.
Note: I have not finished this project as the instructions were faulty and the kit did not contain enough materials.
18 Comments
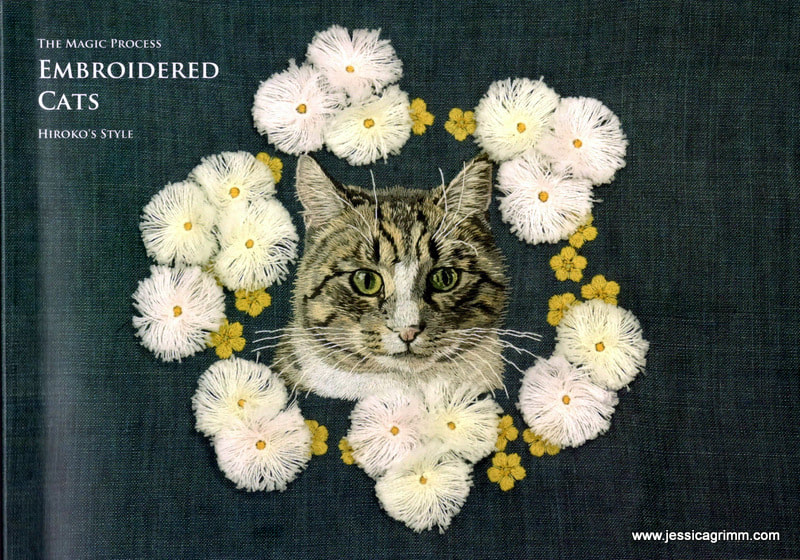
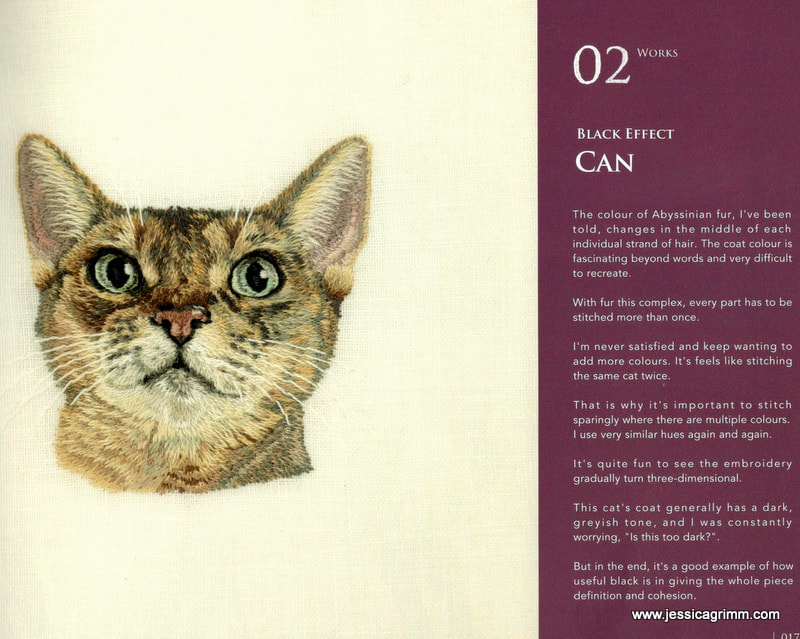
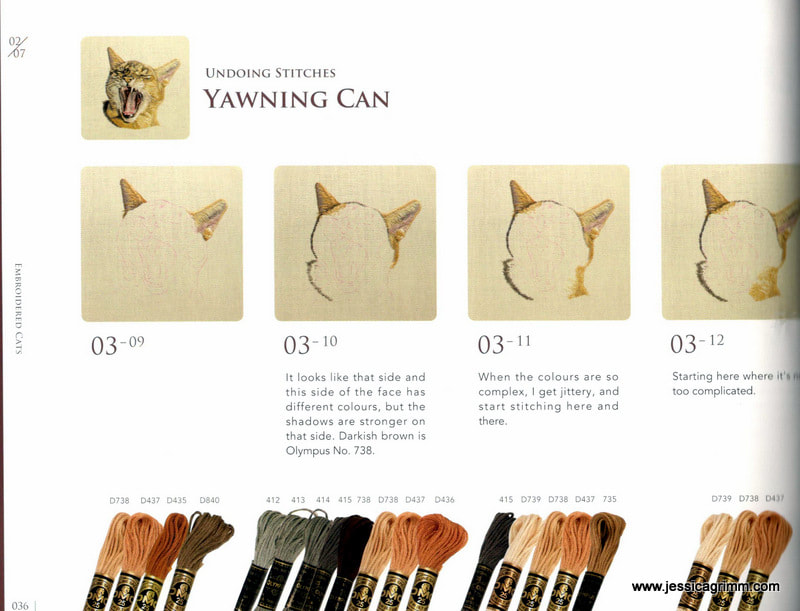
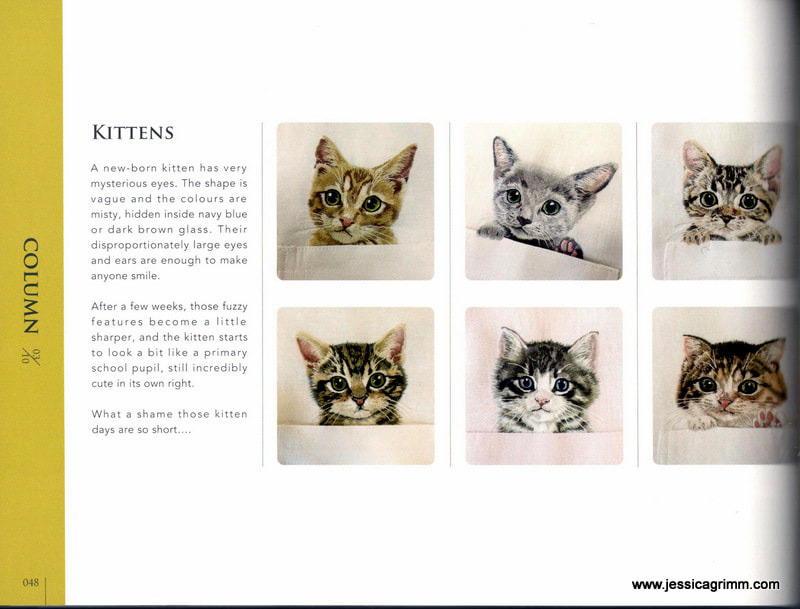
Some of you might have already read Mary Corbet's review of this stunning book on embroidering cat portraits. I did! And since I had seen pictures of Hiroko's work on Pinterest, I really (REALLY) wanted this book. Hiroko shipped it super-fast from Japan; so here is my review. Hiroko's cat (and dog) portraits are mainly stitched on items of clothing. Cat pops out of shirt pocket is probably the image most of us have seen before. Besides good quality natural fibre clothing as her canvas, Hiroko uses one strand of good quality stranded cotton (DMC, Anchor or the Japanese Olympus/Cosmo). The stitching technique used by Hiroko is a form of thread painting. But it is not the same technique as is taught at the Royal School of Needlework and with which I am most familiar. The main difference? Hiroko does not use long stitches which she subsequently splits in order to get the required shading, instead she layers her stitches. And those of you who are familiar with the RSN-way of silk shading will have heard the phrase that it 'shouldn't be called long-and-short-stitch but long-and-longer-stitch'. Well, Hiroko uses tiny, tiny stitches to get the desired effect. Fascinating, I must say! Hiroko's book is not a project book and it certainly isn't a book for silk shading virgins. Although Hiroko shows her order of work in step-by-step pictures for six cat portraits and one dog portrait, it isn't a step-by-step instruction book. This may sound a bit contradictory, so let me explain. The first cat up in the book is a black-and-white puss called Sora. According to Hiroko they are the easiest to do as they have a relatively simple fur pattern and a limited colour palette. The project is broken down in 40 pictures. Now, that sounds like a lot. But it really isn't if you think of the many different directions cat fur flows in. And then there are the tricky areas like nose, ears and eyes... That said, if you are a regular silk-shader/thread painter, you will marvel at her technique! The step by step pictures with their explanatory texts are delightful. Hiroko has great wit and I laughed out loud several times. And I agree with Mary Corbet that although the pictures are too small to see each stitch clearly, a small magnifier solves this problem. I used my Mighty Bright Light and had no problem to follow Hiroko's projects. And at the back of her book there are the original cat pictures too. This enables you even better to understand how Hiroko tackles each cat. Throughout the book, Hiroko dispenses sound advice on how to become a good (cat portrait) embroiderer. It all boils down to observing the original thoroughly, diligence and self-critique in order to improve your work. And it becomes very clear from the book that these magnificently stitched cats do not appear as by magic; Hiroko works hard to make them happen. I think that's very honest and good to keep in mind.
So, where to get this latest addition to your ever-growing embroidery library? Straight from Hiroko through her Etsy store! The book is self-published and entirely written in English. A big round of applause for that! Including shipping (Japan-Germany took about a week) it cost me €37. In my opinion, very good value for your money! After a nice long walk through the beautiful Bavarian landscape on Thursday, me and my husband came home to an overflowing mail box. What had happened? Mary Corbet of Needle 'n Thread reviewed my crewelwork kit 'Carol's Rose'. I have been over the moon ever since. But it had some unexpected consequences... Due to Mary's lovely review, I sold more Roses in a couple of hours than I did in the past 18 months :). No complaining here. It just meant that I ran out of kits. No problem, or so I thought. Printing new instructions in large quantities upset the printer. It wanted a new image drum. Never heard of the part, but a new one was delivered to my home. Then it was time to overlock the edges of the fabric to go into the kits. My overlock machine thought NOW would be a fine moment to stop working. Yes, you read that correctly. She STOPPED. How dare she.
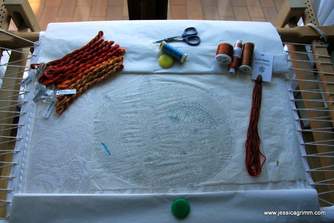
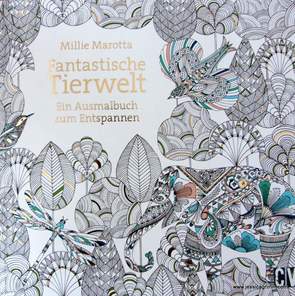
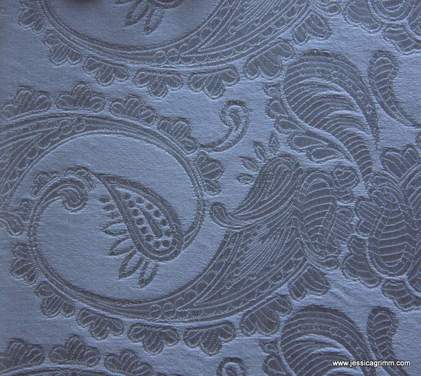
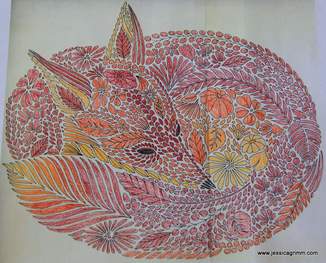
Me and my handy husband took the whole machine apart. They look pretty archaic on the inside, by the way. Cleaned her and oiled her and put her back together again. We were pretty good as she does work again and we were only left with one extra washer.... :). And then all Rose kit making had to grind to a halt. Even though I have a rather large stash to make new kits from, by now I had run out of the correct shades of wool. So a HUGE THANK YOU to all the lovely patient people who have pre-ordered the kit. As soon as the wool arrives, I'll start making kits again and mail them out. Oh, yes, and I will start regular blogging again early September. See you then! Want to keep up with my embroidery adventures? Sign up to my weekly Newsletter! I've fallen in love. Head over heels. With a, uhm, fox... A certain famous embroidery blog lady from America introduced us. Alas, what can you do? It was love at first sight. All other projects simply will have to wait. Thanks Mary Corbet, you're the best excuse for procrastinating a silk shading hollyhock, a Schwalm angel and a pair of Bavarian braces! Isn't it fascinating how you can sometimes see an illustration or image and instantly a picture forms in your mind of the corresponding embroidery? Such things can really keep me awake. I practically start to stitch the piece at night in my head. That's silly, I know. But that's how it goes, isn't it? Luckily, my copy of Millia Marotta's colouring book for grown-ups arrived at the bookstore last week. During the night, my brain seems to be at its absolute best. Not only did I stitch several versions of the fox already, I also figured out thread and fabric choices. Very cool this grey matter. Several years ago, I bought a piece of a heavy weight pure silk damask. The bright white silk has a pretty paisley design. My stash also includes several yummy skeins of variegated perle #12 by House of Embroidery as well as a skein of Gloriana silk and several spools of metallic threads. My night time stitch adventures did not include the latter. However, whilst discussing the design at the bookstore (!) with three men (!!!) it was put forward. Don't these burnt oranges, corn yellows and copper tones make you think of a fox already? So, I duly dressed my frame with the very nice silk, hunted for all the threads and waited until it was dark outside. Real stitching at night time? Nope. I've just found that using a light box for tracing the design is so much easier when the room is dark. Normally that is. This oh so nice silk turns out to be a tracer's nightmare. Oh dear. Not only is it hard to see through, on the smooth parts of the paisley's my aqua trick marker runs. No neat tracing lines in sight. This was our first major relationship crisis. I figured that if ink runs on certain parts of the fabric, there's a good chance that the paint of the prick and pounce transfer method does as well. Apart from that risk, this intricate design requires a very steady hand able to paint very thin lines. Not going to happen when you are going through your first major relationship crisis. So what did I do? Well, I copied the design onto tissue paper and now I am in the process of tacking all important design parts. It is very, very slow going. But what do they always say: you have to work at your relationship. Well, work it certainly is!
|
Want to keep up with my embroidery adventures? Sign up for my weekly Newsletter to get notified of new blogs, courses and workshops!
Liked my blog? Please consider making a donation or becoming a Patron so that I can keep up the good work and my blog ad-free!
Categories
All
Archives
July 2024
|
Contact: info(at)jessicagrimm.com
Copyright Dr Jessica M. Grimm - Mandlweg 3, 82488 Ettal, Deutschland - +49(0)8822 2782219 (Monday, Tuesday, Friday & Saturday 9.00-17.00 CET)
Impressum - Legal Notice - Datenschutzerklärung - Privacy Policy - Webshop ABG - Widerrufsrecht - Disclaimer
Copyright Dr Jessica M. Grimm - Mandlweg 3, 82488 Ettal, Deutschland - +49(0)8822 2782219 (Monday, Tuesday, Friday & Saturday 9.00-17.00 CET)
Impressum - Legal Notice - Datenschutzerklärung - Privacy Policy - Webshop ABG - Widerrufsrecht - Disclaimer



 RSS Feed