|
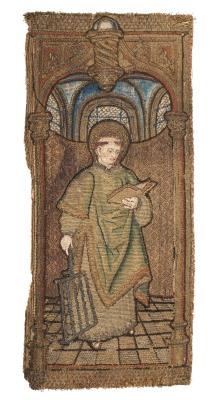
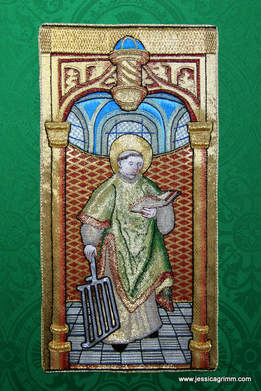
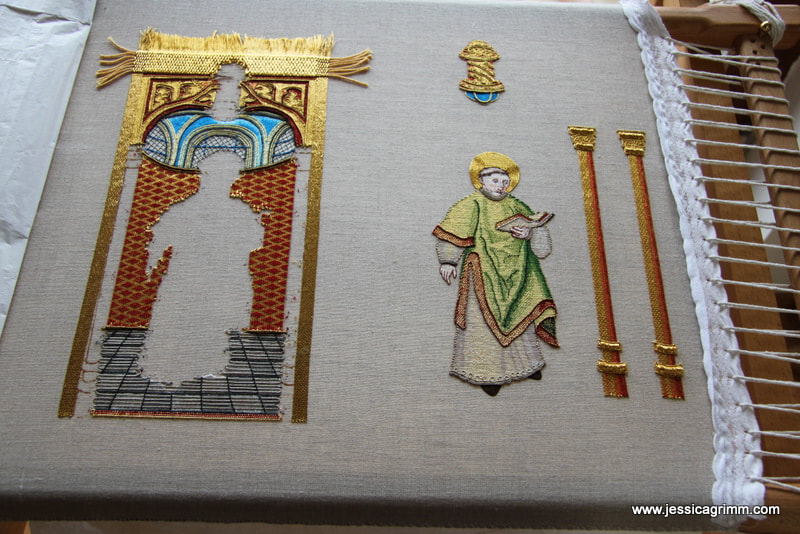
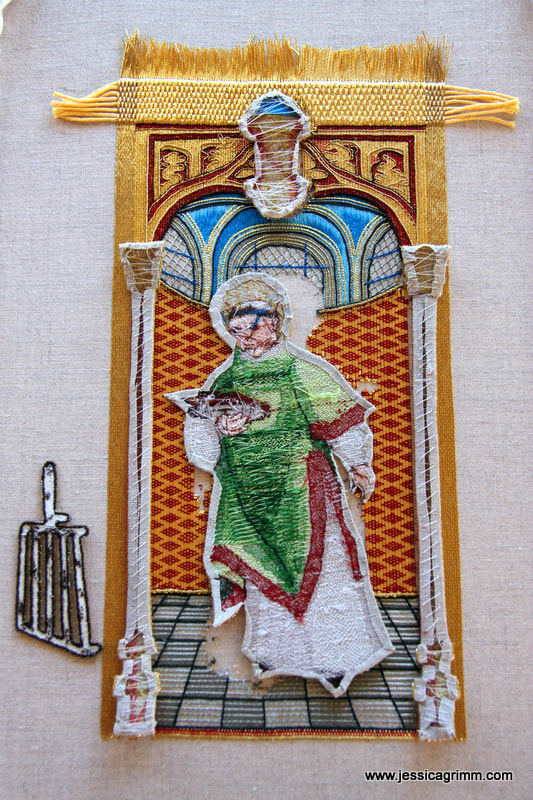
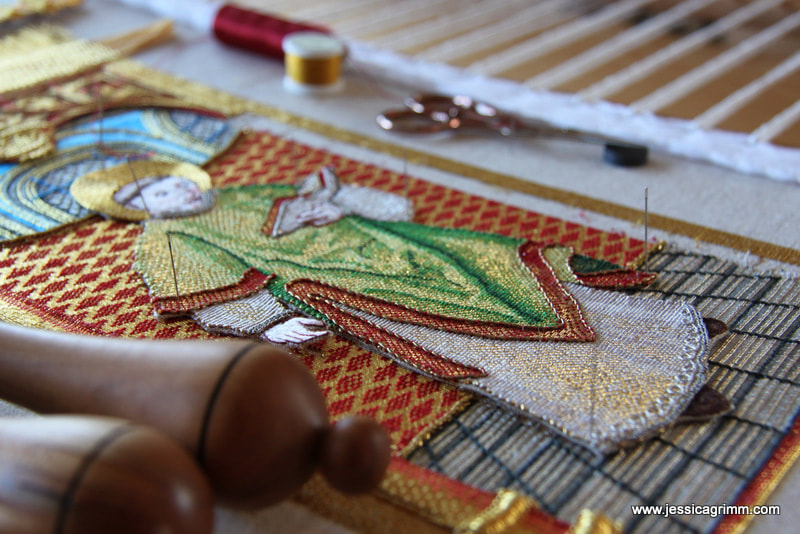
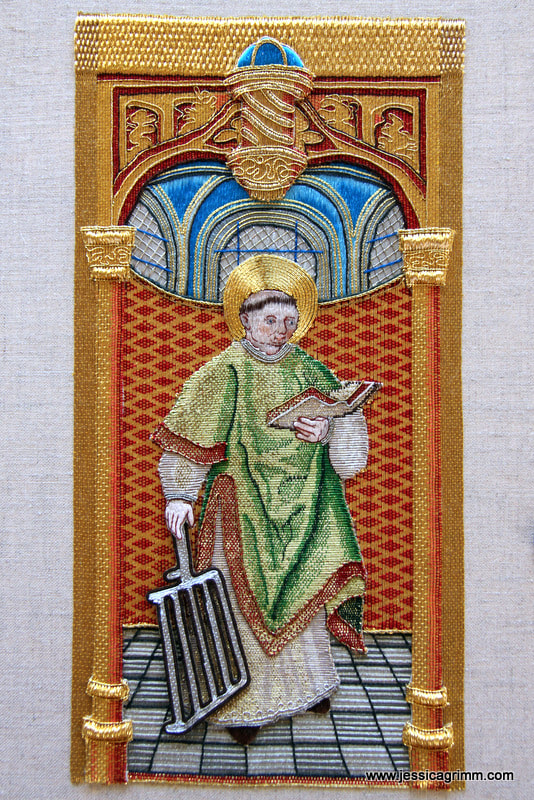
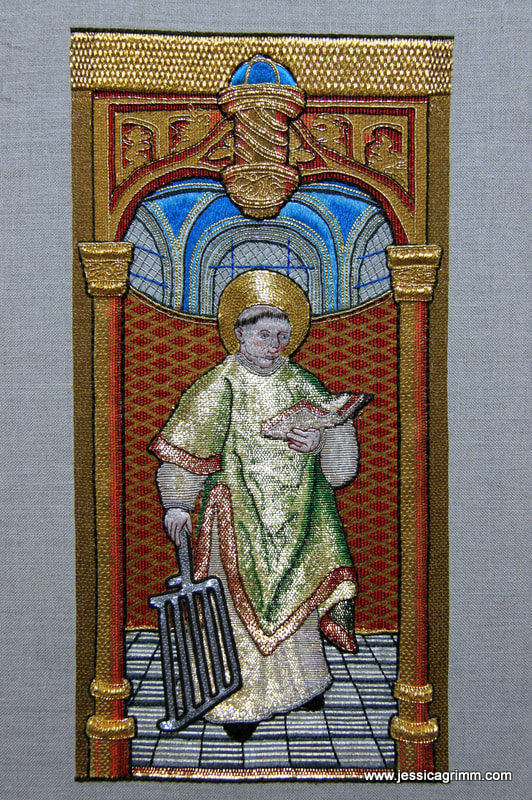
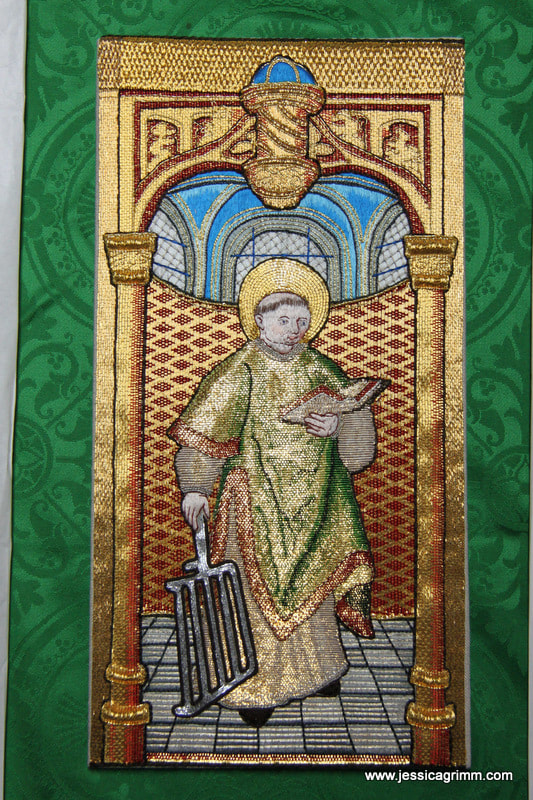
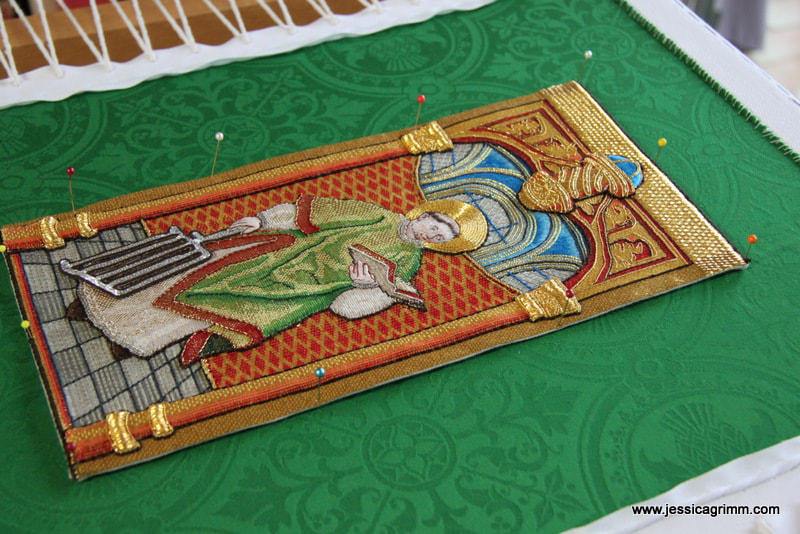
Since St. Laurence was grilled to death, I thought the above a fitting blog post title. After almost two years of on and of working on this goldwork piece, St. Laurence can finally be revealed in all his glory. The piece is a near perfect copy of the orphrey held under catalogue number ABM t2107h at the Museum Catharijneconvent, Utrecht in the Netherlands. The original orphrey was made between AD 1520-1525 and measures c. 28.5 x 17 cm. I have covered this project in earlier blog posts too, in case you'll want to read the whole story. Above on the left the original museum piece and on the right my version. However, last time you saw the piece, I was still working on the background. So let's explore how I assembled all the different pieces. Apart from the background and St. Laurence, I also worked both columns and the ceiling keystone on the same Zweigart 40ct natural linen. I worked his bbq separately in a small embroidery hoop on a piece of calico. It is in essence a wired slip filled with silver plated Japanese Thread #8. Cutting away the calico between the bars, was challenging! So I used a dark brown textile paint marker to stain the remaining calico fibres. Then it was time to cut out St. Laurence, the keystone and both columns. I took the whole piece of the slate frame and redressed it only with the background. As you can see in the picture above, I cut the other items out with a bit of a seam allowance. I folded the seam under and laced the back. This worked particularly well for the straight columns. It was less successful for the keystone and proved impossible for St. Laurence himself. So...., I used conservation glue. And it worked a treat! Since you only want the seam to stay put as long as you are appliqueing, you don't need huge amounts of glue, i.e. you are not soaking your embroidered fabric. Before I attached any of the elements, I made sure my fabric wasn't drum taut. I started with the keystone, then did the left-hand column, then St. Laurence and then the right-hand column. Although I worked my background a little further than needed so it would go under St. Laurence, the fit wasn't perfect on all sides. I figure this is due to the whole piece being worked on a drum taut slate frame and once you release this tension completely, your elements shrink a bit. Note to self: work the background more generously on the next piece! Appliqueing the elements onto the background was rather straight forward. As you can see in the above picture, I pinned the element in place and then couched around the edge with matching silks. Only for the columns, I used a different method. I noted that my long vertical rows of tightly packed Japanese thread gaped when couched down at the edges. Instead, I sew in a straight line between the last and the before last row of Japanese thread. With all elements couched down, it was time to add the dark brown edging around all the elements. It adds a sense of depth to an otherwise near flat piece of embroidery. I used four to six strands of a dark brown silk perle. They were offcuts from a weaving project by a fellow local artisan. Don't you love it when you can recycle things?! My original plan was to mount the goldwork first and then applique it onto the green chasuble fabric. This would support the heavy gold embroidery better. However, I didn't like it one bit. The embroidery was too high up from the fabric for my taste. As I have worked this piece mainly during demonstrations, it did mean that I hadn't been as accurate as I would have wished. The piece is 1,5 linen threads too high on the top left and 1,5 threads too short on the lower right side. This happens when you chat to people and/or work in improper light. No worries, I can perfectly live with these minor discrepancies! However, it did mean that my initial mounting had to go. I ended up cutting out the whole orphrey with a seam allowance and couching it in place directly onto the green chasuble fabric. It worked a treat! As it should have done, since my medieval counterparts did it the same way. With the orphrey in place, I couched a gilt Twist #3 and a large gilt Roccoco around the edge to hide most of the linen background fabric. Today I mounted the whole piece and weather permitting, will bring it to the framer's tomorrow.
Working on this project certainly had its challenges, but I loved it immensely! During demonstrations and through this blog people from all over the world were able to follow the process. I will certainly make another one in the future! But for now, I can't stop looking at my achievement and enjoy this splendid piece :).
34 Comments
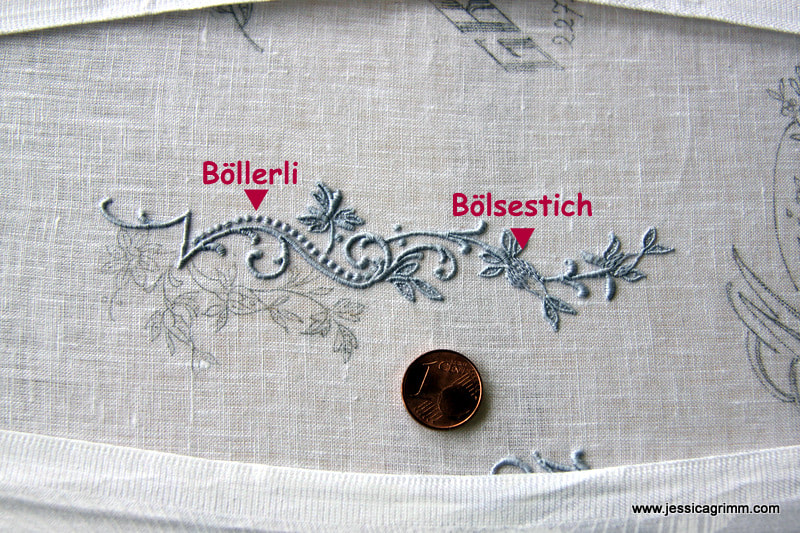
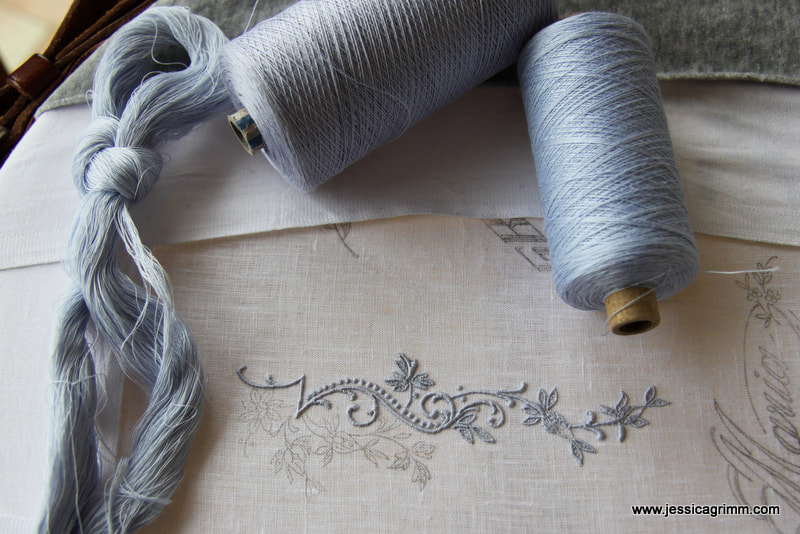
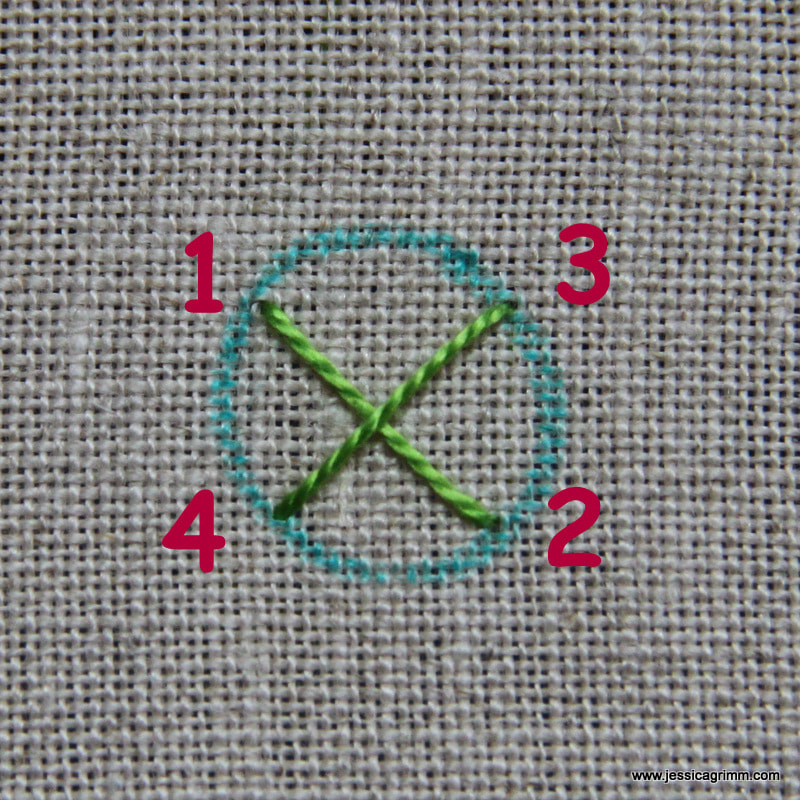
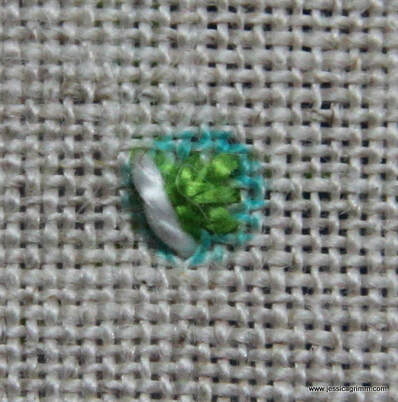
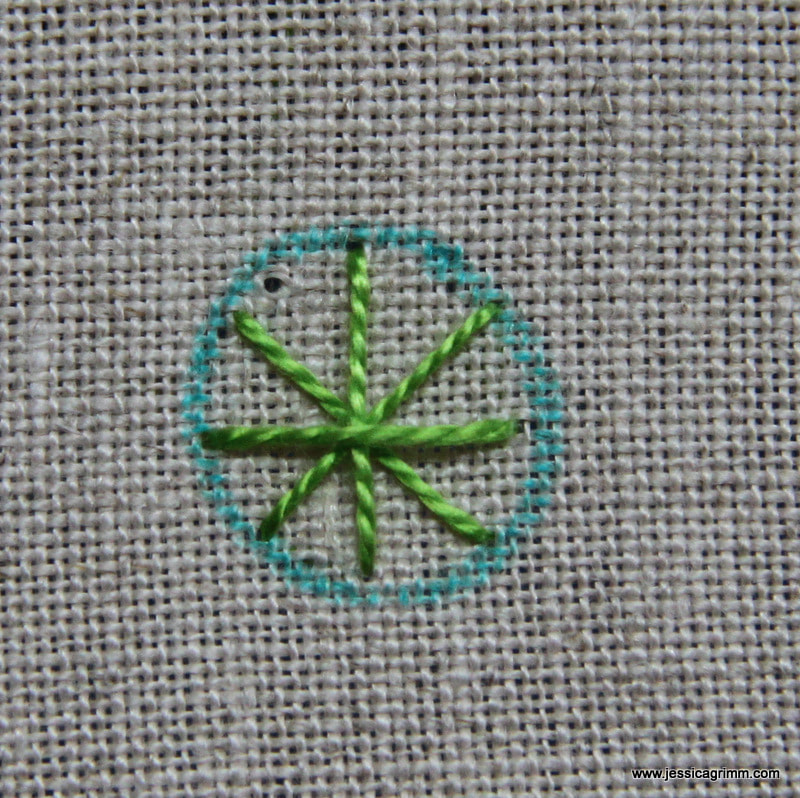
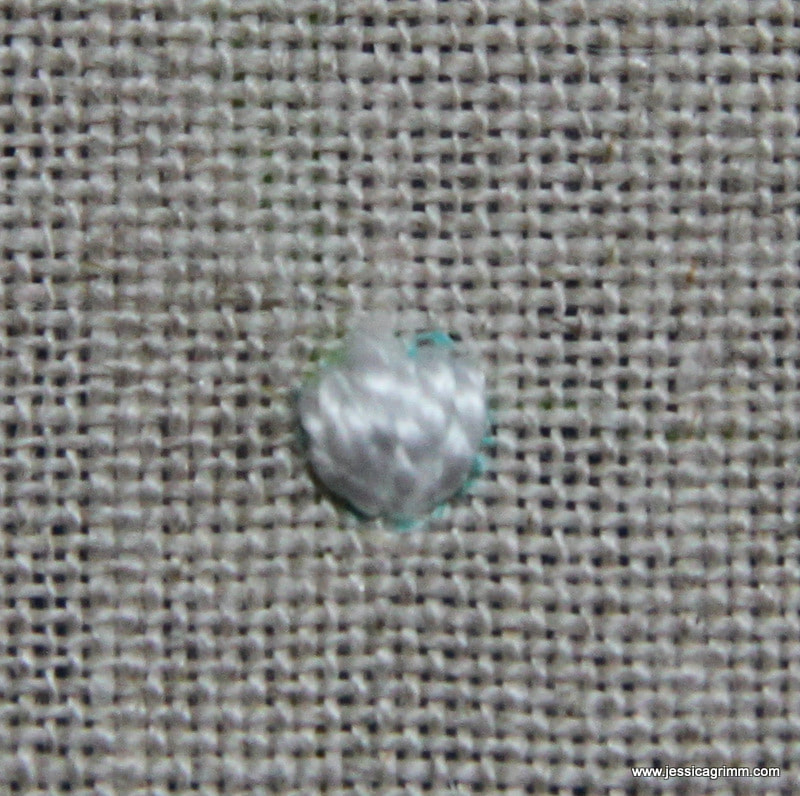
Did you miss me last week? Sorry for not writing a blog post. However, I had a pretty good excuse: another four-day course in Appenzeller fine whitework embroidery with Verena Schiegg. But before we dive into that, I'd like to invite you to listen to my Fibertalk podcast I did with Gary and Christine. What fun we had discussing bones, academic careers and lots of embroidery! For my four days with Verena, I choose to continue working on my sampler. There are still a few techniques characteristic for Appenzeller fine whitework which I haven't touched. One of them is the 'Figurenstich' or 'Bölsestich'. It is used to fill areas, but it isn't padded (as most of the other elements in this type of embroidery are). It is a very formal stitch, not unlike some of the filling stitches in traditional Chinese embroidery. It creates a brick pattern, and unlike needle painting, stitches aren't split. But you can stitch the drape of clothing with it as you can subtly change the direction of your stitches. You can see the Bölsestich in action on the rosebuds in the picture above. Second new thing I learned were the 'Böllerli'. A way to create a dot of padded satin stitch. As described in a previous post on this type of embroidery made for international export, it was very important to be economical with your threads. The creation of a Böllerli explains this concept very well. So, how does one create a Böllerli? Not by laying your layer of padded satin stitches in one direction and then, starting from the middle, laying your layer of satin stitches at an angle on top. Far too much waste of material! Instead you start with a cross-stitch inside the lines of your dot. You execute the stitches in such a way, that there is as little thread carrying on the back as possible. Add a second cross-stitch on top at an angle. Again, as little thread as possible on the back. Now you start your satin stitches on the left-hand side. You work from top to bottom and you angle your first stitch in. Add as many stitches as needed to completely cover your dot. Your last stitch, on the far right, is angled in too. NOTE: in order for you to be able to see what goes on in these pictures, I used perle #8 and worked at two different colours. The original Böllerli in the picture further above where stitched using cotton threads size #55 and are less than 1mm in diameter... Another big difference between the two ways of stitching a padded satin dot is, that due to all the padding stitches crossing in the middle, the dot is more domed. If you would like to try your hand at a Böllerli, you could use a 2mm circle template and one strand of stranded cotton. You can learn more about Appenzeller fine whitework from my previous blog posts: Appenzell Embroidery (with a link to a documentary), Diligence on white part I, Diligence on white part II & Appenzell re-loaded.
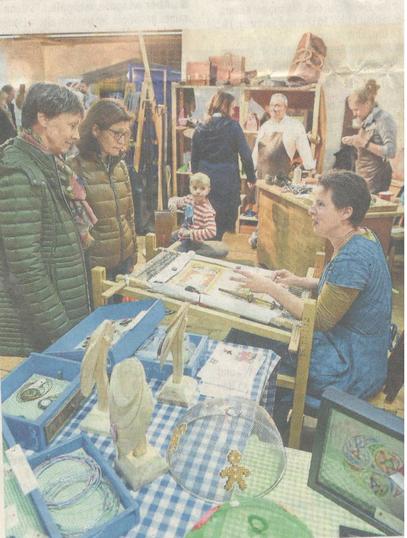
Selecting and packing everything for the Leonhardimarkt in Geitau taken place last weekend. Now that the markt is over and my embroidery studio back in order, let me tell you what I have learned from the experience... Up first, a picture of me explaining the St. Laurence goldwork project to some visitors in the local newspaper. Nice free publicity!
The Leonhardimarkt is organized by Fazination Handwerk (Fascinating Craftmanship) and aims to create a platform for artisans (i.e. not hobby makers) to sell their handmade products and to demonstrate how they make them. They do this by organising two 'up-scale' fairs a year. I had visited a fair before, but this was my first time participating in one. Unfortunately for me, this one was not visited well on two of the three opening days. Not only a pity for me, but for all the participating artisans as sales were way below what they used to be in other years. On Friday, we had by far the most interested crowd of visitors. People really enjoyed seeing the St. Laurence project and for many it was their first encounter with anything other than embroidered tablecloths :). It was really nice to be able to explain to people what I was doing and why I was doing it a certain way. We drove the 1,5 hours home on a high! But as always, after the sunshine comes the rain. The crowd on Saturday was bored and unfriendly. It was kind of a blessing that there weren't that many of them... The Sunday saw a much higher volume of visitors, but these were mainly the families who came for the watching rather than the buying. Overall, my finished embroideries did not find a new home. I sold a couple of beaded pendants and a few embroidery kits. Interestingly, my lovely neighbour the Federkielstickerin didn't sell any of her finished embroideries either! It seems that embroidery still has a long way to go when it comes to fair pricing. Why is that? For a starter, I noted that people do not have a clue how long it takes to stitch. They really think that I spent only a couple of hours on a piece and then sell it for top euros. Educating them that I only want the German legal minimum wage of €8,84 per hour + material costs, opened a few eyes. Secondly, although you can only sell at this particular fair when you are a true artisan and not a hobby maker, many people still thought that embroidery is my hobby and not my way of making a living. It became clear that embroidery is not recognised as a serious art form or a way to pay the bills. How best to change this? By attending future fairs! Even though I made quite a loss, I might pick up some after trade. The trouble is, I won't know until after a certain time. Unfortunately, I need to make a decision in the next two days if I want to attend their fair in February. And that fair has an even higher attendance fee... What would you do, dear reader? |
Want to keep up with my embroidery adventures? Sign up for my weekly Newsletter to get notified of new blogs, courses and workshops!
Liked my blog? Please consider making a donation or becoming a Patron so that I can keep up the good work and my blog ad-free!
Categories
All
Archives
July 2024
|
Contact: info(at)jessicagrimm.com
Copyright Dr Jessica M. Grimm - Mandlweg 3, 82488 Ettal, Deutschland - +49(0)8822 2782219 (Monday, Tuesday, Friday & Saturday 9.00-17.00 CET)
Impressum - Legal Notice - Datenschutzerklärung - Privacy Policy - Webshop ABG - Widerrufsrecht - Disclaimer
Copyright Dr Jessica M. Grimm - Mandlweg 3, 82488 Ettal, Deutschland - +49(0)8822 2782219 (Monday, Tuesday, Friday & Saturday 9.00-17.00 CET)
Impressum - Legal Notice - Datenschutzerklärung - Privacy Policy - Webshop ABG - Widerrufsrecht - Disclaimer



 RSS Feed