|
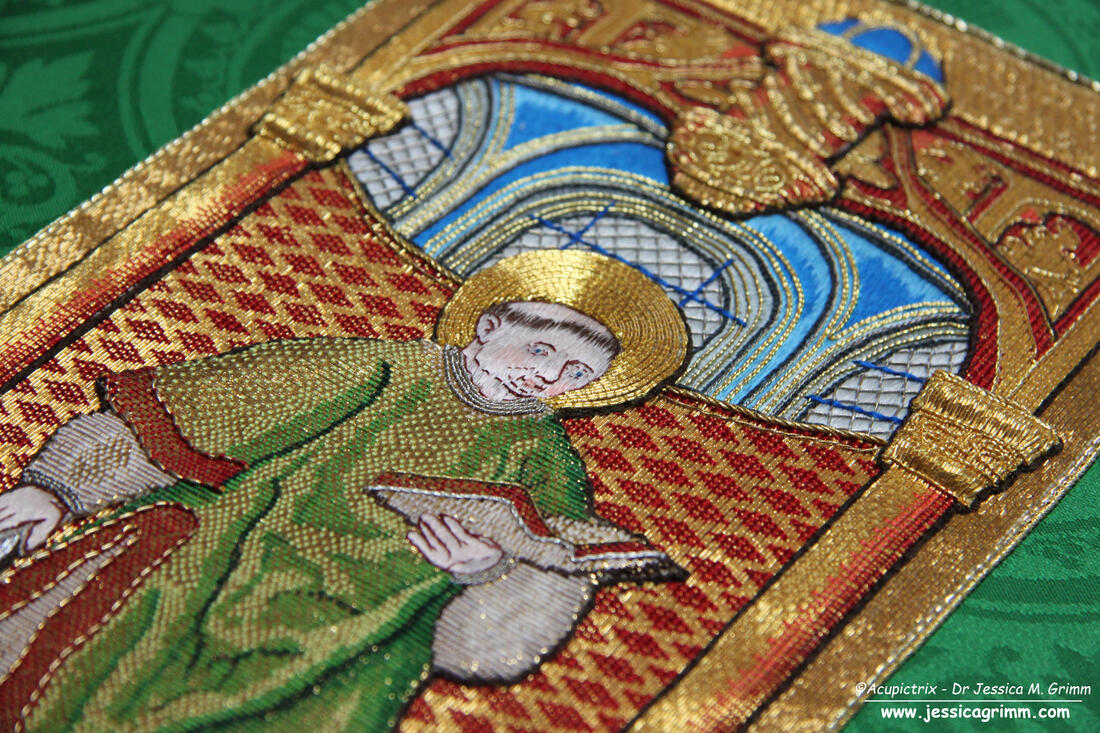
Finally the start of my medieval goldwork course! For years in my head, for months in the making and now at last the first lesson has been released to the first group of students. My husband and I celebrated with pizza and cake for lunch :). But now it is back to work again. As my research is very much ongoing, future versions of the course will require constant updating. Not in the least because certain materials are no longer available or a better alternative has finally been found. I'll share one such update with you below. But first: have s sneak peek at the current course contents in the short video below.
As I want my medieval goldwork course to be as authentic as possible, I search high and low for the correct materials. For some things that's surprisingly easy as the climate crisis leads people to rediscover natural materials. In other cases, it is a bit more trial and error. Take the luxury silken fabrics. Samite is rare as hen's teeth. This is a heavy silk fabric with a marked twill weave. It is a joy to stitch on. God only knows why it is no longer the embroidery fabric of choice. Luckily, I knew where to buy some: Sartor in the Czech Republic. They specialise in the re-creation of historical fabrics. Unfortunately, each run is a one-off. And since I had no idea if my course would be popular and samite is not a cheap fabric, I did not buy a huge amount. This means I can probably run the course twice more as is and then I will at least need to change the design of lesson 2. It will be such a burden to stitch another design on yet another piece of this heavenly fabric :).
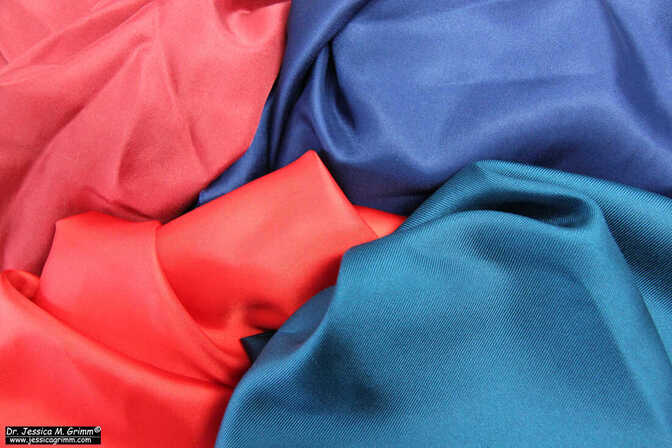
Not as rare as hen's teeth is silk twill. You can have silk twill by the shipload. Just not the one you need if you want to recreate Opus Anglicanum :). To stay with the teeth: you have a choice between dentures and the real deal. Lots of dentures out there. You can have very light-weight silk twill in any colour your heart desires. But it is oh so flimsy. Oh, and the colours are very bright and so not medieval-y either. In the end, I went with a madder-dyed flimsy version for the first run of the course. At least it had the right colour. And although it is so very flimsy, it does survive underside couching surprisingly well. But what I really wanted was a firm version of silk twill. And lo and behold, Sartor came to the rescue again.
The lovely ladies who run this excellent fabric business have recently revamped their website. And among the normal silk twill, they now carry two heavier versions too. They arrived on Saturday and I cannot wait to start underside couching on them. Unfortunately, the one my gut feeling says is the right weight, has the wrong colour: petrol. Ah, well. A born-again medieval goldwork embroideress just cannot have it all! These two examples show that running my medieval goldwork course is not like serial production. Before I announce the next run, I want to be sure that I can actually run it again. And run it well.
29 Comments
Wow, my course filled up within three minutes last night. That's brilliant for me :). But I do realise that quite a number of people, unfortunately, missed out. Many of you have sent me an email to ask when the course will re-run, if they can be put on the waiting list or if they may attend without a kit. I have emailed all of them individually but I think it would be a good idea to publish the answers here as well. First: Will there be a re-run of the course? Honestly, I don't know yet. The interest is there and this is not the problem! But sourcing the materials during a pandemic is. Although I started placing orders more than a month ago I cannot ship out the kits today. Normally, Zweigart linen fabric is on next day delivery as it is being produced here in Germany. As it did not arrive more than a month ago, I started calling them. The phone wasn't picked up for days. Finally, they emailed me to say that delivery will not be before the middle of November! Still plenty of time to send out the kits :). Another example: paint produced in Germany. To get 15 tubes, I had to order from five different sources. One source being particularly cheecy as it turned out they did not have the stuff and had to order in from the manufacturer! Brushes the same thing. Some silks too. And, oh yes, the freshwater pearls too. Even with a four months period between ordering the materials and the start of the course, I probably could not have sourced all materials for more than 15 kits. Second: Will there be a waiting list? No there won't. Because of the above pointed out supply difficulties I simply cannot say if the course can run again in its present form. And I do not want to give out promises I cannot keep. Thirdly: Will you allow students to attend without a kit? No, I won't. From the questionnaire send out after the Imperial Goldwork Course it became clear that students did not like the fact that there was no kit. Sourcing your own materials during a pandemic (and even without!) is a nightmare. They also stated that the small classes on Zoom were a blessing and very much appreciated. I, as a tutor, never liked larger classes. You have no idea what some people are up too when you turn your back on them for only a very brief moment :). For 'live and in the flesh teaching', I limit the numbers to about 10. When organisers push me to take on more, I am not a happy bunny. As a student, I do not like to sit in big classes either. I am far too polite :). The ones who scream the most and the loudest get their money's worth of teaching. I, as a student, end up figuring it out for myself. No matter how experienced the teacher is, there is a limit to the number of people you can teach successfully.
So what is the way forward? As long as the pandemic rages: take it step by step and don't plan too far ahead. I don't know about you, but I found these past seven months exhausting! Learning so many new things in such a short span of time. Not knowing if I would be able to find a way to earn money when all the teaching was cancelled was scary. The many extra hours and worries took their toll. My body didn't like me punishing it that much and started to rebel. My body is way wiser than I am! I stopped working all hours, set some boundaries and I quit Instagram. Instead, I try to make sure that I get enough exercise, work on my art (I haven't seen St. Nick in over a year!) and support my husband as much as I can as he is presently swamped in work. What that will mean for you? Excellent news in fact! It means that my head is free again to come up with fresh ideas for future classes. But the classes will not be taught back to back. There will always be enough breathing space for me in between classes. I need that. I am not a machine. So get on my mailing list for my newsletter and keep an eye on this blog for announcements of future courses. They will always have limited spaces and come with a kit. This will ensure that you don't have the stress of sourcing hard to get items and in class, you will not have to shout for attention either :). Organising the Imperial Goldwork Course during the lock-down posed a real challenge. I couldn't send out course materials due to international mail not going out. I needed to invest in a high-spec webcam and software at a time when our household income was low due to the pandemic. Teaching live on Zoom for an international crowd in which often three languages were spoken, was new for me too. But I tremendously enjoyed sharing my knowledge and skills. And I learned a lot. Which changed the way I will do similar things in the future. As my husband lost 40% of his already meagre income at the start of the lock-down, I was very aware of the struggle many people were in. Especially those who do not live in a welfare state like Germany. That's why I came up with a donation payment structure for the course. The idea is that people with disposable income donate when they take the course and those who lost (part) of their income can join for free. As the warmth and the solidarity of the embroidery community is so often praised, it should not have been a problem for me to draw an income from my efforts. But it was and still is. Of the 108 stitchers who have taken the course to date, 30 made a donation. Donations range from €10 to €265, with an average of €59. Producing each lesson and supporting students via email took me to date about 3,5 days per lesson. If we subtract the cost for the webcam and the software, I am left with €484. If we divide this by the working hours I invested, I worked for €2,16 per hour before taxes. As most people took the course during or immediately after the live zoom classes, I sent out a survey to those who downloaded the PDF-handouts. After all, I wanted to learn from my mistakes. And I thank all who took the trouble to respond and provide me with valuable feedback. One of the questions asked why people did or did not pay for the course. And the replies where illuminating. Reasons for not paying in order of their frequency: 1) others don't pay so why should I?, 2) when I cannot attend (all) of the live zoom classes and need to watch (some of) the recordings, I am not really participating in the course so I do not need to pay and 3) only wanted to see how you do it so that I can use your format for my own offerings/report format back to my organisation. From the above, it becomes clear that the donation payment structure does not work. Thanks to Social Media, I could watch people, who took my course without paying, showing-off their latest buys and sign-ups for embroidery courses. I will thus not use this payment structure again. For all future courses, I will make a proper costing. If you want to take the course, that is what you will need to pay. I am aware that some will probably not be able to afford my future courses. However, if all 108 students, who have taken the course so far, would each have donated €32,64, I would have earned the German legal minimum wage of €10 per hour. That's for a person without qualifications and experience, by the way. Before the pandemic, but certainly now during the pandemic, some colleagues and stitchers have started to 'shop' for ideas from my blog, Instagram and YouTube channel. Thank you to those of you who have warned me. I had seen it with my own eyes too. As you probably have noticed, I am posting very sparingly on Instagram and I am not sure if I will make more FlossTube videos. I am also struggling with how much detail to post on my blog. It is a real dilemma. On the one hand, I need to be engaging so that I keep myself in the picture and sell my products and services. But on the other hand, it is soul-destroying to see others turn your ideas into blockbusters.
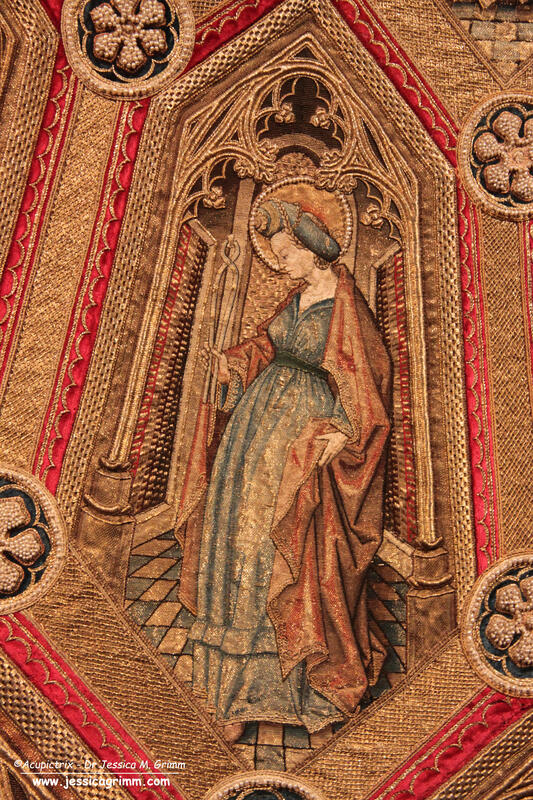
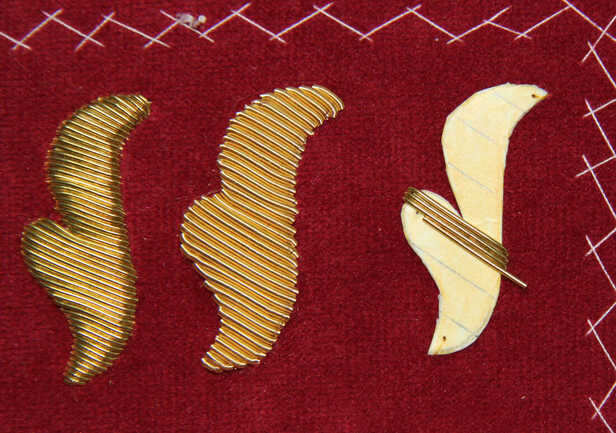
My academic background and language skills should give me an edge over many of my colleagues. But this only works if the potential costumers are able to distinguish the difference in quality. But fake news and alternative facts show that increasingly people are unable to do so. Quality news outlets suffer and so do quality embroidery tutors. I took the course off-line on the 31st of December 2021. Although the course was still regularly downloaded, I only received two donations during 2021. As explained above, the donation model sadly does not work. During my break from blog writing and after the success of the first online goldwork course, I have come up with a new online course: Medieval goldwork techniques - a journey through 500-years of embroidered history. In this new ten-week online course we will explore different forms of couching: underside couching, pattern couching, couching over padding and the queen of couching techniques: or nue. We will explore each technique in its (art) historical setting. In each sample worked we will use as authentic materials as feasible. The beautiful goldwork techniques of the Middle Ages deserve precious gilt threads and real silk! Over the past five years, I have travelled extensively to visit museum exhibitions, research facilities and libraries in Germany, the Netherlands, France, Austria, England, Italy and Lithuania. Many of these trips were covered on this blog. The resulting research now forms the basis of the course. By attending the course you will gain in-depth knowledge of how medieval goldwork embroideries were made. What technical inventions revolutionised the process and the workshop setup. What inspired the stylistic language? You will learn about the close relationships between embroiderers, goldsmiths, painters and sculptors. Who were these embroiderers? Did they see themselves as artists? How were they organised? Who did they work for? The core of the course form the embroidery samples you will work. They are all inspired by actual medieval embroideries. You will handle luxury fabrics like samite and silk twill, as well as high-quality gilt threads and different kinds of beautiful silk yarn. After taking this course, you will know the benefits of using madder, sienna and iron gall ink. This course is directed at embroiderers of all levels. With the possible exception of or nue, none of the techniques are (technically) difficult. The techniques covered will form the basis for future (online) historical goldwork embroidery course I am developing. The medieval goldwork course will start February 2021 (registration will start 1st November). This enables me to assemble a full kit and get it shipped in time to all participants. Class size will be limited to 15 to enable me to give proper attention to each of the students. Each lesson will comprise of a PDF-download with all the historical and technical information on the particular technique explored, a video abstract of that information, a video of me working the sample and giving tips, a zoom-meeting where you can meet fellow students and discuss the lesson and a classroom on NING where you can find all the course material and keep in touch with your fellow students. And as always, I am only an email away!
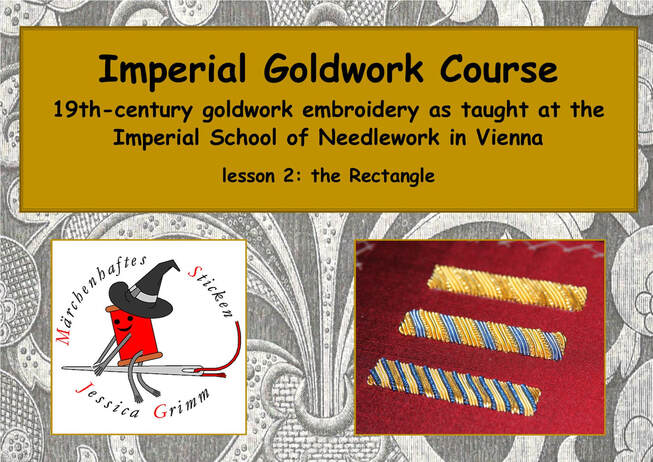
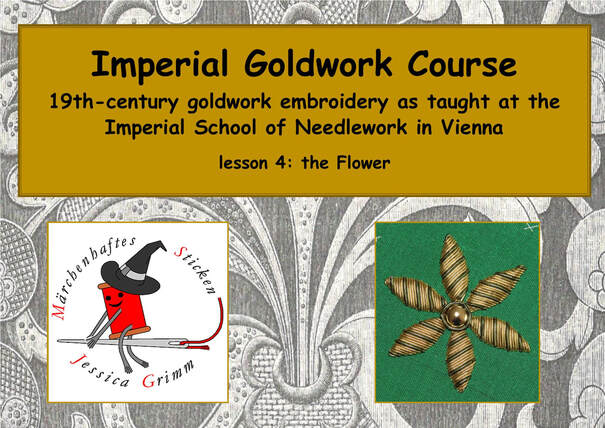
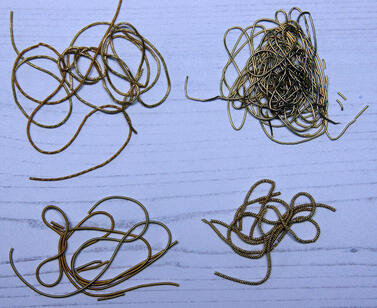
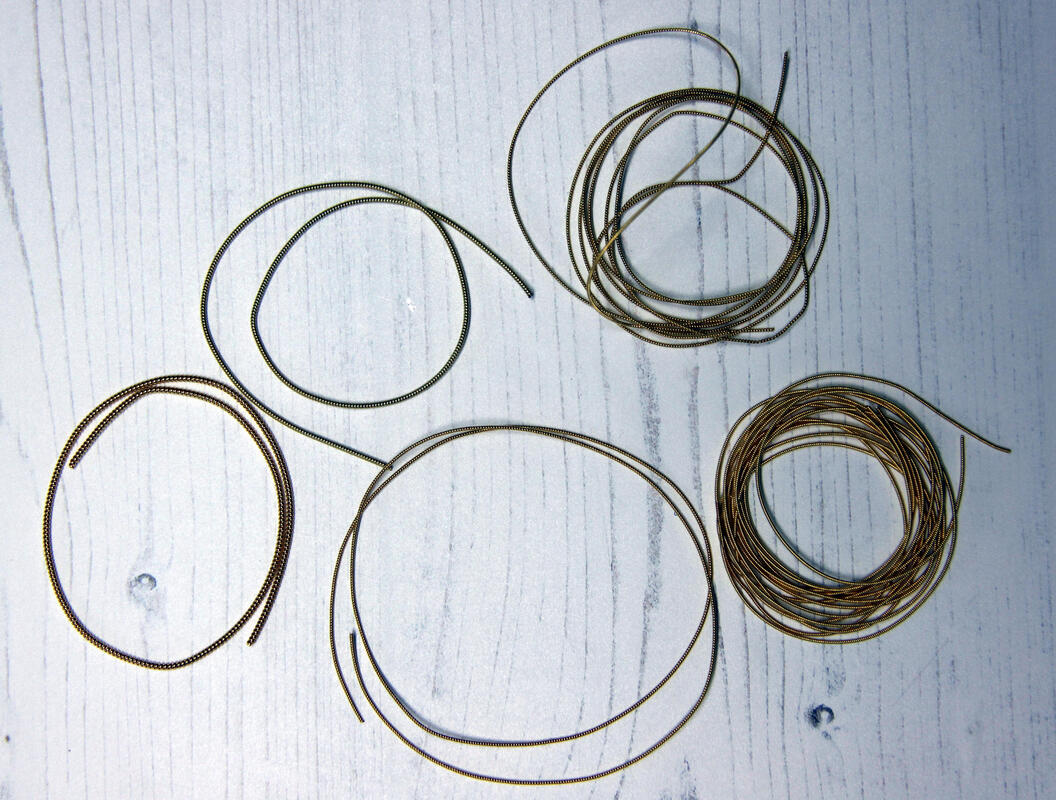
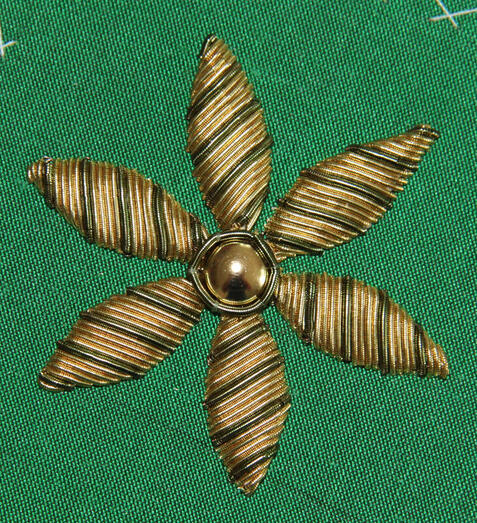
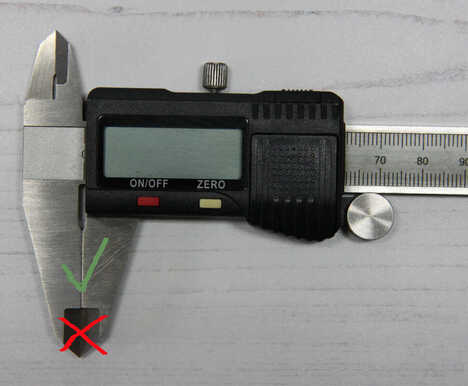
Updates on the course and registration will be disseminated through this blog and my newsletter. Looking forward to sharing my enthusiasm for medieval goldwork embroidery with you in this new course! During the zoom-meeting on Saturday evening for my online goldwork class 'Imperial Goldwork Course' we stumbled upon the sizing systems for metal threads. Some students from the US had trouble finding the correct sizes of purls mentioned in the PDF-handouts as they claimed that the sizing system in the US is different from that used in Europe. They mentioned that on the websites of Garibaldi's Needleworks and Berlin Embroidery the sizing would run in such a way that the higher the number the thicker the metal thread. This was opposite to my sizing system mentioned in the PDF-handouts. This was new to me. Immediately after class, I started to investigate. However, on the aforementioned websites, I found exactly the same measuring system as I was using. After a while, I realised what had happened. A quick email to the said students confirmed my suspicion. It was a stark reminder that, for somebody starting with goldwork embroidery, it can be a jungle out there! Let me clear the confusion. In the first eight lessons of the Imperial Goldwork Course, we learn about the different forms of cutwork used in 19th-century goldwork embroidery. For cutwork you normally use: smooth purl, rough purl, wire check and bright check. These purls have a sizing system that runs from #4 (the wire with the largest diameter) to #10 (the wire with the smallest diameter). For the course we use the larger #6 and the smaller #8 as they are the two most commonly used sizes. An opposite sizing system is used for pearl purl. It runs from Very Fine (the wire with the smallest diameter) to #3 or #4 (the wire with the largest diameter) depending on the manufacturer. Said students had previously worked kits with pearl purl in them and logically assumed that the higher the number the fatter the metal thread. One word of warning here: whilst the sizing system in the English-speaking world is the same for metal threads, the sizing system in the German-speaking world is different. Although I am based in Germany, I use the English sizing system as it is the most common system used by goldwork embroiderers. Oh, and the French system differs too :). Another student mentioned that it would be a wonderful idea if I would measure the diameter of the purls the students need to use and then tell them that number instead of the sizing system commonly used. Although I mentioned that my gut feeling was that this would be rather cumbersome for a number of reasons (measuring accuracy would be difficult to maintain and all students would need high-speck calipers too), the said student was not convinced. What does every good teacher do? Investigate! Here we go. As I have been an archaeozoologist for 15 years and measured 100-thousands of animal bones with scientific digital calipers, I still had several pairs laying around the house. The pair I used are made by Milomex Services in the UK. The measuring range is 0-150 mm with a resolution of 0.01 mm. Measuring accuracy is: 0-100 mm +/- 0.02 mm and 100-150 mm +/- 0.03 mm. This means that if you measure something that's between 0 and 100 mm the inaccuracy is +/- 0.02 mm and for something between 100-150 mm it is +/- 0.03 mm. As the smaller purls have tiny diametres, this measuring accuracy is potentially important. Apart from the measuring inaccuracy innate to the calipers, there is the problem of the metal threads being rather soft compared to the tips of the caliper. It is therefore rather easy to squash your metal threads ever so slightly and getting a wrong (lower) diametre. To prevent the very pointy tips of the caliper to slide between the coils of the purls, I placed the purls between the broader parts of the caliper's tips (see picture above). To further try to minimise the measuring error caused by the relative softness of the metal threads, I took multiple readings of each wire sample and noted the average. What were my findings? As my gut feeling told me and the measurements confirmed: samples from different manufacturers can differ. Even different samples from the same manufacturer can differ. What are the sizes of the most common metal threads used according to my measurements? - gilt or silver-plated bright check #6: 1.1 mm - gilt or silver-plated rough purl #6: 0.9-1.1 mm - gilt or silver-plated smooth purl #6: 0.9 mm - gilt or silver wire check #6: 1.2-1.3 mm - gilt or silver-plated bright check #8: 0.9-1.0 mm - gilt or silver-plated rough purl #8: 0.7 mm - gilt or silver-plated smooth purl #8: 0.7-0.8 mm The results are discrete enough that it is possible to distinguish between #6 and #8 purls when you accurately measure their diametre. Can these measurements assist you when you want to buy goldwork supplies? Not so much. For instance, on the website of Berlin Embroidery you will find that the measurements are approximately: - gilt or silver-plated bright check #6: 1.5 mm - gilt or silver-plated rough purl #6: 1.5 mm - gilt or silver-plated smooth purl #6: 1.5 mm - gilt or silver wire check #6: 1.5 mm - gilt or silver-plated bright check #8: 1.0 mm - gilt or silver-plated rough purl #8: 1.0 mm - gilt or silver-plated smooth purl #8: 1.0 mm As Tanja Berlin and I use the same goldthread suppliers, her measurements should have been exactly the same as mine. Instead, they differ (she probably used a ruler to measure the purls). As a beginning goldwork embroiderer, what would you have bought from for instance Berlin Embroidery when I would have told you that we are going to use a gilt smooth purl with a diameter of 0.9 mm? You would probably have ordered a #8 from Tanja Berlin's website and then have ended up with a wire that could have had a diameter 0.2 mm smaller than I am using. This does not sound like much, but it makes a huge difference. By just ordering the #6 as stated in my PDF-handout you would have ended up with the correct thread. That's why we use the numbering system instead of accurately measuring the diameter of the threads. Besides, not all goldthread suppliers state the diameter nor do most teachers or books. And as every good scientist should do, you can find the raw data in the document below.
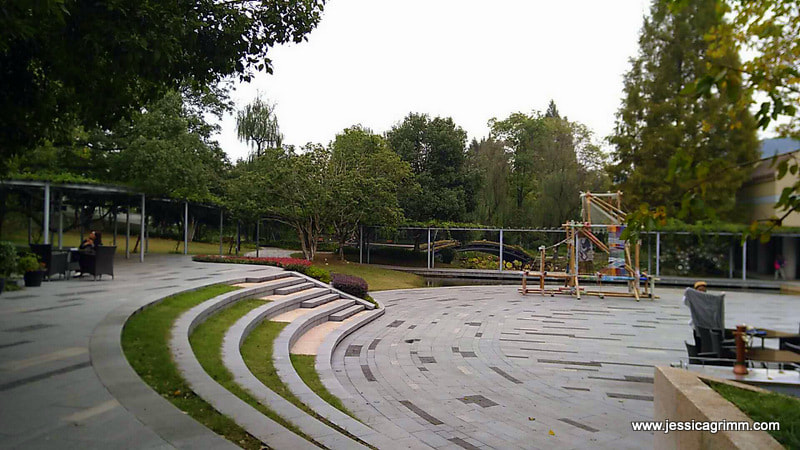
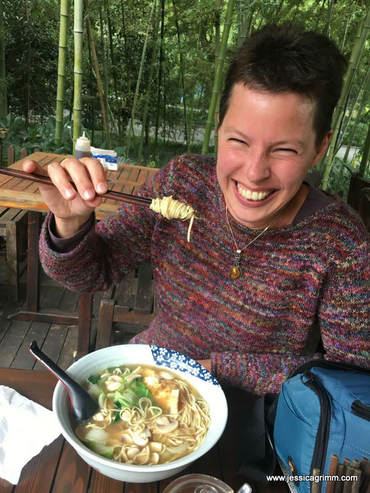
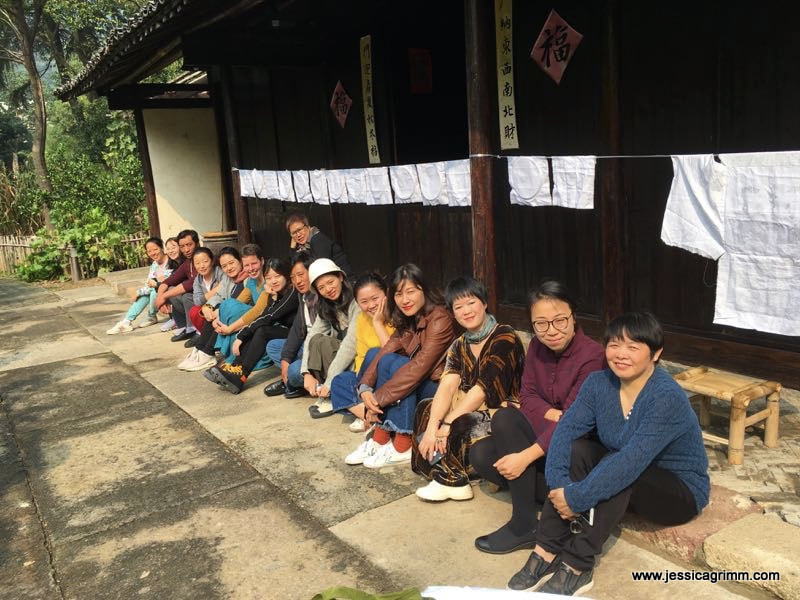
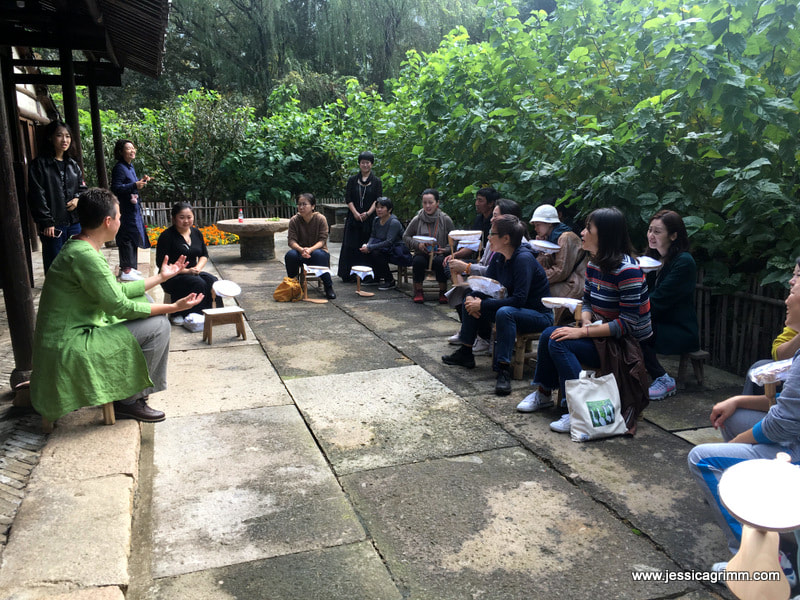
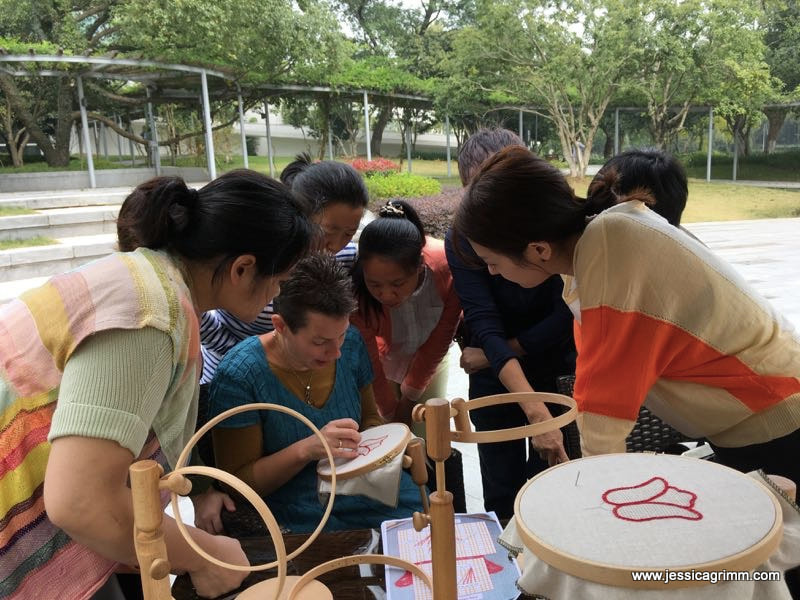
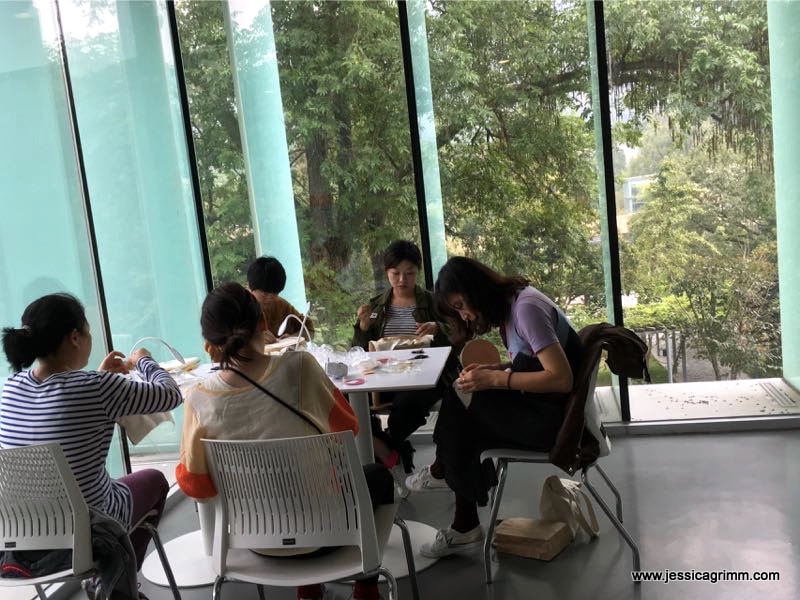
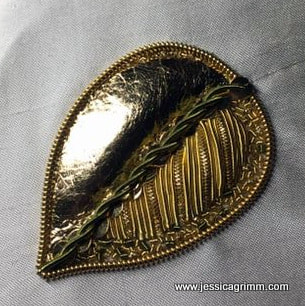
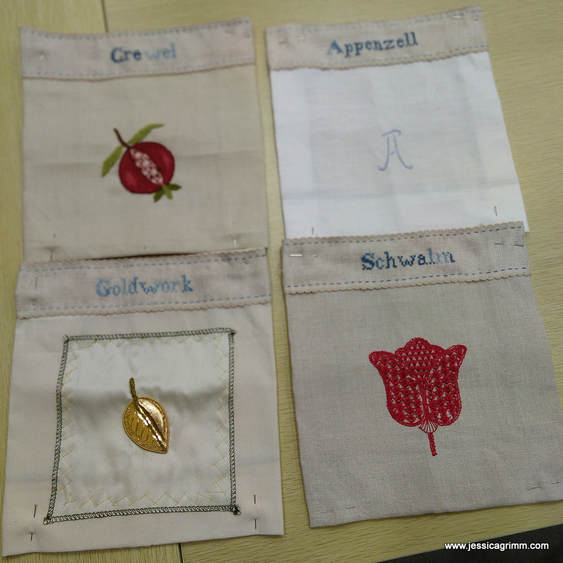
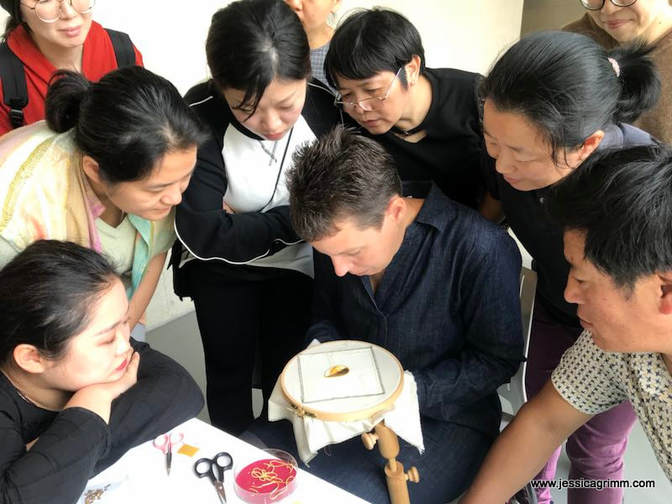
Jetlagged and with a nasty cold, but full of wonderful stories about my recent teaching trip to China, I sluggishly slump behind my laptop. To add insult to injury, my dearest coffee machine died on me when we got home from Beijing on Saturday night. I nearly killed someone this morning who carelessly suggested that I could easily survive on instant coffee until my beloved machine gets repaired... Let's talk of happier things, shall we!? Packing my 24 days in China into one blog post might be a little too much :). Instead, I will write several posts in the coming weeks on my adventures in the far East. We'll start today with the actual teaching. I arrived a few days early in Shanghai and was picked up by Edith, a textile enthusiast from Hong Kong, who had organised the workshop. We immediately got on really well! We decided to take the bus to Hangzhou; my first taste of the excellent public transport services in China. After being dropped off in the centre of Hangzhou, we took a taxi to the hotel situated near the famous West Lake. As Bad Bayersoien - Hangzhou takes nearly 24 hours, I was ready to slip between the covers in my lovely hotel room. After a delicious breakfast the next morning, we crossed the street to visit the National Silk Museum. The museum is quite large with several buildings housing different exhibitions related to silk. The buildings sit in a beautifully landscaped park. Exploring the ground floor of the silk road exhibition alone took me about two hours! In the afternoon, I decided to take a walk and explore the famous West Lake. As it was the weekend, many Chinese holiday makers had the same idea. The place is famous for getting your wedding pictures taken and the whole area is an important inland holiday destination. I ended up visiting a Buddhist temple, the tombs of some revolutionaries and ended with Jasmin tea overlooking the lake. As there where not many other Westerners, the Chinese looked upon me with great curiosity :). On Sunday, we prepped the classroom for the workshop starting on Monday. I met my assistant and translator Clover who has studied weaving in London. She did a great job translating my English into Chinese during the workshop! And in between, we ate :). Not only breakfast was a treat, the local eateries were fabulous too! Me using chopsticks for the first time was hilarious and I must confess that I don't miss them... On Monday, the teaching started. The group of students was very divers. I had museum staff, art teachers, fashion designers and even two craftsmen from Tibet. They were all very eager to start! Although the official classroom was in the basement, we decided to use the lovely weather and stitched outside a lot. Sitting in front of an old sericulture farm was a favourite with all of us until the mosquitos found out about it too... We strung a line and hung up the result of the previous day to talk about the experience. I was very impressed with my students as most of them had finished their projects overnight! However, getting them to critique their work publicly or express their experiences with the particular embroidery technique, wasn't easy. Other favourite stitching spots were the cafe... ...and the gallery of the fashion building. Those large windows were fantastic. When teaching the goldwork leaf on Thursday, I discovered a mistake with the scale of the leaf. Oopsy! Time for a last-minute change: add some chipping to the original design and all was well again. It shows that no matter how well you prepare, mistakes can always happen. Adapt and carry on! We ended the day with a Chinese high-tea organised by the students. They had brought all sorts of delicacies for me to try. Yummy! The schedule on Friday and Saturday changed a little. We had the opportunity to pair my talk on medieval embroidery with that of a local master embroiderer on Friday. We had all hoped that she would talk on the techniques she used in her embroideries or the thought process that went into them. Unfortunately, she didn't. It was more a sales talk. However, some of her work was really nice and unusual. It showed that she also experienced difficulties with branding her work as art. My talk went really well. The museum did record it on video and as soon as I know where it is available, I will let you know. If it does not become available, I will put up the original presentation and let you know where to find that. However, it is much more fun to hear a Dutch person talk in English and have that translated into Chinese by Clover :). As one afternoon of the original five-day workshop was high jacked by the presentations, we decided to meet again on Saturday morning (in the original plan I would have given my presentation on Saturday). I was completely blown away by the fact that quite a few students had completed all four projects! That's the best praise a teacher can get. It shows that they really enjoyed themselves and loved the tasks I had set them. Those six days were immensely gratifying and I really had a blast! Seeing people figuring things out and going on helping others is such a great experience. I really hope they can implement the things they have learned in one way or the other.
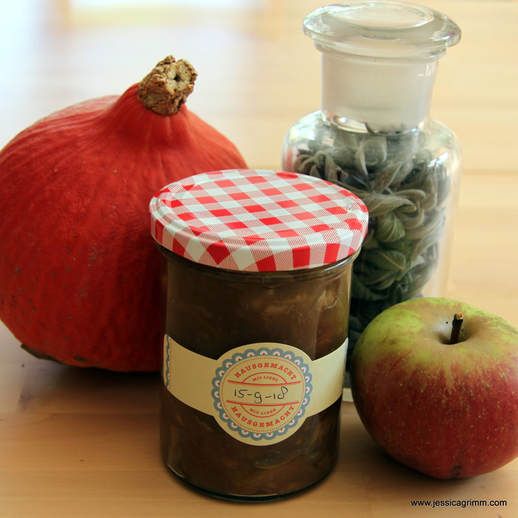
After having had a sore arm for three days thanks to 1ml of immunisation fluid, I was hit hard again. Obtaining a visa for China will set you back a whopping €286! So when I received my passport back I was hoping for something sparkling. A little gold dust perhaps? Nope. It is a rather ordinary looking sticker.... Luckily the mailman brought me some promotional material concerning the museum and Hangzhou to cheer me up. Especially the museum and the West Lake look very pretty! Preparing for China means I don't have much time to do some stitching. I still need to make instructional videos from the footage I shot whilst stitching the class samples. This means I am learning to use Adobe Premiere Pro and video platform Vimeo. Quite fun actually. The first eight videos concerning the crewelwork pomegranate are up there. And then there is another major thing that gets in the way of stitching: the garden. Whilst the rest of Germany and indeed most parts of Western-Europe had a severe drought this summer, the Alps had a good summer. This means that our 'Belle de Boskoop' is having a bumper crop. Normally, this tree has a hard time coping with the harsh alpine climate and only gives us miniature very hard green fruits. However, it seems we now have a climate change winner here. My kitchen turns into an apple processing plant most days. So far me and my husband have made several pies, Lithuanian apple cheese (google it!) and apple sauce. On top of that, we have the larder full of beautiful pumpkins and herbal teas. I am very grateful for nature's bounty!
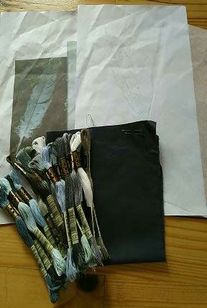
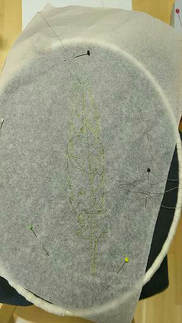
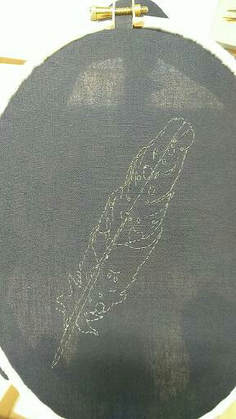
Back to making more apple sauce :)! I signed up for a distance class in silk shading with Jen Goodwin. Why did I sign up for this particular class? Well, the design sports a feather with quite irregular edges AND has water droplets. As I have no idea how to stitch droplets, I really like to learn from a fellow pro. It is also another great opportunity for me to see how I could possibly run an online class in the future. The class runs for eight weeks and is, at GBP 195/$ 284/€ 229, not cheap. The class should have started on the 20th of January, but due to Jen not being very organised, I actually received my kit on the 23rd and the first instruction email on Sunday morning the 28th. This can happen to the best of us. My kit contained a colour photocopy/printout of the feather, an outline drawing of the pattern, a piece of tissue paper for the transfer, a piece of dark-navy cotton, 2 #10 sewing needles and 20 skeins of DMC stranded cotton in the most fabulous colours. However, due to the fact that it was shipped in a plastic seal bag, it arrived rather wrinkled and dishevelled. Oddly, there wasn't a note or compliment slip either. The dropbox Jen uses for her teaching videos also contained a high-resolution original picture of the feather. So before any stitching commenced, I ordered a proper photo printout of the feather. The printout in the kit is, in my eyes, just not very defined and has a green tinge to it. But above all, it is wrinkled. And I don't find it very practical to work from a dropbox/computer screen. Next thing I did was watching Jen's video's on binding a hoop and tissue transferring a design. I was hoping the videos would be of the same quality as Mary Corbet's 'How to' videos. Unfortunately, they are not. Important things and actions are frequently out of focus, text is sometimes blocking the action, important action is going on outside the video frame and action in the video contradicts the text in the video. I really hope that the actual stitching videos provide enough detail to be able to clearly see Jen's stitching. Before starting the tissue transfer method, I ironed the piece of fabric and ran the edges under my Babylock machine. I hate disintegrated fabric edges whilst stitching. I faithfully copied Jen's outline drawing onto the tissue paper and started tacking. About half-way through I came upon an uncertainty and wanted to check on the picture printout... SHIT!!! The outline drawing Jen provided in the kit is a mirror image of the picture we are supposed to stitch... I very carefully unstitched, flipped the tissue paper, traced the lines again and started tacking again. I also immediately warned Jen so she could warn the other students. I really hope they hadn't started. As there is no email-list, forum or group to 'meet' the other students. I have no means of getting into contact with them directly. This is my first ever online-class that does not provide for contact with my fellow students. It is a bit of a shame as I can't learn from their progress or get inspired by them either. Finally, I was able to remove the tissue paper and to have my feather all set up for my next lesson. I'll keep you posted on my progress. Rather than week-by-week, it will probably be a summary of several weeks in one post. After all, it is not my intention to spill the beans on Jen's project and provide very detailed information so my readers could just stitch the project too from reading my blog. However, if you were thinking of doing an online class with Jen, you will be able to make an informed decision based on the testimonials on her website and my blog posts.
|
Want to keep up with my embroidery adventures? Sign up for my weekly Newsletter to get notified of new blogs, courses and workshops!
Liked my blog? Please consider making a donation or becoming a Patron so that I can keep up the good work and my blog ad-free!
Categories
All
Archives
July 2024
|
||||||
Contact: info(at)jessicagrimm.com
Copyright Dr Jessica M. Grimm - Mandlweg 3, 82488 Ettal, Deutschland - +49(0)8822 2782219 (Monday, Tuesday, Friday & Saturday 9.00-17.00 CET)
Impressum - Legal Notice - Datenschutzerklärung - Privacy Policy - Webshop ABG - Widerrufsrecht - Disclaimer
Copyright Dr Jessica M. Grimm - Mandlweg 3, 82488 Ettal, Deutschland - +49(0)8822 2782219 (Monday, Tuesday, Friday & Saturday 9.00-17.00 CET)
Impressum - Legal Notice - Datenschutzerklärung - Privacy Policy - Webshop ABG - Widerrufsrecht - Disclaimer



 RSS Feed