|
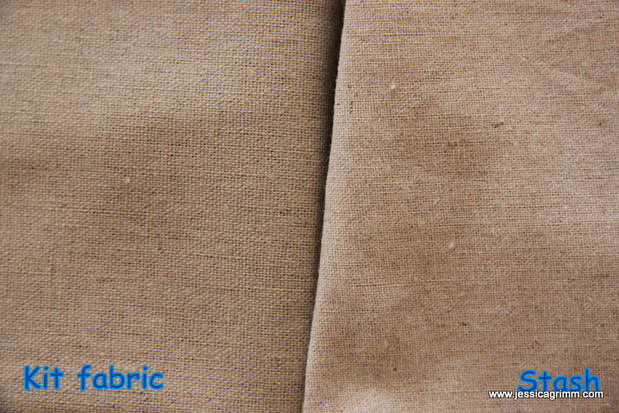
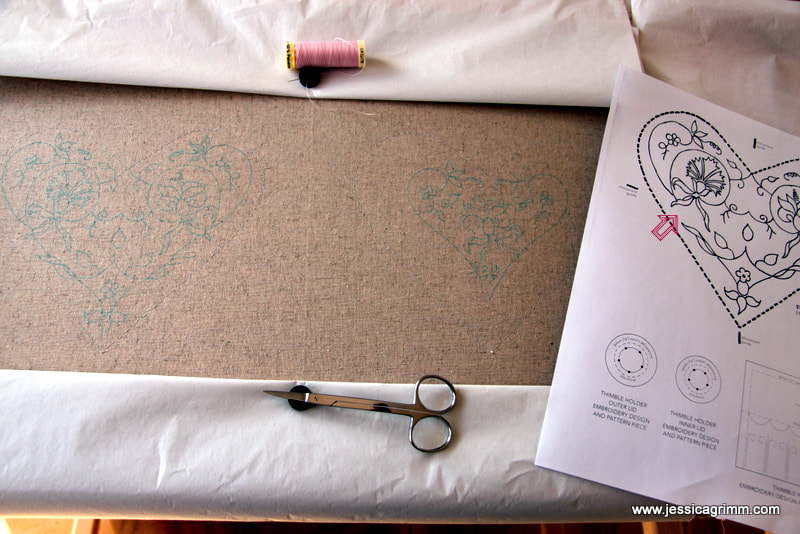
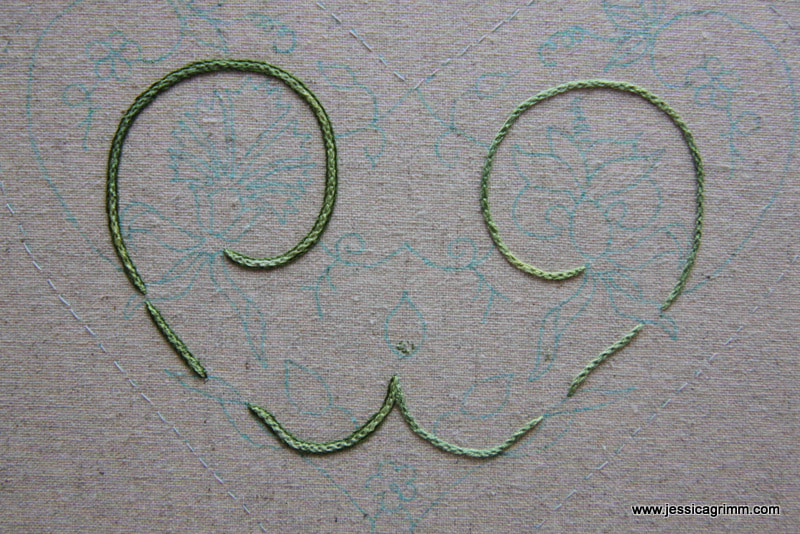
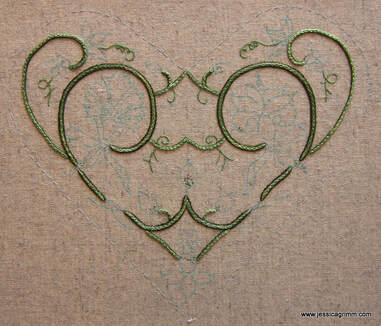
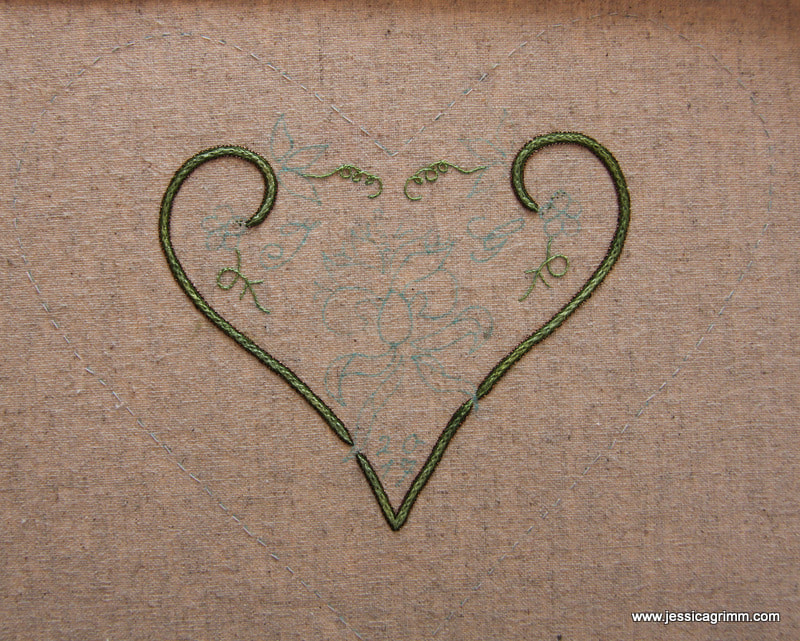
Time to start a new project! Not that there aren't any W.I.P.s left... However, I have the perfect excuse to start this particular project: YOU. It feels nice to be important doesn't it? The latest Carolyn Pearce project 'Strawberry Fayre' featured in Inspirations #95 generates quite a buzz in the worldwide embroidery community. And rightly so! It is every bit as cute as Carolyn's other world-famous project: Home Sweet Home. There is however, a bit of a downside. As with the Home Sweet Home workbox, this project requires an awful amount of speciality threads and finishing materials. We all know that, depending where you are in the world, these are a nightmare to source. Inspirations does offer a kit, but at AUD$255.00, that can be quite steep. Quite frankly, if I wasn't an embroidery tutor who wants to be at the top of her game, I would probably not have bought one. So, what should one do if one desperately wants to stitch this particular project, but doesn't have access to either an elastic wallet or a well sorted needlework store? Follow me along on this blog! Over the comming months I will be stitching the project using the kit provided by Inspirations. I will show you what's in it and talk about readily available substitutions which would do the job beautifully too. Now, let's start! I have decided to start with the front and back heart. They require the most and similar stitching. This will give me a good idea of the threads used and thus of possible substitutes. But first things first. When the Inspiration's kit arrived, I was a little disappointed to find that the fabric included isn't the original one used by Carolyn. It is a little difficult to convey in a picture, but the fabric in the kit has a looser weave and is slightly stiffer. It does not feel as nice as the fabric which came with the Home Sweet Home kit. Fortunately, back then, I bought 10 meters of this fabric and still have enough left to use for Strawberry Fayre! And that's not the only change I've made. Ever since I attended the Royal School of Needlework, I love to work on a slate frame. As a slate frame takes some time to dress, you don't want to use it for small scale projects. However, the amount of stitching on the front and the back heart do justify the use of a slate frame. I've also swapped the permanent marker for an aqua trick marker. In order to transfer the design, I made a copy of the pattern sheet and thickened the lines with a permanent black marker. The lines were now clearly visible when using my lightbox for transferring. And that's when I found a little mistake on the pattern sheet. There's a stem missing (see arrow in picture above). Happens to the best of us :). I've also added my initials and the year to the back heart. Let's talk about the actual embroidery. I'll start with the stems and move onto the flowers and leaves in future posts. A combination of four different threads is used to stitch all stems on the front and the back heart: Au ver a Soie antique metallic #223 black copper, DMC stranded cotton #937, Gumnut yarns 'stars' stranded silk #606 rainforest and Gütermann sulky rayon no. 40 #1177 light avocado green. The pattern advices you to stitch the thickest parts of the stems with two strands of the Gumnut silk using Hungarian braided chainstitch. I have to admit that I struggled with that. Using two (or more) strands of a particular thread poses its problems when maintaining good tension. In this case, we are advised to use a spun silk which is already a bit 'fluffy'. Now add these two characteristics together and you are in for trouble. In this case: you'll bound to lose definition in your stitching. Normally, the Hungarian braided chainstitch produces a nicely defined braid. Well, it might be me, but I couldn't do it. Looking at some of the close-up pictures in Inspirations, neither always could Carolyn. However, her stitching on the front and back heart look immaculate. That puzzles me a little. Or could it be she used two different threads or batches of thread? So, if you are going to stitch this project using more readily available threads or your own stash, I propose that you'll use a #12 perle for these parts of the stems. You could for instance use Anchor #265 or #266 these are not variegated, but still a good match! Unfortunately, DMC does not have a good match. And if you want to have an almost perfect variegated match, you can use House of Embroidery #6a Privet. What I really like is the adding of a stem stitch outline to the Hungarian braided chainstitch using a darker shade of green. It really lifts the previous stitching! This again is outlined with a stem stitch line using the Au ver a Soie metallics. Not nice to stitch with as this is a metallics. Can't be helped, the effect is lovely :). You could substitute this thread by using a single strand of either DMC or Anchor metallics. Us the 'darker' of the gold options. DMC Diamant even has a copper colour, but bear in mind that this thread is thicker than the Au ver a Soie. Next up is something pretty puzzling. The thinner stems should be stitched in chain stitch using two strands of the Gumnut again. Now that's straight forward, although I would swap for the perle #12 next time :). But then it gets a little strange. One should whip the chainstitch with one strand of the Gütermann Sulky? Huh, you can't see that! Not in the pictures and not when you work it yourself. So, I omitted that on all but one stem :). This rayon thread is also used for stem stitching the tendrils. Not a nice task either as this rayon thread untwists itself faster than woman can stitch. It is therefore an excellent idea to swap it for a single strand of either DMC stranded cotton #704 or Anchor #225.
And that are the stems on Strawberry Fayre! Remember that, if you are going to swap out the recommended threads by my suggestions, you'll test your colour selection together! Next time we'll visit this project, I'll show you the threads and embroidery on the large pink flowers. Note: I never finished this project as the instructions were faulty and the threads in the very expensive kit were not nearly enough.
31 Comments
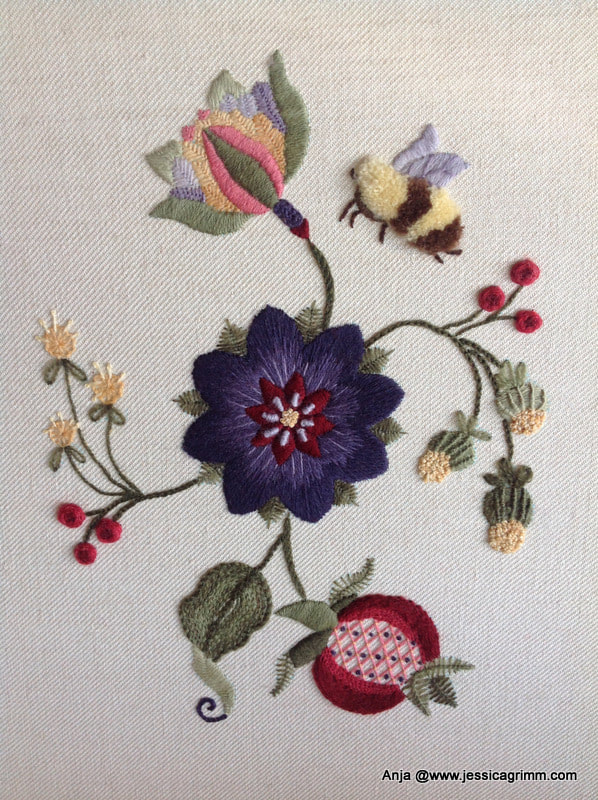
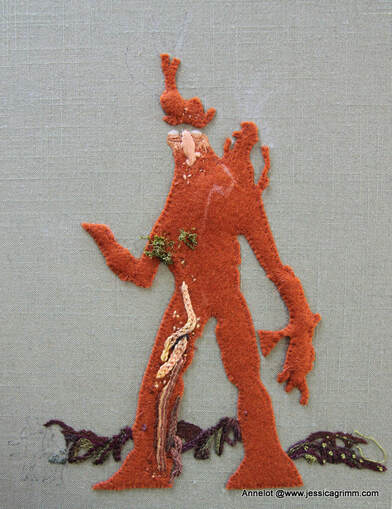
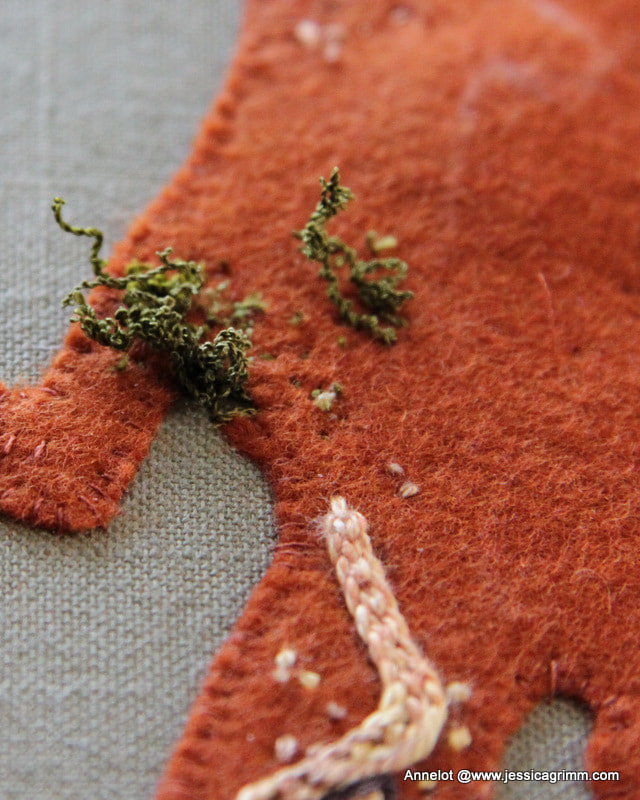
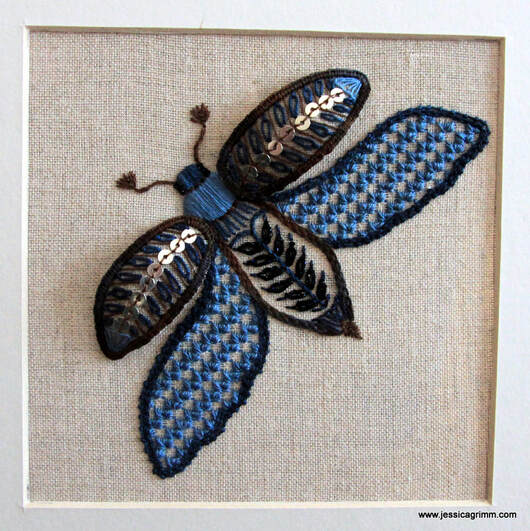
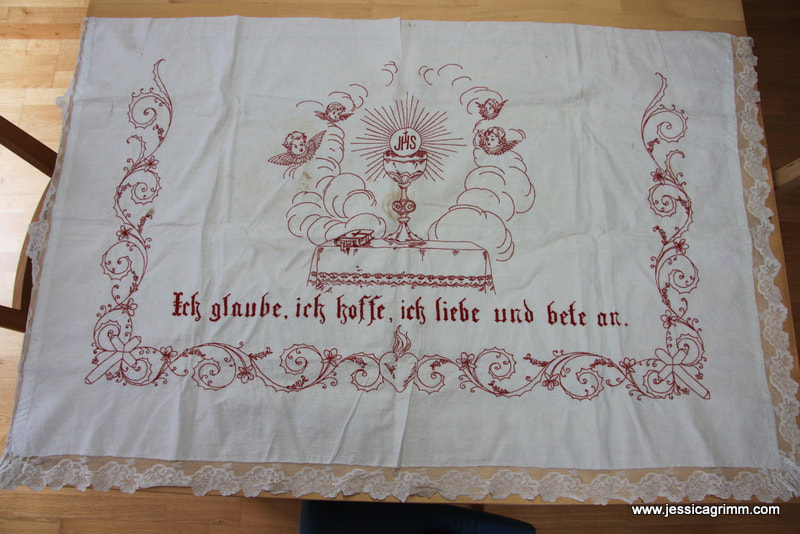
Before I open the candy tin, I would like to voice a big thank you to all who left comments of encouragement on last week's blogpost. I also received many personal emails. Thank you very much! What will happen next? The farm building is beyond help and will be demolished. The cattle will be sold over the next weeks. The Lötschmüllerhof will no longer be a farm. That's a strange idea. As reference to 'the farm' in my family was always to this particular place. However, we are all settling in to our new lives and the help from others is balsam to our souls. On to the eye candy! Remember this piece by Anja from the Netherlands? She started it earlier this year during one of my stitching retreats. I think she did a terrific job! The piece is balanced and the purple flower is such a beautiful centre piece. So proud of her :). Note: I no longer run this course. Next up is a stumpwork piece by Annelot from the Netherlands. She started it last week during my stumpwork stitching retreat. Annelot is creating a stitched version of Treebeard, the oldest Ent from the tales of J.R.R. Tolkien. For his mossy beard we tried the overtwisting method as described by Alison Cole in her great book on stumpwork (you can read my review here). This is a fun method with great texture. Can't wait for the piece to be finished. Over the years, I have learned that embroidery calms and sooths my soul. So I was particularly happy to find the September broderibox by Nordic Needle in my mail last week. With this month's threads I worked a moth from one of Millie Marotta's books. I used Snow by Caron, Watercolours by Caron, Kreinik Silk, Colour variations by DMC, Londonderry linen thread and silver plated spangles. The moth is stitched using a combination of Schwalm drawn-thread work, surface embroidery and stumpwork. And last but not least, this altar frontal or antependium was saved from the fire. It used to adorn the Corpus Christi altar put up in front of the farm every other year. It is a little dirty, so I will try to gently clean it. Since the altar did burn, we need to construct a new one. But the antependium will still adorn it!
And that's it. All candy distributed :). See you next week! Just a short post to let you all know that in the early hours of 2nd of September, the 400-year old farm building 'Lötschmüllerhof' burnt to the ground. Amazingly nobody got hurt and even the oxen that could not be freed in time survived the inferno without a scratch! The best proof that angels watch over stubborn oxen too. Luckily, the apartment we live in has very little damage. However, our lovely land-lord and land-lady (our additional parents) lost everything, but have now taken up residency in one of the other apartments. Not exactly home, but still theirs. Making sure that they are okay takes presidency over running my business. I am sure you will all understand. However, workshops and courses will run as normal. Maybe interrupted for an important phone call or emptying out the washing machine (my small Miele is the only one functioning at the moment). Here are pictures of what the farmstead looks like at the moment. Video footage and pictures of the inferno can be found online when you type 'Bad Bayersoien' into the news section of Google. We have been very impressed with the many men and women fire fighters, neighbours, red cross and THW who came so unselfishly to our aid. And so a new chapter begins. But with this amazing group of people I am sure we will do it! |
Want to keep up with my embroidery adventures? Sign up for my weekly Newsletter to get notified of new blogs, courses and workshops!
Liked my blog? Please consider making a donation or becoming a Patron so that I can keep up the good work and my blog ad-free!
Categories
All
Archives
July 2024
|
Contact: info(at)jessicagrimm.com
Copyright Dr Jessica M. Grimm - Mandlweg 3, 82488 Ettal, Deutschland - +49(0)8822 2782219 (Monday, Tuesday, Friday & Saturday 9.00-17.00 CET)
Impressum - Legal Notice - Datenschutzerklärung - Privacy Policy - Webshop ABG - Widerrufsrecht - Disclaimer
Copyright Dr Jessica M. Grimm - Mandlweg 3, 82488 Ettal, Deutschland - +49(0)8822 2782219 (Monday, Tuesday, Friday & Saturday 9.00-17.00 CET)
Impressum - Legal Notice - Datenschutzerklärung - Privacy Policy - Webshop ABG - Widerrufsrecht - Disclaimer



 RSS Feed