|
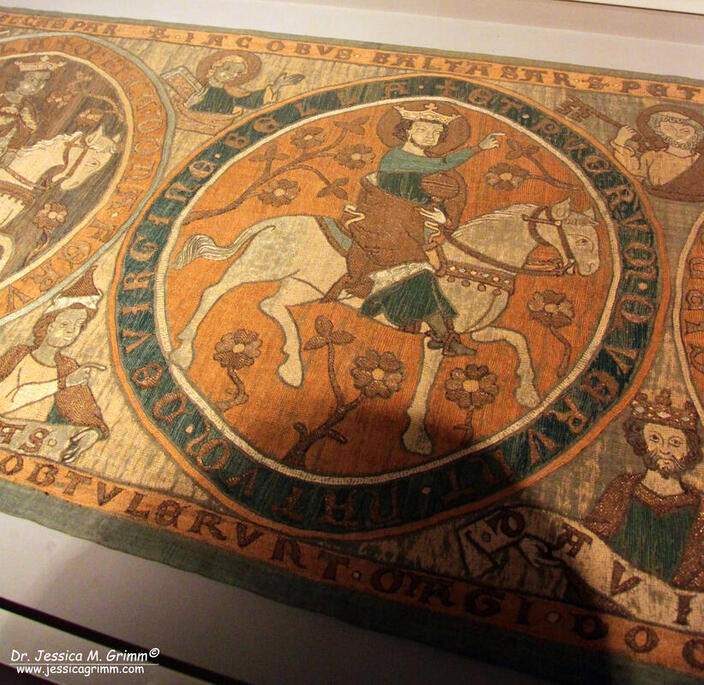
From 12-14 February, the Bavarian Academy of Sciences will host the 15th international conference on medieval and early modern epigraphy. They have asked me to demonstrate the various ways in which lettering can be represented in goldwork embroidery during this long period. I've decided to concentrate my efforts on five different historical pieces: 1) the Sternenmantel of Henry II Holy Roman Emperor, dating to AD 1010-20, 2) the Bamberger Antependium from AD 1300, 3) the Vice cope from AD 1350-75, 4) the funeral pall of Maria of Mangup AD 1477 and 5) a podea (icon cover) donated by Serban Cantacuzino in AD 1671. I have seen all these pieces in the past couple of years and taken my own pictures. However, determining how the lettering was stitched, proved to be difficult. In order to keep a log of my findings and to teach you a thing or two about goldwork embroidery, I am going to write four blog posts on this project.
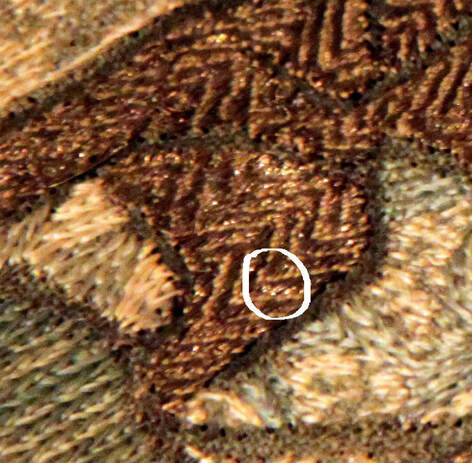
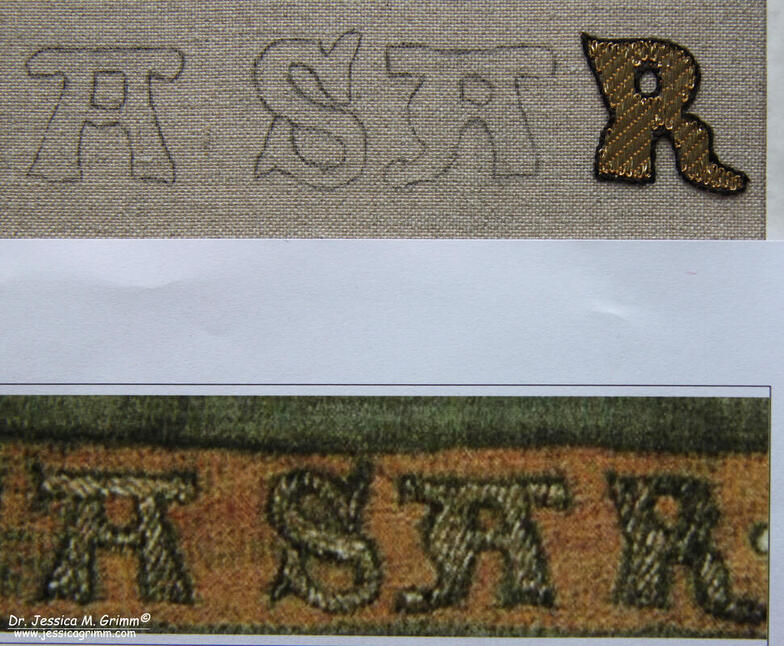
First up is preparation. Apart from the Bamberger Antependium, all these goldwork letters were stitched on very luxurious silk fabric. So I dressed my slate frame with Zweigart Bergen linen and kept the tension a bit slack. Then I applied pieces of my silk fabrics using herringbone stitch. It is important to orientate the fabric pieces on the grain of the linen fabric. Once the pieces are applied, the frame is stretched to drum taut. In the two short videos above, you'll see slack on the left and drum taut on the right. I'd like my lettering to be as close to the originals as possible. The first thing to do is to determine how large the lettering in question is. Lighting in the textile department of the Bayrische Nationalmuseum is rather poor and I had to take all of my pictures under an angle. Not suitable. Luckily, I found a perfect picture in a book. It had the whole height of the Antependium on there and since I knew that height in centimetres, basic math led me to an approximation of their size. The word Baltasar measures about 25 cm from B to S. Since the goldwork was stitched directly onto the linen, I used a pencil and a lightbox for the transfer. The original transfer was probably done free-hand: look at the irregular spacing between the individual letters and the irregular shape of the three As. Next up I tried to determine the size of the gold threads used. Without actually measuring them, this is a rather wild guess. Since the piece is quite old, the gold thread used is probably very fine. But from my memory, it was not as fine as what I recently saw in Bamberg. So I originally went for a gilt passing thread #3 (but had to later change to the even finer gilt Stech 50/60 CS as my edges became too round compared to the original). From the literature, I knew that couching in goldwork embroidery went from single thread to pairs of thread being couched down in one go, somewhere in the 12th century. Since the Bamberger Antependium was stitched around AD 1300, it could well be that this newer and faster method of couching down pairs of thread was employed. And I think the picture above proves this. From the literature, I knew that yellow silk was used for the couching stitches. I went with DeVere Yarns Chamoix #682. One of the things I can't tell from my pictures nor is it mentioned in the literature: what happened to the tail of the goldthread? Was it plunged? Did they simply secure them on the surface and clip them close? The latter method is used in the orphreys from the 15th and 16th centuries, so I went with that. The couching pattern used is not our now very common bricking pattern. Instead, it is a slanted line or slash. And since the ground fabric is linen, the couching process becomes a counted thread embroidery technique. I opted for five fabric threads between each couching stitch. As stated above, I did stitch the first letter twice as I couldn't copy the sharp turns of the original with the ticker thread. The way the letter is shaped also meant that I had to start and stop my goldthreads several times as just bending them would not have accommodated the shape of the letter. Once I was happy with how my R turned out, I needed to stitch a black silken outline around it. As all of the silk embroidery in this piece is done in stem stitch (yup, everything! Rows and rows of alternating stem stitch to fill every design element that's not filled with couched goldthreads), I used stem stitch for the outline too. I used four plies of black Chinese flat silk. Literature
Durian-Ress, S., 1986. Meisterwerke mittelalterliche Textilkunst aus dem Bayrischen Nationalmuseum. Schnell & Steiner. ISBN 3-7954-0636-6. Grimm, J.M., 2021. A hands-on approach - Epigraphy in medieval textile art, in: Kohwagner-Nikolai, T., Päffgen, B., Steininger, C. (Eds.), Über Stoff und Stein. Knotenpunkte von Textilkunst und Epigraphik. Harrassowitz, Wiesbaden, pp. 141–147. Müller-Christensen, S. & M. Schuette, 1963. Das Stickereiwerk. Wasmuth. No ISBN. P.S. Did you like this blog article? Did you learn something new? When yes, then please consider making a small donation. Visiting museums and doing research inevitably costs money. Supporting me and my research is much appreciated ❤!
8 Comments
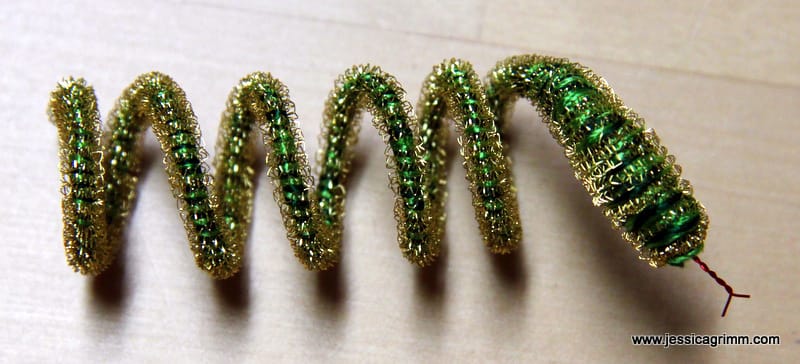
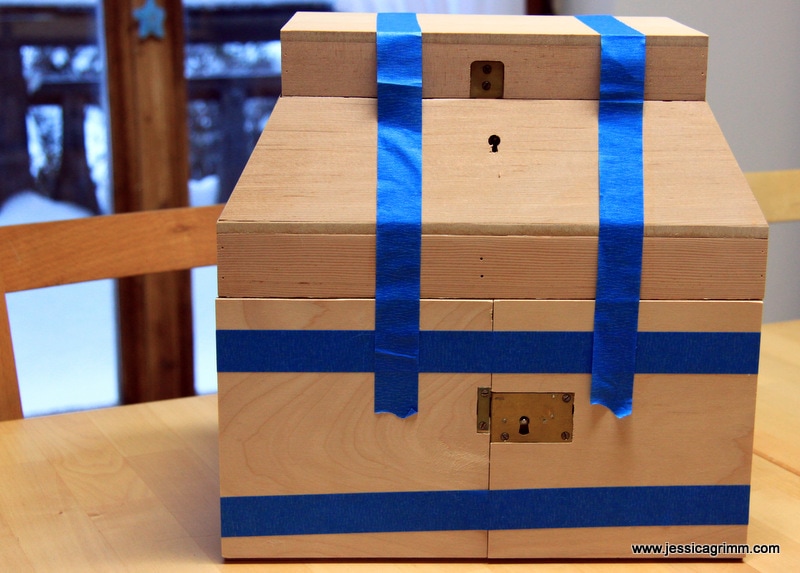
As many of you may remember, I started Tricia Nguyen's 18 month online class last year: Cabinet of Curiosities. The aim of this course is to learn almost all there is to know about 17th century embroidered caskets and then to design and stitch your own. Last year, I completed lesson one and two and then LIFE interrupted and I had to put the project on hold. Since the village shop is now up and running and I've taken the decision to quit volunteering 'here-there-and-everywhere', 2017 will be the Year of the Casket. A short recap of what I had done so far in 2016. I picked a theme for my casket. Ever since I was given the historical novel De Leeuw van Vlaanderen of de Slag der Gulden Sporen by my parents, I've read it and re-read it many times. It is highly romantic and not too historically correct. Think Ivanhoe by Sir Walter Scott. I had also picked the casket shape I wanted to embroider. As I am not in a hurry and want to live to at least a 120, I picked the largest one on offer: the double casket. I also made this nice chap: a bullion snake. They were common 'toys' found in the caskets. Then late in 2016, Tricia published a series of articles on her blog about 'casket-decision-making'. Apparently, caskets can be used as URNS. Now that's an interesting idea. As most of you probably know, I am a trained archaeozoologist and love to play with bones! A common misunderstanding is that, when you are cremated you end up all ashes as by magic. Oh no. They'll put your burnt remains through a grinder to create these perfect uniform ashes. Not so in ancient times. Our ancestors respected our individuality and had a heart for future archaeologists. Burnt bone remains are a treasure trove of information. With a bit of luck, your burnt remains can still tell if you are a boy or a girl, your ethnicity, how tall or small you were and if you had any bone-related pains and aches. Fascinating stuff, don't you think? As you might have guessed by now, my casket is going to be my urn. No worries, I am in no hurry to try it out anytime soon. But I must admit, I start to chuckle any time I start thinking about my memorial service in 2098 :). So how do I proceed now? It is time to start designing my casket. There are many panels which I can fill with scenes out of the novel. So far I am thinking: hunting scene, maid Mechteld & knight Adolf van Nieuwland, mortally wounded Adolf van Nieuwland, Count Gwydde and his knights in front of Queen Joan I of Navarre and the battle scene. In order to do that, I started listening to the audiobook version as found on Librivox. This is a great source of free audiobooks in over 30 languages. Perfect to listen to when you are stitching. When I listen to each chapter, I have a notepad to hand to jot down any major characters, the place of action and other tiny things like the flora and fauna the author mentions. I can then easily compose a panel design with the historical motifs Tricia has provided. I will also ask my husband to tweak them a little here and there to make them unique. As I might have inspired some of you with my casket-turns-urn idea, I do want to make sure my urn turns out truly unique!
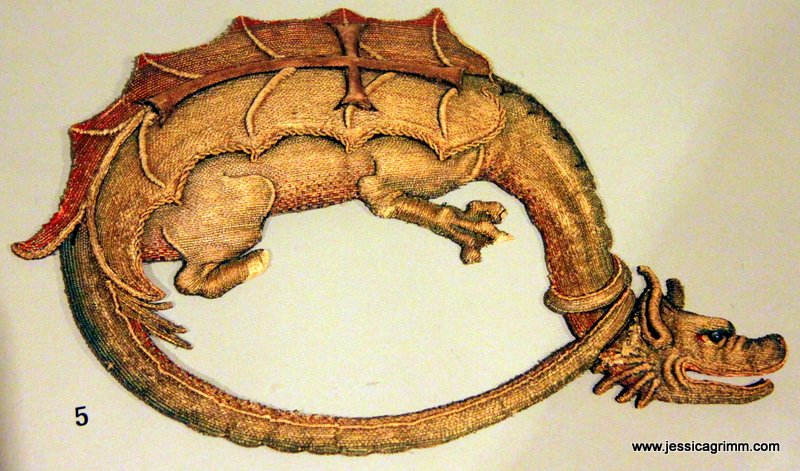
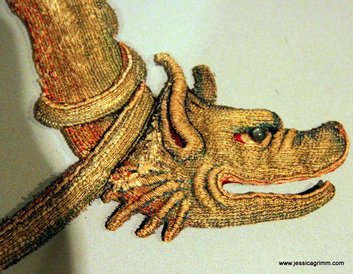
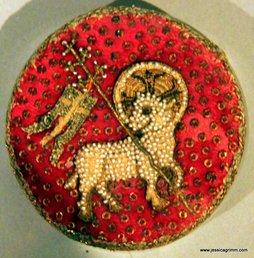
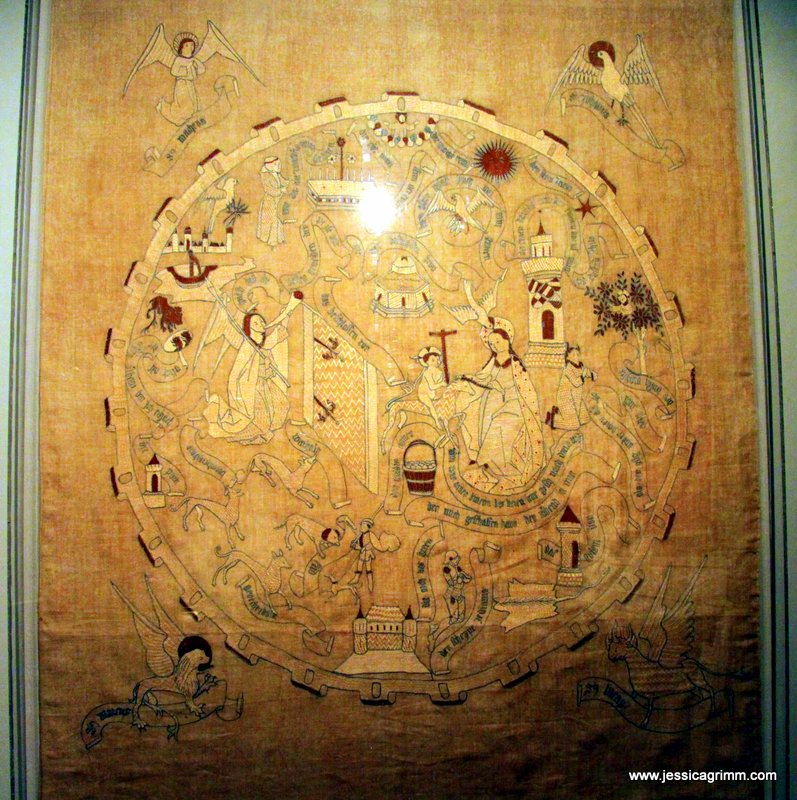
Note: I am currently not working on this project! Want to keep up with my embroidery adventures? Sign up for my weekly Newsletter! As promised in my last post, a few more deliciously stitched goodies from the National Museum in Munich. One of my favourite pieces is this golden dragon slip (Inv. Nr. T3792). The dragon looks really live like and three dimensional. This is achieved by couching the membrane gold (comparable to Japanese Thread) over clever padding. The darker underside of the dragon's belly and the shadow side of its tail and neck are worked in or nue with red silk. I particularly like his face with its detailed expression. This dragon was probably once stitched onto a banner or a cape. It was stitched around AD 1430 in southern Germany. The dragon is besieged by the Christian cross on its back. This symbol was part of the late medieval Order of the Dragon founded by Sigismund, Holy Roman Emperor. The noble knights were obliged to defend the cross and fight the infidels. Another adorable little piece consists of an Agnus Dei capsule stitched around AD 1450-1470 in southern Germany. These capsules were made to preserve a piece of the burned down Easter candle. This particular capsule shows the Lamb of God on one side and the head of Christ on the other. The body of the lamb is covered in freshwater pearls. Red velvet covered with spangles is used as a sparkling background. Unfortunately, the museum does not have a picture of the other side of the capsule on display. And last but not least, a huge piece of fantastic surface embroidery (Inv. Nr. T1742). The piece probably once adored the altar. Stitched around AD 1500 in Swabia, Germany with linen yarn on linen. The cloth shows the popular imagery of a unicorn hunt in a secluded garden. Remarkable about the piece are the many different filling patterns in needle lace technique. The figures are outlined in a dark chain stitch and then some areas are filled with intricate patterns of needle lace. Other areas are filled with what seems satin stitch, couching and cretan stitch. Truly a piece I could study for hours!
The National Museum has a handful of Late Medieval/Renaissance chasubles on display. By far and large, these are my favourite embroidered objects in any museum. You are in for a treat. The embroidery on the first chasuble (Inv. Nr. T278) was executed in Cologne in the third quarter of the 15th century (1450-1475 AD). The intricate diaper patterns were made using 'Häutchengold' or membrane gold also called Cypriot gold thread. It is comparable to Japanese gold, but was made by gluing gold leaf onto animal gut subsequently wrapped around a core of coloured silk or white linen. Here you can find an interesting article on medieval gold thread production by David Jacoby (2014). And here you can find an older article in German by Brigitte Dreyspring (2007). In the early 16th century, the embroidery was rearranged on the green velvet it is attached to today. Another chasuble (Inv. Nr. 65/163) with re-used late medieval (c. 1500 AD, Rhineland) embroidery. Click on the pictures to see a close up of the figures executed in fine silk embroidery and surrounded by diaper motives in membrane gold. However, the most elaborately stitched chasuble (Inv. Nr. T1499) is the one above. Do click on the pictures as the detail is stunning. The gold and silk embroidery was executed in Italy around 1500 AD. To achieve such a rich texture, the embroiderers used string padding and applique slips on both the silk figures and the oriental architecture. The style reminded me a bit of chasuble remains in the Catherijne Convent Museum, Utrecht (NL), showing the vita of St. Martin and St. Willibrord. However, those were made around the same time, but in the Netherlands.
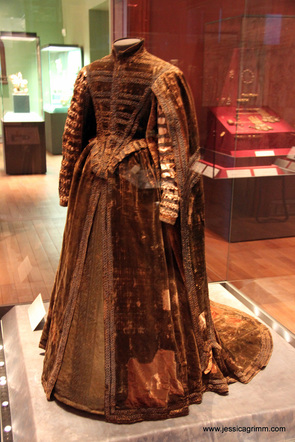
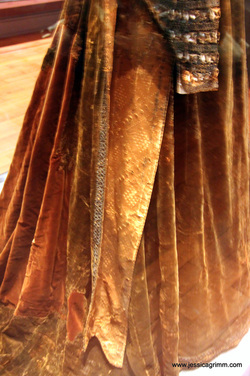
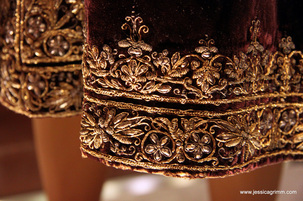
I have been toying for a while with the idea of trying to replicate some of the highly textured architectural background of these pieces. If only I could find the time :). However, when I do, I will share the process with you. I have a few more goodies to show you from the National Museum, so stay tuned! Literature Durian-Ress, S. (1986): Meisterwerke mittelalterlicher Textilkunst aus dem Bayerischen Nationalmuseum. München: Schnell & Steiner. Until late 2016, the National Museum has a small exhibition on embroidered clothes from 1780-1800 on show. Together with the other textile collections, it is well worth a visit. Living too far a way to pop over and have a look? No worries. Let me show you some exquisite silk embroidery. Centrepiece of the exhibition is a Robe paree, a French female court dress from 1780-1790. It was altered three times to follow changes in fashion. The dress ended up in the museum as 20 separate parts and was recently pieced together again. Its cream satin is lavishly embroidered with silk embroidery using satin stitch, stem stitch, knots, needle lace, goldwork, paper padding and applique. In all, there are 20 different dainty little flower patterns consisting of roses, pansies and bellflowers scattered on the dress. Larger patterns consisting of garlands and bouquets of roses, carnations and forget-me-nots. They are stitched using 14 different colours of silk. Now that we've seen the dress of a lady at the French court, what did the accompanying boys look like? Very colourful! Their mostly unicolour satin frock, trousers and waistcoat were richly embellished with colourful silk embroideries. These embroideries were placed along the seams, the cuffs and collar. Patterns mainly consisted of floral motives, little birds or Chinese scenes in satin stitch, stem stitch and knots. Again goldwork techniques, padding and applique are used as well. Tambour embroidery was used on garments made in Italy. Matching passementerie buttons completed the stylish outfits. Who made these lovely embroideries? The French court employed its own embroiderers and maintained its own embroidery workshops. Apart from that, Lyon was an important centre of silk and goldwork embroidery. In the late 18th century, apparently 6000 female embroiderers were occupied. The garments were stitched on large embroidery frames and tailored into clothes afterwards. The many uncut finished embroideries show that clients could buy these and have them custom made into a finished garment. Alternatively, they could flip through a catalogue with sample pieces. Either drawings or actual pieces of embroidery. The Bavarian National Museum sells a lovely little booklet on the exhibition. With only 67 pages it gives a good discription of pieces on show. And more importantly, it is jam packed with detailed close up photographs of the embroidery. Good enough to see individual stitches. There are even a few photographs of the backs of the embroideries! You can order your copy of Mode aus dem Rahmen here. My absolute favourite would have been the uncut finished ambroidery with the large flowers and tulips on the cream coloured satin. It is absolutely spectacular! However, my husband did not seem keen on wearing it... What's your favourite? And do you own and wear embroidered garments? Please leave your comment below.
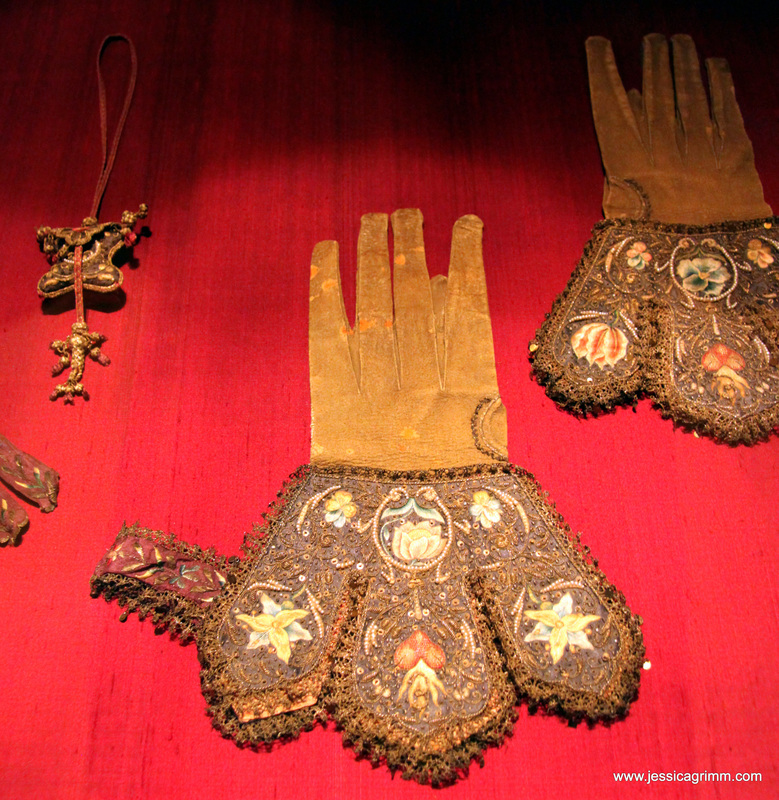
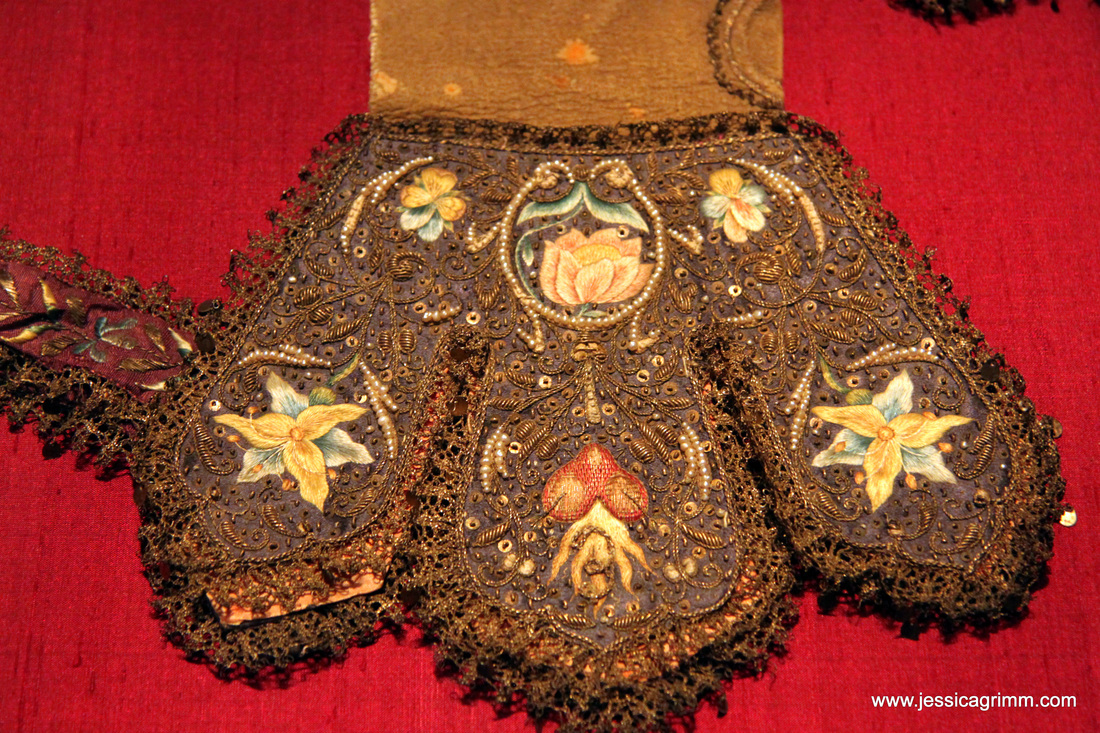
I'll leave you with a detailed picture of one of the gloves. As these were not the only embroidered textiles on display at the Bavarian National Museum, I will write two more blog posts in the future. One will be dealing with embroidered costumes from the Baroque period and one will consider the ecclesiastical embroideries. Please leave a comment below if you liked this historical post!
Literature Borkopp-Restle, B. (2002): Textile Schätze aus Renaissance und Barock aus den Sammlungen des Bayerischen Nationalmuseums. München: Bayrische Nationalmuseum. |
Want to keep up with my embroidery adventures? Sign up for my weekly Newsletter to get notified of new blogs, courses and workshops!
Liked my blog? Please consider making a donation or becoming a Patron so that I can keep up the good work and my blog ad-free!
Categories
All
Archives
July 2024
|
Contact: info(at)jessicagrimm.com
Copyright Dr Jessica M. Grimm - Mandlweg 3, 82488 Ettal, Deutschland - +49(0)8822 2782219 (Monday, Tuesday, Friday & Saturday 9.00-17.00 CET)
Impressum - Legal Notice - Datenschutzerklärung - Privacy Policy - Webshop ABG - Widerrufsrecht - Disclaimer
Copyright Dr Jessica M. Grimm - Mandlweg 3, 82488 Ettal, Deutschland - +49(0)8822 2782219 (Monday, Tuesday, Friday & Saturday 9.00-17.00 CET)
Impressum - Legal Notice - Datenschutzerklärung - Privacy Policy - Webshop ABG - Widerrufsrecht - Disclaimer



 RSS Feed