|
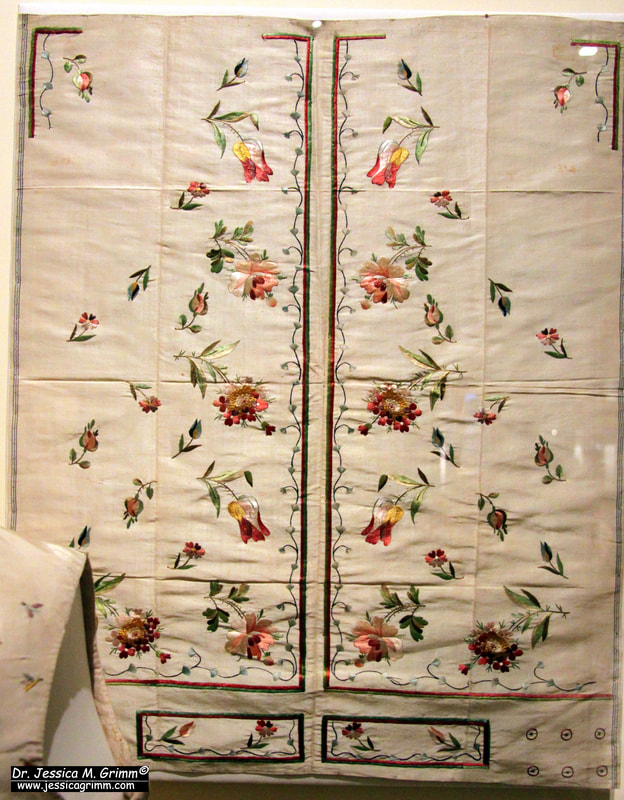
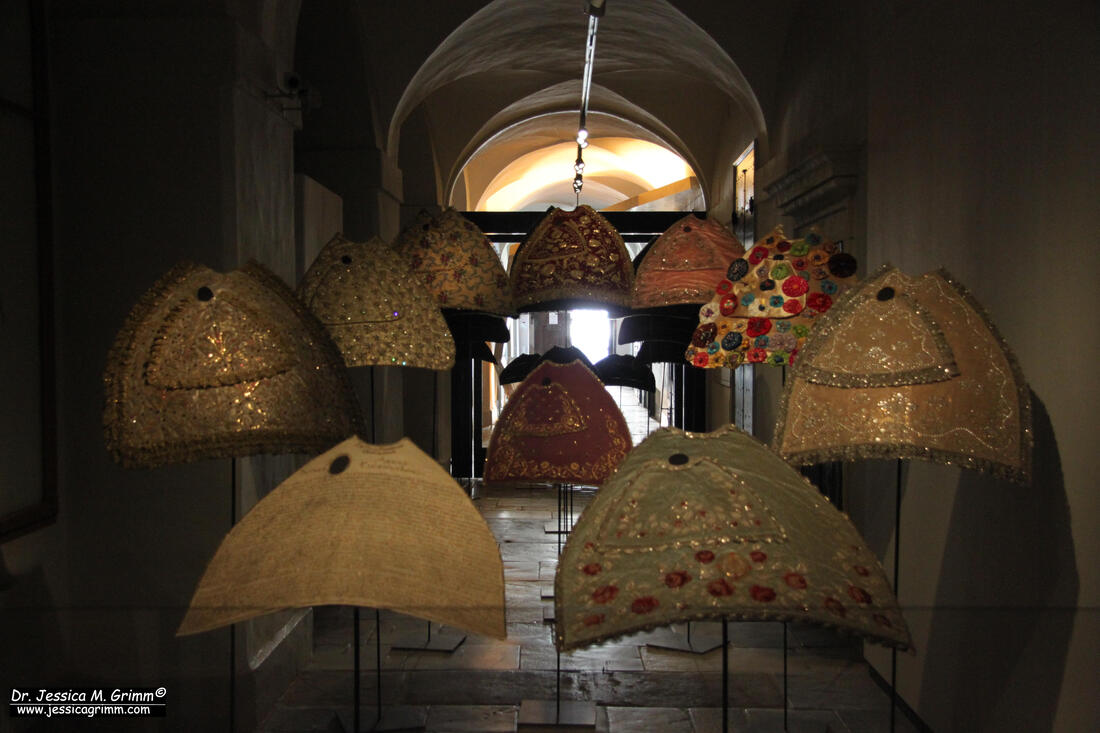
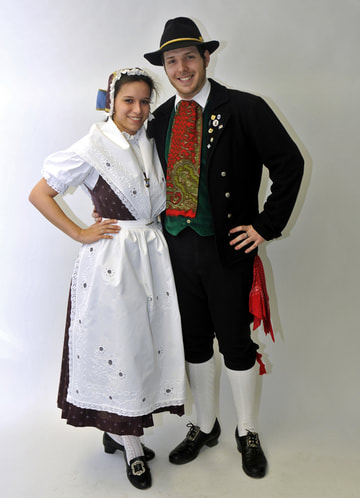
Until I was asked to write a book review for the current issue of the Journal of Dress History, I had never heard of either the journal or the Association of Dress Historians accounting for its publication. You might have the same 'problem'. Let me, therefore, introduce you to this fantastic free open-source publication that has plenty to offer for textile enthusiasts and lovers of embroidery. And if you like to support this initiative, please consider becoming a member too. At only 10 GBP per year, it is a good way to help support academic research in the field of dress history. I haven't yet read every single issue of the journal, but I did find some embroidery related articles from combing through the index. The first article you might be interested in was issued in the Spring issue of 2017: 'Professional and Domestic Embroidery on Men's Clothing in the later Eighteenth Century' by Alison Larkin. It focusses on the female makers of these embroideries whether in a professional setting or not. If you were taught to embroider at all, depended on your social status and your gender. Paradoxically, professional embroidery was seen as a female lower-class job whilst middle and upper-class women would learn to embroider in their domestic setting to show off their suitability as a chaste wife and their status. Meanwhile, the men were the owners of the professional workshops or the designers of the embroidery patterns. Alison Larkin concludes with pointing out some technical and material differences between the pieces made in a professional setting and those in a domestic setting. The spring issue of 2018 contains the paper: 'Fashion Victims: Dressed Sculptures of the Virgin in Portugal and Spain' by Diana Rafaela Pereira. Apart from the interesting discussion, this paper includes some pretty pictures of beautiful goldwork embroidery on these lavish clothes. The clothing of saintly sculptures can be traced back to medieval times. However, there has always been opposition against the practice as it was seen to be too profane. And the lavishly decorated clothes were not at all in keeping with the supposedly poor reality of the saint's real life. If you are familiar with the embroidery books of Yvette Stanton, you have probably heard of the Norwegian folk dress called bunad. In the autumn issue of 2018, Solveig Strand writes about this 'Peasant Dress, Embroidered Costume and National Symbol'. I found this a most interesting paper as it explains that bunads were created in the 20th-century to reflect modern taste and the need for a national symbol, rather than historical accuracy. This is similar to the story of the Dirndl worn in the South of Germany. Historically accurate peasant dress looks very different indeed, but you better not discuss the topic with a local ...
5 Comments
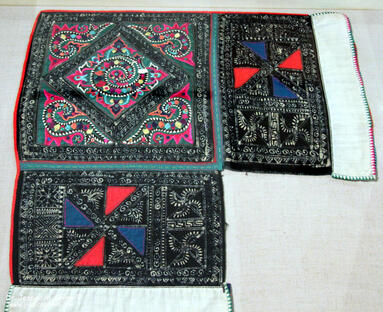
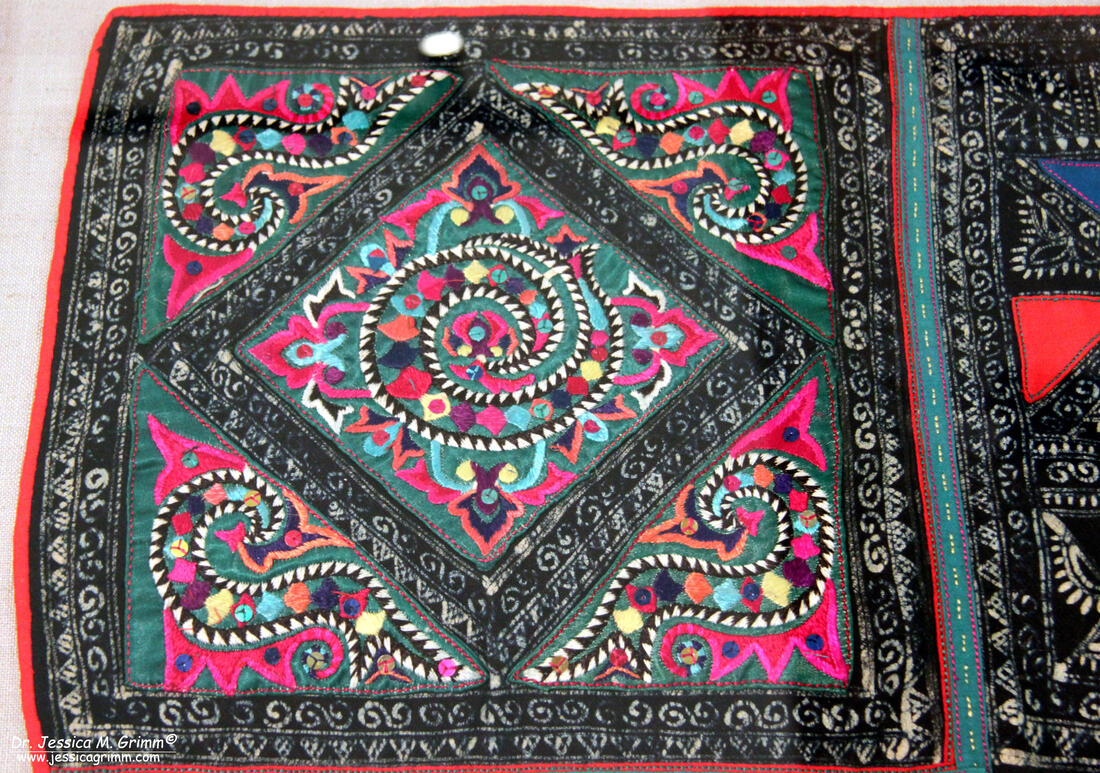
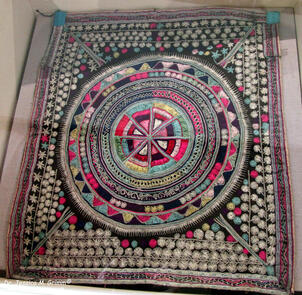
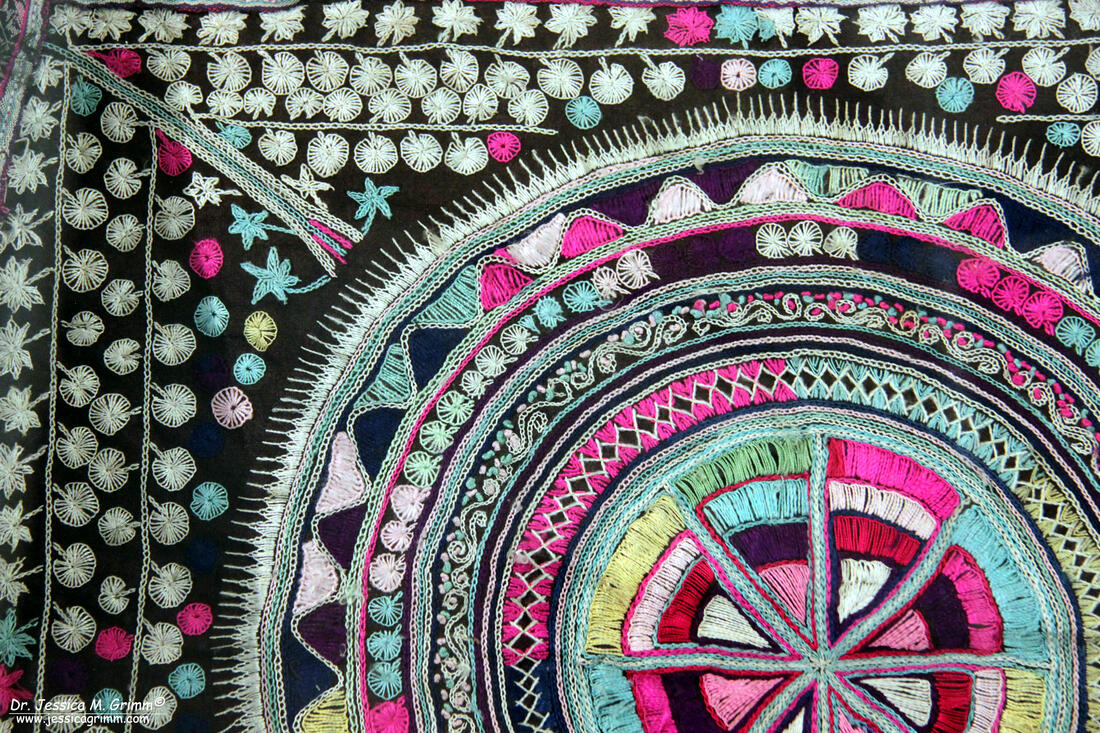
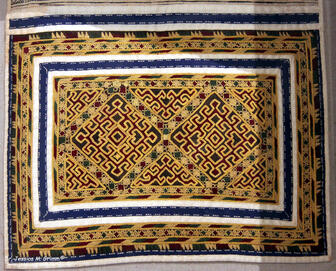
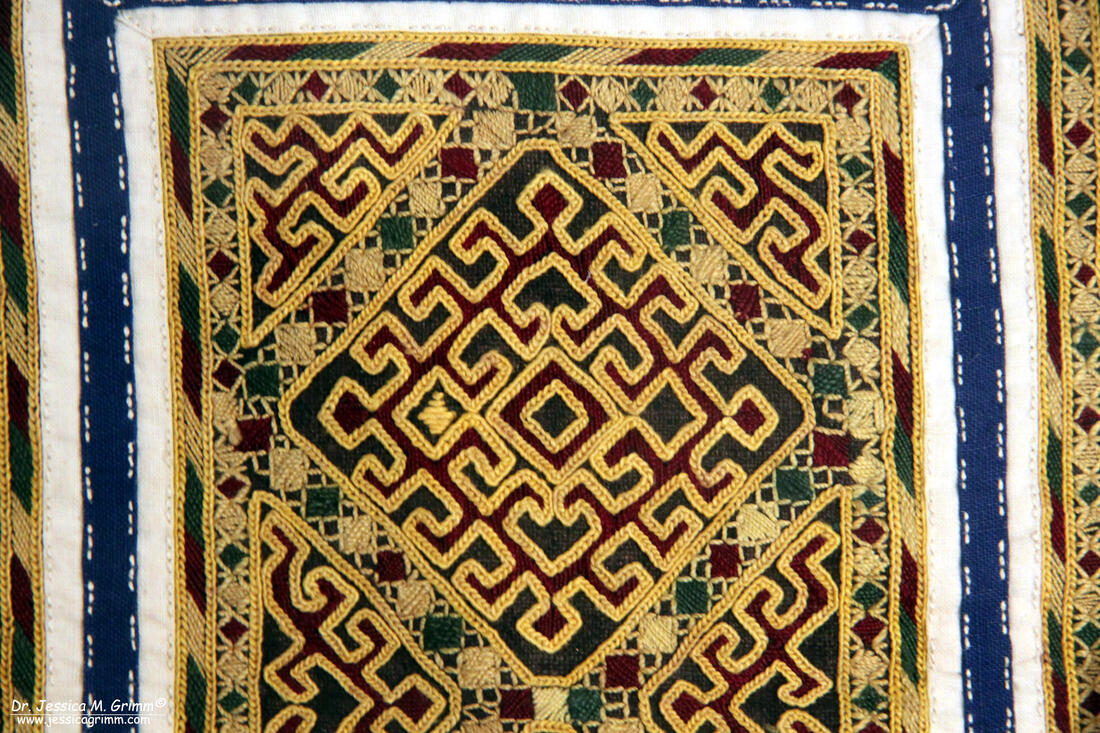
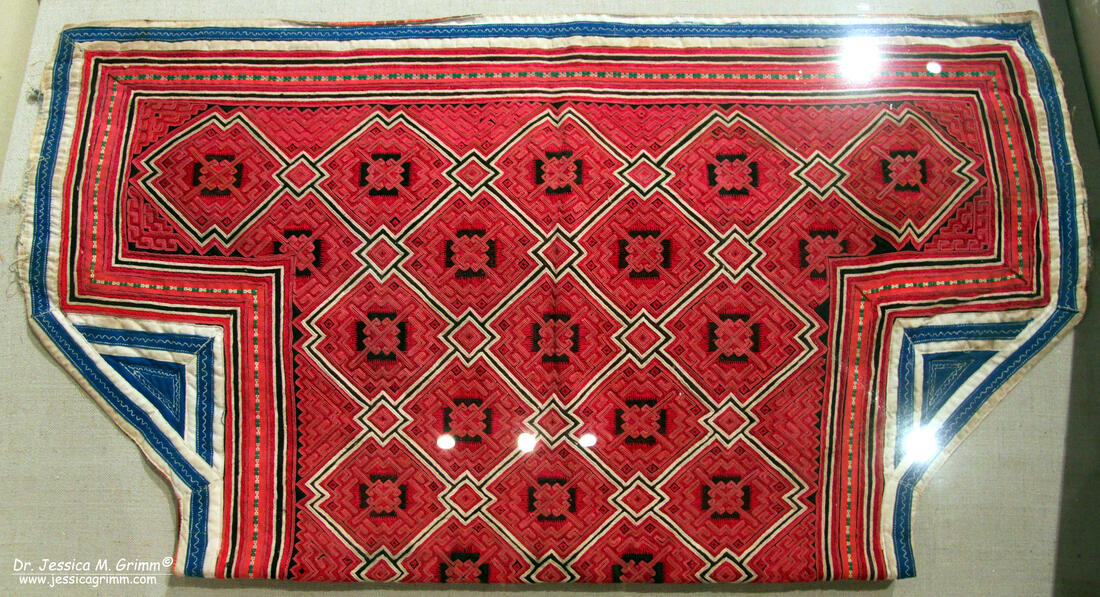
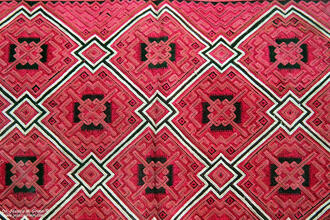
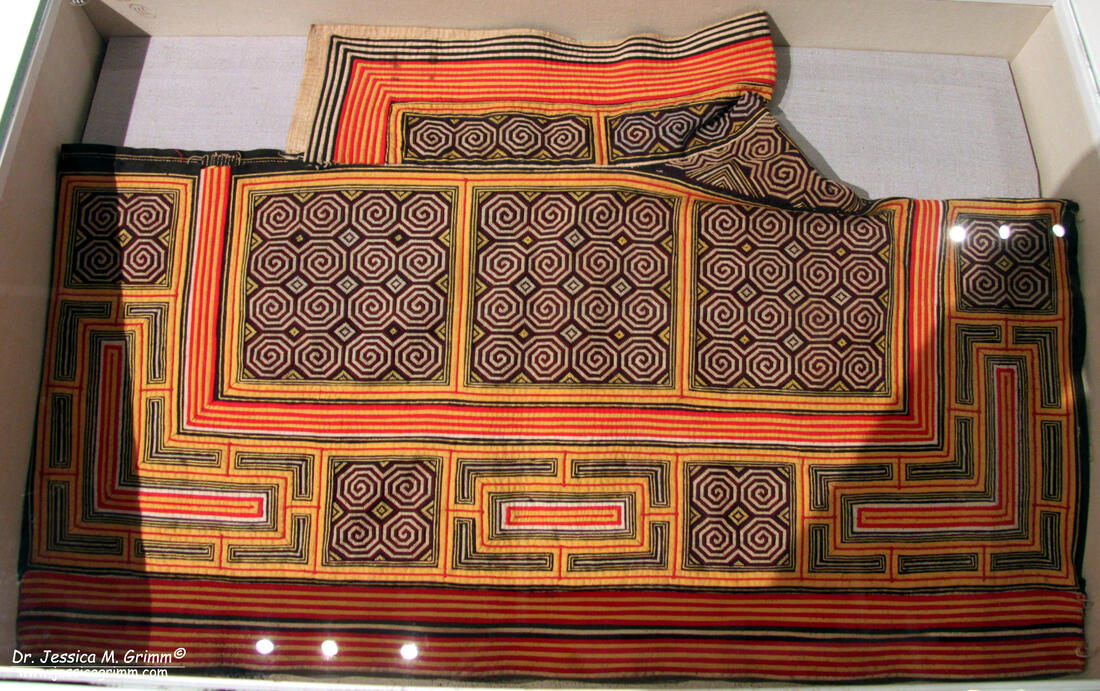
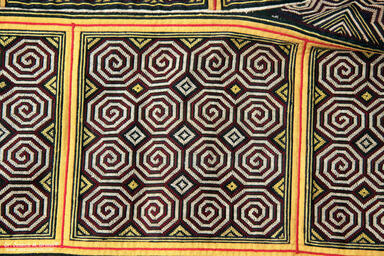
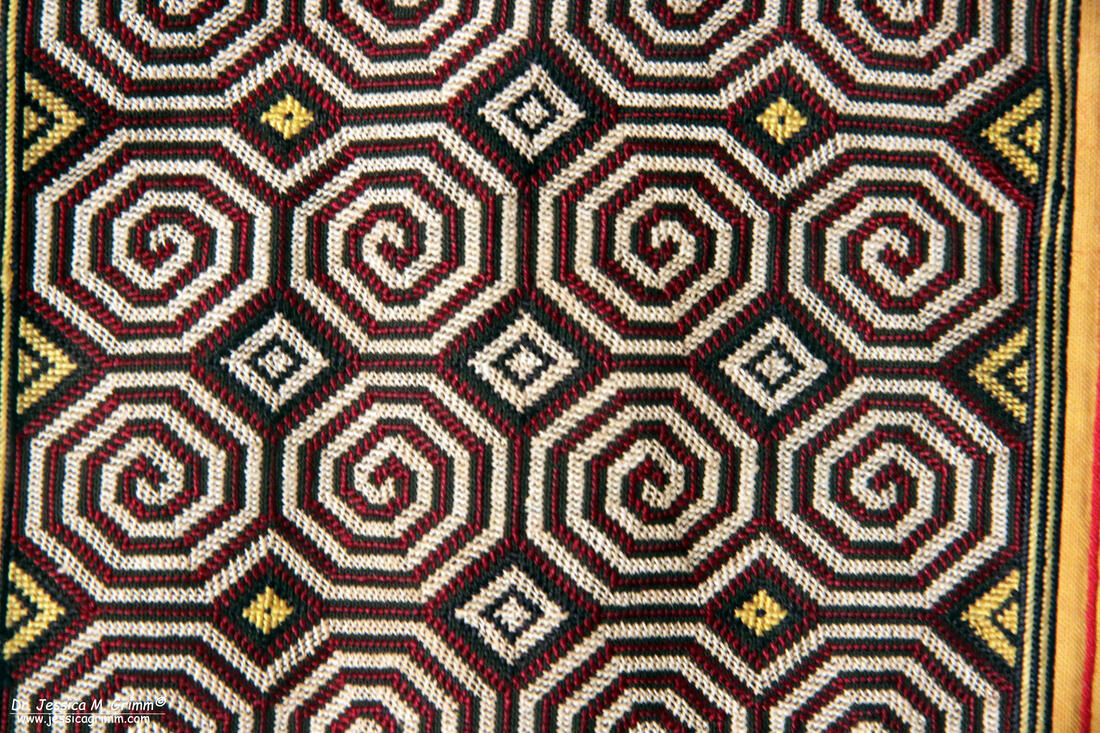
The National Silk Museum in Hangzhou had a small number of embroideries made by several ethnic minorities on display. After last week's book review on the textile traditions of one of these minorities, the Miao (Hmong), I thought it a good idea to share my pictures with you! First up is an embroidered apron worn by women of the Dong minority. The Dong are matrilinear people from the south of China. The embroidery on this apron consists of brightly coloured satin stitches (possibly over a cut paper template) and some applique. The pattern is made up of stylised flowers and the sun symbol (probably the swirls; Chinese explanations at museums are notoriously vague ...). Other parts of the apron consist of strips of wax-resist dyeing. Unfortunately, the only thing stated on this apron is that it was worn by an ethnic minority from Guizhou province. What I understand from the museum's description is that this is a single panel and that several of these embroidered panels would make up the actual apron. Do you see all these white buttonhole wheels? There are also chain stitches and knots. I think they used chain stitches to create the star shapes on the left and the maple leaves on the far right. Quite a clever and visually pleasing piece, I think! This panel was embroidered by the Ge people who also live in Guizhou province and who are officially considered to be a sub-group within the Miao. This piece mainly consists of outlines stitched with fine and very regular chain stitches. There is also some back stitch and some satin stitch visible. This piece of clothing (called 'braces' in the description) was also embroidered by the Ge people. It is again covered with very regular chain stitches and interspersed with satin stitches. The regularity of both pattern and stitching is absolutely stunning! The last piece on display was an embroidered shawl made by the Miao. The geometric pattern is based on an old song and represents flower beds. The stitching is entirely done in a form of long-armed cross-stitch. This is even a better close-up of the flower bed pattern. The movement created with the stitching is absolutely sublime! Keep staring at it and see how many different patterns you are able to see :).
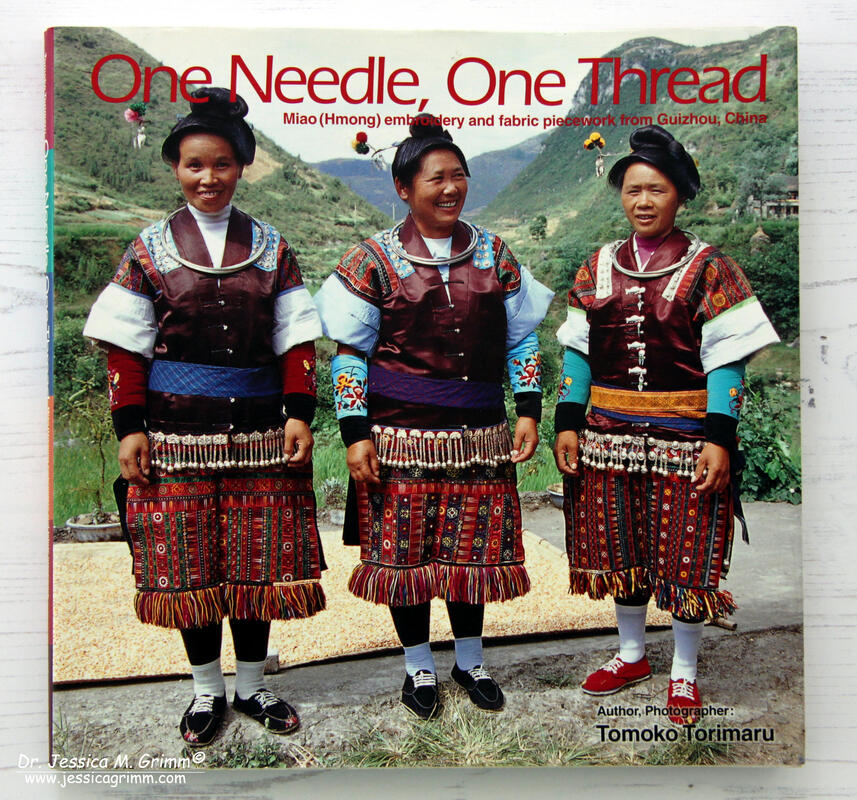
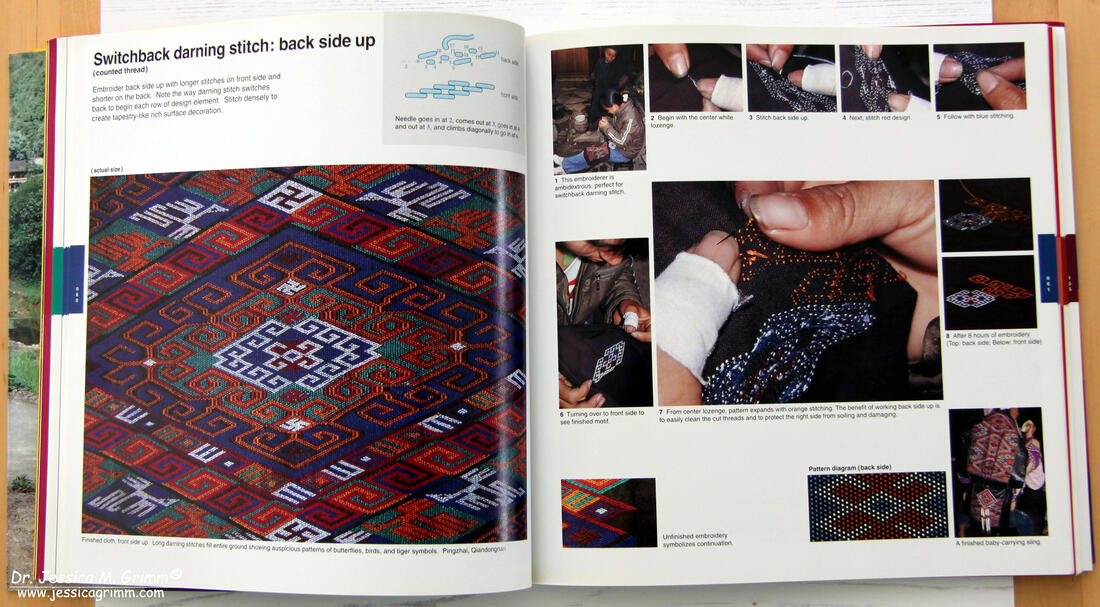
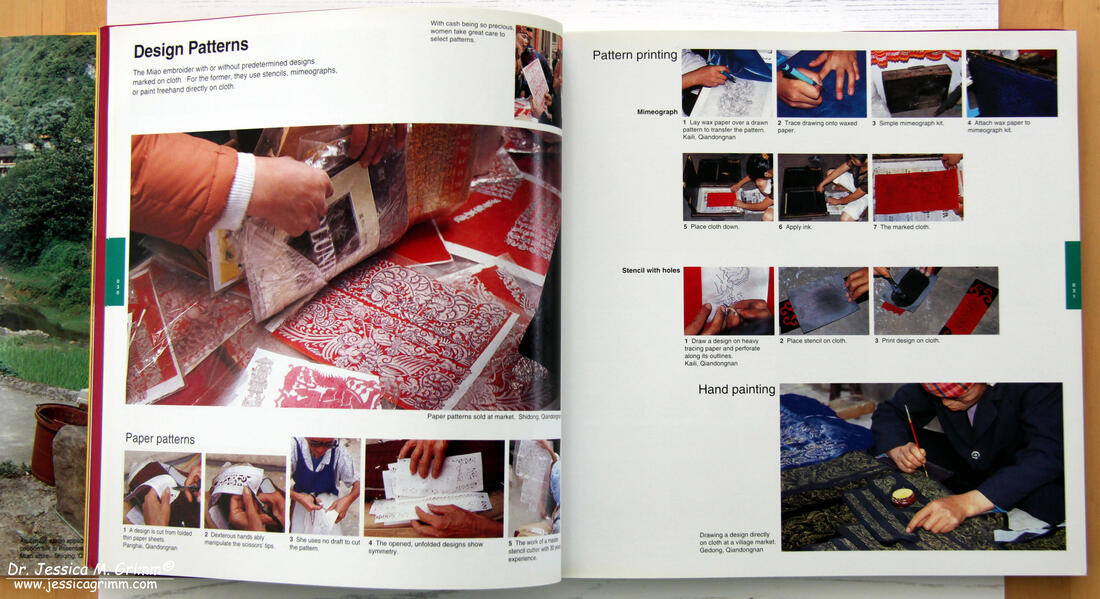
I was given this lovely book about ethnic embroidery from China by the lady who organised my teaching trip to China last year. This book on an interesting topic has a rather special and highly pleasing visual concept as well. Although it is not your classic project book, the step-by-step photographs and descriptions mean you can easily recreate particular stitches and patterns. Especially for those of you who are already adept at wielding a needle, there is a lot of 'new stuff' in this book which will make your hands itch. The book is written by Dr. Tomoko Torimaru, a Japanese woman who studied Chinese textiles at the University of Shanghai, China. She is the daughter and research-associate of her mother Dr. Sadae Torimaru. Together they have studied the textile traditions of the Miao and related ethnic groups for many decades. They are both well-known and respected textile researchers and deserve to be more widely known among Western embroiderers as well. Full details of the book: Torimaru, T., 2008: One Needle, One Thread: Miao (Hmong) embroidery and fabric piecework from Guizhou, China, University of Hawai'i Art Gallery, ISBN: 978-1-60702-173-5. And this is what a typical two-spread from the book looks like. Many detailed pictures with explanatory text. In this particular case, the darning stitch is worked from the back in order to protect the finished embroidery. One needs great skill to not make a mistake when carrying threads or otherwise the pattern on the front will show a mistake. There are several embroidery techniques detailed in the book where the embroideress works from the back to avoid soiling the finished embroidery. Throughout the book, you will learn about the myriad ways of pattern design and transfer. I am blown away by the fact that some paper-template cutters are so skilled that they do not need to make an outline drawing prior to cutting ... There are also many 'recipes' in the book for making starch and thread conditioner from local plants. You'll be amazed at how often the silk threads for embroidery are conditioned to behave during embroidery. I am always quite reluctant to use thread heaven or the like on my silk threads. I usually talk them into submission (with various degrees of success, I must admit). Another thing I was reminded by when reading the book from cover to cover, is how ingenious people are. We can be one heck of a clever naked ape! For the Miao, embroidering their folk costumes is typically done in between other tasks. When waiting or tending the family, for instance. There's often no ergonomic position to be had or good lighting. Slate frames or hoops for perfect tension? How about using your knees and thighs instead? And it is almost always an activity you'll share with other females. Knowledge transferred from mother to daughter. Underlining and taking pride in one's ethnic identity one peaceful stitch at a time!
Last week, I and my husband, my parents and my younger sister with husband and two kids met up in Lauterbach for a family holiday. I quickly realised that this is 'little red riding hood country'. Apparently, my namesakes the brothers Grimm were inspired by the embroidered little red caps of the Schwalm folklore dress worn by young girls. A small, but dedicated museum with lots of Schwalm embroidery can be found in nearby Schwalmstadt. And since so many of you live too far away to go visit, I am happy to take you there by means of this blog! Let's start with the red caps ... For most embroiderers, Schwalm embroidery is a whitework technique. We will get to that in a moment. Let's start with the more colourful embroidered pieces of the Schwalm folk dress. As you can see in the pictures above, there are not only red caps (Betzel in the local dialect). The colour depends on the age and marital status of the female wearer. Red is only worn by girls before they get married. The embroidery on the caps consists of satin stitch over cardboard padding. Making these cut cardboards was a special craft and usually performed by men. Similar to the prickings made for Appenzell embroidery; that's men's business too. No wonder these crafts disappeared as soon as they were no longer economically viable ... The Ecken (squares) are embroidered in the same style. These extra decorations were worn on feast days over the apron on the hips. The stomachers are also embroidered the same way. As are some bits of the highly decorative endings of the bands which keep the caps in place. These also sport elaborate needlelace. And last but not least, highly decorative garters. All the above pictures show folk dress items from the 18th till the 20th century. Those pieces also sporting goldwork embroidery, are at the later end of the spectrum. Let's end our trip to the museum with some beautiful 'typical' Schwalm embroidery in white. The Schwalm whitework does incorporate a little colour every now and then. And some pieces where actually dyed with indigo blue or even dyed black. All depending on the age of the wearer and the occasion. Male and female blouses were typically decorated with this type of embroidery. As are very fine and highly decorated handkerchiefs. And bedlinen. Probably not practical, but boy I want one! The museum also has modern Schwalm embroidery on display. Many pieces are even for sale. They also organise special exhibitions every other year. The beautiful catalogues of the past exhibitions can be obtained in the museum shop. And best of all: they sell antique linen. And they have a whole big cupboard full of the stuff. I was really good and only bought about four meters :). Two different qualities and rather fine. Someday they will inspire me to a beautiful whitework piece!
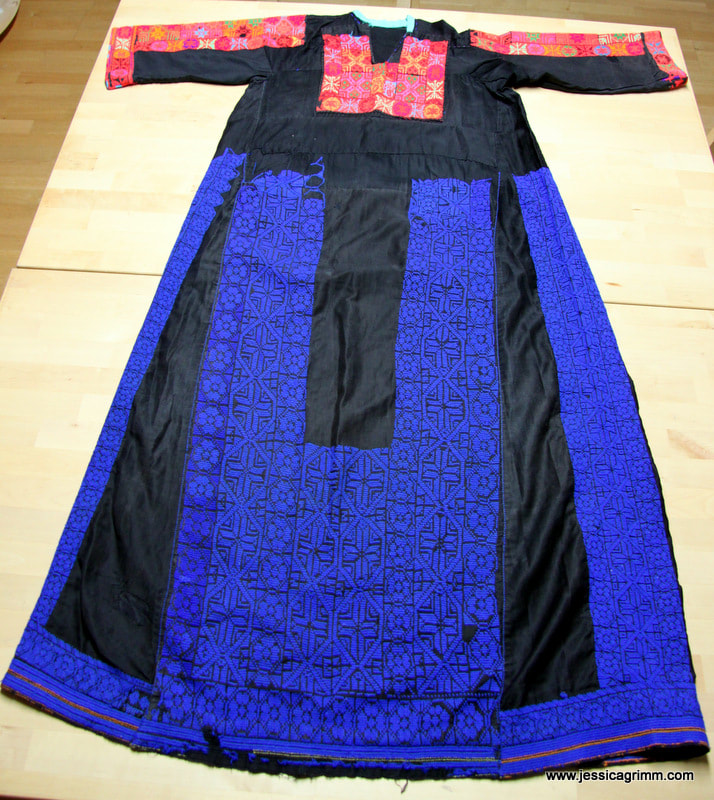
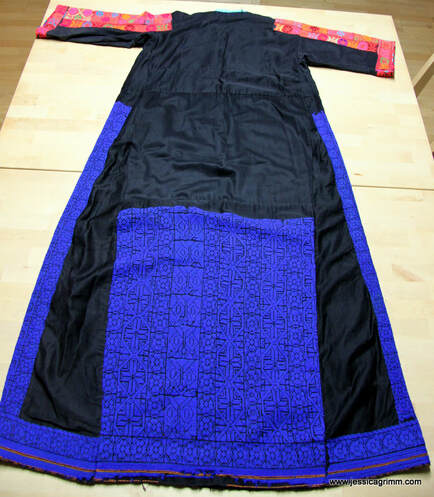
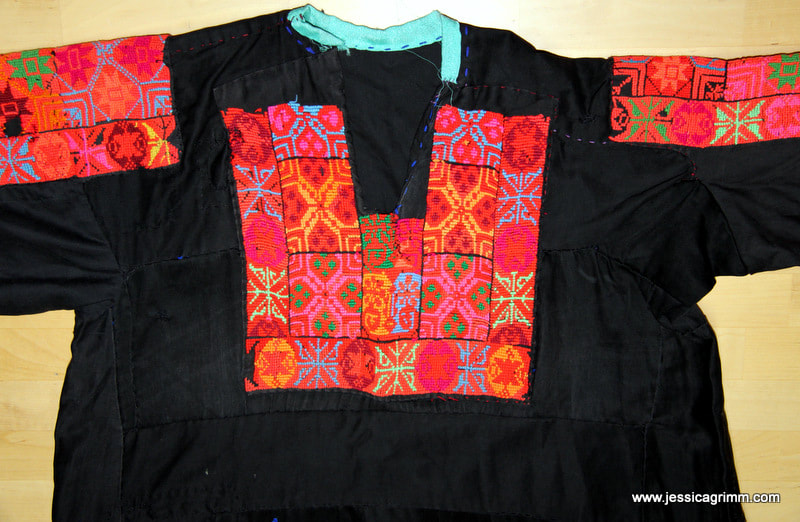
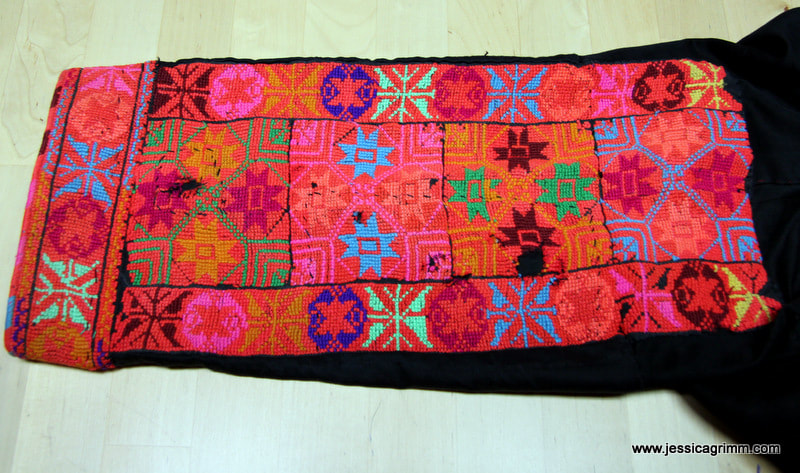
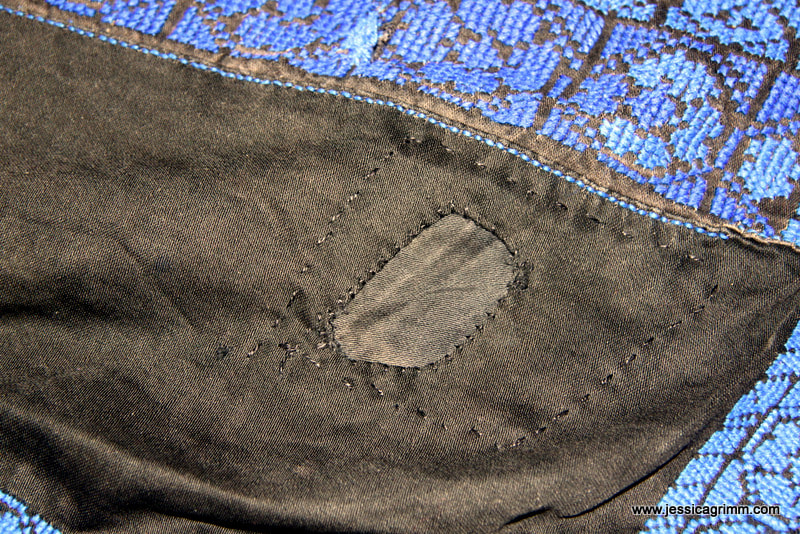
P.S. Please visit Luzine Happel's blog if you would like to know more on Schwalm embroidery and Schwalm folk dress. Make yourself a cuppa and prepare for a fall down the rabbit hole ... When I was in the Netherlands shortly before Christmas, I and my parents stumbled upon a lovely Middle Eastern shop in Utrecht. They mainly sell ceramics, but they also have a rather large collection of textiles. Among the latter; several embroidered items of clothing and cushion covers. I bought a dress showing Fallahi or Palestinian embroidery. For those of you living in the Netherlands: the name of the shop is 'Samira' and you'll find them at Oude Gracht 209. The friendly Egyptian man running the store is happy for you to come in to see the textiles on display. They also have a website with many pictures of old Bedouin dresses. Here you see the front and the back of the dress. According to the seller, this dress comes from the Bedouin living in the Sinai dessert. This is confirmed by the seam sporting bands of slanted tent stitches. Dresses like these always tell a story... Firstly, the dress has been patched together from many pieces. Sometimes embroidered pieces have been sewn onto the background cloth (as is the case for the collar you see pictured above) or... ...embroidered pattern pieces have been sewn into the dress (as is the case for the sleeves you see pictured above). Furthermore, the dress has been patched up in many, many places. You can also see in the picture above that the cross stitches are worked on a good quality cotton satin. Not at all easy to count! And consequently the embroiderer made many mistakes in the geometric patterns. There is always a marked mistake in these embroideries as only God is faultless. Why is this dress patched together the way it is? Firstly, it would take a Bedouin woman about three years to embroider a festive dress like this. Her days are filled with many household tasks and thus she would only have limited time to embroider. Consequently, it is normal that wear and tear would be repaired as best as possible. But what could she do when her life changed dramatically? Brides and married women would wear dresses embroidered with shades of red. Widowed women would use dark blue. And widows who would like to marry again would use a red collar. Once re-married, she would stitch reddish accents on top of the blue. Here we thus have the dress of a widowed woman seeking to re-marry. A very similar dress is depicted on page 40 of the book: 'Stickereien für 1001 Nacht' (Embroideries for 1001 nights) by Anna Dolanyi from 1989, ISBN 3-473-42427-7. What else can we learn from this lovely piece of old embroidery? Well, the wearer was probably right-handed as the right sleeve shows much more wear and tear than the left one. Furthermore, I think the woman had a baby or small child on her hip. The collar has been torn and this would typically happen when a child grasps the collar when it does not want to be put down :).
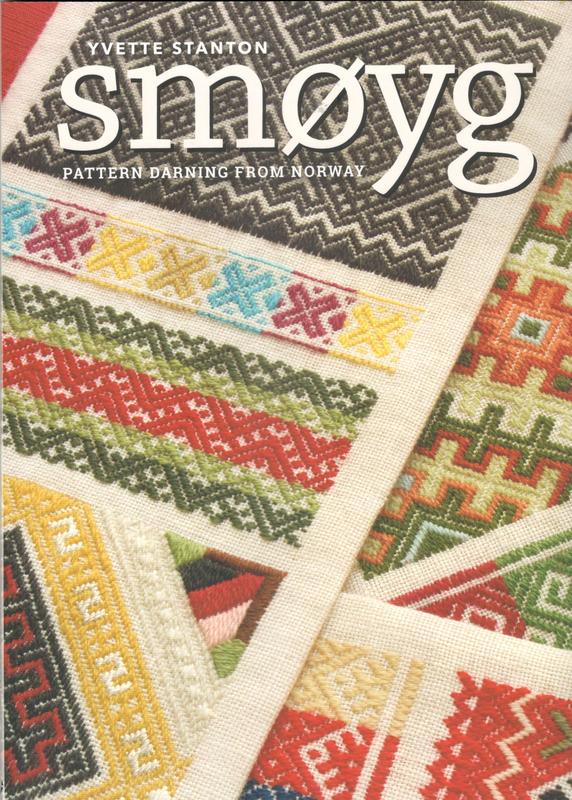
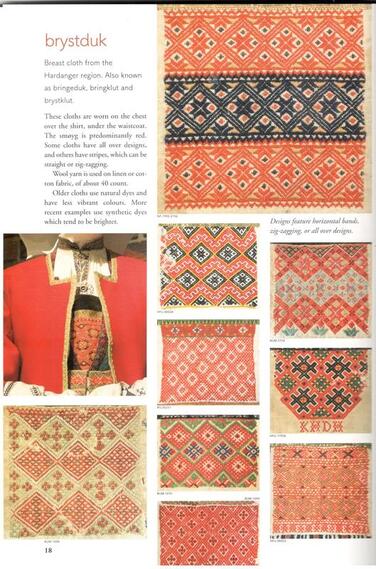
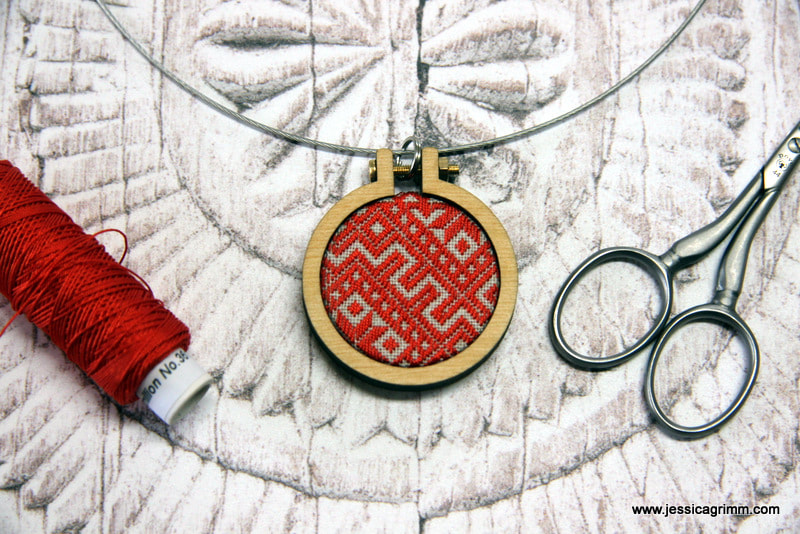
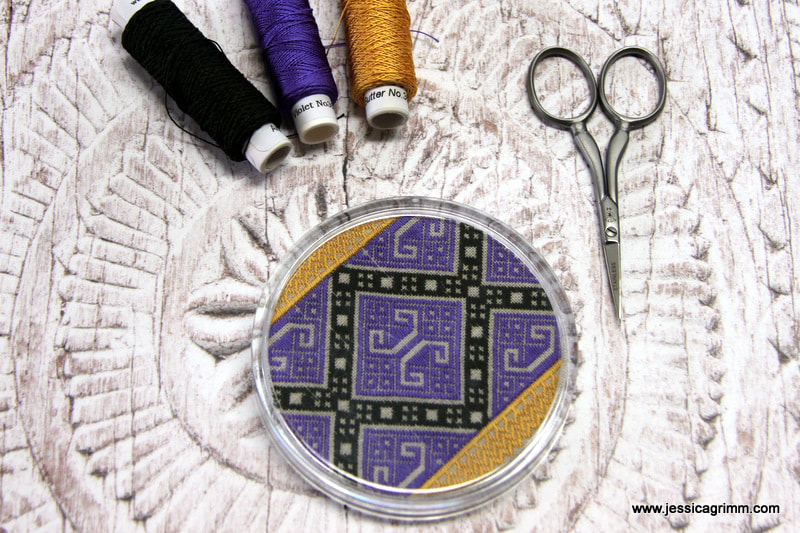
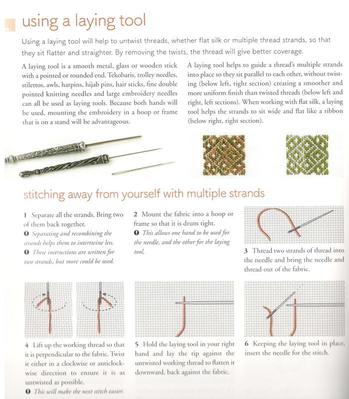
A little while ago, my mailman brought my pre-ordered copy of Yvette Stanton's latest book: Smoyg, pattern darning from Norway. Yvette is well-known for having written several excellent books on historical whitework embroidery and this latest addition is no exception. It is just a little more colourful than the other ones :). If you are unfamiliar with Yvette's books, this is their general layout: introduction to the technique with plenty of pictures showing historical pieces, a project part and a part detailing the technical side of the technique with step-by-step stitch diagrams for left-handers and right-handers. In this case, the introduction is full of clear pictures showing a myriad of historical pieces from museum collections in Norway. This type of embroidery is found on the folk costumes of the Southern parts of Norway and may date as far back as the Vikings. You'll learn about: skjorte, handaplagg, belte, likkross, brudgomaduk, luve, brystduk, kinnlag, skaut, kasteplagg, forerme and forklebord. The many, many pictures are inspirational for those who want to design their own patterns; both in terms of pattern placement as well as colour combinations. Yvette even provides you with hints if you want to explore pattern darning in other cultures (it turns out that I already have a book on pattern darning from the Mameluke era). The project part of the book includes a good range of taster projects, medium-sized projects and larger projects that will keep you busy for a while. Especially the jewellry bag, scissor keep and two different pendants are perfect to try out this technique when you only have a few hours to spare. As the poppy pendant was worked on 40-count linen with DeVere yarns #36 silk and I happened to have both in my stash, this is the project I decided to try first. My Dandelyne mini-hoop was slightly smaller than the pendant Yvette sells, but it still turned out quite pretty. I used Zweigart Newcastle linen and the colour of the DeVere yarn #36 silk is called Vermillion. This particular silk is a tightly twisted thread not unlike perle. In general, I hate silk perle; it untwists faster than I can stitch and I thus end up throwing away at least half of my thread. Not so with the DeVere #36! It hardly frays at the end and I decided to order a decent selection of colours after working the poppy pendant. A clear case of #yvettemademedoit. The colourful needlecase, bookmark and adorable hanging-ornament require a little more work. Whereas the table runner, table centre, cushion, framed square and shirt will occupy your hands and needle for many, many delightful hours. And then there is the gigantic band sampler featuring no less than 22 different colourful patterns. As all these patterns come fully chartered, this is also a candy store if you want to decorate a particular item using this embroidery technique. I decided to use one of the patterns to fill a plexiglass coaster. Worked on the same linen using DeVere #36 Algae, Violet and Butter. The technical part of the book is as good as it gets. Yvette is a left-hander herself and thus she always makes sure that ALL stitchers can replicate her stitching when reading the step-by-step instructions. You might think that, as pattern darning uses only the humble running stitch, there is not much scope for instruction. Wrong. Yvette will show you several ways of turning at the end of a row, how to plan a larger project using tacking, stabbing versus sewing, starting and ending threads, working with more than one colour, using a laying tool and how to best stitch a larger, more complicated pattern. I might just add one more tip: enlarge the diagrams and use a ruler to mark where you are. I have absolutely no problem finding my way around a crossstitch pattern, but using the darning diagrams straight from the book made me go cross-eyed :).
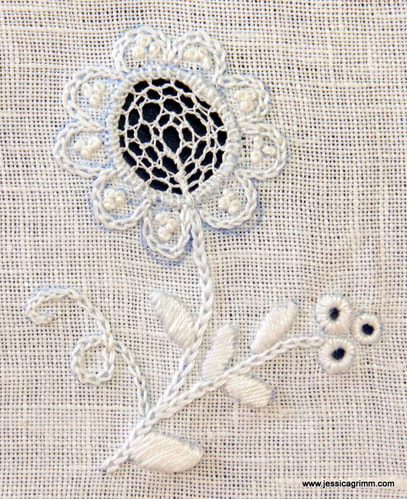
But, my possibly favourite part of the book is its three very last pages before the credits. It is called: appendix of fabric and thread compatibility. Yvette has tested many types of threads (silks & wools) with four types of fabric: 50 count, 40 count, 34 count and 28 count linen. She even states which size of needle to use. This means that most of us will have the appropriate threads and fabric in our stash to start stitching immediately! But beware: it is a very addictive type of embroidery... Where to find the book? For the moment it seems that you can only order your copy straight from Yvette's website. I paid €43 including shipping. The book is due for general release in the autumn. Last Friday, I attended a course on Silesian whitework by Elisabeth Bräuer at ArtTextil in Dachau. This particular form of whitework was practiced by the German population of Silesia, which after the second World War became part of Poland. Those Germans that had not fled for the Russian army, were expelled by the new rulers and fled into Germany. They brought with them their cultural heritage and folk costumes. The linen apron worn on feast days and for other special occasions was richly decorated with whitework and needlelace. On Friday, we started by practicing the surface stitches with cotton a broder (#16 - #30) on a scrap of linen. This particular form of whitework only uses buttonhole stitch, satin stitch, french knots, chain stitch and eyelets. As with for instance Richelieu, parts are cut out and the rim is strengthened with buttonhole stitch. The order of work is a little different though. You start by outlining the design line with a double row of closely worked running stitch. Then you make cuts in the middle and you turn the unwanted fabric flaps under. The edge is then fastened with not too closely worked buttonhole stitch. Any unwanted fabric bits still protruding on the back, are then cut off. The so formed holes are then filled with needlelace using crochet yarn #80. There are about 19 different forms of this needlelace. However, only five different patterns were ever used on one apron. I presume that using more would result in an unbalanced and unpleasing design. The needle lace consists of differently worked buttonhole stitches and is anchored in the previously worked buttonhole rim. The aim is to create a very open lace. This results in a striking contrast between the surface stitches done in a thick type of thread and the lace being worked very open in a thin type of thread. I must confess that I find this contrast not very esthetically pleasing. One of the things I had to come to terms with was the very different technical aspects of working the surface stitches. I am a stabber and I don't sew my embroidery stitches. And I am simply too old to change :). It always takes me a while to translate the demonstrated 'sewing' into 'stabbing'. Furthermore, I am used to outline with split stitch before I cover with satin stitch. Silesian women used running stitch. Since I wanted to learn this particular type of embroidery, I went with it. But it wasn't a success. My leaves aren't as crisp as they normally would be. Another technical improvement I would make, concerns the cutting of the fabric. I would outline with one row of closely worked running stitch, then cut and then secure the unruly flaps of fabric with my second row of running stitch. This prevents the fabric pieces from being caught up in the subsequent buttonhole stitching. This is how far I have come preparing for coming Friday which sees the second part of our course when we will learn to do the different Hirschberg lace patterns. I will tell you all about it in next week's blog post. Would you like to try your hand at this particular form of whitework? No problem. Elisabeth Bräuer has kindly published the instructions on her website. Do browse through the different articles, although they are all in German, they do have lovely pictures of embroidered Silesian folk costumes.
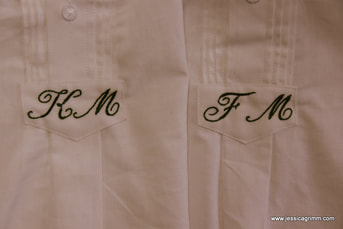
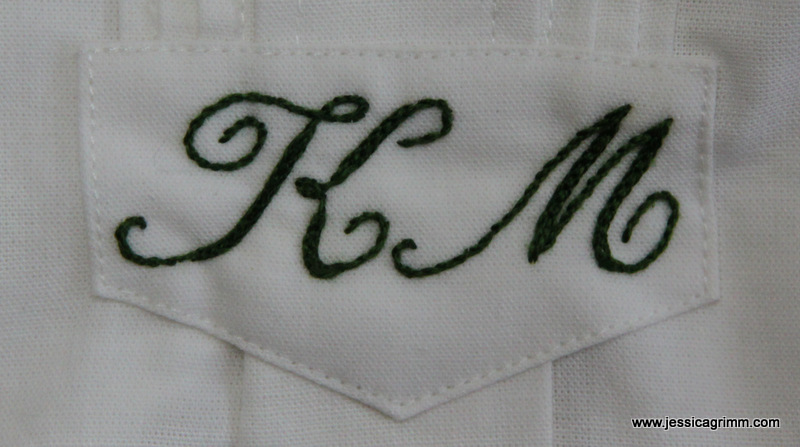
You may probably have heard that we had rather wet weather conditions here in Bavaria. Luckily, apart from some damage to the plants in our vegetable plot, nothing major happened. In fact, perfect weather to work on some commissions. First up, two traditional boy's shirts needed monogramming. They are made of a sturdy linen fabric and are a joy to stitch on. All be it a little hard on the hands as you partly go through four layers of fabric. I use DMC perle #8 for the monogramming. This ensures that the shirts can be washed at high temperatures. Not unimportant as they are going to be worn by teenage boys :). For the fatter parts of the lettering, I used Hungarian braided chain stitch petering out into stem stitch for the thinner parts. Next up is the breast piece (Steg) of a pair of traditional Bavarian braces. The pattern comes from Wolle42. It took me 16 hours to stitch this particular piece. It is stitched with a whole strand of Anchor stranded cotton onto 18 TPI canvas using tent stitch.
Although it was nice to be stitching indoors guilt-free, I am looking forward to real spring/summer! I want to be able to dine on my balcony and make long hikes through the alpine foothills. After all, our native orchids are in bloom at the moment! (they seem to be pretty waterproof...) My studio seems to be flooded with commissions at the moment. There might be a causation with the fact that Christmas is only 5.5 weeks away... A major milestone was reached today upon finishing the lengths of another pair of Bavarian braces I started quite a while ago. Both lengths are 107 cm long and five centimetres wide. It took me 173 hours to stitch them. They were stitched using a full strand of DMC floss. I've used 22 colours on 18 TPI brown canvas. The pattern was adapted from an old Berlin Wool Work hand painted pattern. So, for the moment at least, there is no one with the same pair of braces in all of Bavaria :). I love to stitch unique patterns and I will not use this pattern again as long as it is still worn. The only option to obtain the pattern is to sit quietly behind the wearer in church with a piece of graph paper...
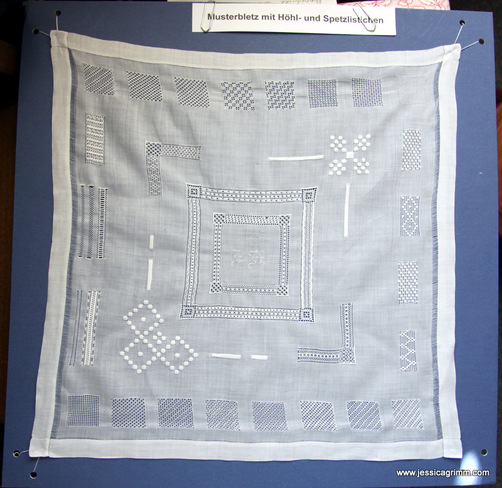
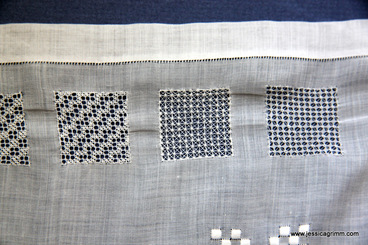
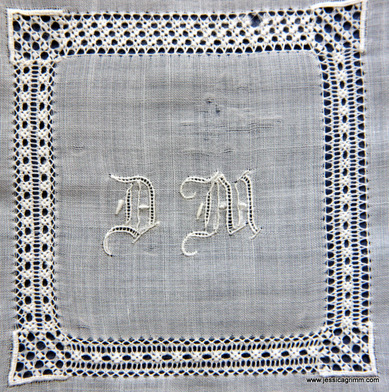
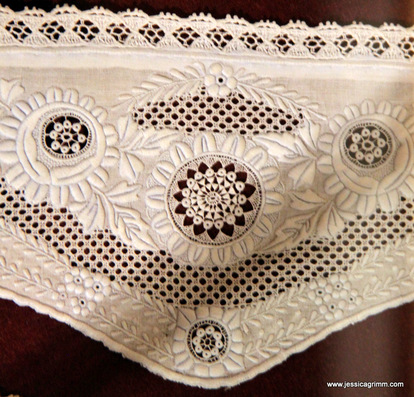
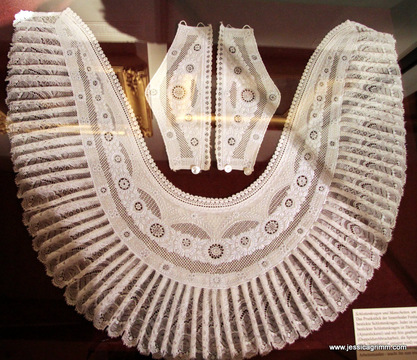
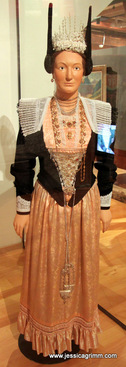
I've also spent some time today on designing the breast piece. It will feature the coats of arms of Bad Bayersoien flanked by two fearsome lions. Hope to finish that in the next couple of weeks too. Along with a couple of traditional shirts which need monogramming. Regarding my refugee ladies crafting group; we laughed our socks off (a picture of my husband proofed to be very popular with the ladies!). In between the laughter, I even learned a new stitch from Ukraine. Never seen it before and I will make a tutorial once all the commissions have safely left the building. A huge thank you to all who left words of support and encouragement on my website or otherwise. The donations received will be used at a later date. The coming weeks, we will do some paper crafting to produce Christmas decorations to be sold at our local Christmas market. Every little helps. Last week, we examined the basis of Appenzell embroidery: padded satin stitch. This week, we'll have a closer look at other major components: Höhlen or drawn thread work, Lääteli or pulled thread work and Spetzlistiche or needle lace. This sampler, made by Martha Ackermann and part of Verena Schiegg's collection, mainly shows pulled thread work. First, the outer line of the design area (in this case squares) is worked in padded satin stitch. Next, threads are taken out from the back to open up the fabric. For instance, every fourth vertical and horizontal thread is cut and taken out. This 'canvas' is now filled with stitches with a thread as fine as the fabric threads. Here is a close up of some of the filling stitches. Today, only about twenty stitch patterns are still in use. However, the Appenzell Museum (well worth a visit!) has a sampler with 124 different patterns. Unfortunately, without taking it apart, it is impossible to tell how these were made. Some patterns are similar or equal to those used in Schwalm embroidery. You can find more on this whitework technique very suitable for beginners on Luzine Happel's blog. Do you see the ladder-like structures in the above monograms? These are called Lääteli and are a form of pulled thread work made with hem stitch. Finally, the creme de la creme of Appenzell embroidery is formed by the Spetzlistiche: very fine needle lace. See the filled roundels on the above cuff? That's the stuff. The outer line of the design element is worked in padded satin stitch. Then the fabric is cut away carefully. Buttonhole stitches are worked over the padded satin stitch to clean up the border. Now a piece of lace is formed by anchoring threads into the buttonhole stitches. Nowadays, Appenzell embroidery can still be seen on the festive folk costumes of the region. Collar or Schlottechrage and cuffs are elaborately embroidered.
That's all for now folks. Back to packing the last bits needed for the show in Osnabrück at the end of the week. Hope to meet many of you there! |
Want to keep up with my embroidery adventures? Sign up for my weekly Newsletter to get notified of new blogs, courses and workshops!
Liked my blog? Please consider making a donation or becoming a Patron so that I can keep up the good work and my blog ad-free!
Categories
All
Archives
July 2024
|
Contact: info(at)jessicagrimm.com
Copyright Dr Jessica M. Grimm - Mandlweg 3, 82488 Ettal, Deutschland - +49(0)8822 2782219 (Monday, Tuesday, Friday & Saturday 9.00-17.00 CET)
Impressum - Legal Notice - Datenschutzerklärung - Privacy Policy - Webshop ABG - Widerrufsrecht - Disclaimer
Copyright Dr Jessica M. Grimm - Mandlweg 3, 82488 Ettal, Deutschland - +49(0)8822 2782219 (Monday, Tuesday, Friday & Saturday 9.00-17.00 CET)
Impressum - Legal Notice - Datenschutzerklärung - Privacy Policy - Webshop ABG - Widerrufsrecht - Disclaimer




 RSS Feed