|
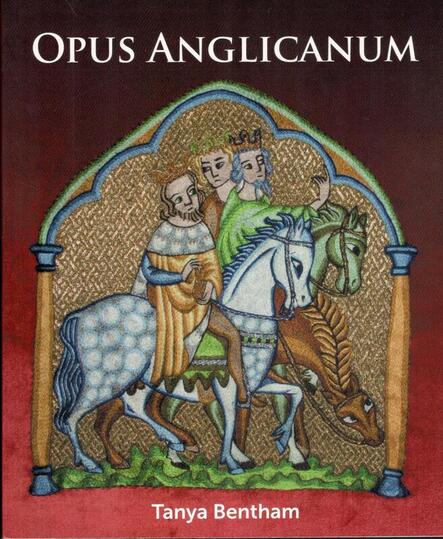
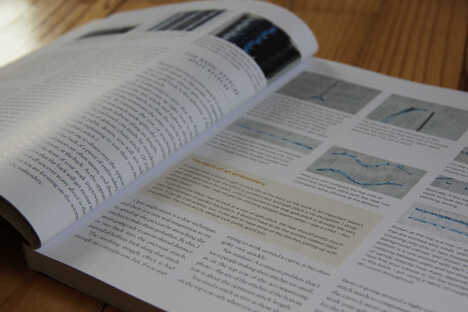
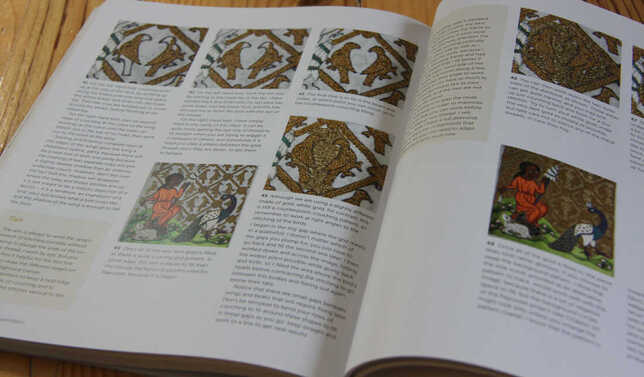
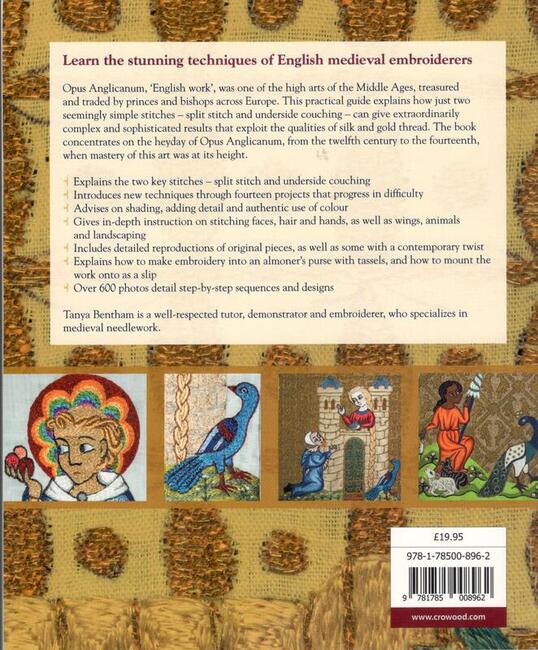
When I returned from my lovely family visit to the Netherlands, I had one of these pesky little Deutsche Post notes informing me that I had to pick up a parcel in the next village and pay customs duties. As usual, you have no idea which parcel it is until you have paid the outstanding bill and they hand it over to you. To my delight, it was Tanya Bentham's book Opus Anglicanum: a practical guide! I pre-ordered the book as soon as Tanya announced the possibility on her blog. The blog comes highly recommended as the humour with which Tanya both writes and stitches is unsurpassed. I particularly liked her rendition of a medieval watermill with a CCTV camera above the entrance. So let's dive into the book! The book is in essence a paper version of all Tanya's embroidery courses. It is filled to the brim with information and tips from a master embroiderer who has practised her art for many years. Best of all: it is written with the same kind of no-nonsense straight-talking dry humour as her blog is. Things like: "It is slow, too, so, if you need a quick fix, go to do some cross stitch; if you want to get your teeth into something, try opus" in the introduction are not for everyone. However, this is honest advice. You will simply not ever get the same level of mastery as Tanya when you are not equally prepared to sit on your butt and STITCH A LOT. Oh, and don't ever try opus with stranded cotton. Ms Bentham doesn't like it :). The book starts with a chapter on materials, tools and frames. Whilst Tanya stresses that you don't need a lot of fancy stuff to practice opus, it is necessary to use a good (slate) frame that will hold your fabric drum taut (her method of testing with a full bottle of wine is just another version of seeing what happens when a cat sits on it). The next chapter delves into the mighty split stitch. Tanya not only details stitch length but also shows what happens if you still think it is okay to use stranded cotton :). There's also ample information on different types and brands of silk, as well as picking colours. Medieval embroidery is all about the play of light, so what thread you use and how you place your stitches is very important. The split stitch chapter is followed by three project chapters. Each project is shown in clear step-by-step photographs with precise instructions. The projects are tailored in such a way that they increase in difficulty and each teaches you new skills. Opus is not only about the mighty split stitch. Underside couching provides the necessary bling. A whole chapter is devoted to explaining this stitch in depth. And then it is your turn again. Project chapters with (adapted) designs from the Syon cope, the Bologna cope and the Pienza cope give you ample opportunity for wielding your needle. My favourite is "Rumpelstiltskin" with a background of underside couched facing pairs of falcons. Yummy! The last chapters in the book deal with applying your finished embroideries as slips onto something else and assembling an almoner's purse. The last pages are filled with designs drawings and a list of suppliers. As said before, the book is packed with tips and troubleshooting. This shows that Tanya is really at the top of her game. A master is not somebody who does not make mistakes, but who knows how to fix them when they inevitably happen. Everything Tanya knows about opus is in here. No information is kept from you. If you want to sink your teeth into opus, follow Tanya's instructions and practice a lot. Along the way, you will pick up the confidence and skill to work your own masterpieces!
Anything I didn't like about the book? Yes. The binding and the cover aren't very sturdy. This makes a book cheaper to produce (GBP 19,95 is a steal for a 208-page book with over 600 pictures!), but it is a trade-off when it comes to longevity. Furthermore, I would have liked to see a suppliers list with entries for mainland Europe, North America and Australia/New Zealand. After all, this book was not written for UK stitchers only. With protectionism on the rise, knowing where to source materials in your own region becomes increasingly important as shipping costs and customs duties are getting insane. Where to find the book? Please order from Tanya directly! Writing a book does not make you rich. On the contrary. When you order from the writer directly, she/he will get the maximum financial return. Literature Bentham, T., 2021. Opus Anglicanum: a practical guide. Marlborough, Crowood. ISBN 978 1 78500 896 2.
4 Comments
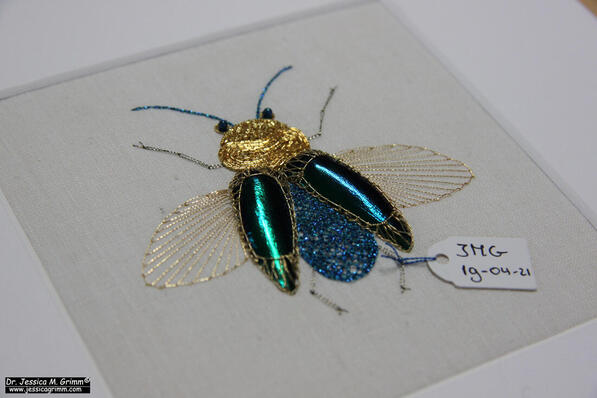
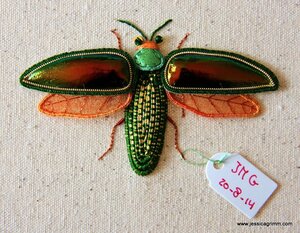
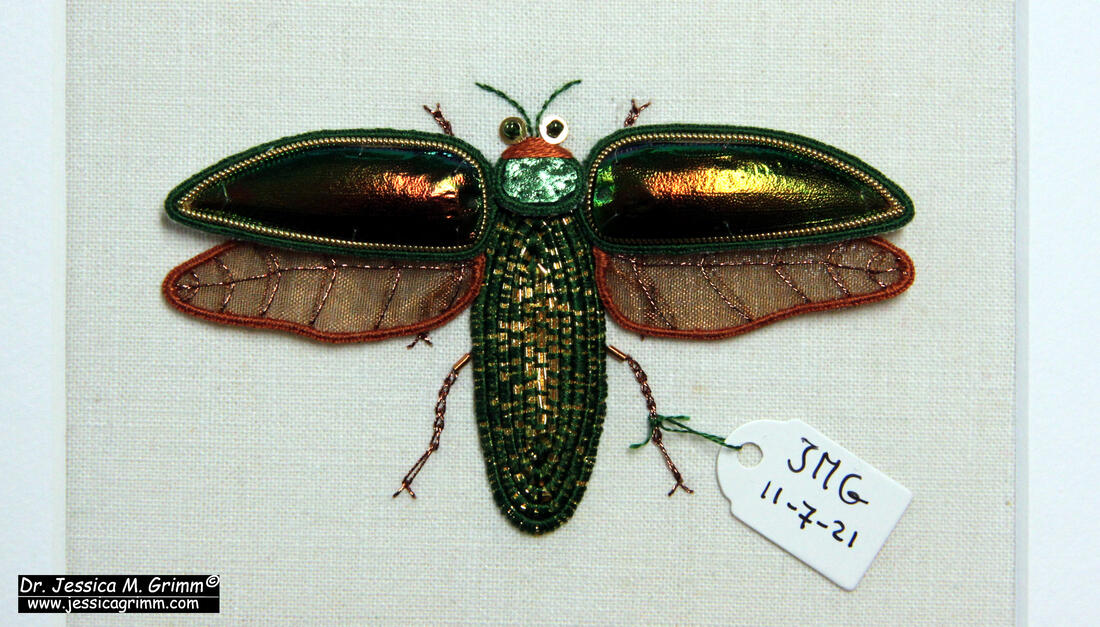
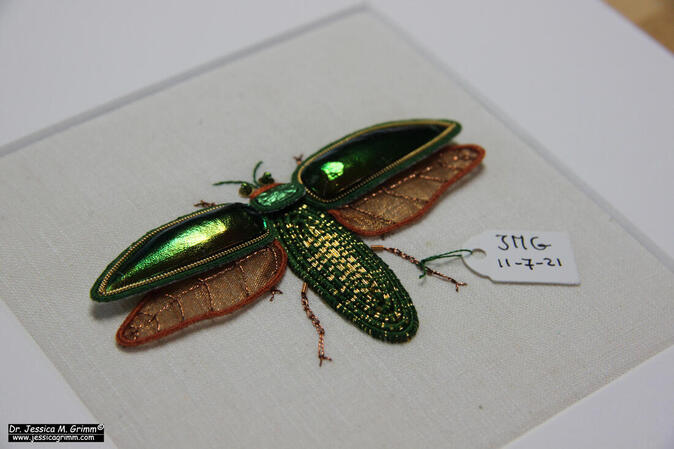
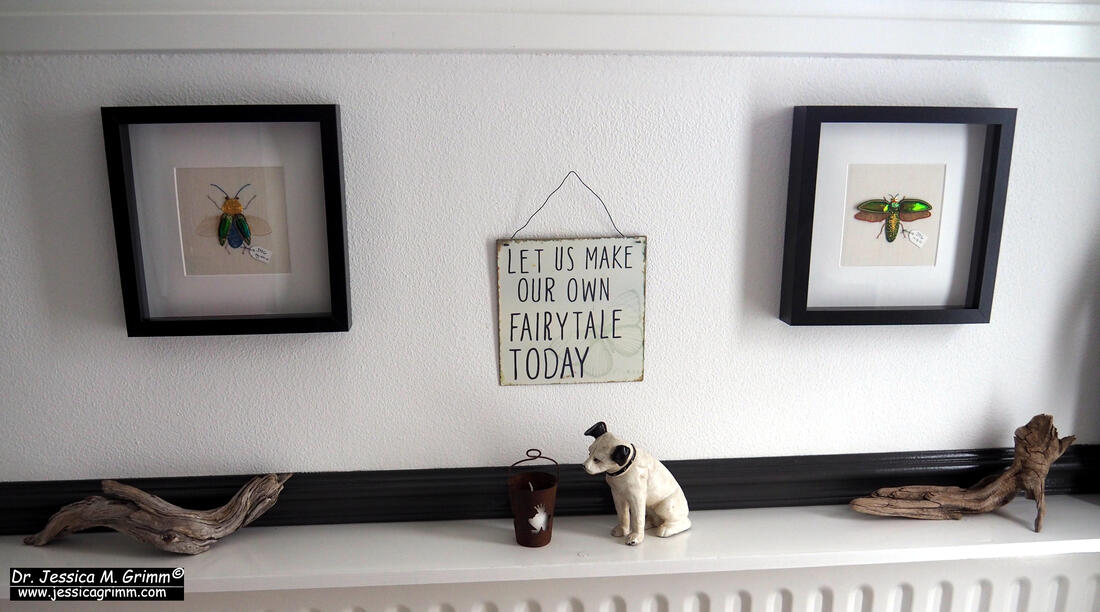
A couple of months ago, I made the first embroidered beetle for my mum. Now that I am fully vaccinated (and they too), I could finally visit them after 21 months. That did however mean, that I needed to embroider the second beetle as well :). But after so many years, I did not have all the original ingredients to make an exact copy of the original beetle. So the new version is a little more bronze instead of orange. And since my mum is not a huge fan of bright orange, she likes the bronze version even more! This was the first recreated beetle: Wilhelmina. Incidentally, the completion date on the label is my parents' wedding day. The orange original on the left and the bronze version of Adriana beetle on the right. And here is a glamorous picture of Adriana. And this is how my father hung Wilhelmina and Adriana on the wall at the Grimm's residency :).
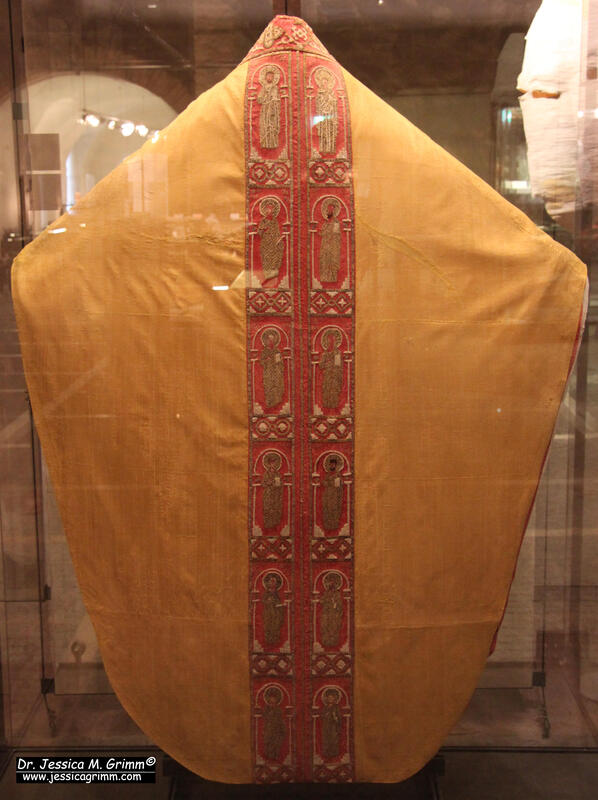
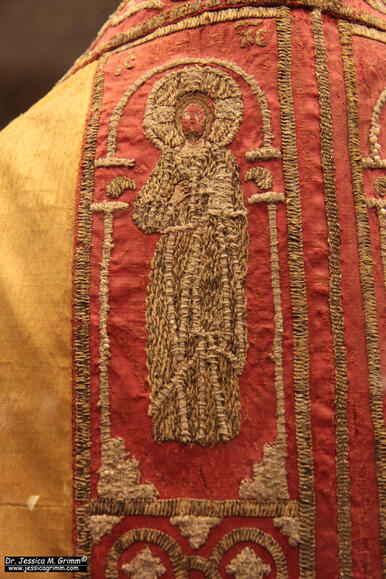
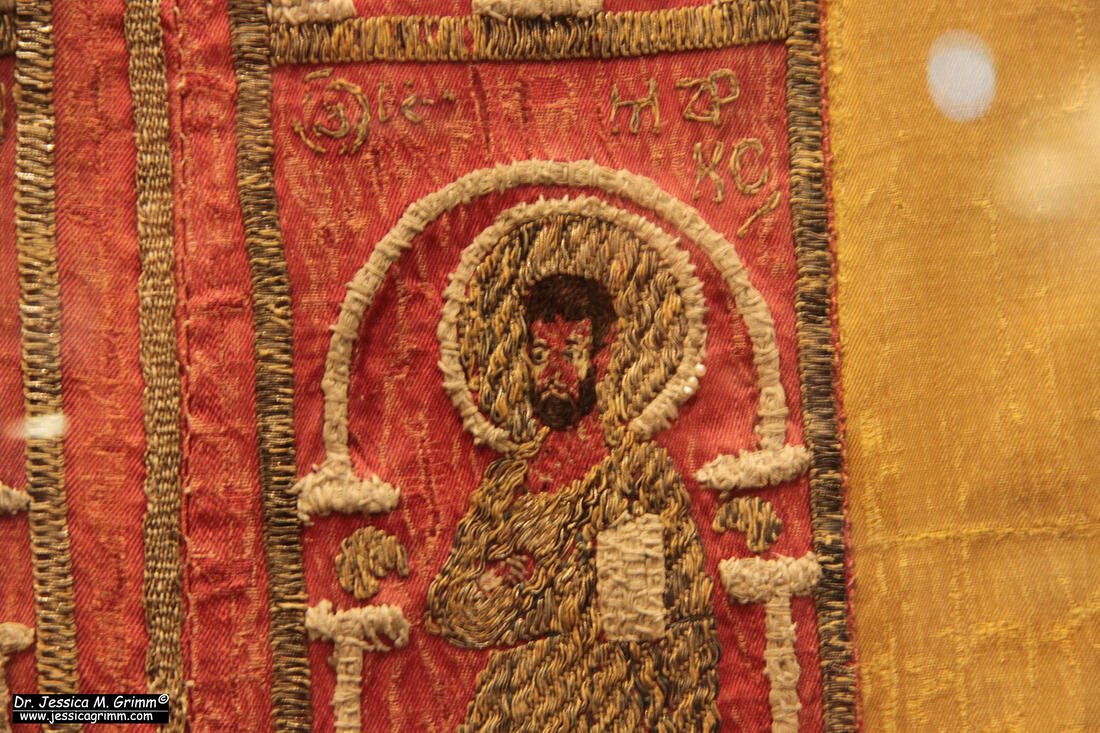
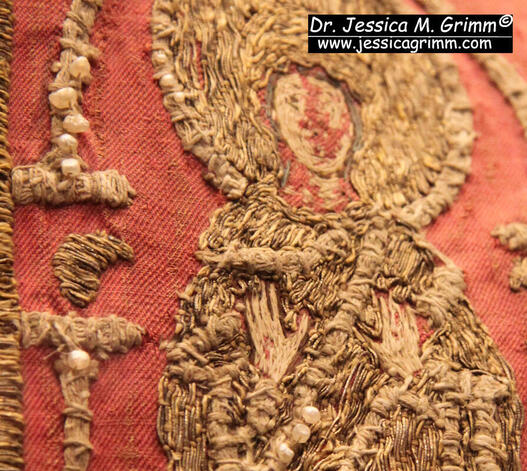
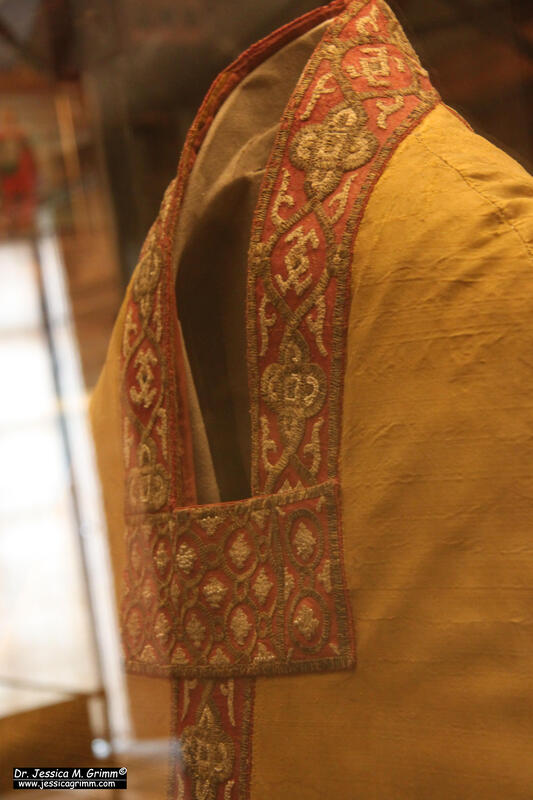
A couple of weeks ago, I and my husband visited the lovely Diocesan Museum of Eichstätt. Apart from the normal sacral art on display, were a few important medieval vestments. The most interesting of them all is the so-called chasuble of St Willibald dating to the 12th-century. Goldwork embroidery was either made in Byzantium or in Cyprus according to the meagre information displayed in the museum and the literature. Originally, the shape of the chasuble would have been bell-shaped. The yellow silk twill dates to the 12th-century as well and was either made in Italy or in Byzantium. Although the chasuble is attributed to St. Willibald, he never wore it. St. Willibald was the founder of the diocese of Eichstätt und lived c. AD 700-787. Being the son of a Wessex chieftain and with a host of saintly relatives, he seems to have been predestined for the job! Depicted on the back of the chasuble are Jesus and Mary with 10 Apostles. Each figure is depicted under a Romanesque arch. The persons are identifiable through their stitched Greek names above the arches. The embroidery is worked on a strip of red silk twill. The goldthreads are couched down in pairs in a characteristic slanting couching pattern. Today, we are used to a couching pattern forming a brick pattern. However, a pattern forming a simple slant was very popular in the medieval period. As a rule of thumb: medieval embroideries where a single goldthread has been couched down are older than those where two (or more) goldthreads are couched down with each couching stitch. In this detail of Mary, you can see that her face and hands are stitched with small silken stitches. The literature states that these are stem and chain stitches. However, it looks more like irregular split stitch to me for the hands and typical "contour-following" split stitch as seen in Opus Anglicanum, for the face. Especially the latter can look like very fine chain stitches. The literature also states that Mary and Jesus were originally the only figures where the halo, architecture and clothing were further decorated with pearls. However, if you look carefully at the picture of the Apostle, you spot pearls there too. Just imagine what these embroideries once looked like with all the pearls still intact! As the pearls were padded with the beige string (linen or cotton) you see almost everywhere in these embroideries, the pearls would have sat proud of the surface catching the light better. The front of the chasuble was incredibly difficult to photograph due to a piece of modern art being right behind it. But you get an impression from the picture above. It is the same type of goldwork embroidery as seen on the back. Interestingly, many more pearls have survived on the front.
Unfortunately, it is unknown how this splendid piece of Byzantine embroidery ended up in the Cathedral treasury of Eichstätt. However, Eichstätt was an important Diocese in the Middle Ages and still has a Catholic University and Seminary. Literature Müller-Christensen, S., 1955. Sakrale Gewänder des Mittelalters. Hirmer, München. If you want to study any form of European embroidery, you will need to be able to read languages other than English. When you solely rely on the literature available in English, you will miss a lot! For all sorts of reasons, people are often afraid to tackle a language they don't speak (well). However, with a bit of elbow grease, a camera or scanner, free software on the internet and a computer with Microsoft Word, you will be able to tackle text written in foreign languages. And it is good for your brain too. Plus you will have many guaranteed giggles along the way! Still not convinced you can do it? I, Dr Jessica Grimm, have sucked at languages in school as I am dyslectic, but I love reading and research. And I have come to love (foreign) languages too. Once I stopped beating myself up (and learned to shrug it off when others negatively commented) over the many writing mistakes I make, I discovered that I am actually good at writing and associating. This means that I quickly pick up words that are related to words in Dutch (my native language), English (my second language), German (my third language) or French/Latin/Arabic (rudimentary knowledge). Some of you will now think that I must actually be an ace at languages. NOPE. If you still don't believe me, you can leave a comment below. My mum, who IS an ace at languages, reads this blog too. And she will happily fill you in on all the language drama of my school years. And now, let me show you how I translate texts written in a foreign language in five easy steps! Step 1: Start by scanning or photographing the text page by page. Although the OCR software needed later in the process has a capacity to work with multiple pages, you get less muddled-up results when you work page by page. Should you scan or photograph? That depends on two things; 1) when your text contains pictures it is better to photograph and 2) if your camera is poor, it is better to scan. Scans are saved as PDF and pictures as JPEG. Step 2: Now you will need to convert the PDF or the JPEG into written language. This is done by feeding your PDF or JPEG into OCR software. I like to use this website and I recently bought Sedja. You are allowed to convert 15 pages an hour for free. The website itself is available in many languages, just set the correct one at the bottom of the page. Upload a page (PDF or JPEG), set the correct parameters and push the convert button. Your text will now appear in the window below. Mark the text, copy and paste it into Microsoft Word. Step 3: For the next step, you will have to make sure that you have installed the corresponding language pack in Microsoft Word. This is free when you have a Microsoft Office subscription. Once you have all your OCR converted text pasted into your Word document, you'll need to check against the original text. This is the most time-consuming part. But it is also the part where you will snatch up words that might come in handy should you ever visit the country in which the language is spoken. Think of reading captions in a museum exhibition. Step 4: Once you have checked the whole text, mark it and set the font and size. This step is very important! On your screen, it might look like the whole text is written in the same font and same size, but this is never the case. If you proceed to the next step without making sure the font and size are corrected, you will get a very poor translation! Step 5: And now the fun starts! Let Microsoft Word translate the document. It works best to translate foreign languages into English. But translating into Dutch, German or French is ok too. Depending on the original language and the writing style of the author, you might end up with a near-perfect document that you can already easily read. However, as scholarly literature often has rare words in it, you usually will end up with a few hilarious translations you will have to correct. These were the best ones in my latest translation of a Swedish text:
- the priest wears a maniac on his left arm (maniple) - party mite for a mitre petriosa - calving scene for calvary scene - cow cover for cope It took me a whole working day to get to this stage of translating a 21-page Swedish text (that's A4 in Calibri 11pt). That is not bad when you compare it with the "olden method" of using a dictionary! |
Want to keep up with my embroidery adventures? Sign up for my weekly Newsletter to get notified of new blogs, courses and workshops!
Liked my blog? Please consider making a donation or becoming a Patron so that I can keep up the good work and my blog ad-free!
Categories
All
Archives
July 2024
|
Contact: info(at)jessicagrimm.com
Copyright Dr Jessica M. Grimm - Mandlweg 3, 82488 Ettal, Deutschland - +49(0)8822 2782219 (Monday, Tuesday, Friday & Saturday 9.00-17.00 CET)
Impressum - Legal Notice - Datenschutzerklärung - Privacy Policy - Webshop ABG - Widerrufsrecht - Disclaimer
Copyright Dr Jessica M. Grimm - Mandlweg 3, 82488 Ettal, Deutschland - +49(0)8822 2782219 (Monday, Tuesday, Friday & Saturday 9.00-17.00 CET)
Impressum - Legal Notice - Datenschutzerklärung - Privacy Policy - Webshop ABG - Widerrufsrecht - Disclaimer



 RSS Feed