|
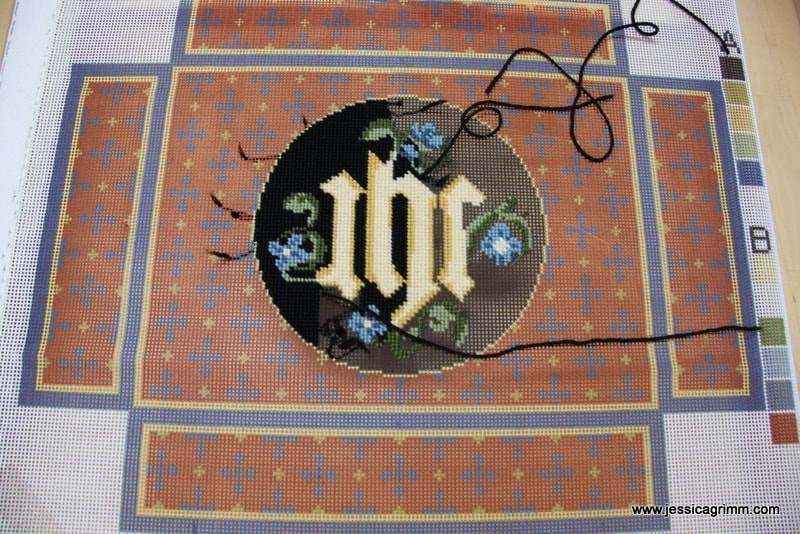
This weekend, I had set up shop at the Klosterladen at Ettal Abbey. In the video below, you can see me and my good friend Kathrin working on the needlepoint church kneeler. Later in the day, a young man with his father and grandfather came along. The young lad had a go at embroidery and was really good at it! Apart from demonstrating stitching a church kneeler, I chat quite a bit with the visitors. That's fun too. But the best part of my 'job' is to observe how people react to monks :). couple: Are you a real monk? monk: Do you want to touch? (stretches out an arm) couple: Do you really live here? monk: Ofcourse! couple: Where exactly? monk: Oh, madam, I couldn't possibly tell you. I already have so many fans standing under my window at night! And to prove that we not only laugh our socks off all day, here is a picture of process so far: P.S. I ordered my church kneeler kit from www.churchkneelers.com
8 Comments
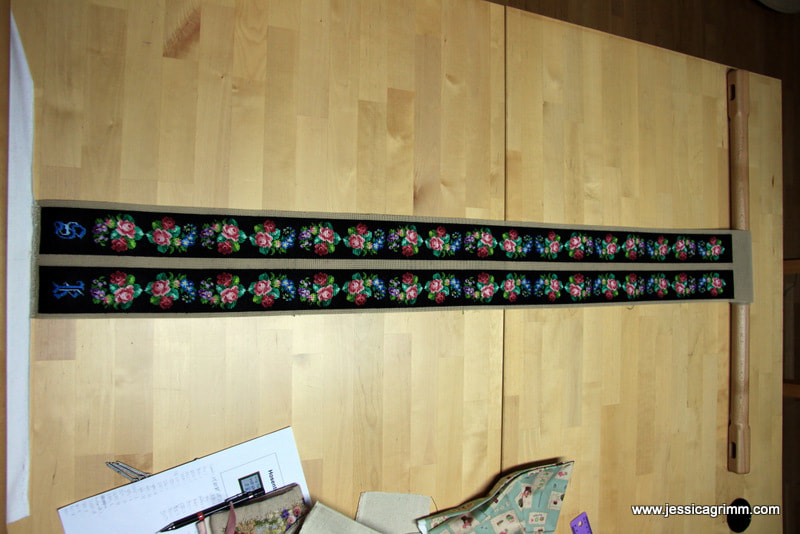
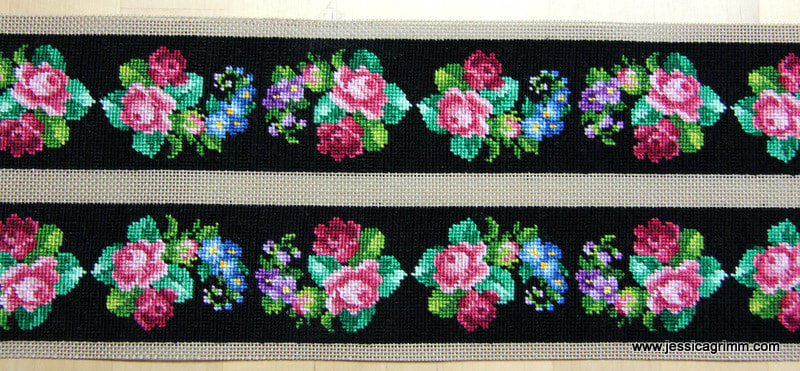
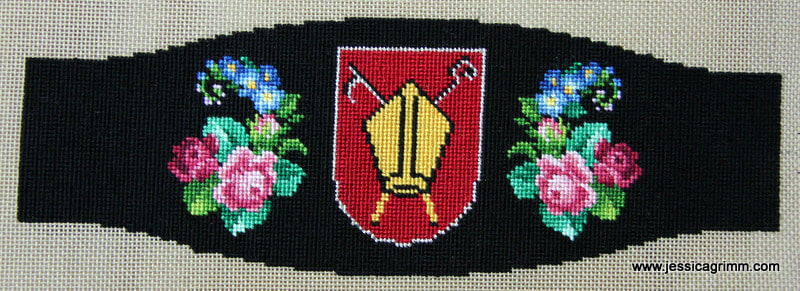
They're done! After 174,5 hours of stitching, my traditional Bavarian braces/suspenders were picked up by a very happy customer yesterday. I used 82 skeins of DMC and Anchor stranded cotton and 18 TPI brown canvas. Here are some pictures for you to enjoy: This is the total length of them: 115 cm. It's a tall lad :). And a close-up of the re-drawn antique pattern used. And the breast piece with the coat of arms of the village of residence. Now my embroidered 'raw material' goes to the saddler to get its leather backing and matching corded trims. Time to get one of my other embroidery projects out!
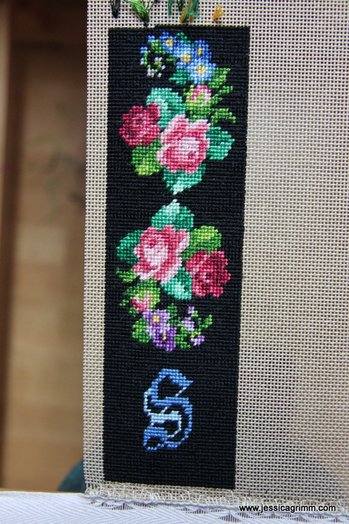
My head spins with creative ideas for yet more embroidery projects. I wish my hands were faster... So, let's check in with progress on my Bavarian Hösenträger (suspenders)! Here they are, just before I rolled my slate frame. This is about a quarter of the total length of 112 cm. Right now, I've progressed to one third of the total length and that has taken me 51.5 hours. Apart from these two 'lengths', I also need to stitch a breast piece, or the Steg as it is called. This year, I am also attending a course on wild herbs. I love to know what is edible and/or has medicinal uses. And I've discovered that some of our local wild herbs can even be used for dying. However, since Bad Bayersoien lies at 850 m above sea level, I need to be patient for spring to really kick in. But then I will be out and about collecting wild herbs!
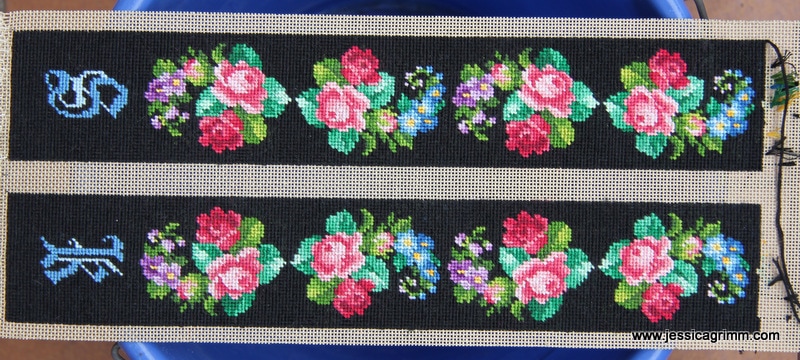
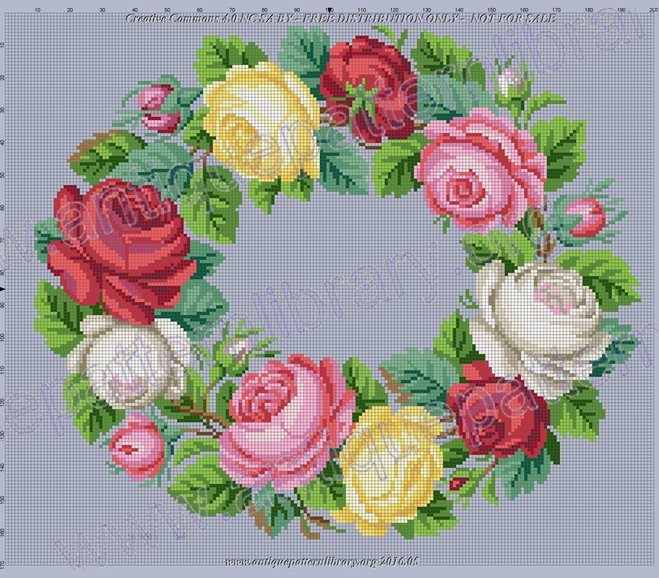
And as part of my course portfolio, I need to make a 15 plant herbarium. Now that got my creative juices flowing big time! How about a stitched version? I am thinking silk shading the plants, mounting them, adding a pocket on the back for the pressed herb and a sheet with botanical information, and then turning the whole thing into a leporello. That would be fun, wouldn't it? Can't wait to start :). On a personal level, my husband finally comes to live with me. Ten more days and he will be here! So far, we haven't been able to find him a new job. However, he has secured many short-term free-lance projects. Not the security one wants, but it is a start! As we will have to move his stuff from his accommodation in the Netherlands to here, we will be on the road in a couple of weeks' time. I will try to keep my blogging going, but life might take me out... Yes, I know, 2017 should have been the year of my casket. Things never go to plan, do they? Luckily, I have a very pleasant interruption: a commission of another pair of traditional Bavarian braces. Today, I'll share with you how I go about such a commission. Since I have stitched several of these braces to date, I now know that it will take me 150-200 hours to complete one. When you work on larger projects, it is always a good idea to keep track of your stitching hours and the materials used. After all, it is nice to be able to tell people who ask, how long it took you to create the masterpiece. Especially if they want one too and would like to commission you. Next up: what does my client want? I have several books on Berlin woolwork. For instance, books by Raffaella Serena feature beautifully detailed antique patterns. The Antique Pattern Library has some of these hand-painted patterns too and there seem to be new ones added all the time. Browsing the books, my client can then pinpoint what he or she wants. When I have my client appointment, my table is also laid out with all the DMC skeins in order. This enables us to match colours and patterns. And they love the visual feast! Then it is time to cut and paste a new pattern from the old ones the client wants me to use. This makes it a new and unique pattern. I only use this new pattern for this specific client. There are far too many exactly the same Hosenträger in Bavaria already. I use computer software to draw the new pattern: Cross Stitch Professional platinum. Not cheap, but very good and unmissable if you do this job regularly. As subsequent turning my embroidery into a Hosenträger with a leather back, corded edges and buckles is a rather harsh process, I use sturdy embroidery materials: 18 TPI Antique Canvas and DMC/Anchor stranded cotton. The stranded cotton is used as is; no stripping of threads. Maybe not the prettiest thread to use, I would love to use a perle, but it is tradition :). Then I send a computerised picture of the pattern to the client for approval. Once approved, I set up my frame and stitch one repeat pattern. I photograph that again and send it once more for approval. In this case, the guy commented 'unbelievably horny'! Yup, that's what he said :). Isn't German a fantastic language? So now I am all set to stitch the other 15 repeats :)!
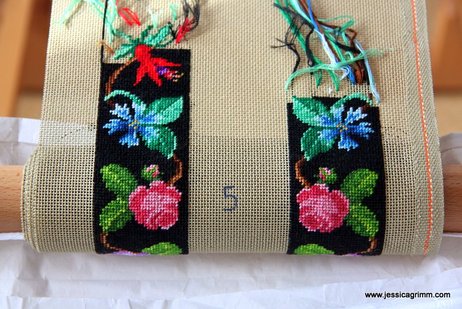
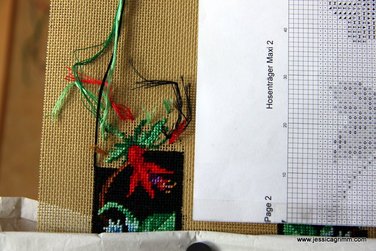
My current embroidery project consists of a pair of Bavarian braces which will be worn at first communion by Maxi. The straps are nearly finished and then there is only the breast piece (Steg) to be stitched. These braces are part of the Bavarian folk costume and were first seen in the early 18th century. From what I have seen, the oldest surviving ones are from about the mid-19th century. These were stitched in tent stitch on a linen background. The patterns are the same as for Berlin Wool work: mainly roses and other flowers, as well as animals and foliage. Me and my husband find a lot of inspiration in the old patterns. It is great fun to use new colour combinations and introduce new flowers. Maxi's pattern consists of a rose, followed by a cornflower, a fuchsia and a pansy. The Steg will feature the coat of arms of Bad Bayersoien. We use Crossstitch Professional Platinum to design our patterns. It easily allows us to adjust colours and to shift or flip design elements about. Nowadays, mainly canvas is used instead of linen. I am working on brown 18 count mono canvas made by Zweigart and I use a whole strand of DMC or Anchor stranded cotton. As the background of the braces are covered with black stitches, I have found that on occasions white canvas shines through. Please don't be tempted to remedy this by 'painting' your white canvas black with a thick marker pen! These inks are not stable. The embroidery will be steam pressed at high temperatures when the leather backings are put on and you don't want black ink spoiling your lovely pink roses. Another thing to avoid is the thin double canvas. It is not sturdy enough and may rip during the construction process. As tent stitch is a repeated stitch in one diagonal direction, there is a heightened risk of the straps becoming askew. To avoid this, I use a slate frame. As an added bonus, my posture whilst stitching is better too. Quite important as only the straps have taken 101 stitching hours so far. It also allows me to work with both hands and to 'automatically' start and finish my threads. This speeds up the work enormously. First: working with two hands. My slate frame rests on two adjustable standers. For this kind of work, I like my frame tipped slightly towards me. As I am right handed, my right hand stays on the back of the frame, whilst my 'weaker' left hand is guided by my eyes on the front of my embroidery. With each stitch I pass my needle from my left hand to my right hand and back. Much more economical movements then when I would only use my 'good' right hand and would have to move my whole arm forwards and backwards. Secondly: automatically start and end threads. This method was such a huge eye opener when I studied at the Royal School of Needlework in London! And now I am met with a lot of 'aha, that's genius' when I pass the skill on as a tutor. Have a look at the picture above. You might think my embroidery has a bad hair day, but that is not the case (the same can unfortunately not be said of me...). Every tail of thread you see is either the start of a thread or the end. When I now continue stitching these threads are caught on the back and secured. Once I reach one of these tails, I can snip it off knowing that it is indeed secured on the back. For this method to work, it is paramount that pattern and background are stitched more or less simultaneously. The practice of firstly stitching the flowers and then fill out the black background in one go is not only tedious, but also adds the risk of differences in thread tension. Occasionally, I do unintentionally pull up a fibre of a starting or ending thread. No worries, I just pull or push it back. With practice, this occasional annoyance becomes less frequent. I hope you enjoyed reading about my current embroidery project. Soon, I hope to post some pictures of the end result.
|
Want to keep up with my embroidery adventures? Sign up for my weekly Newsletter to get notified of new blogs, courses and workshops!
Liked my blog? Please consider making a donation or becoming a Patron so that I can keep up the good work and my blog ad-free!
Categories
All
Archives
July 2024
|
Contact: info(at)jessicagrimm.com
Copyright Dr Jessica M. Grimm - Mandlweg 3, 82488 Ettal, Deutschland - +49(0)8822 2782219 (Monday, Tuesday, Friday & Saturday 9.00-17.00 CET)
Impressum - Legal Notice - Datenschutzerklärung - Privacy Policy - Webshop ABG - Widerrufsrecht - Disclaimer
Copyright Dr Jessica M. Grimm - Mandlweg 3, 82488 Ettal, Deutschland - +49(0)8822 2782219 (Monday, Tuesday, Friday & Saturday 9.00-17.00 CET)
Impressum - Legal Notice - Datenschutzerklärung - Privacy Policy - Webshop ABG - Widerrufsrecht - Disclaimer




 RSS Feed