|
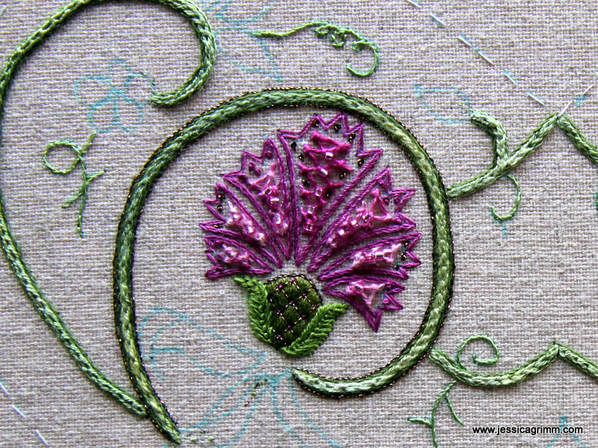
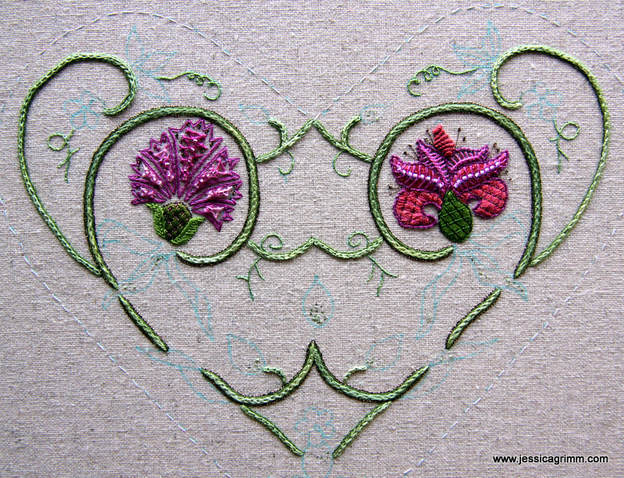
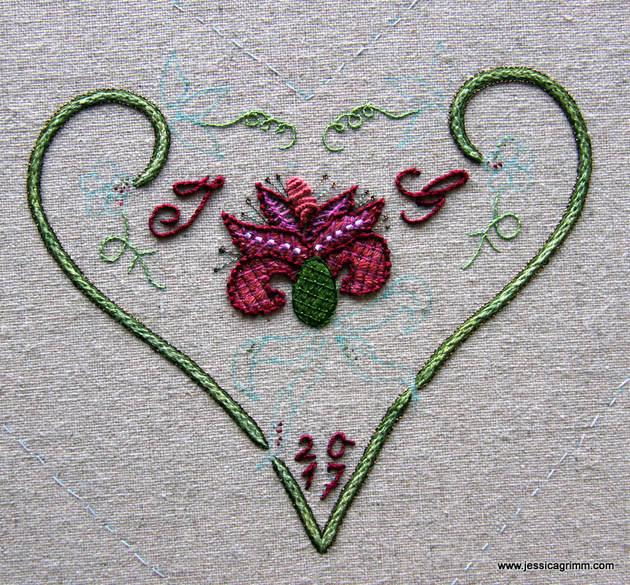
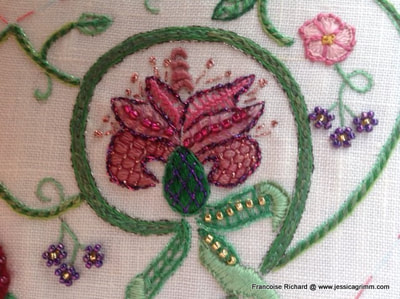
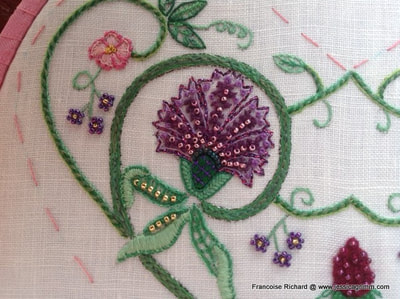
This time we are going to talk about the two big pink flowers in the big hearts. Now, since Janet Granger has published two excellent thread substitution lists on her blog, I'll concentrate on the actual stitching. Do visit Janet's blog as it is a really good read and personally I can't wait for her to start the actual stitching! First up was the carnation. And the first stitch called for was the beaded diamond stitch. Never heard of it. But the step-by-step photographs provided in Inspirations were excellent and I soon mastered this stitch. It is quite pretty with the beading. However, as the space is limited in the lower petals, it all becomes a little crammed. I am especially proud of my padded satin stitch calyx covered with a tiny trellis. I love this stitch combination and the threads used (silk and metallics). As I am severely allergic to fishbone stitch, I swapped it for fly stitch on the flanking petals. You see, it is ok to push yourself to learn new things. But, you'll find that there are certain stitches that give you the creeps. In my case: fishbone stitch. And it is perfectly ok to swap stitches in a design devised by somebody else! Oh, and once I completed the carnation and compared it with Carolyn's original, I spotted a further difference. My petals do not touch the calyx. Then I checked the line drawing of the pattern and saw that this is indeed different from Carolyn's piece. Personally, I quite like the separation and will leave it. However, if you don't like it: pay heed before you start stitching. Next up is the lily. Quite straight forward stitching with Vandyke stitch (one of my favourites!), satin stitch and fly stitch. The largest lower petals were covered with satin stitch using two strands of silk. The instructions advice you to follow the petal-curve with your stitches. However, as this is a rather small area and you are working with a double strand, it is a bit hairy. Therefore, I stitched the second lily on the back heart with a single strand and the result is a lot smoother. Note to self: only ever execute satin stitch with a single strand :). And then I hit a block. Oh dear. I ran into cable plait stitch. Another unknown stitch to me and this time I could not make heads or tails from the step-by-step instructions. So what does an embroidering damsel in distress do? Well, certainly not call for a handsome, but rather big-boned knight with zero-knowledge of embroidery stitches. Instead one consults Mary Corbet's excellent how-to-video on cable plait stitch. Then one grabs a thicker thread and a spare piece of cloth and practices. Then one finally returns to Strawberry Fayre and continues to stitch. Do I like cable plait stitch? Yes!, or at least when I stitched it with perle #8 on 40ct linen. Even when closely spaced. Do I like it as an outline on the lily petals stitched with Gütermann silk? Not so much. The thread is so thin and the subsequent stitches so tiny, that the braid-like appearance is lost to the naked eye. Another annoyance was the thread itself. Gütermann silk breaks a lot with this stitch. Instead, I have opted for coral stitch with a slightly thicker thread (Soie Perlee #384 by Au ver a soie) on the other lily. I liked this thread and its colour so much, that I also embroidered my initials and the year with it. I think my overall impression so far with Strawberry Fayre is that it is basically crewel embroidery on the scale of fine whitework. This is by no means a mistake or displeasing, but it does mean that most of my young-at-heart-but-with-older-eyes readers will need to use a magnifier for the whole project. In comparison, I liked the Home Sweet Home project better as, at least for me, thread choice and stitches were better. I would love to hear your thoughts on this! Please do leave a comment below. Next time we are going to check in with this project, the leaves and the beaded flowers will make an appearance.
Note: I have not finished this project as the instructions were faulty and the kit did not contain enough materials.
18 Comments
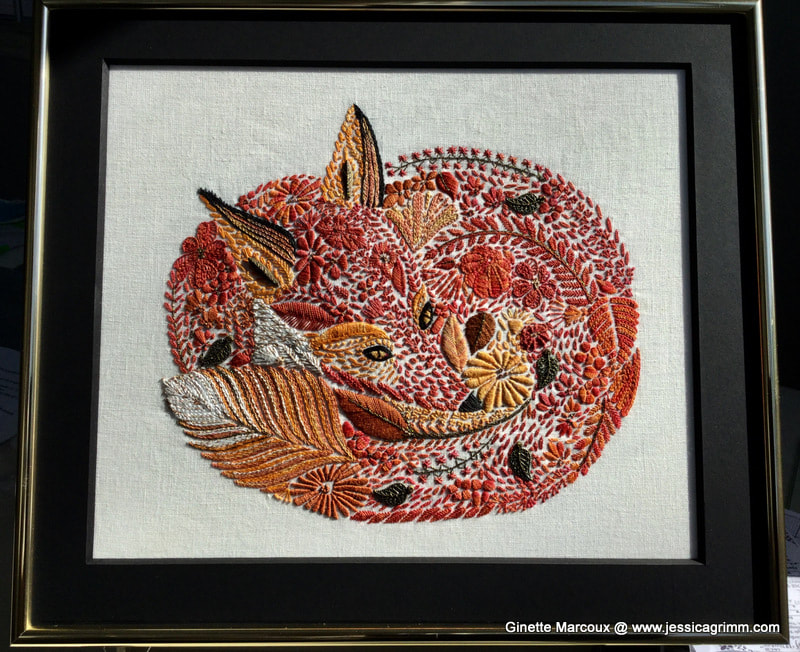
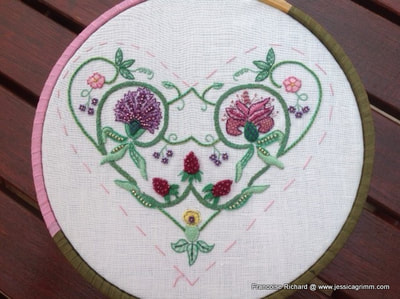
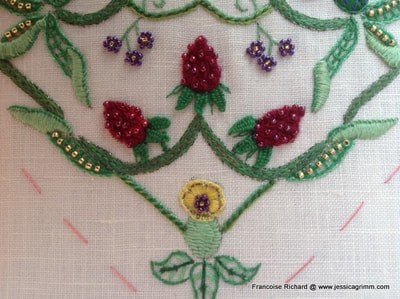
Two weeks ago I found, in between all the spam on easy loans, Viagra and what not, a most impressive surprise in my mailbox. Ginette Marcoux, one of the readers of this blog, wrote the following: "Today I want to share with you a special thanks for the prize winning beautiful embroidery of the fox from Millie Marotta colouring book. Because I came across a post on Mary Corbet's site talking about it I got curious and went on your site. And then.....then..... I fell in love with it! I am what Mary calls a very determined beginner embroider and I decided that if I bought the book, and follow your instructions I could do this, I simply had to work on something inspiring. So here is a picture I took when I was done (it took me nearly a whole year of trial and errors). Although I tried and tried again the stumpwork it was over my competencies, so I decided to add some bead leaves to compensate." And when I asked her if I could share her beautiful embroidered fox, this is what she wrote: "Thank you for your kind words, without your inspiring modern approach to embroidery design I think that I would have dismissed this art altogether (I thought that embroidery was for older people!). If you believe it could be of interest for others to see what a new embroiderer can do with a bit of determination and a lot of discovery learnings, then yes it will be my pleasure to share this project with them. Thank you for sharing all your work as well!" I am still blushing about Ginette's lovely comments! It makes my heart swell as this is exactly why I do what I do. So without further delay, here is her great rendition of the Millie Marotta fox: I think Ginette's work is stunning! The idea to use beaded elements instead of stumpwork wired elements works so well. Her fox has so much definition! It makes me want to make another one... And lucky as I am, I had further incredible mail a couple of days later. Francoise Richard, a reader from France, send me an email regarding last week's post on the project Strawberry Fayre. It turns out she has already stitched the project using her own stash. She kindly let me share with you her list of used supplies and some pictures. How cool is that?! This is what she wrote: "Bonsoir, I am Françoise from Françe and embroiderer for my pleasure. First, I would tell you that I follow your blog every time because you are a great embroiderer, I love all what you do! I made this fabulous kit of Carolyn Pearce this September but I don't purchase the kit because it is too expensive and I have a lot of threads and beads. You will see the photo above and this are the supplies I have used: Dmc stranded Cotton art 117: 727,210,208,915,911,913,954,910,3818,912 Dmc satin: 552,700 Caron collection Silk waterlily cardinal Gloriana silk 106 , 061 Ver à soie , soie d'Alger 2941, soie surfine 223, soie Metallic au sextant 122440, soie de Paris 3023 Guterman sulky ca02776 Madeira Metallic 12 et 305 Beads mill Hill petites 40332, 40557, 42101, 42012, 40553 42011 Mill Hill glass seed beads 02077, 02011" Now that made me blush again! I am blessed with great readers indeed. So here are Francoise's pictures of Strawberry Fayre: To all others who follow along with the Strawberry Fayre project: do read the great comments on last week's blog post (and probably future ones as well :)!). You are such a helpful bunch and this project is so popular, that great comments came in on possible substitutes. Someone even came up with the brand name of a possible substitute for the fabric! You will be able to find all blog posts regarding the project by clicking on either 'Carolyn Pearce' or 'Strawberry Fayre' in the right-hand categories column.
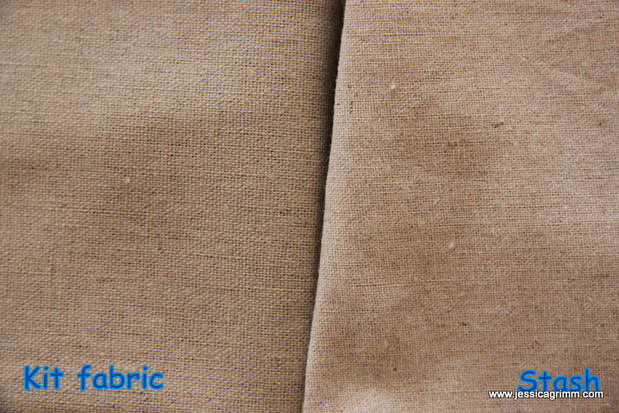
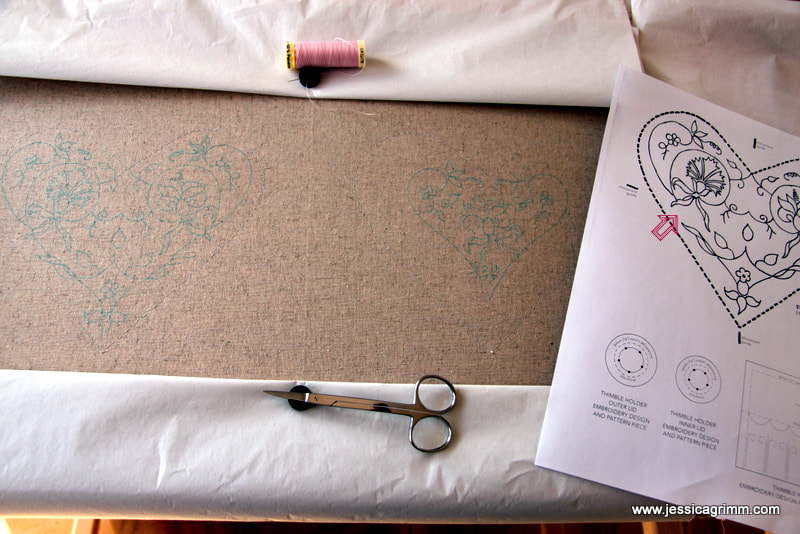
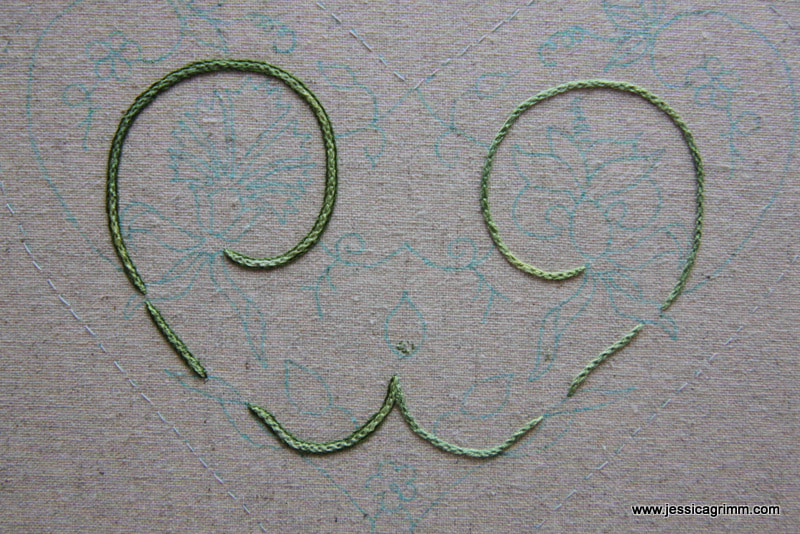
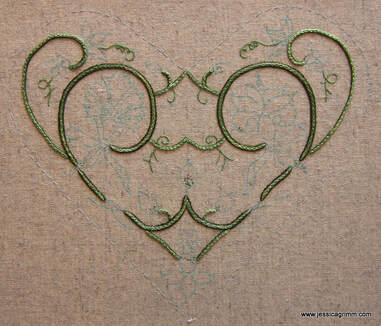
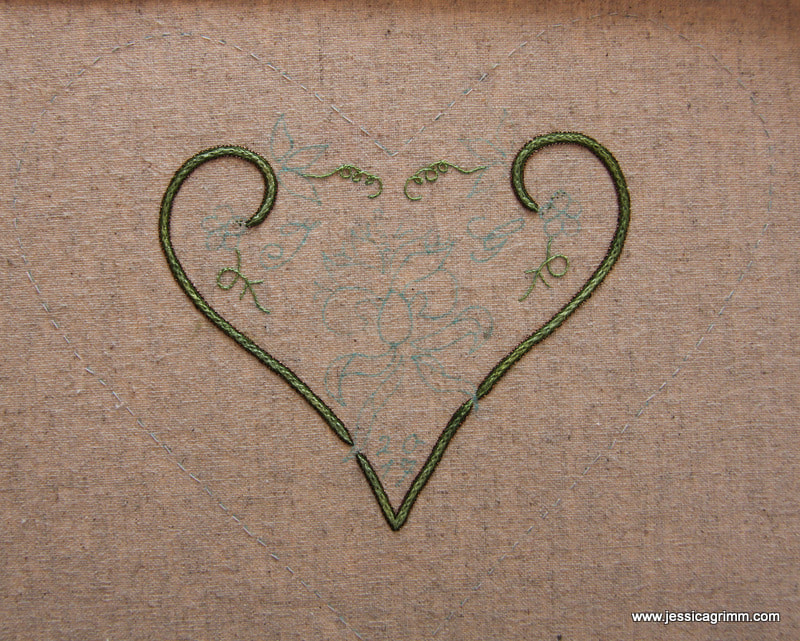
Time to start a new project! Not that there aren't any W.I.P.s left... However, I have the perfect excuse to start this particular project: YOU. It feels nice to be important doesn't it? The latest Carolyn Pearce project 'Strawberry Fayre' featured in Inspirations #95 generates quite a buzz in the worldwide embroidery community. And rightly so! It is every bit as cute as Carolyn's other world-famous project: Home Sweet Home. There is however, a bit of a downside. As with the Home Sweet Home workbox, this project requires an awful amount of speciality threads and finishing materials. We all know that, depending where you are in the world, these are a nightmare to source. Inspirations does offer a kit, but at AUD$255.00, that can be quite steep. Quite frankly, if I wasn't an embroidery tutor who wants to be at the top of her game, I would probably not have bought one. So, what should one do if one desperately wants to stitch this particular project, but doesn't have access to either an elastic wallet or a well sorted needlework store? Follow me along on this blog! Over the comming months I will be stitching the project using the kit provided by Inspirations. I will show you what's in it and talk about readily available substitutions which would do the job beautifully too. Now, let's start! I have decided to start with the front and back heart. They require the most and similar stitching. This will give me a good idea of the threads used and thus of possible substitutes. But first things first. When the Inspiration's kit arrived, I was a little disappointed to find that the fabric included isn't the original one used by Carolyn. It is a little difficult to convey in a picture, but the fabric in the kit has a looser weave and is slightly stiffer. It does not feel as nice as the fabric which came with the Home Sweet Home kit. Fortunately, back then, I bought 10 meters of this fabric and still have enough left to use for Strawberry Fayre! And that's not the only change I've made. Ever since I attended the Royal School of Needlework, I love to work on a slate frame. As a slate frame takes some time to dress, you don't want to use it for small scale projects. However, the amount of stitching on the front and the back heart do justify the use of a slate frame. I've also swapped the permanent marker for an aqua trick marker. In order to transfer the design, I made a copy of the pattern sheet and thickened the lines with a permanent black marker. The lines were now clearly visible when using my lightbox for transferring. And that's when I found a little mistake on the pattern sheet. There's a stem missing (see arrow in picture above). Happens to the best of us :). I've also added my initials and the year to the back heart. Let's talk about the actual embroidery. I'll start with the stems and move onto the flowers and leaves in future posts. A combination of four different threads is used to stitch all stems on the front and the back heart: Au ver a Soie antique metallic #223 black copper, DMC stranded cotton #937, Gumnut yarns 'stars' stranded silk #606 rainforest and Gütermann sulky rayon no. 40 #1177 light avocado green. The pattern advices you to stitch the thickest parts of the stems with two strands of the Gumnut silk using Hungarian braided chainstitch. I have to admit that I struggled with that. Using two (or more) strands of a particular thread poses its problems when maintaining good tension. In this case, we are advised to use a spun silk which is already a bit 'fluffy'. Now add these two characteristics together and you are in for trouble. In this case: you'll bound to lose definition in your stitching. Normally, the Hungarian braided chainstitch produces a nicely defined braid. Well, it might be me, but I couldn't do it. Looking at some of the close-up pictures in Inspirations, neither always could Carolyn. However, her stitching on the front and back heart look immaculate. That puzzles me a little. Or could it be she used two different threads or batches of thread? So, if you are going to stitch this project using more readily available threads or your own stash, I propose that you'll use a #12 perle for these parts of the stems. You could for instance use Anchor #265 or #266 these are not variegated, but still a good match! Unfortunately, DMC does not have a good match. And if you want to have an almost perfect variegated match, you can use House of Embroidery #6a Privet. What I really like is the adding of a stem stitch outline to the Hungarian braided chainstitch using a darker shade of green. It really lifts the previous stitching! This again is outlined with a stem stitch line using the Au ver a Soie metallics. Not nice to stitch with as this is a metallics. Can't be helped, the effect is lovely :). You could substitute this thread by using a single strand of either DMC or Anchor metallics. Us the 'darker' of the gold options. DMC Diamant even has a copper colour, but bear in mind that this thread is thicker than the Au ver a Soie. Next up is something pretty puzzling. The thinner stems should be stitched in chain stitch using two strands of the Gumnut again. Now that's straight forward, although I would swap for the perle #12 next time :). But then it gets a little strange. One should whip the chainstitch with one strand of the Gütermann Sulky? Huh, you can't see that! Not in the pictures and not when you work it yourself. So, I omitted that on all but one stem :). This rayon thread is also used for stem stitching the tendrils. Not a nice task either as this rayon thread untwists itself faster than woman can stitch. It is therefore an excellent idea to swap it for a single strand of either DMC stranded cotton #704 or Anchor #225.
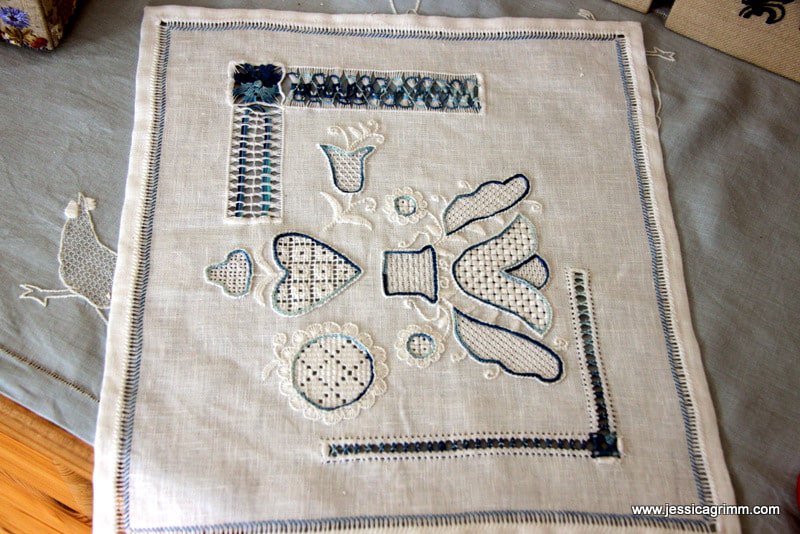
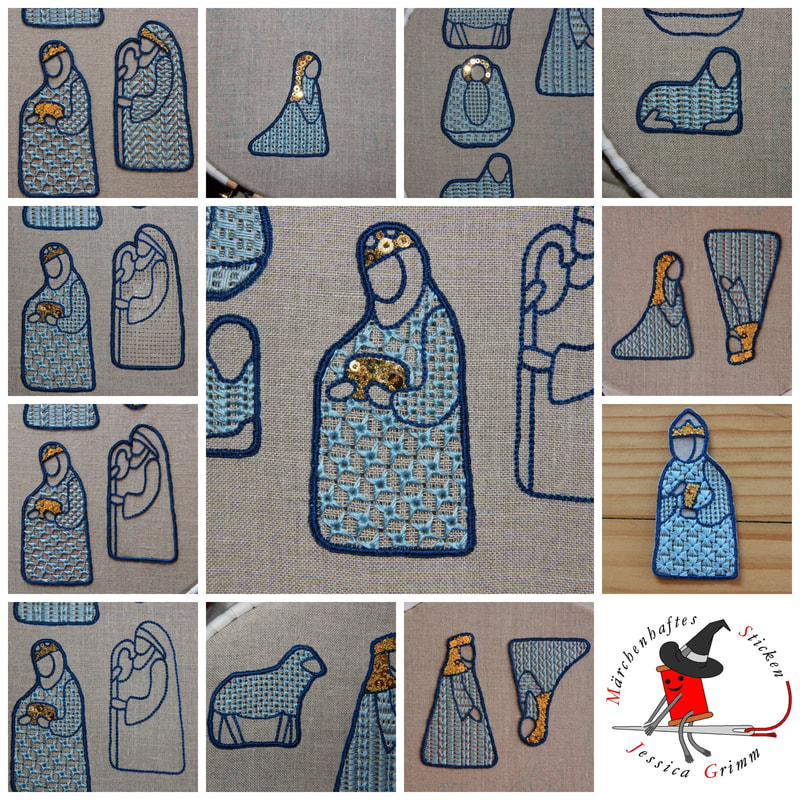
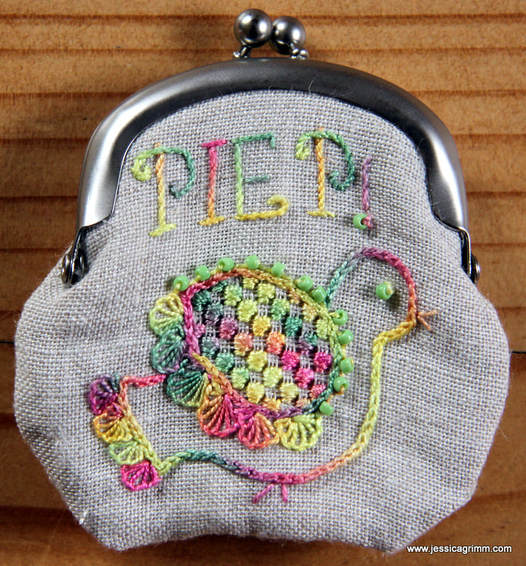
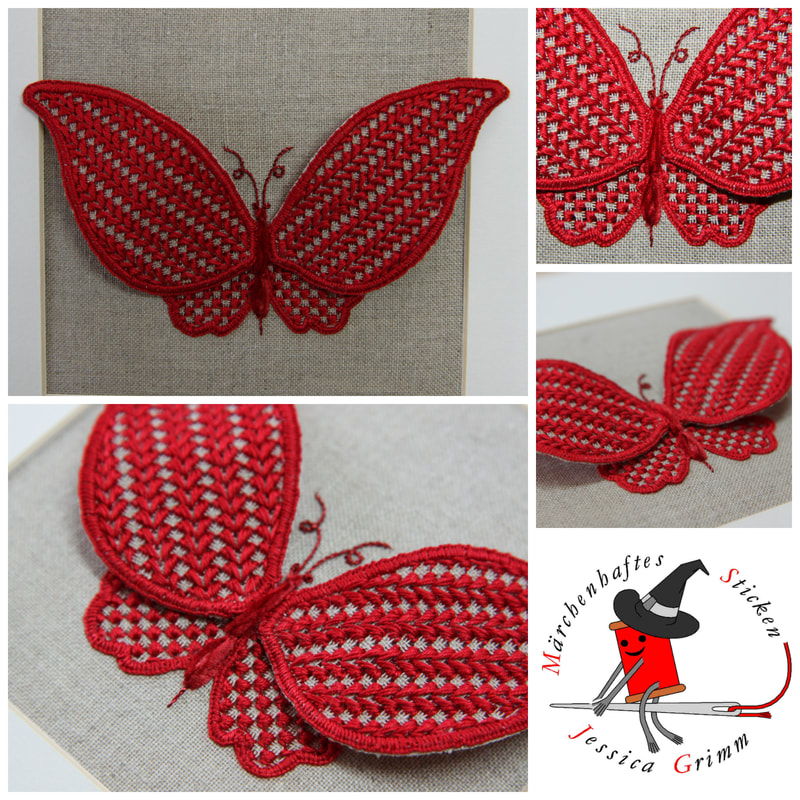
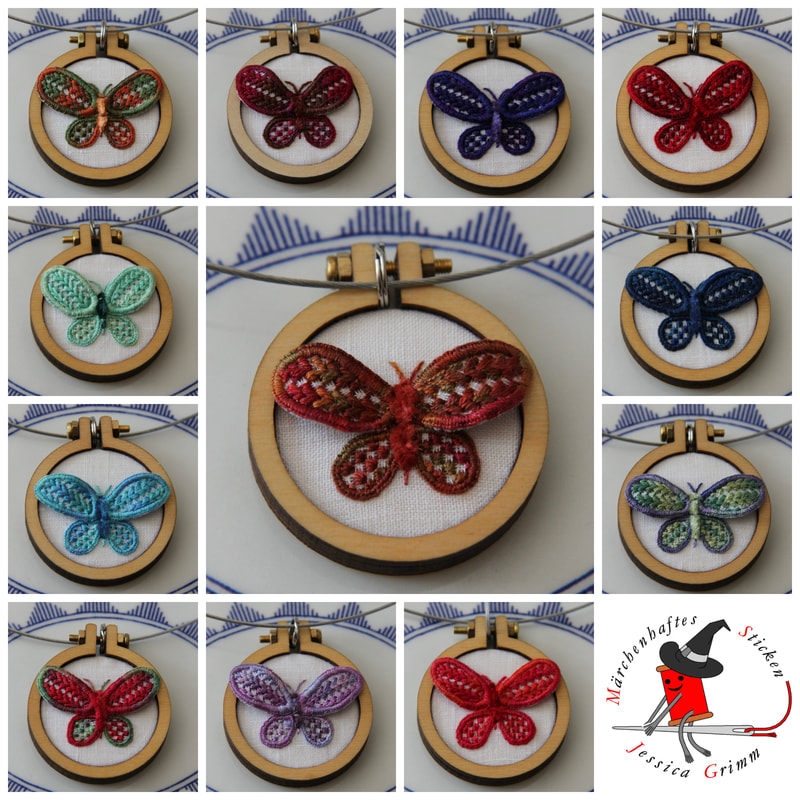
And that are the stems on Strawberry Fayre! Remember that, if you are going to swap out the recommended threads by my suggestions, you'll test your colour selection together! Next time we'll visit this project, I'll show you the threads and embroidery on the large pink flowers. Note: I never finished this project as the instructions were faulty and the threads in the very expensive kit were not nearly enough. Today I am going to write a bit about my love affair with Schwalm embroidery. You see, I can pinpoint exactly where I encountered this pretty whitework embroidery technique for the first time. Not in its native Hessia, one of the federal states of Germany. Nope. It was Inspirations issue 69 in the spring of 2011. The beautiful 'Sense of Place' by Luzine Happel featured hearts, sunflowers and tulips filled with pretty patterns. I so wanted to learn this embroidery technique! But, I had never done any whitework embroidery other than a huge Richelieu window pane featured in an embroidery special of the Dutch Libelle. Luckily, I had just started my Royal School of Needlework Diploma course. And it happened to include a whitework module. Little did I know that they had never heard of this type of embroidery. And my tutors weren't thrilled at the prospect of teaching me something they were not familiar with. So I ended up with a whitework sampler featuring only a little bit of true Schwalm embroidery. And yes, I didn't like the prospect of an all-white piece either :). Now most of you will by now know that I don't like table cloths. Although, to be honest, there is nothing wrong with these pieces of textile. It is just that when I tell people that I embroider for a living, THEY picture me amidst heaps of neatly stacked embroidered table cloths. Now that gives me goose bumps. But for the wrong reasons. It truly freaks me out. Embroidery is so much more than just a means to adore a table cloth! Instead, one of the Schwalm-things I made was a nativity scene to be hung in front of my kitchen window. It is an ongoing process and I hope to add camels, a donkey and an ox this year. And although I like white, I like colour better. White reminds me of those pretty shoes I once had as a girl. They were lovely, but not so white for long. The same with those pretty lacily white stockings me and my younger sister wore under our Sunday dresses as girls. They attracted dirt like nobody's business. So in came the use of colour in my Schwalm embroidery projects. Now, traditional Schwalm embroidery is done with cotton a broder. A not so shiny non-strandable cotton thread. It is nice, but cotton perle and silk threads are nicer. Or at least in my opinion they are. I especially like to use variegated threads as they form pretty colour patterns when used with the many different Schwalm filling stitches. So, by now, I had changed the colour of things, the materials and the stitching topic. What's next? How about adding a stumpwork technique to the mix? Using wired elements with Schwalm embroidery really tickled my fancy! It looks so elegant and yet isn't too hard to create at all. But I wasn't quite finished yet! How about one shrinks the butterfly? For instance, until it fits a tiny 4cm Dandelyne wooden hoop. Thanks to my training in Appenzeller whitework embroidery, I knew that you can add tiny filling stitches (some the same as in Schwalm embroidery; after all there is only so much you can do with a blank grid) into a tiny grid of withdrawn threads. Born where the elegant butterfly pendants! Still using original heritage skills, but sans the table cloth. After weeks of stitching (one butterfly takes about six hours to create), I now have a colourful bunch of lovely butterfly pendants.
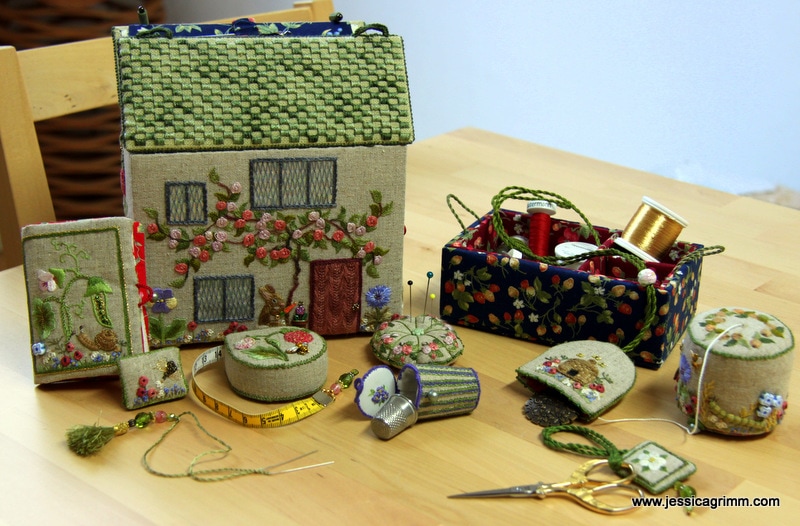
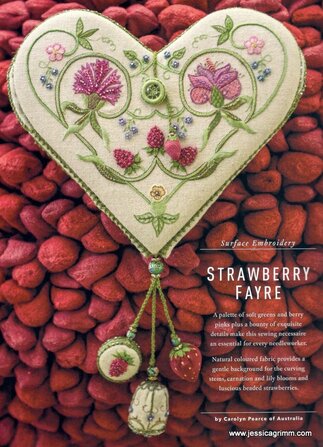
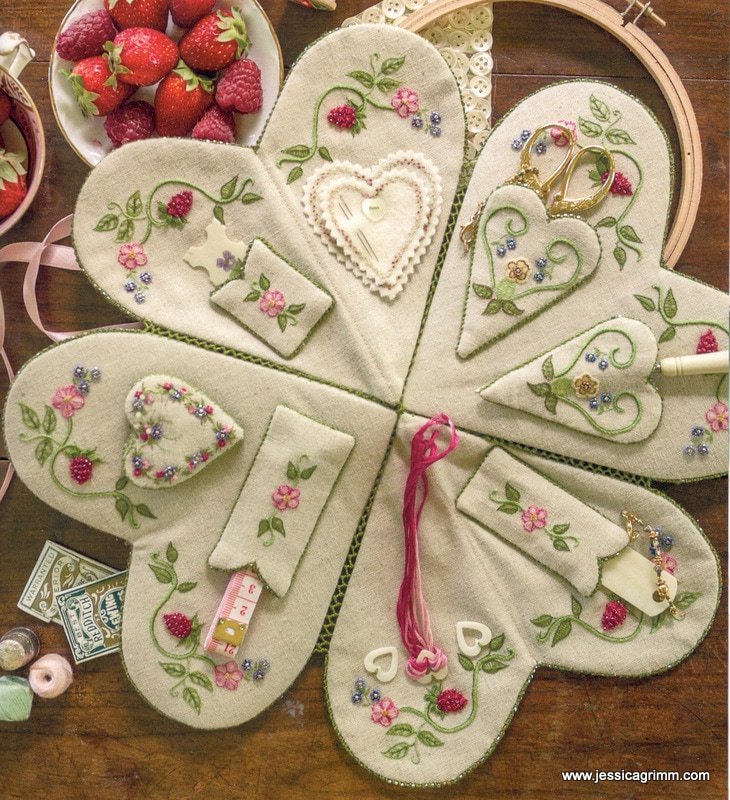
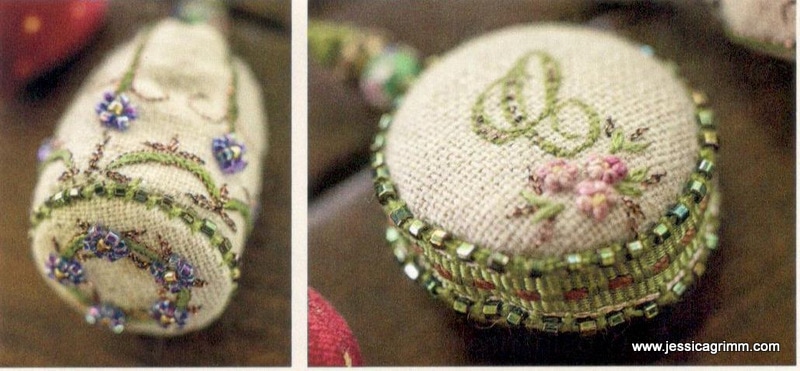
If you would like to know more about the traditional form of Schwalm embroidery (including its use on folk costumes), check out Luzine Happel's website and blog. Also available in English. Luzine self-published a whole library on Schwalm embroidery. These are very good books if you want to learn this pretty whitework technique. I highly recommend them! The books are available in German, English and even French. Happy stitching! Last week, I received my copy of Inspirations Magazine #95. And wow what a beautiful issue it is! Packed with great embroidery projects exploring a wide range of embroidery techniques. Clear favourite for me: Strawberry Fayre, a heart-shaped sewing necessaire designed by Carolyn Pearce. Carolyn is one of my favourite embroidery designers. A couple of years ago, I stitched her famous Home Sweet Home needlework box. The sewing necessaire is packed full of lovely stitched details in green, pink and blue. This projects uses 40 embroidery stitches ranging from the well-known French knot to the more exotic cable plait stitch. Equally, it uses a whole array of yummy embroidery threads in cotton, silk, rayon and metallic. And the design uses beads as well! A perfect project to learn new embroidery skills. Not unlike a sampler, but then way more useful. Inside the sewing necessaire there is ample room for your scissors, stiletto, tape measure, needle pages, pincushion and thread rings. The heart-shaped necessaire closes with a pretty Dorset button. Another pretty technique you will learn from this project! Dangling from the necessaire are exquisite little needlework essentials: a pinwheel, an emery strawberry and a thimble holder.
I so love this new Carolyn Pearce design, that I ordered the kit as my birthday present (I'll turn 39 on Friday!) from Inspirations. As an Inspirations subscriber, I paid €146 + €26 shipping. Yup, that isn't cheap. However, Carolyn Pearce is known for using many different components in her designs. Trying to gather them yourself from suppliers all over the world isn't necessary any cheaper. That said, if you have a large stash and you don't mind swapping things out, you will be perfectly fine stitching this necessaire with your own supplies! As the kit is on pre-order at the moment (it will probably ship at the end of July) and will take 3-4 weeks to arrive in Germany, enough time to see if there are others who plan on stitching this project. Wouldn't it be great to hook up online and stitch this project together? Like a Stitch Along (SAL)! Please leave your comment below if you are up for the game. Looking forward to start... Note: I have never finished this project as the instructions turned out to be faulty and the materials in the kit were not sufficient. |
Want to keep up with my embroidery adventures? Sign up for my weekly Newsletter to get notified of new blogs, courses and workshops!
Liked my blog? Please consider making a donation or becoming a Patron so that I can keep up the good work and my blog ad-free!
Categories
All
Archives
July 2024
|
Contact: info(at)jessicagrimm.com
Copyright Dr Jessica M. Grimm - Mandlweg 3, 82488 Ettal, Deutschland - +49(0)8822 2782219 (Monday, Tuesday, Friday & Saturday 9.00-17.00 CET)
Impressum - Legal Notice - Datenschutzerklärung - Privacy Policy - Webshop ABG - Widerrufsrecht - Disclaimer
Copyright Dr Jessica M. Grimm - Mandlweg 3, 82488 Ettal, Deutschland - +49(0)8822 2782219 (Monday, Tuesday, Friday & Saturday 9.00-17.00 CET)
Impressum - Legal Notice - Datenschutzerklärung - Privacy Policy - Webshop ABG - Widerrufsrecht - Disclaimer



 RSS Feed