|
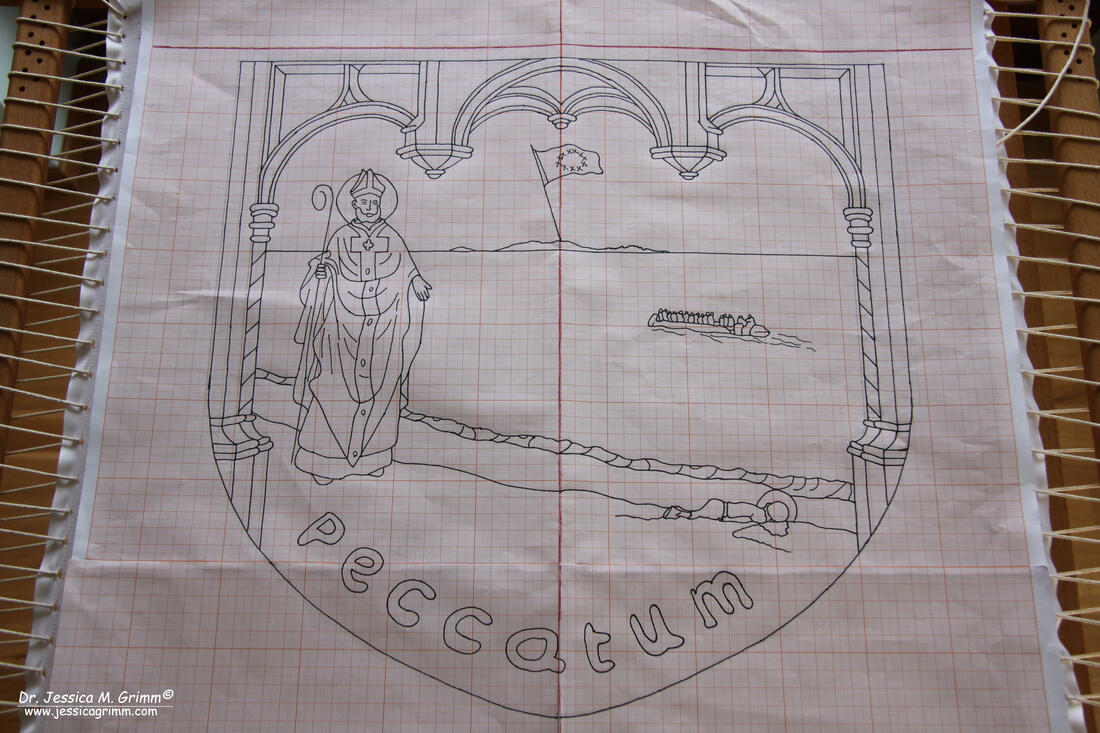
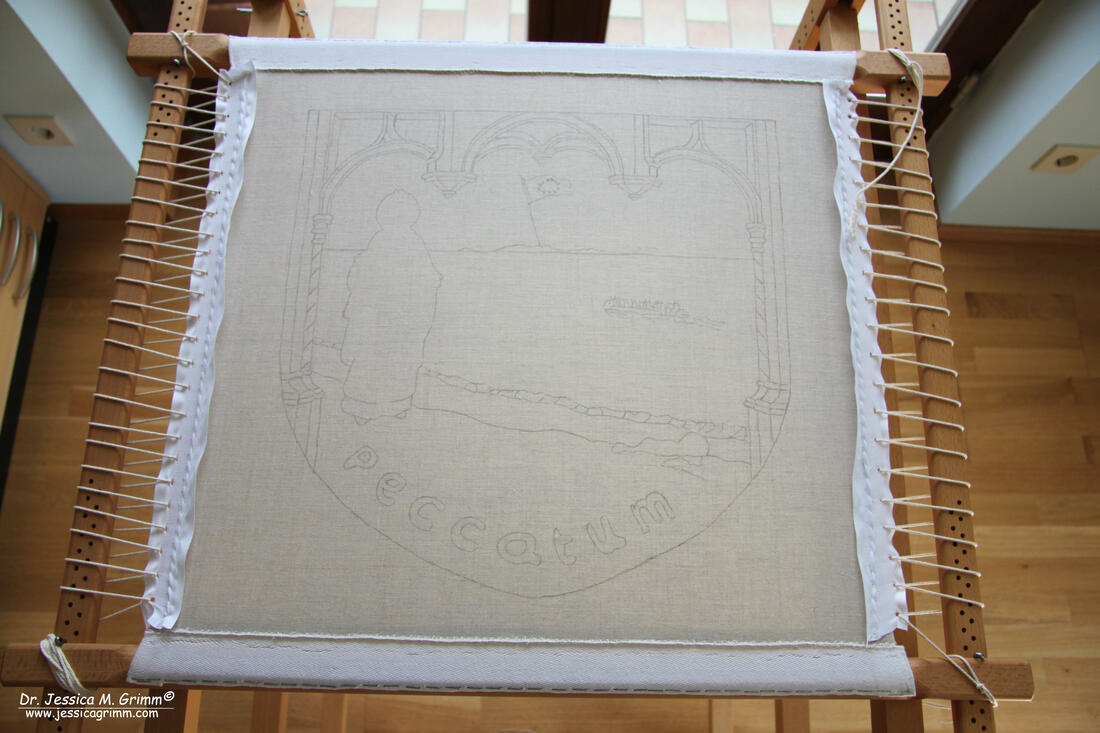
When I was still working on Pope Francis, I already had the idea for my next piece in my head. After a bit of research, I have made the drawings and transferred the pattern onto 40ct Zweigart natural linen. As the piece is quite big, I had to use a window to do the pattern transfer. And even then it only just fit. So what is it going to be? I am sort of working on a series using the religious goldwork produced in the first half of the 16th century as my inspiration. After two orphreys (St. Laurence and Pope Francis) I needed a bigger canvas for the next story I wanted to tell. So I am going for the shield of a cope or pluviale in Latin. This type of garment may be worn by all ranks of clergy during processions. It is modelled on the late Roman raincoat. The now decorative shield was originally a hood. For me, the migration crisis of 2015 has left some powerful images in my head. There were these family fathers on Munich main station looking so stressed when trying to keep their wife and children safe. I immediately wondered how well my own father would cope with us at the central train station in Damascus. He is good with keeping an eye on us, but his Arabic is rather poor... Furthermore, I and my husband travelled amongst refugee families when coming from Vienna. When I confirmed that we had crossed the German border some refugees started to praise God. But the most powerful picture of them all has been that of the little Syrian boy Alan Kurdi washed up on a beach in Turkey. Whatever your views on immigration, a drowned two-year-old war victim is a shame on us all. That's why the Latin word for 'sin' is written in the sand. My cope shield shows how Saint Nicholas finds the body of Alan on the beach. Saint Nicholas was bishop of Myra, in Turkey, in the early fourth century. He happens to be the patron saint of sailors. Also on my cope shield is the silhouette of the Greek island of Kos. Alan and his family were trying to reach Kos when their inflatable boat capsized and many drowned. The body of Alan's mother and brother also washed ashore. When researching for the piece, I found out that the family had tried to officially immigrate to Canada as they already had family there. Fulfilling all the bureaucratic requirements proved impossible and so the application was denied. This sad story has a lot of similarities to the heart-breaking stories of Jews who tried to migrate out of Nazi Germany in the 1930s.
So what am I planning to do embroidery-wise? The dome and columns framing the piece are going to be couched goldwork. The figures of St Nick and Alan Kurdi will be done in or nue. For the fast background of sand, sea and sky I will be using classical canvas filling stitches. Especially for the later, I am hoping to use fairtrade hand-dyed silks by House of Embroidery. Poverty and hopelessness, now increasingly the result of climate change, are the underlying factors of conflict and migration. Let's combat this one stitch at a time!
14 Comments
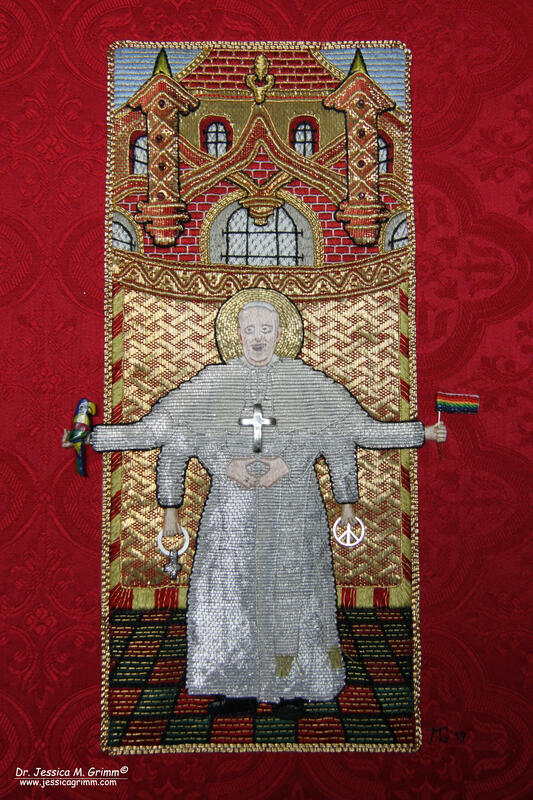
Before we finish the pope (hmm, for some reason this sounds very wrong), I'd like to tell you about a special place I visited this weekend: the Abbey of Niederaltaich. Here, Benedictine monks live according to the Roman Catholic rite (West) and the Byzantine rite (East). They celebrate divine office parallel in two churches: a Catholic church and a Russian Orthodox church. As, during the Russian revolution, the Russian Orthodox church was suppressed, the pope asked several Benedictine monasteries to study and celebrate the Byzantine rite (and possibly take in refugee monks from Russia) in order to preserve this branch of Christianity. Niederaltaich is such an 'Ark' and continues to function in this unique way. And as a visitor, you are more than welcome to join them and ask lots of questions. I and my husband were fortunate enough to be invited to the Easter service at a small monastery on Crete last year, but couldn't understand much due to the language barrier. At Niederaltaich however, the Russian and Greek have been completely translated into German. And the signing of the monks is just divine. And so are the beautiful icons. If you are interested in such things, this is definitely a place you should visit! In last week's blog post you could read how I finished the background. This week you'll see how I finished the figure of the pope and how I put the whole picture together. Firstly, I had to build up the rest of the figure with or nue. As the pope is always mainly dressed in white, this isn't an easy task. I've used two shades of white and two shades of grey silk to work the or nue over silver-coloured Japanese thread. Contrasts are rather subtle and the next time, I will probably opt for stronger contrast. You can see in the picture how I use my pencil to add remarks on shading and colour placement. The hands and faces are always very finely silk shaded. When I worked St. Laurence, I learned that simply silk shading over the Japanese thread doesn't work. Instead, I use Bondaweb and a small piece of very fine linen. The Bondaweb prevents the linen from frying. I've cut out the hands and glued them in place. I then carefully silk shaded the hands and outlined them. Silk shading the face posed a problem when stitching St. Laurence. The 40ct Zweigart linen was just too coarse to get a fine enough result. I remedied that this time by glueing a small piece of the very fine linen in place using Bondaweb again. It worked really well! I did not attempt to get a life-like image of the face of the pope from the photo I had. In that picture, he has very dark bags under his eyes and quite red ears... Instead, I opted for a more cartoon-style face. Just so people recognise him as Pope Francis. Last but not least, I defined the figure further by couching down fine silver plated Twist on the pope's clothing. I also added small beads for the buttons. Years ago, I found a small silver-coloured cross and it happened to be perfect for this piece! With the background and the figure finished, it is time for the scary bit: putting the two together. First comes the cutting-out of the figure. The small seam is turned under and secured with a little dab of glue. The background gets re-framed onto my slate frame. I keep the tension just below drum-taut, this time. I then pin the figure into place and applique him to the background with a matching thread. In this case, I also needed to insert the stumpwork hands I had made from wrapping paper covered wire with a single strand of stranded silk. One of the hands holds a wooden parrot that came off a pair of earrings I had saved from the bin at a charity shop. The same holds true for the peace-symbol. The venus or female symbol is made of a metal washer. The "plus" part is stitched with metallic thread by Kreinik. By placing a black outline around it, the different parts form a single symbol. The rainbow flag was made by stitching single rows of chain stitch in the appropriate colours using DeVere yarns silks. The stick is a piece of gold-coloured paper covered wire. For maximum contrast and in keeping with late-medieval traditions, I outlined the pope with black silk. I then cut out the whole orphrey and turned under the seam. I framed a piece of red patterned cotton damask onto my slate frame and appliqued the orphrey onto the new backing. Currently, the piece is at the framers to get the same hand-gilded frame as St. Laurence has. Can't wait for the piece to return to me!
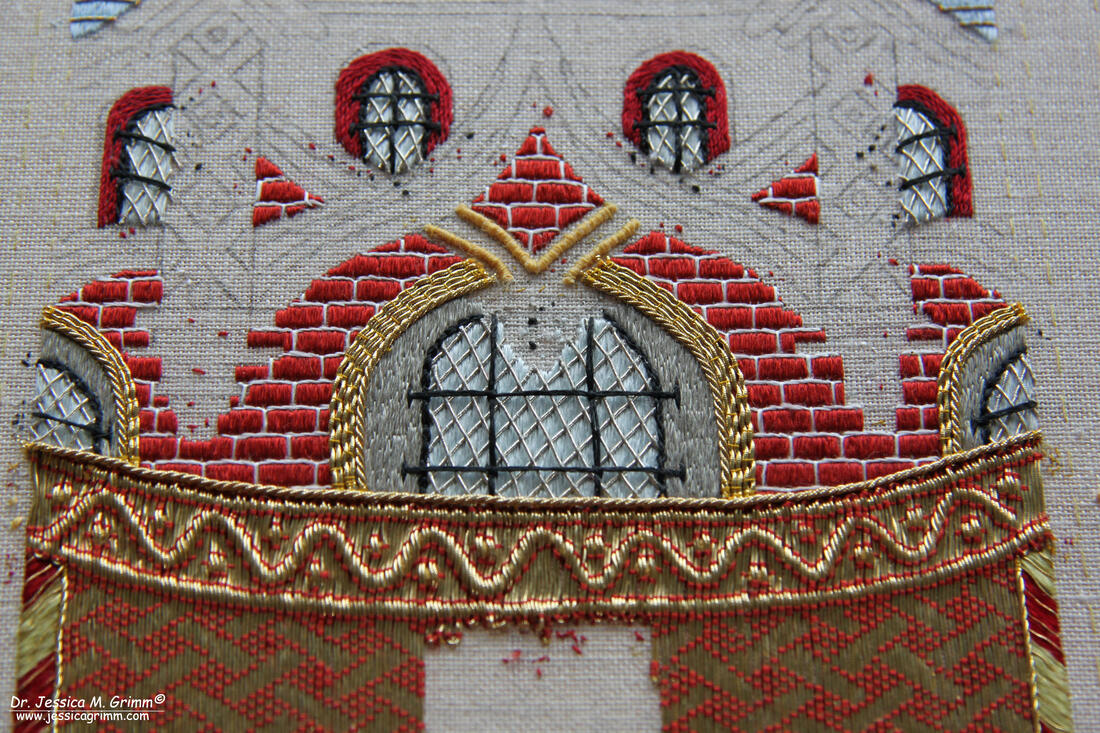
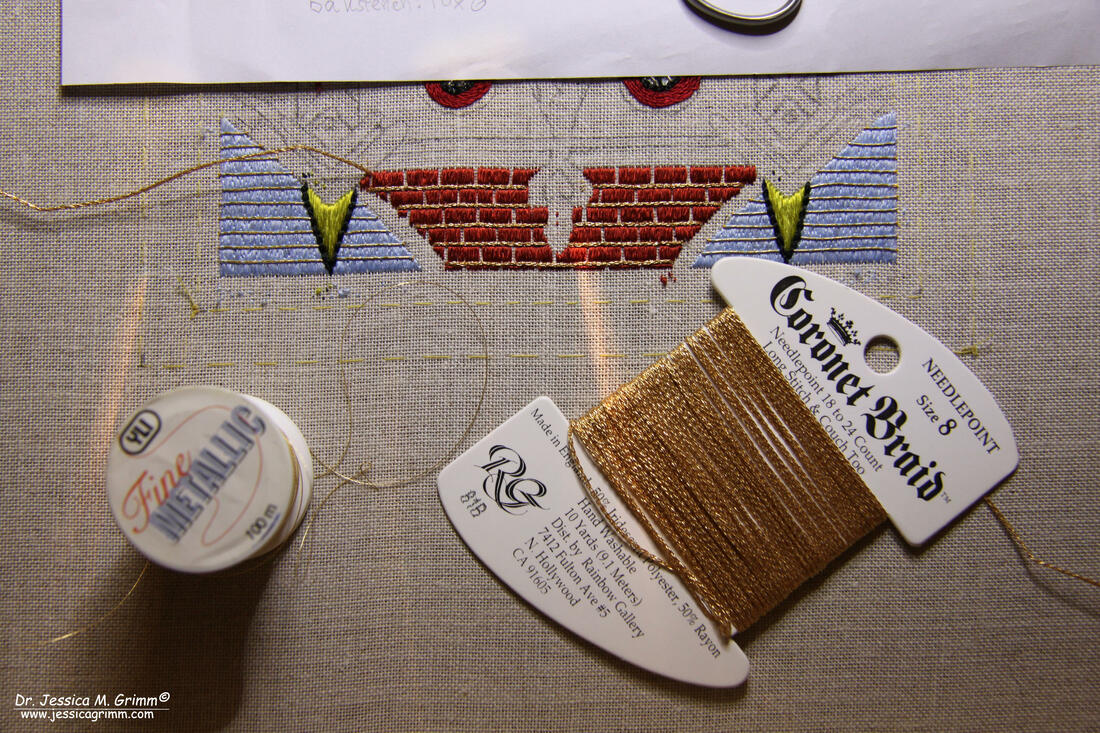
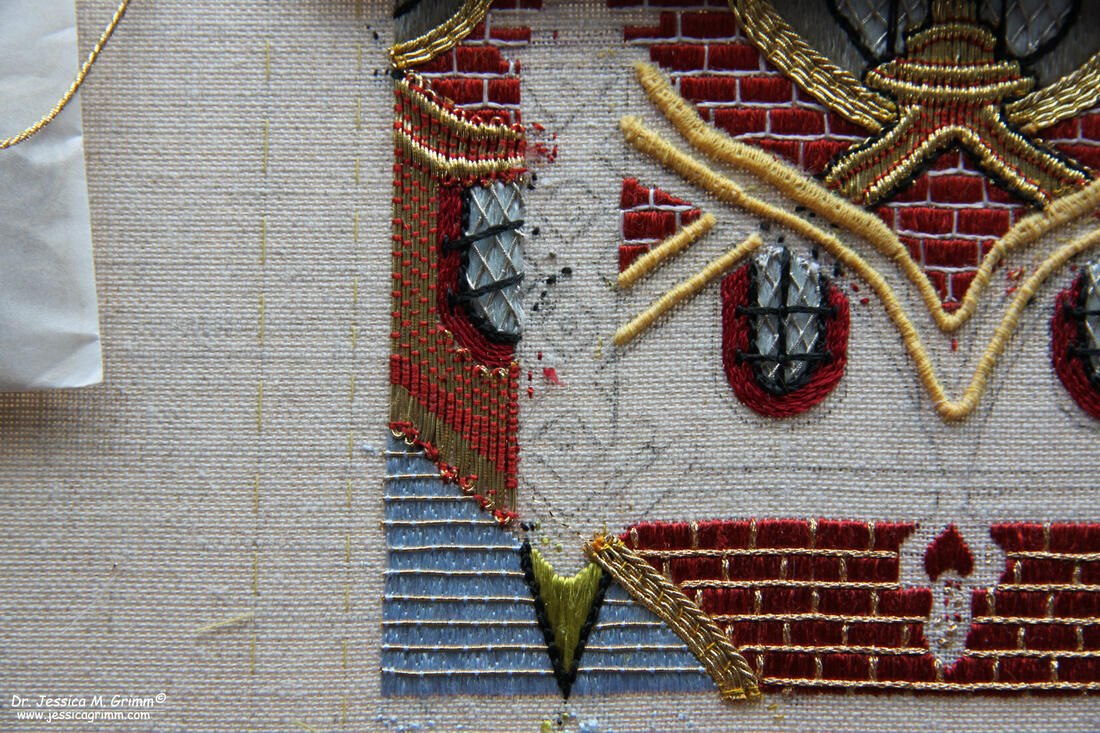
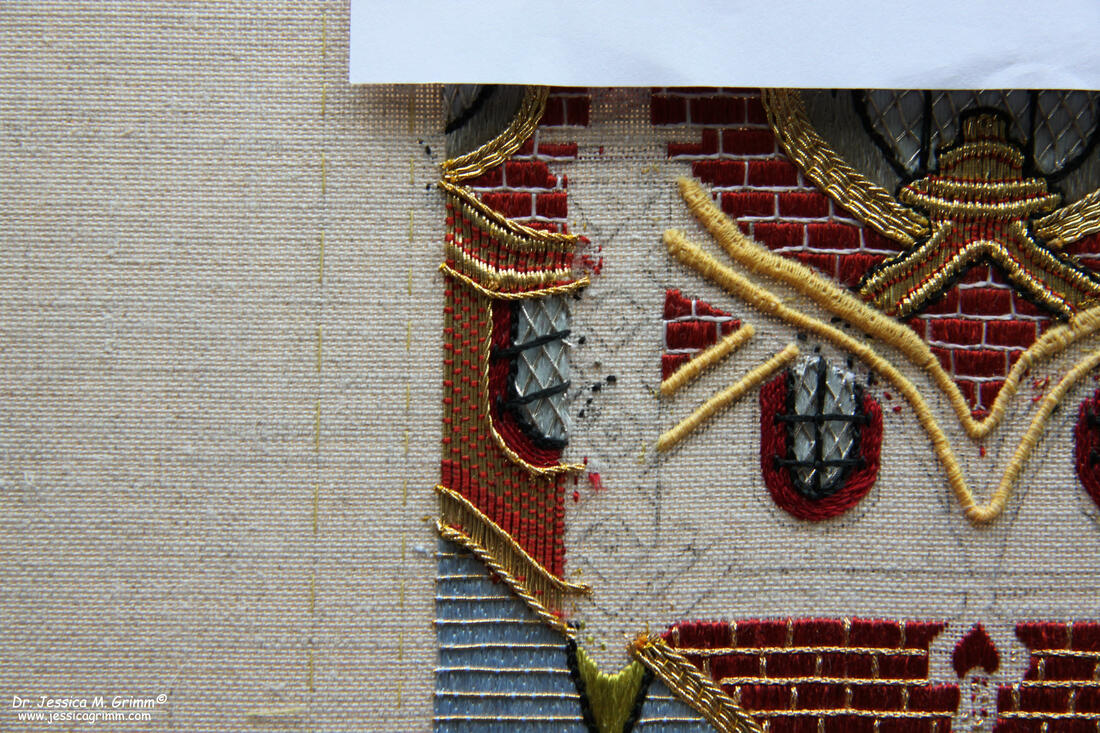
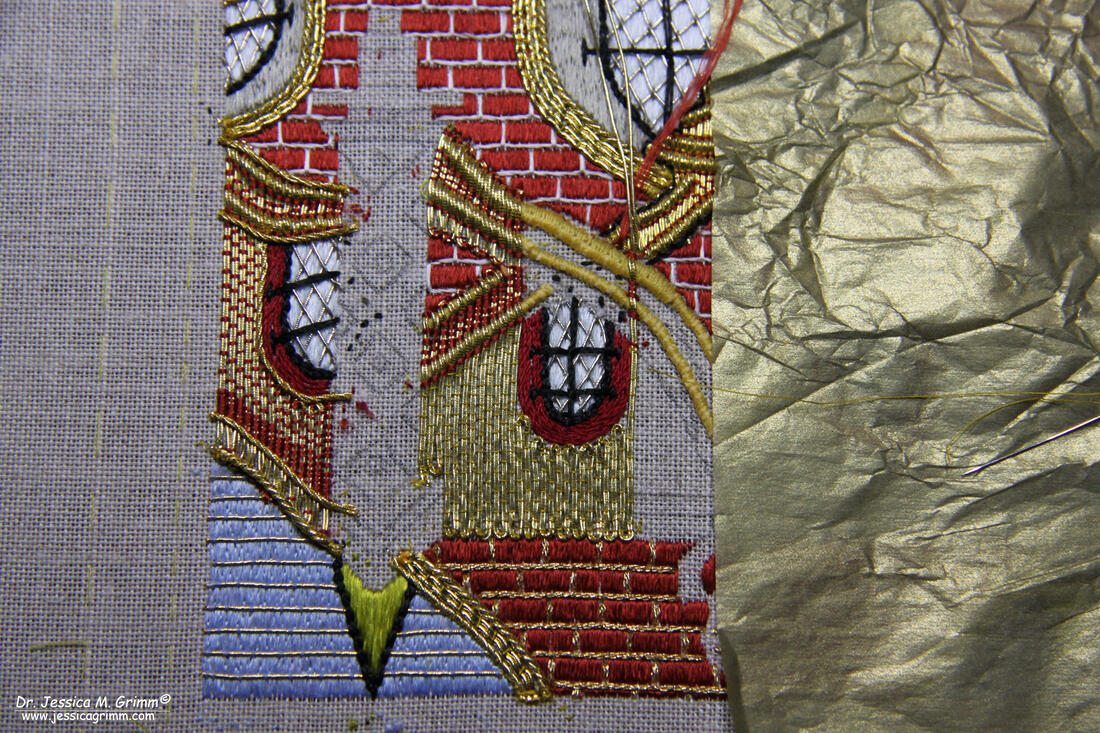
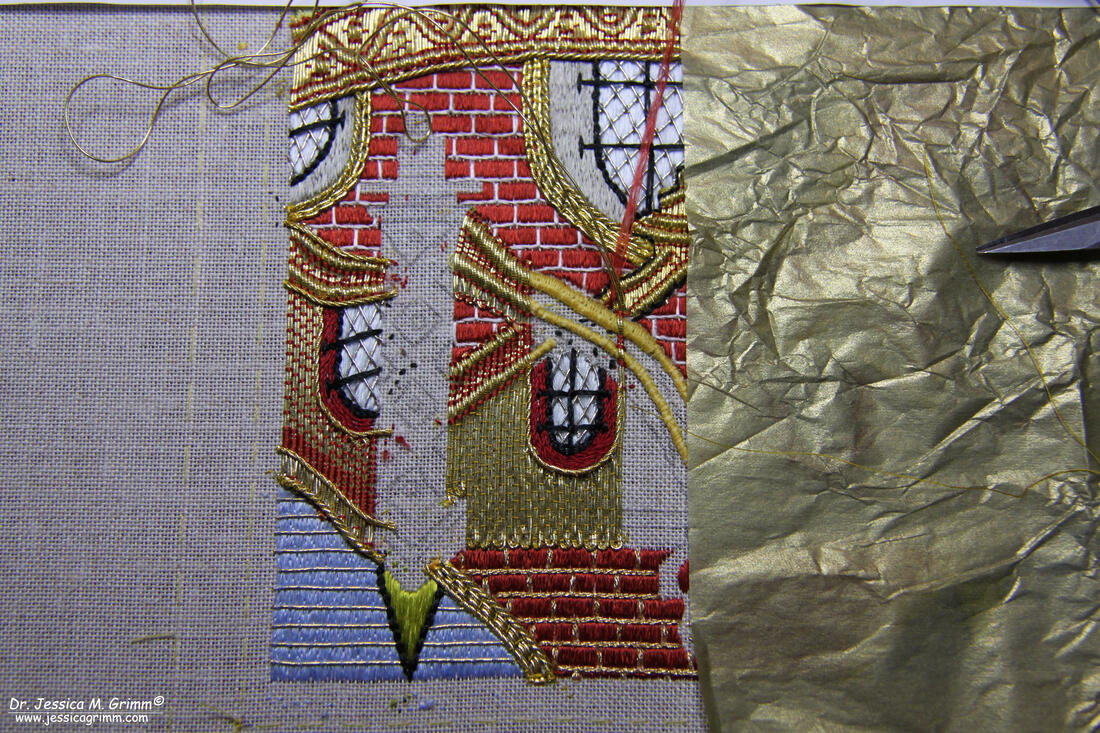
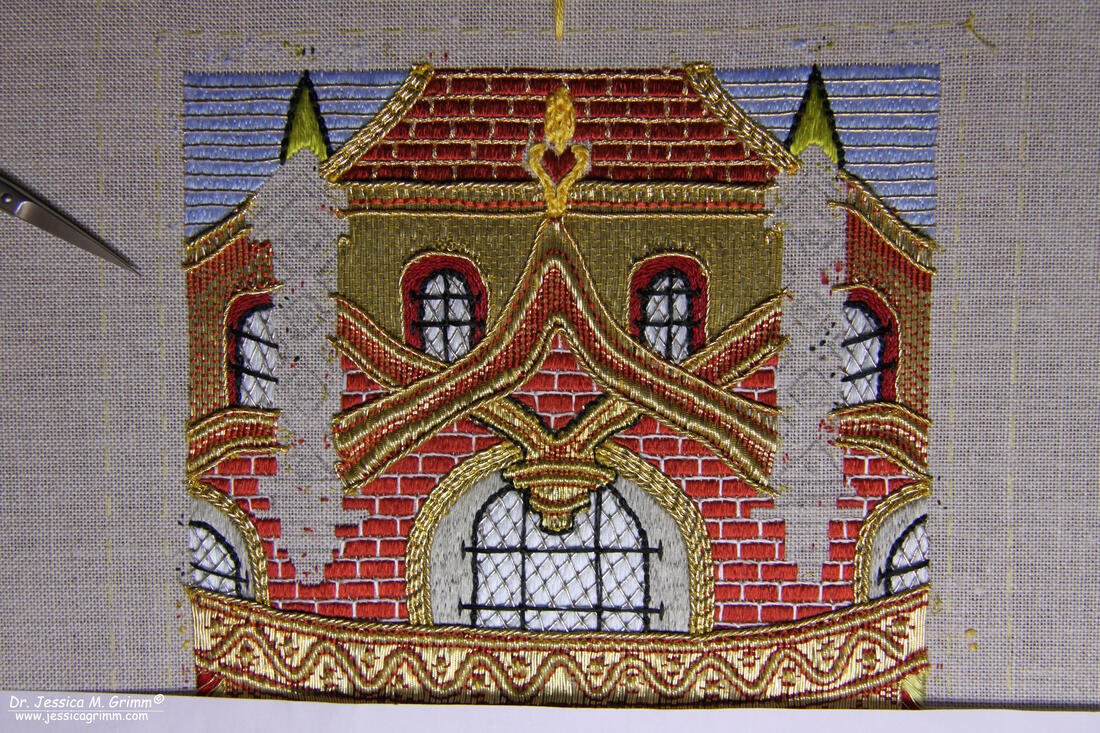
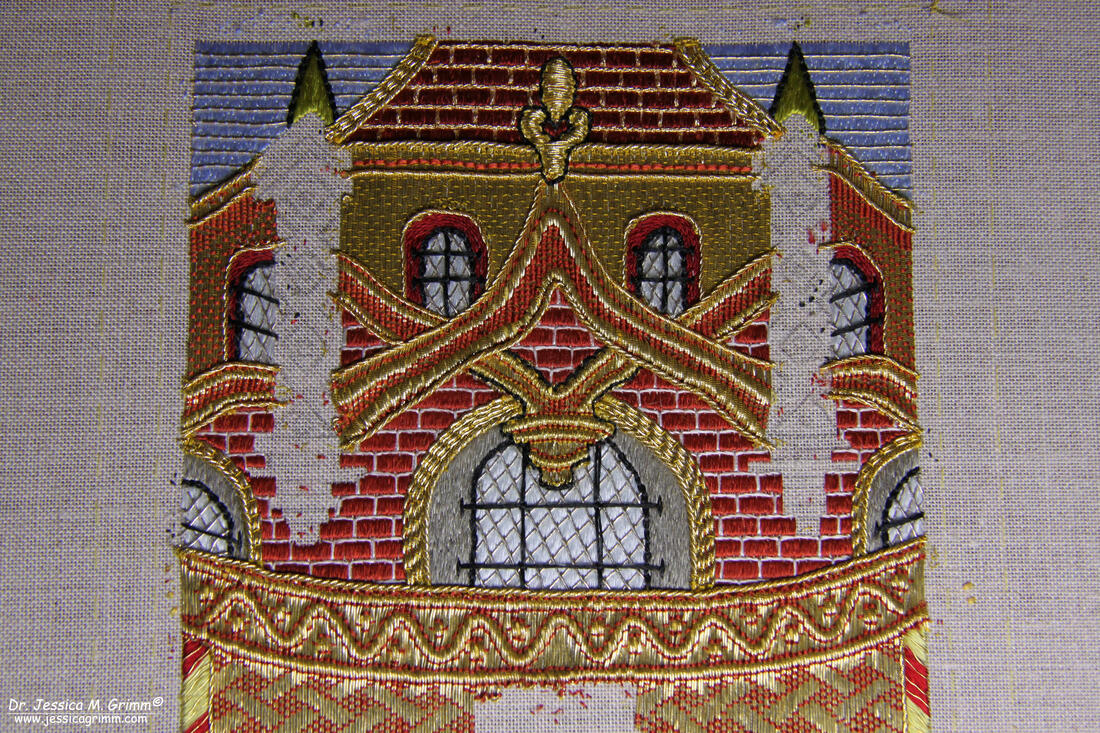
In the mean-time, I have started the drawing for the next piece. Not an orphrey, but the hood of a cope this time. I need a bit more space to tell the story of illegal immigration across the Mediterranian Sea. More on that in a future blog post. You can find the other blog posts on Pope Francis by clicking the category on the right side. A few days after I had submitted my goldwork piece for the 'Emerging Fiber Artist' print exhibition by the Fiber Art Network, I received an email. Pope Francis had not made it into the exhibition due to the high volume of extraordinary work submitted this year. I did ask if they could be a little more specific, but I did not receive an answer. My guess is that, due to its religious content, my piece might be uncomfortable. Or maybe it is because I am not an emerging, but an established textile artist? Or were they looking for more abstract pieces? Or more mixed-media? We will only know when the print exhibition comes out. In the meantime, let's continue exploring how I made Francis shine! One of the main differences between modern goldwork techniques and the way Late-Medieval embroiderers used their gold threads, is that they don't often plunge. You can see that clearly in the picture above. The ends of the threads forming the lentil around the window are just cut to size and then secured with a few extra stitches. Another difference: gold threads are happily layered. This is often done to accentuate parts of the design. Or to hide an ugly edge as in the picture above. The gilt Twist covers the ends and turns at the top of the gold screen behind the figure. At first, it is really weird to lay a goldthread over other goldthreads and stitching it in place. Yes, you might stitch through the threads, but that's okay! And this layering of threads opens up so many nice possibilities. As I am not doing a historical reconstruction, I was able to use 'modern' threads. Originally, the separations between the roofing tiles were stitched with passing thread. Due to the pattern, they had to start and stop the thread many times. Far too time-consuming! I decided to use the Coronet Braid #8 by Rainbow Gallery. I couched my long stitches down with a fine metallic threads by YLI. I struggled a bit with the keystone. The padding was a straightforward yellow cotton string. But then I used the same thread as I had used for the gold screen: gilt passing thread #6. However, I wasn't pleased with the result. The thread was just too stiff to sit smoothly atop the padding. So, out it came... That's not a nice job and it probably took twice as long as putting it in. Due to the fact that some of it went on top of previous stitching, that had to be repaired too. Luckily, my second attempt with a finer passing thread looks very pleasing. Next up were the city or castle walls. Firstly, I put in all the string padding. When the padding was wider, I simply couched down an additional piece of waxed yellow string. The construction of the city walls is very straight forward: couching down gilt passing thread #6 with red Chinese flat silk. Again, the edges are covered with two thicknesses of gilt Twist. This defines the shapes and hides the rough edges underneath. Next up is the construction of the middle section of the city walls. Due to the nature of goldwork, you are often left with gaps between previous stitching and the next. In this case, there is a gap between the passing thread and the red silken lentil of the window. However, this gap nearly disappears when the Twist is couched over the top. This is what the finished city walls look like. Next up was the 'keystone' on the roof. I padded it with stranded cotton using chain stitches. This is an ideal way to pad irregular shapes as it is very flexible. I then used gimped couching with the thinner passing thread to fill the shape. To let it stand out some more, I added an edge of couched black stranded silk. I drew the two towers on a separate piece of linen. Making separate pieces and then applique-ing them onto the piece gives the whole embroidery a better sense of depth. This stumpwork is a key characteristic of these Late-Medieval embroideries. After the string padding and the or nue couching, I cut out the pieces. I turned the small seam under and secured it with a dap of white glue. I pinned the towers in place and couched them down. I added a spangle with a 3mm amethyst bead (bought when I visited Crete) to the diamond shapes. And last, but not least, I couched down a black stranded silk edge around the tower shapes for maximum contrast. To finish the background, I couched down two double rows of Rococo thread with red Chinese flat silk.
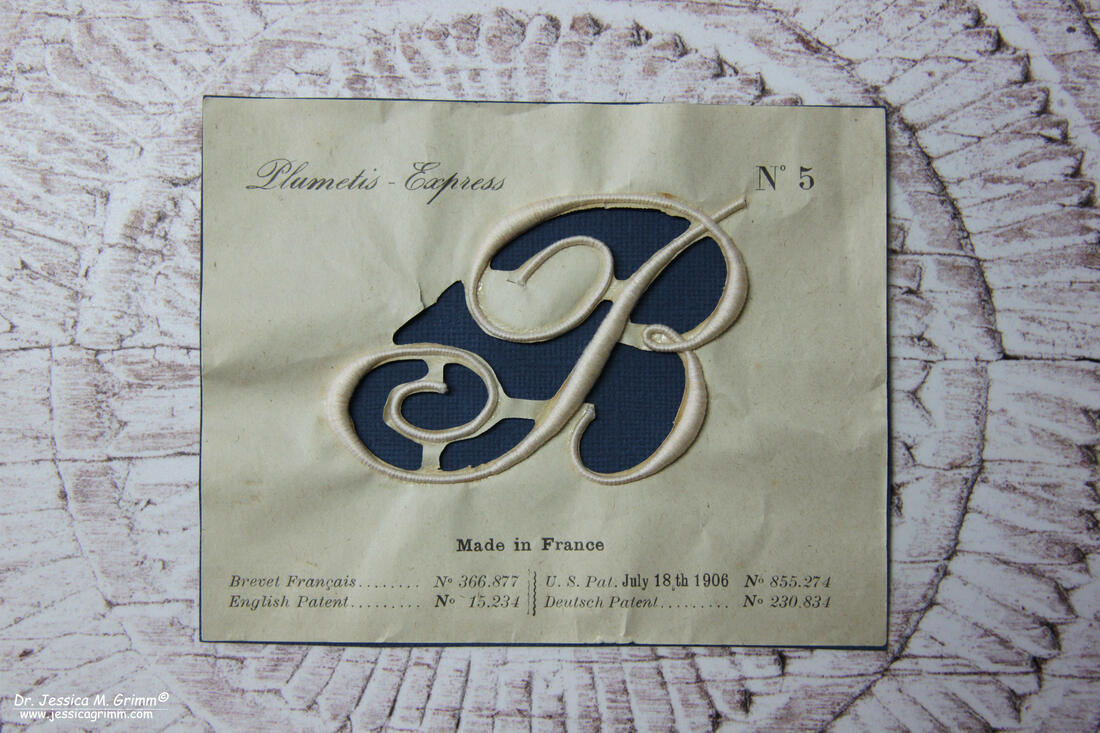
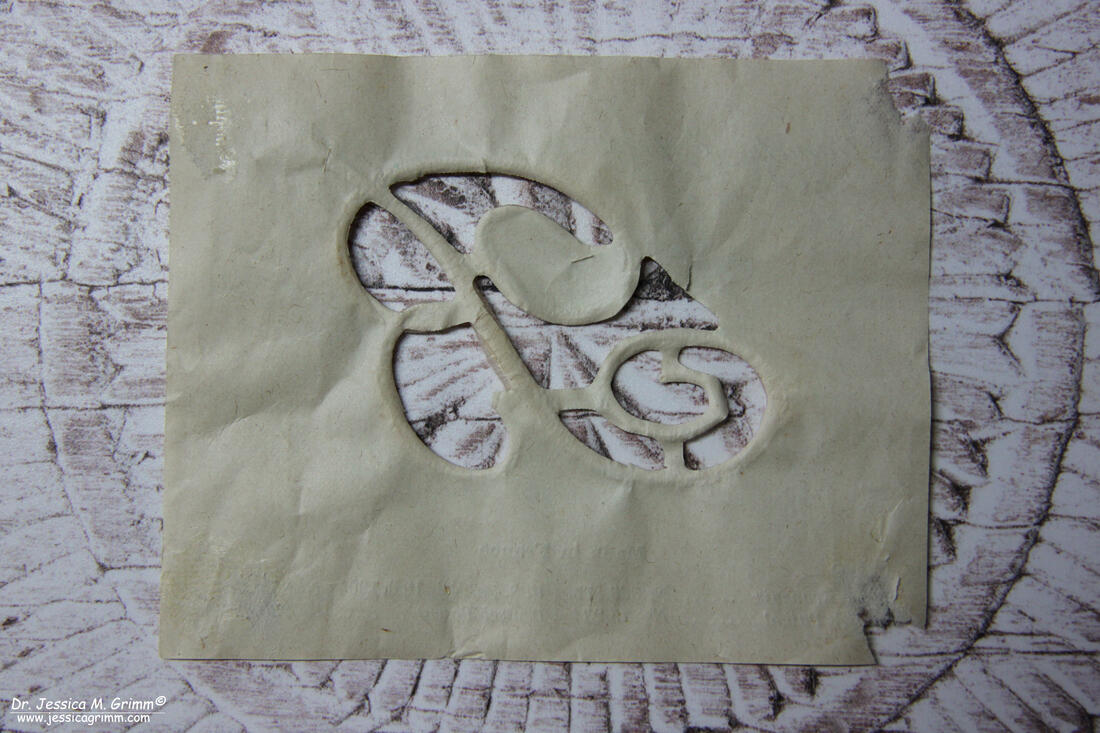
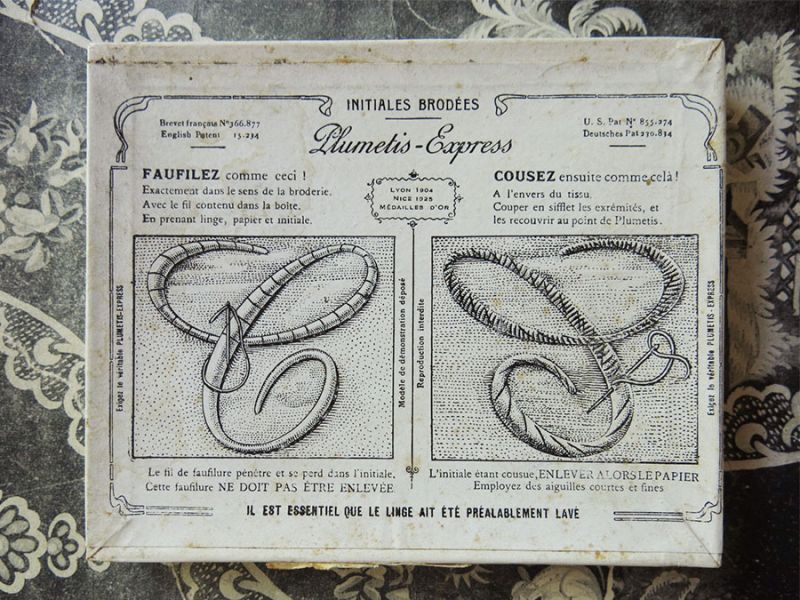
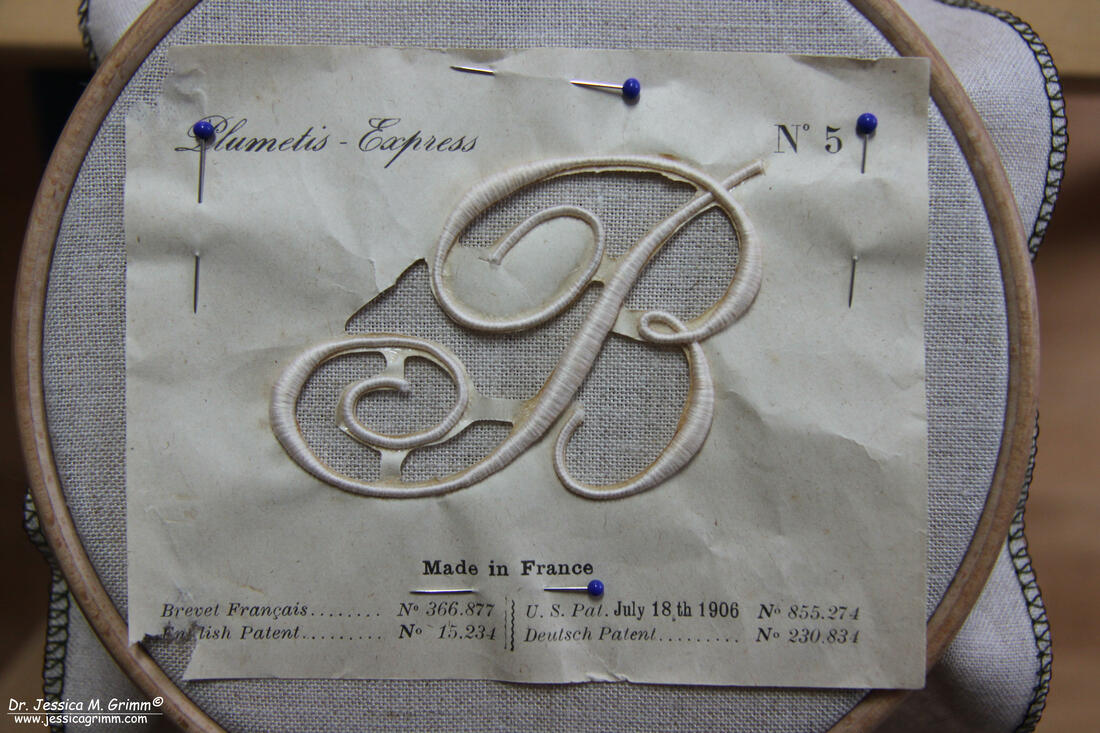
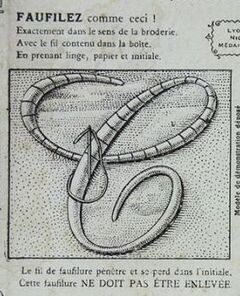
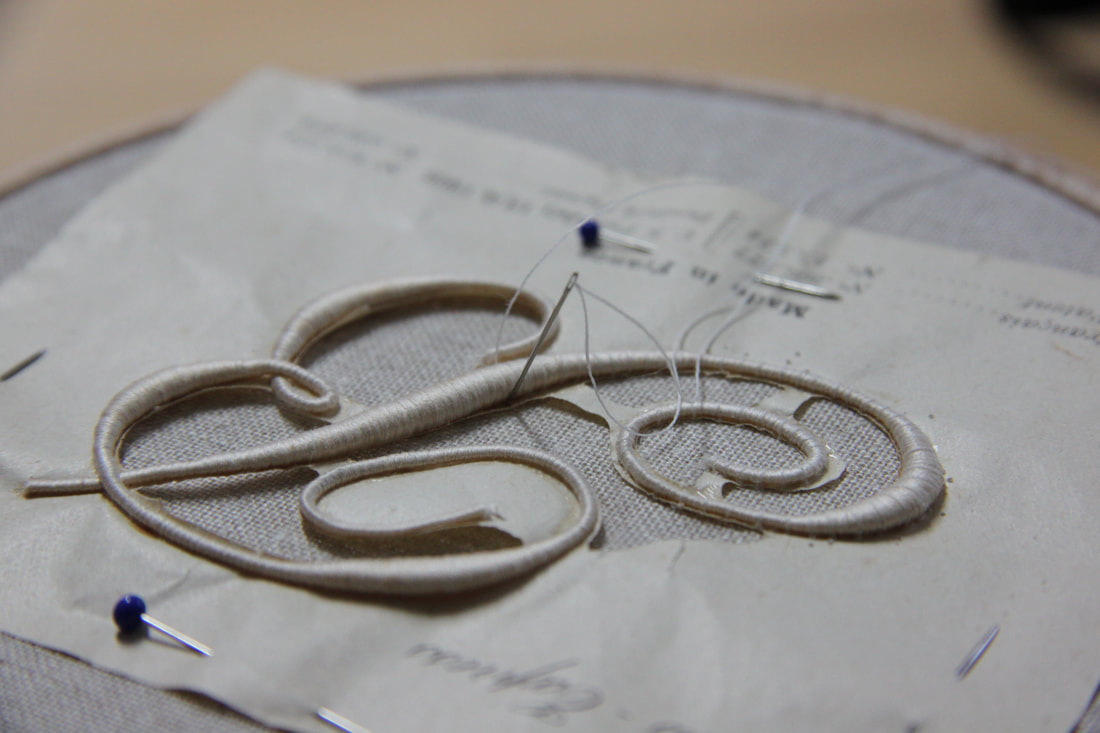
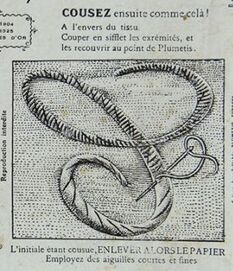
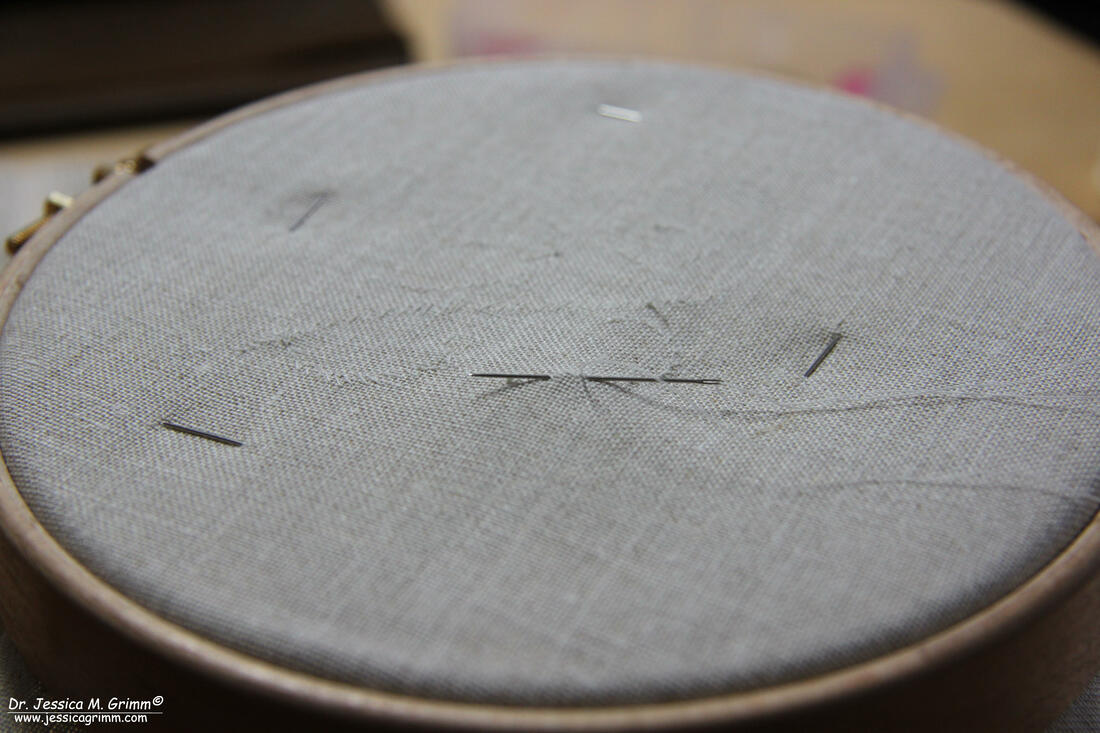
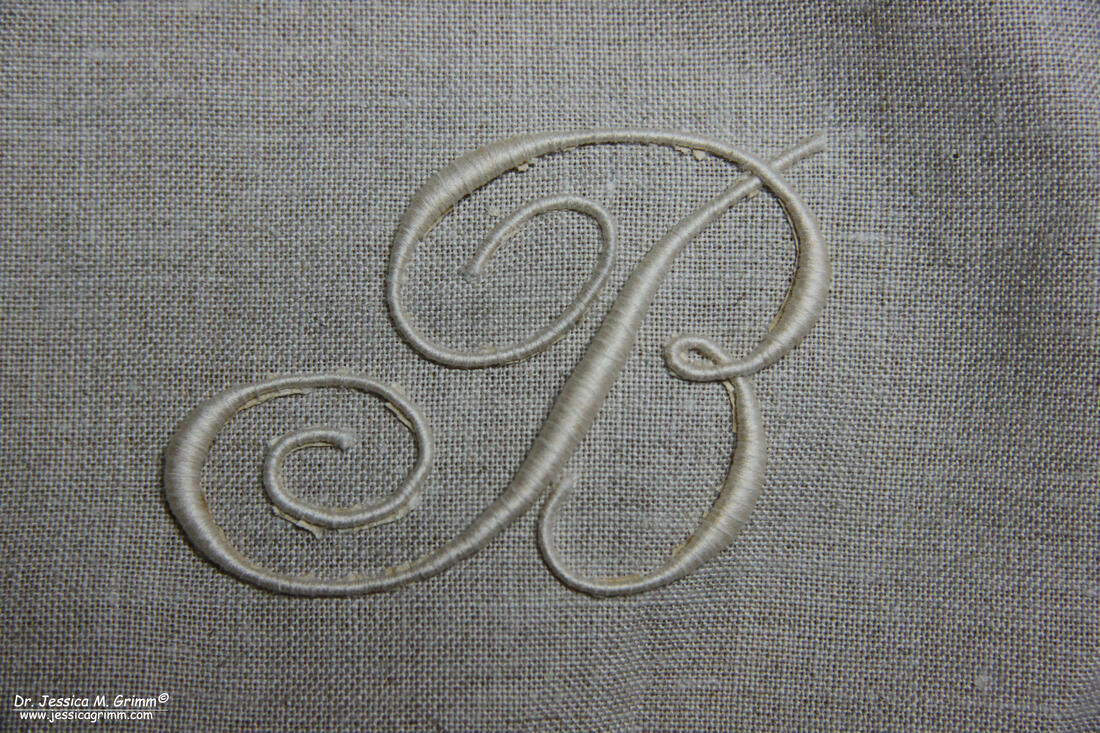
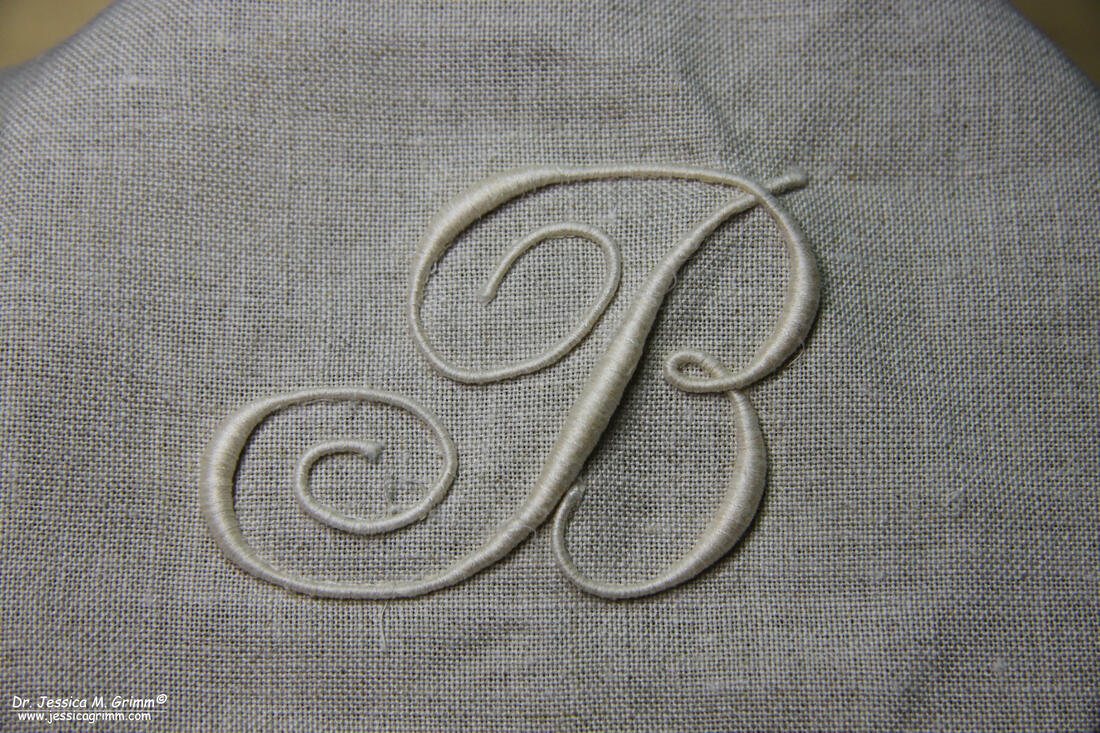
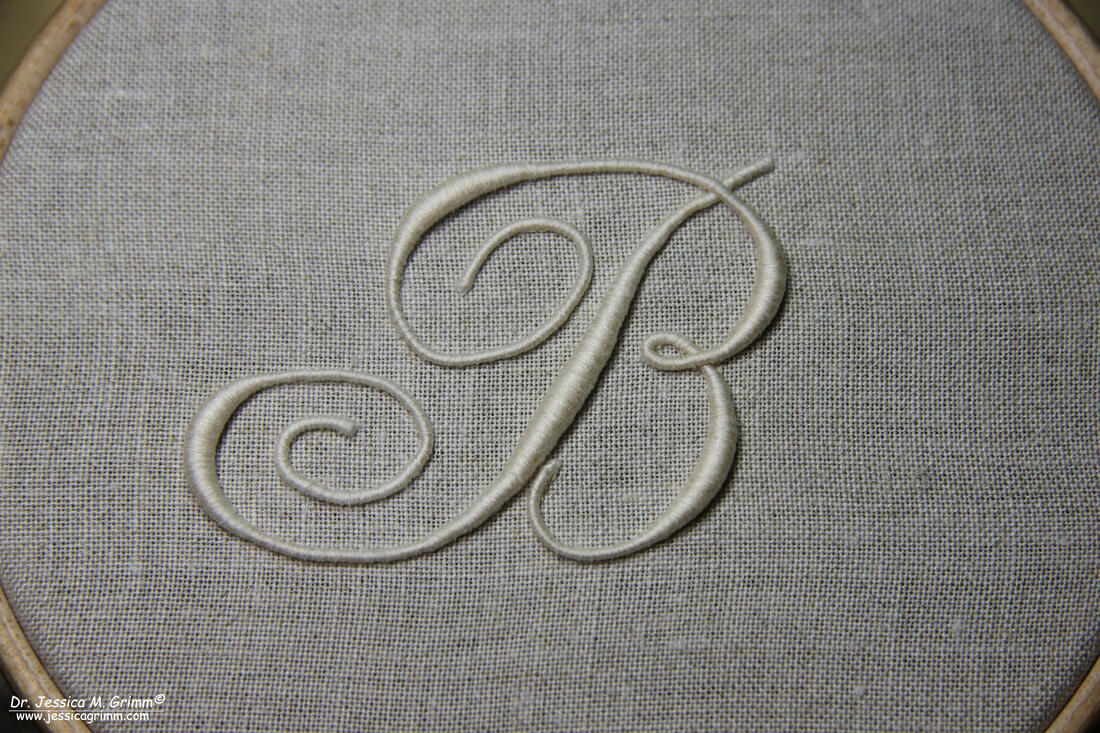
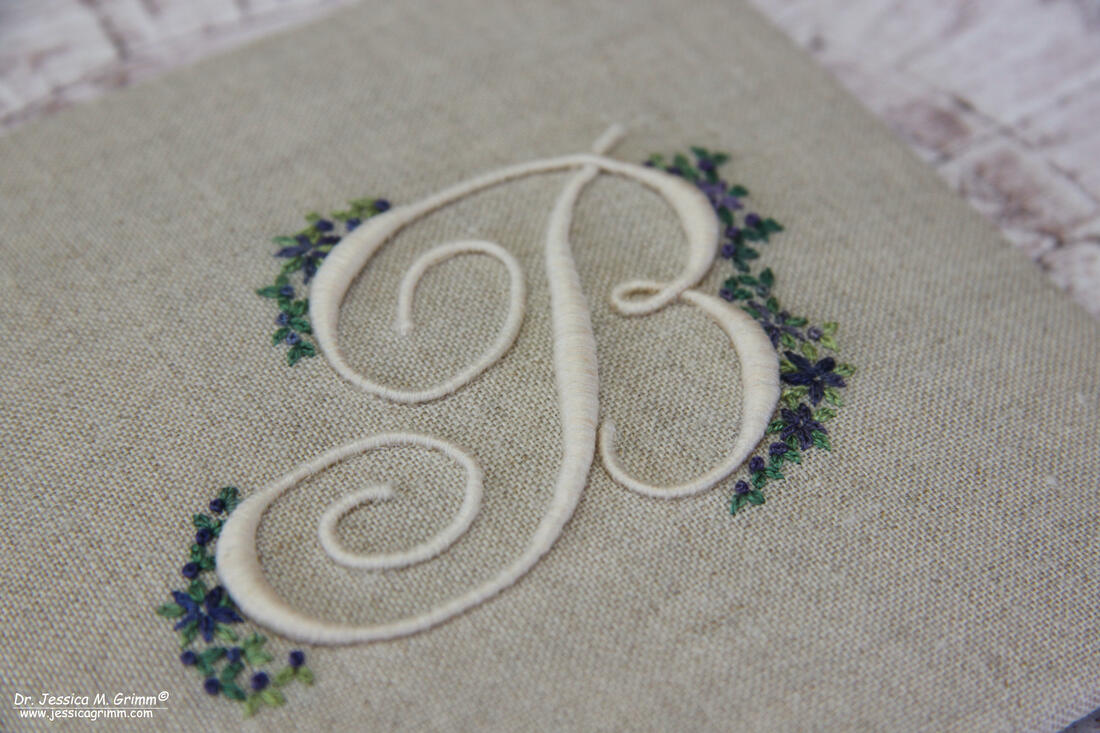
As this blog post is already rather lengthy, I'll save the finishing of the figure and the putting together of figure and background for a future blog post. You can find all blog posts related to this project by clicking Pope Francis in the categories menu on the right. My parents love to go to flea markets! My dad searches for postcards and letters written by World War I soldiers and my mum finds all sorts of lovely vintage stuff and the occasional ceramics. But more importantly, they come across needlework! And their latest find is this: It is a "B" monogram made with very fine shiny cotton thread. The monogram is glued onto an ordinary light weight backing paper (the thicker blue card glued to the original paper has nothing to do with it). It is stated on the paper that the monogram was made in France and patented in France, England, the US and Germany. The date for the US patent is July 18th 1906. I had never encountered them before, but a quick search for 'Plumetis Express" on Google will show you that these vintage monograms can be had a plenty. I and my mum were immediately intrigued, but quite unsure how these monograms worked. Plumetis Express could be translated as "Quick Satin Stitch". Now that I knew that these monograms are not at all rare, I really wanted to try to use my B! I started by removing the blue backing paper. This is what the thing now looks from the back. The monogram measures 7,8x5,4cm and rises to about 3mm in height at the plumpest parts. Now, what is one supposed to do with these monograms? Luckily, some of these monograms have the instructions printed on them. One version goes like this: Ne pas decoller de la feuille support. Faufilez exactement dans le sens de la broderie en prenant initiale papier et linge. Cousez ensuite à l'envers du tissu à points de surjet avec une aguille fine. Ne pas enlever la faufilure. L'initiale étant cousue enlever le papier. and the other like this: Faufiler le tulle supportant la letter sur le tissue à la place exacte que devra occupier la letter. Par intervalles rapprochés, faufiler la letter. Déchirer et enlever le tulle, arrêter solidement les extrémités de la lettre et finir de la fixer en cousant à l’envers de l’étoffe à points de surget, en ayant soin de bien pendre toule la lar geur de la letter. Nota – Si le linge est neuf, le mouiller afin d’éviter tout gondolement qui pourrait resulted du retrait de la toile. Pour la couture de ces lettres, employer des aiguilles courtes et fines. Although I had french in school and in later life even took classes at the Open University, I couldn't quite understand what they were going on about. Feeding the text to Google Translate doesn't help either, but will probably make you roar with laughter (it works equally 'well' for translations into EN, DE or NL!). Luckily, the original boxes these monograms came in, had instructional pictures with the text. The above picture comes from a Japanese website who sold these monograms at some point. A quick chat with Friar Markus, who grew up in Saarland near the French border, confirmed that by now I probably knew how to do this... One starts by washing the linen fabric (I am using my favourite: Zweigart 40ct Newcastle) the monogram will be attached to. Omitting this pre-shrinking will result in wrinkles as soon as the finished piece is laundered. Then one arranges the paper onto the linen and presumably pins in place. So far so good! Now I ran into a problem. According to the instructions I should use the yarn from the box the monogram came in... Bummer. Reading the rest of the instructions, I came to understand that the yarn in the box probably was the same as used for the monogram in the first place. The instructions say that one should place one's stitches in such a way that they fall in line with the thread direction of the monogram. Aha! Let's see if my stash harbours a yarn similar to the stuff used for the monogram. I ended up picking Gütermann Polyester sewing thread Col. 1. Although it seems that the original yarn used is even a bit finer, the Gütermann isn't a bad match. The monogram has aged and stained, so in some places, the Gütermann will be too white. Alas, it is a strong polyester thread and I have a feeling I will need its relative strength compared to cotton or silk. Because the instructions say that I should stitch through the edges of the monogram, the paper and the linen background fabric! I should use a short and sharp needle for the task. I'll better also wear a thimble :). Now let's do as the picture says. It is actually quite easy to pierce through the paper and the monogram. Only the ends unravel a bit. But this might be due to ageing. In the next step, we'll turn the work and work from the back. With small stitches, we secure the initial even further. This step was rather difficult and really hard on the fingers. Changing to a curved needle did help a little. But especially the thinner parts of the monogram were quite difficult to 'catch' from the back. Now it was time to remove the paper. That didn't go well. Short pieces soaked in glue close to the initial were almost impossible to remove. Tweezers and a magnifier didn't help much either. I ended up hand-washing the piece with a little clear dishwashing liquid and scratching the paper away with my nails as best as I could. I assume that either the paper came off much better when the initial was first produced or the little bits of paper didn't bother too much as they would probably come off after a few laundry cycles. The difficulties to remove the paper resulted in some of my stitches having snapped. I ended up carefully removing them and securing the loose parts of the monogram again. By now I am not sure if the additive Express is very appropriate for this Plumetis Monogram... Once the monogram was secure again, I decided to embellish it further with some simple flower embroidery. After all, there is not a whole lot of embroidery going on in a Plumetis Express. I used a lovely variegated silk thread by Caron called Black Iris. My flowers were stitched with two strands using detached chain stitch and French knots. As the variegation is distinctively either greens or purples, it worked very well for the petals and the leaves.
I hope my blog post has inspired you to pick up one of these vintage monograms yourself! Mounted and framed they make for stylish French-style embroideries on your wall. P.S. One thing remains: how were these monograms made? Surely they are machine made. But how did that work? If you have the answers, please comment below! |
Want to keep up with my embroidery adventures? Sign up for my weekly Newsletter to get notified of new blogs, courses and workshops!
Liked my blog? Please consider making a donation or becoming a Patron so that I can keep up the good work and my blog ad-free!
Categories
All
Archives
July 2024
|
Contact: info(at)jessicagrimm.com
Copyright Dr Jessica M. Grimm - Mandlweg 3, 82488 Ettal, Deutschland - +49(0)8822 2782219 (Monday, Tuesday, Friday & Saturday 9.00-17.00 CET)
Impressum - Legal Notice - Datenschutzerklärung - Privacy Policy - Webshop ABG - Widerrufsrecht - Disclaimer
Copyright Dr Jessica M. Grimm - Mandlweg 3, 82488 Ettal, Deutschland - +49(0)8822 2782219 (Monday, Tuesday, Friday & Saturday 9.00-17.00 CET)
Impressum - Legal Notice - Datenschutzerklärung - Privacy Policy - Webshop ABG - Widerrufsrecht - Disclaimer



 RSS Feed