|
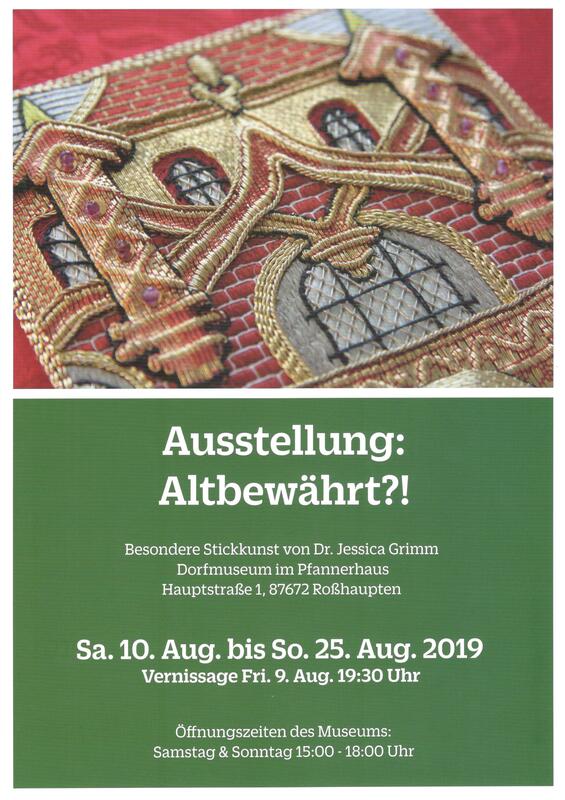
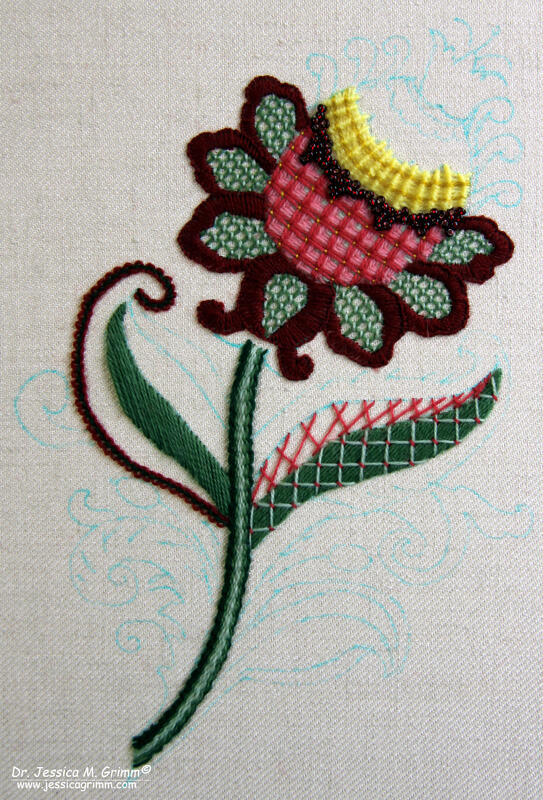
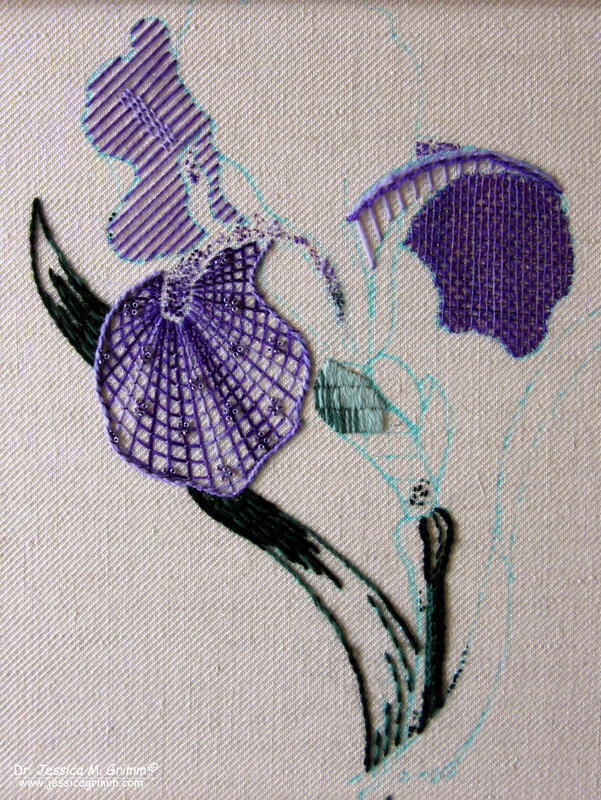
I am getting really excited as the vernissage of my first-ever solo-exhibition draws nearer! As this is my first time organising and promoting such an event myself, I really do hope I have managed to think of everything :). Apart from sending invitations to important people, gallery owners and friends; I and my husband also spent two days dropping them in every mailbox in our village. The only things left: hanging the exhibition posters around the village for the tourists to see, signing the insurance papers, preparing my speech and hanging the exhibition. So cool! But that's not all that has been happening in my embroidery life! Last week, I taught crewel embroidery to Kristin from Berlin and Elena from Switzerland. As the three of us were born in the 70s, love to travel, have no kids, love our men (but think they are a rather peculiar species), we had a lot of fun! And cake, of course. Oh, and we stitched too :). Kristin chose an image from one of these generic pattern books you can find in most bookshops. You can use these patterns for a variety of crafts and they are an especially good starting point for embroidery. Picking colours from the full range of Heathway Milano super-quality crewel wool was a true Qual der Wahl (the agony of choice). But she chose well in combining Pomegranate with Laurel and a dash of Daffodil! Kristin really wanted to incorporate lots of colours and even some pearls. Way out of her comfort zone, but working so well! I can't wait to see this piece getting finished. Elena has been working the same image for years. Don't get me wrong, she isn't slow or anything, but she works the same image in different techniques :). As a base, she uses a Russian translation of the RSN-embroidery book. So far she has worked two beautiful irises: one in goldwork and one in blackwork. It was now time to tackle the crewelwork one! Beautiful Heathway Milano Violet and Gobelin Green were the perfect colours for the job. As the original piece in the book is made with variegated threads, we also added some hand-dyed raw silk by House of Embroidery. The fluffy nature of the wool combines very well with the spun silk. And of course, we added some sparkly pearls as well. As Elena really liked working with the wool and filling areas with trellis stitch, I am hoping for a speedy finish :).
That's all for now! I hope to see at least some of you during the vernissage or the opening hours of the exhibition. All my work will be on display and I will be present during the opening hours.
14 Comments
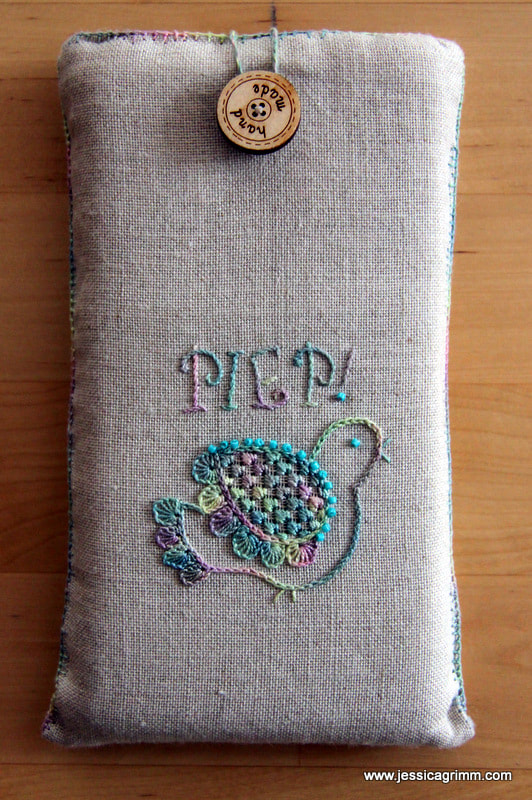
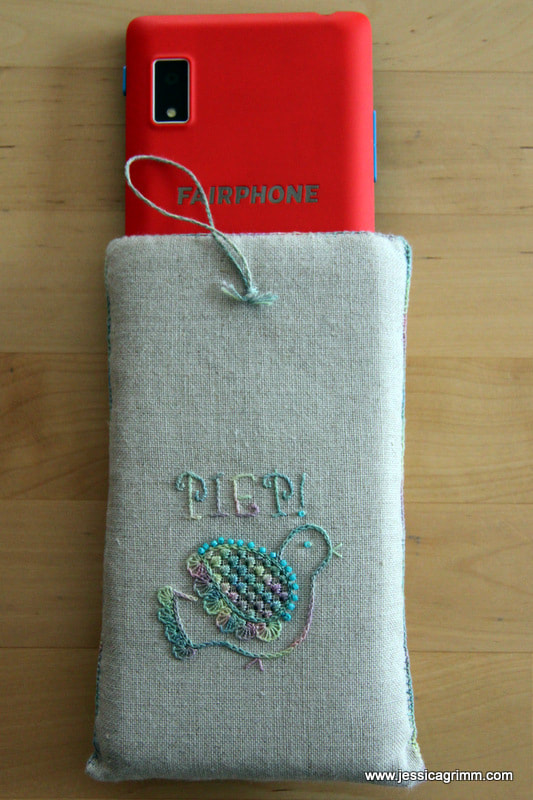
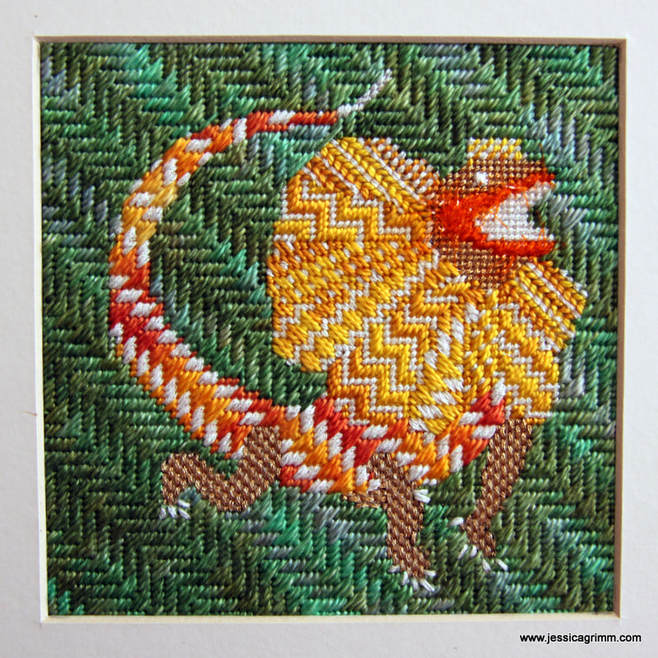
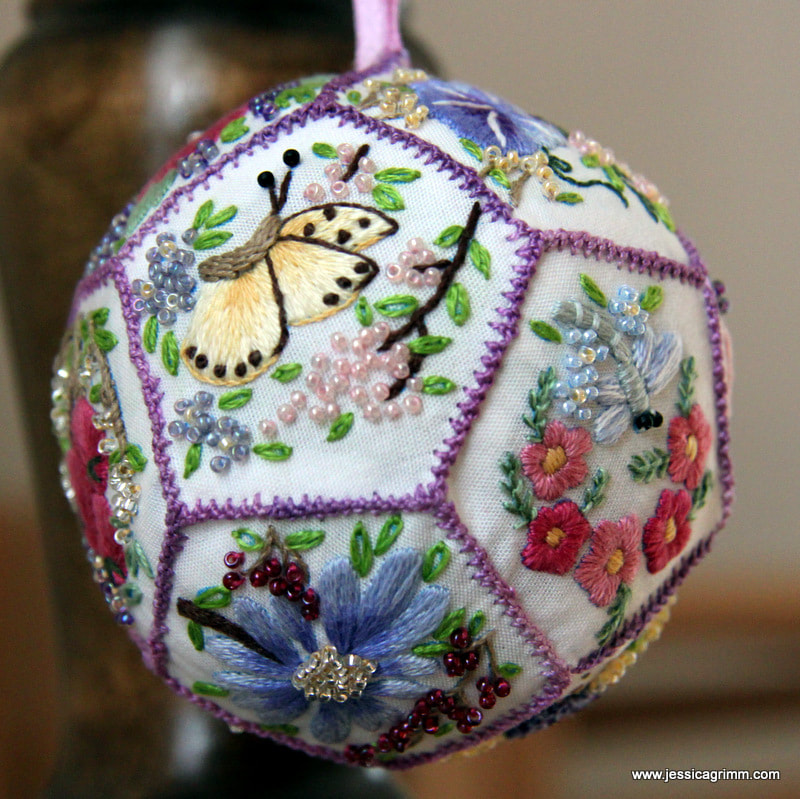
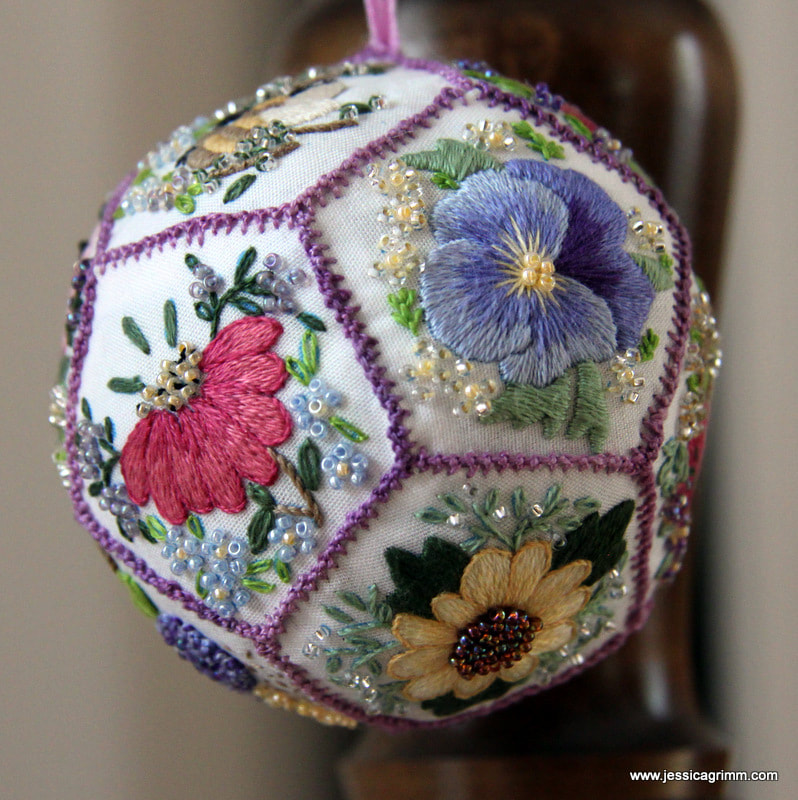
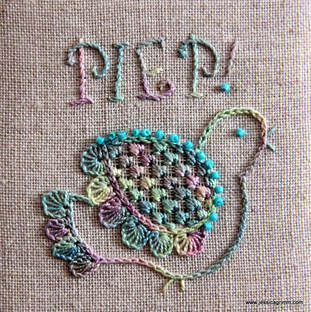
Yup, it is true: I have arrived in the modern area too. It took me years. But when I heard that Fairphone makes smart phones that last, are repairable and don't use blood minerals; I ordered one. So far, I have used it to download (and use!) a 5K running app, WhatsApp with my family, use Google for directions and information AND made the very occasional phone call :). Still much prefer my Ipad and Laptop... Maybe I should seek professional help? Pondering this option, I did make my Fairphone a cozy home to live in. On Zweigart Newcastle natural coloured 40ct linen, I outlined the bird with chainstitch using a #12 variegated House of Embroidery perle colour Grapes C. Then I stitched partial buttonhole wheels for the feathers on the tail and the wing. I added straight stitches for the feet and the beak and attached some blue beads along the upper-edge of the wing. From the back, I withdrew every fourth thread in both directions and then added a Schwalm filling stitch called 'Gefieder'. The lettering was stitched using stem stitch. To make my 'phone home' a bit sturdier, I added wadding and a sheet of template plastic. The seams were then pimped with knotted pearl stitch. So far, my phone seems to be pretty comfy in her new home! I've asked my very talented husband to make a nice clean digital drawing of my scribbled birdy pattern. You can download it at the end of this article. Apart from using it as I did in a Schwalm embroidery way (finished design including lettering H 55mm), there is tons of other possibilities. How about stitching it monochrome on a piece of felt? Or applique with a few simple stitches for embellishment? Surprise me! Next up is another broderibox project using a design of a Chlamydosaurus by Millie Marotta. This amazing creature can impress by unfolding his neck frill. However, it can only do so in opening its mouth widely. The bones in the frill are extensions of the hyoid or tongue bone. Isn't nature amazing?! The lovely people of Nordic Needle had put in a glow-in-the-dark thread made by Rainbow Gallery. I made sure to add it to every canvas stitch I used on the chlamydosaurus (it is the white thread you see). And it glows beautifully at night! Unfortunately, it doesn't translate well in a picture. You have to take my word for it. Last finish for today: the Floral Pomander by Hazel Blomkamp. I really enjoyed this project with all the little flowery scenes using simple embroidery stitches and tiny beads. However, the instructions were a bit messy with tiny pictures of the finished panels. And piecing the pomander together was a little fiddley. That said, it makes a great project if you like miniature embroidery, beads and a different way of finishing your embroidery. Oh, and thanks to the dried lavender mixed in with the toy stuffing, it is my best smelling project ever :)!
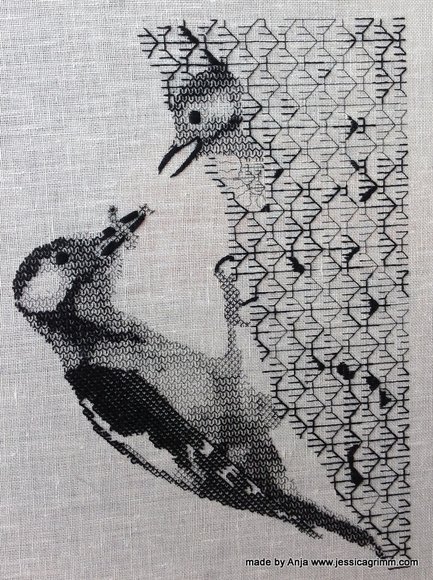
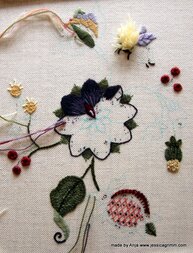
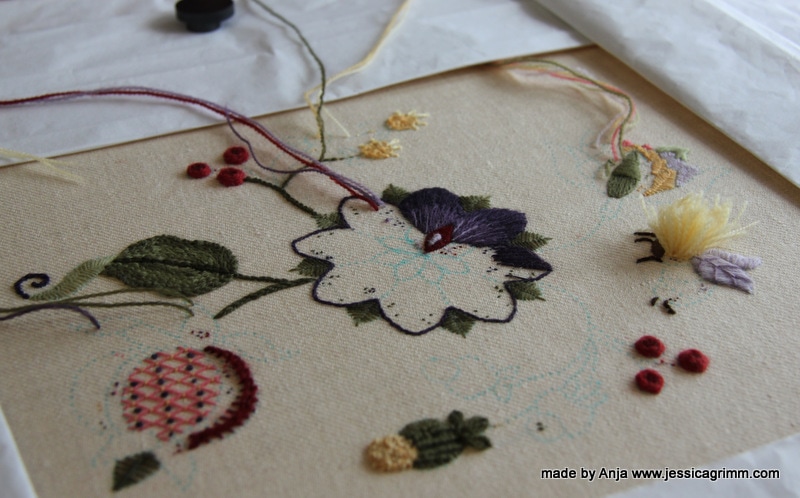
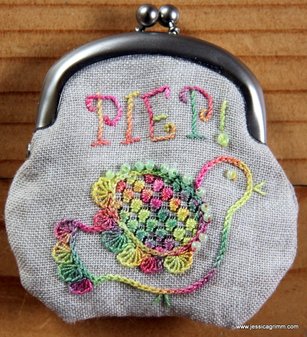
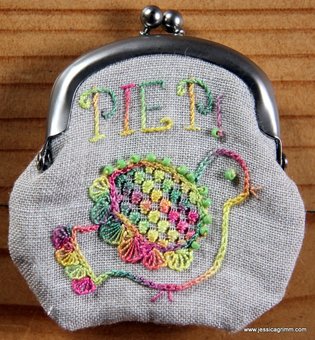
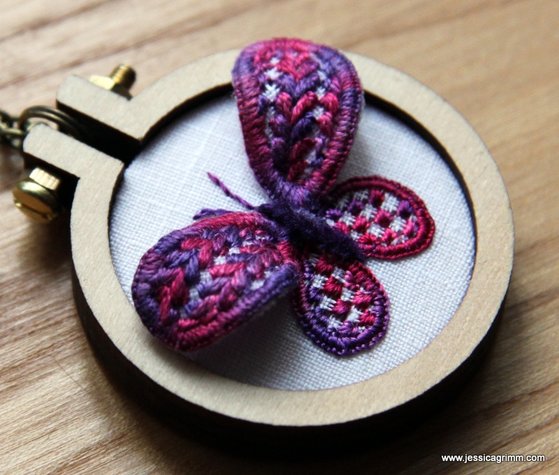
Today I am going to share some lovely embroidery pieces with you. We'll start off with the work of one of my students, then we'll have a look at some new pieces I made and we'll finish with a new initiative to bring Mastercrafts People together. Let's start with a stunning blackwork piece: This piece has been embroidered by Anja from the Netherlands. She started it last year during one of my week-long embroidery retreats. Anja worked from a picture and translated the different textures and shades beautifully into blackwork's geometric patterns. Anja will add some white highlights to the eyes to make the birds even more life-like. I so enjoy seeing a finished piece which started under my tuition! Next up is another piece by Anja. She started it last week during another one of my embroidery retreats. We had great fun designing this piece by using a piece by Hazel Blomkamp as the base. Then we added two flowers from a colouring book by Millie Marotta and a pomegranate from an older embroidery book. Just to illustrate that you don't need to be able to draw your own design from scratch. Mix and match often produces a stunning new design. I have a feeling this piece will turn out great as well! As most of you know by now, I have a subscription to the Broderibox by Nordic Needle. Although I used all threads present in the May box, I wasn't sure what to do with the purse clasp. I am an embroideress and I can mount a finished piece satisfactorily. However, I am not good at finishing. Mainly because I do it so rarely. Time to change that! There are so many lovely products out there to turn your embroidery into something other than a framed picture. Time to become acquainted with the clasp. Luckily for me, there was a website listed on the back of the clasp's packaging: Zakka Workshop. Do visit their website as they have some adorable stuff on there. And best of all, they have a really good Youtube video on how to install the clasp. As I wasn't confident that I could come up with the right size embroidered purse, I ordered their instructions for the simple patchwork pouch. It provided me with a template for the purse and then it was just a matter of adding a cute bird, do some Schwalm embroidery, add some beads and best of all: use a House of Embroidery hand-dyed perle #12 in a colour combination that's totally out of your comfort zone :). Worked a treat so far. Installing the clasp wasn't as easy as the video makes you believe. Especially not as I've probably used the wrong interfacing between the embroidery and the lining of the purse. Mine is probably too thick/stiff. That's the challenge when using instructions from another country. However, I am quite pleased with the result! Another great way to finish your embroidery is to use a tiny wooden hoop by Dandelyne. Since I really like my Schwalm butterfly, I wondered if I could shrink the piece enough to go into a 4cm hoop. Guess what? I could! I used a combination of House of Embroidery hand-dyed fine silk and raw silk as well as paper covered wire to stiffen the upper-wings. I've now worn the piece around my neck for two days straight (I did put it down for sleeping...) and it holds up beautifully. By the way, you can get your Dandelyne hoops here in Germany from the lovely Nadine from Zur lila Pampelmuse. That's where I got mine :).
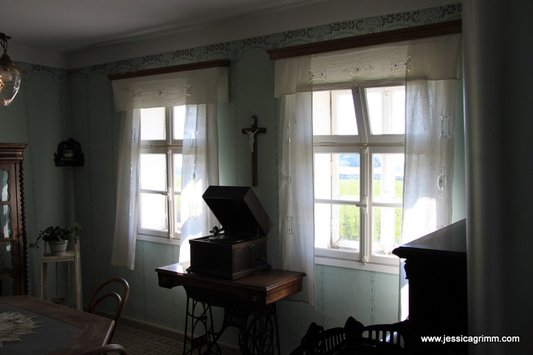
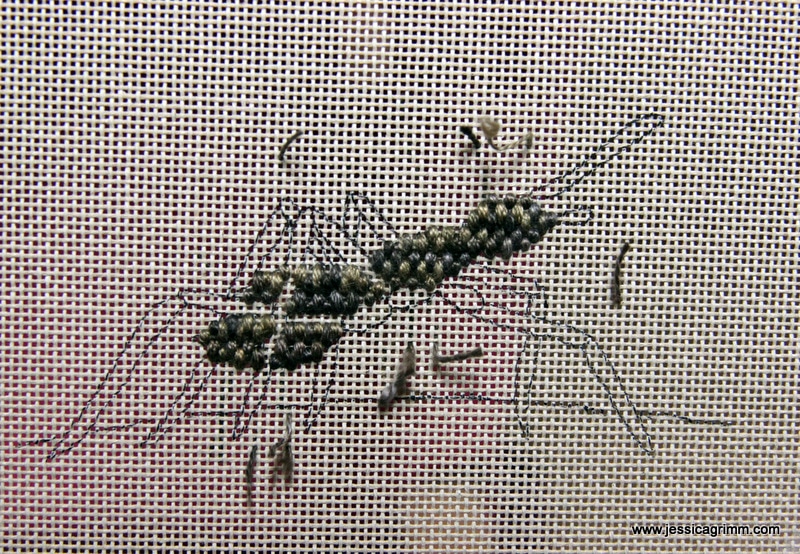
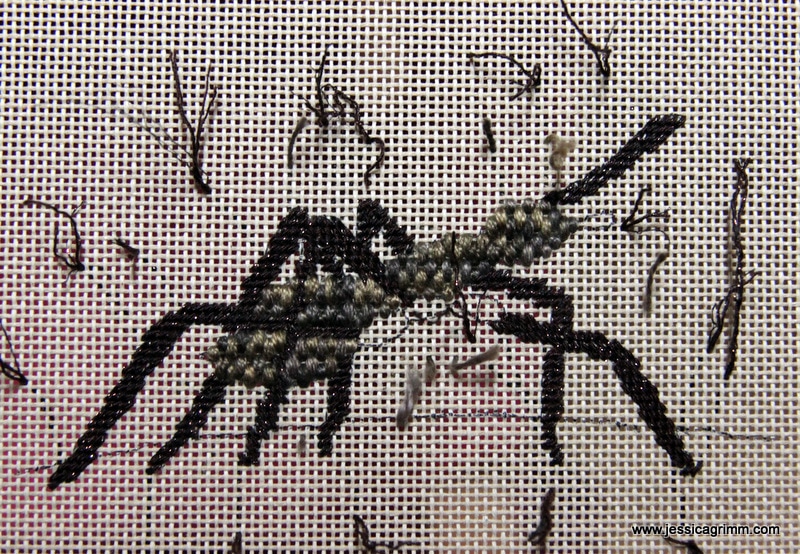
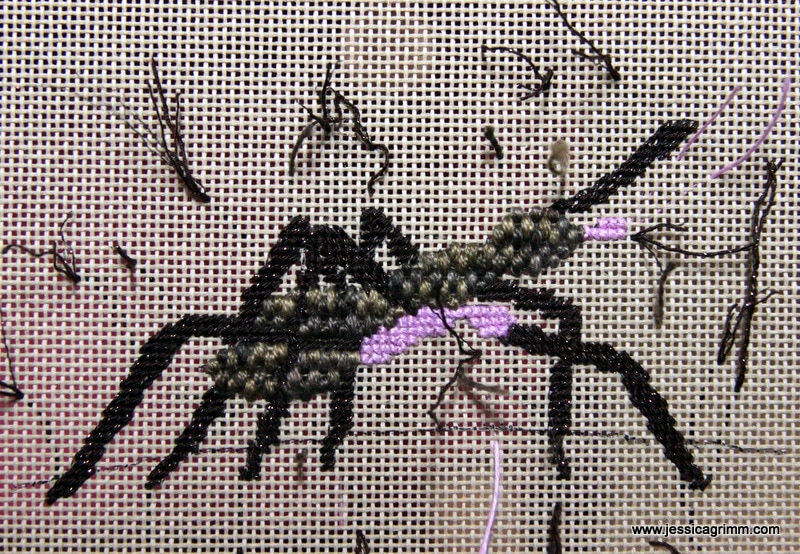
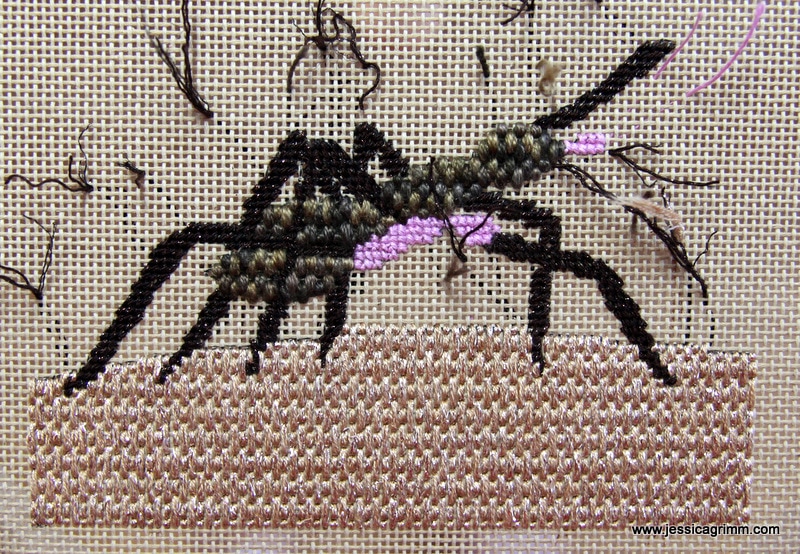
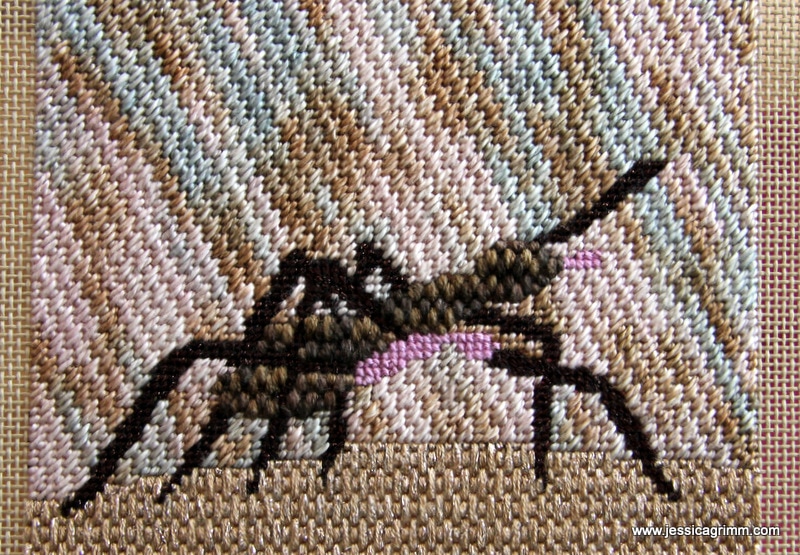
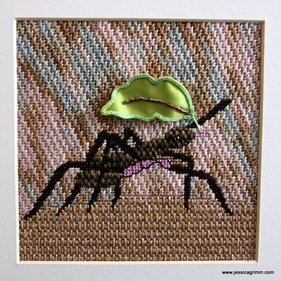
Happy start of the week dear reader! I am back from a week full of wonderful sight-seeing with my family. And one of the sites we visited was the Bauernhofmuseum in Illerbeuren. A pretty open air museum showcasing farm life from the Swabia area of Germany. And of course, there was some lovely embroidery on display as well. Mostly on household linens and mainly involving monogramming and whitework embroidery. How about these gorgeous Richelieu embroidered curtains featured in an inn? In between family commitments, I sneaked in enough embroidery moments to complete my next broderibox project. The broderibox is a monthly embroidery threads subscription put together by the lovely people of Nordic Needle. This month's box contained: five embroidery threads, beads and a purse clasp. Since the threads had a lot of browns in them; an ant sprang to my mind. Lucky for me, the amazing Millie Marotta has drawings of ants included in her colouring-in book 'Wild Savannah'. As many of you probably know, canvaswork or needlepoint embroidery is stitched front to back. Or: object first, background later. Now be good and do not ever do that with your silk shading ;)! So, in this case, I started with my ant. She is called Truus de Mier, by the way. A favourite ant from a children's tv-show in the Netherlands. For Truus' body, I used a variegated perle #8 by Valdani. I really wanted to try this brand of embroidery threads. It worked a treat! No 'typical-low-grade-Eastern-European-Quality' here. As I wanted Truus to have a little 'body' to her body, I used the raised spot to fill it. As this stitch required me to pass 8-times through the same hole, I expected the thread to wear beyond pretty. But it didn't. They surely do know how to produce a fine perle in Romania! Next up were Truus' legs. I stitched them in tent stitch and used both directions for different legs. This made the whole thing a little less tangled-up when legs crossed. The legs were stitched using Vineyard Silk shimmer. It is a silk thread with a shimmering filament added. It does not have a nice feel and it unfortunately stitched accordingly. A bit disappointing as I really liked the previous 100% silk threads by Vineyard Silk! Apparently, ants have segmented legs that start with a bit of a bulky part. And ants have a mouth piece with which they cut leaves in handy transportable portions. Since this month's broderibox had a violet Londonderry linen thread in it, I decided to use it to stitch these parts in cross-stitch. Lovely thread! I do stitch some whitework embroidery with linen threads and really love it. That's Ms Truus de Mier sorted. On to the background. I decided to stitch the earth on witch Truus walks with Silk Lame Braid by Rainbow Gallery. Despite it being a silk thread mixed with metalized polyester and some rayon, it felt and stitched fantastically. Very well suited for the vertical Parisian stitch. As the variegated cotton thread Watercolours by Caron had some blue in it, that was going to be turned into the sky. I separated the three plies and stitched the diagonal Cashmere stitch with one ply. I really love these cotton threads by Caron! They are so soft and hold up so well whilst stitching on canvas.
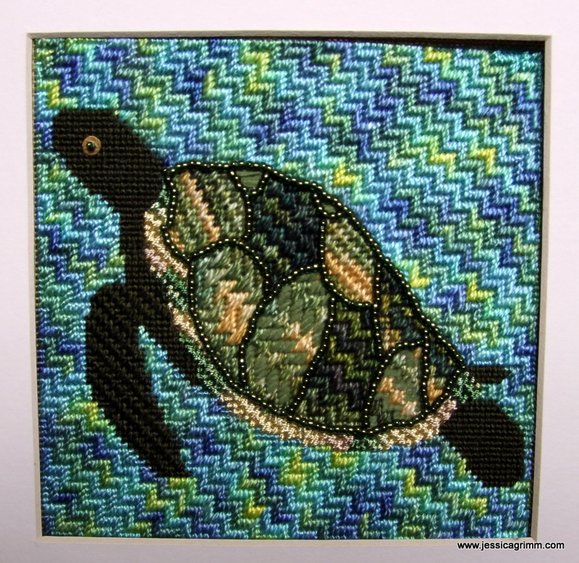
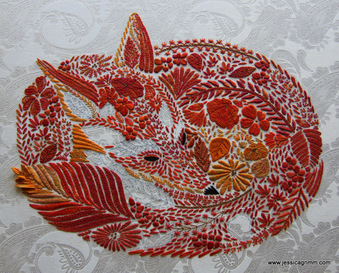
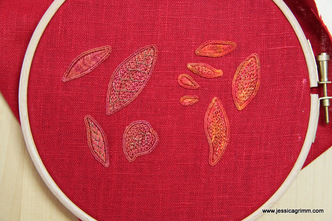
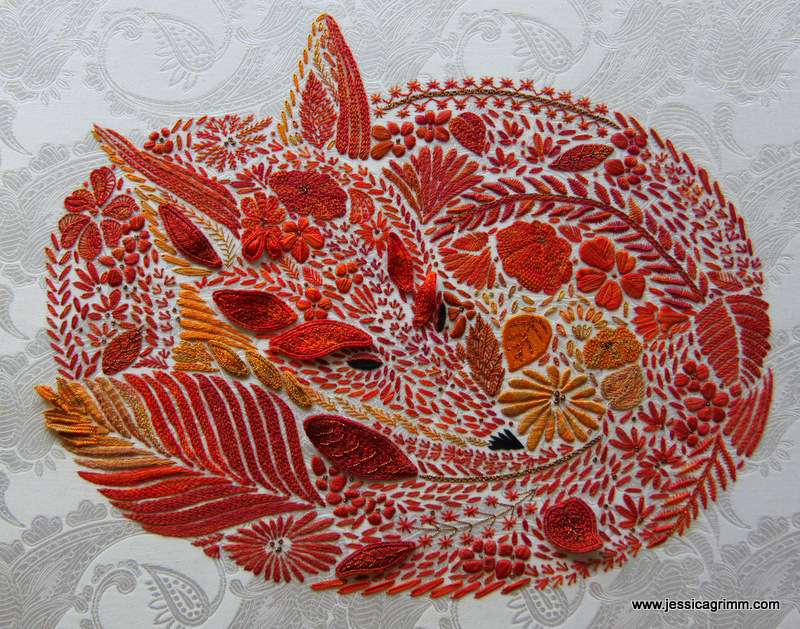
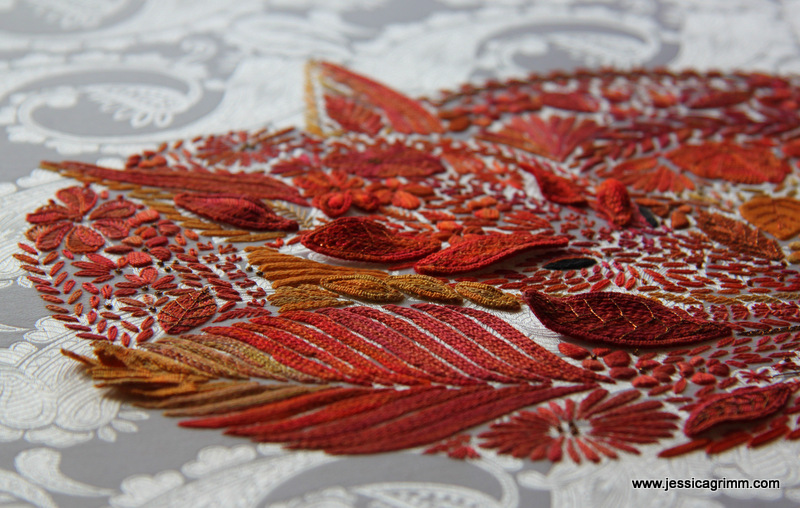
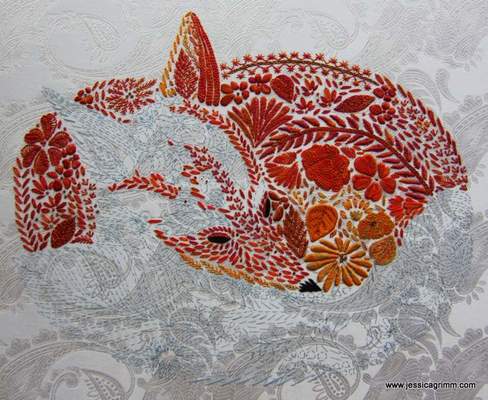
To finish my Truus de Mier, I decided that she needed a bright green stumpwork leaf. I wired a piece of dupion silk backed with calico. The buttonhole edging was stitched using a #12 House of Embroidery perle from my stash. I added the Mill Hill magnifica beads provided in the broderibox to my leaf. Subsequently, I stitched a few beads onto Truus for an eye. And that's another broderibox project finished satisfactorily! P.S.: Us dummies did take the camera with us to the Bunter Markt craft fair in Wessobrunn on Sunday, however, we forgot to take a picture of our stand... On the up-side, we did manage to sell two pendants and shed a few flyers and business cards! Like most of my dear readers, I love thread! The ordinary everyday threads and the speciality threads, monocolour, over-dyed, variegated. You name it; I'll drool. So, when Mary Corbet talked about the BroderiBox 2017 by Nordic Needle, I signed up. Full well knowing that this would mean a monthly trip to the customs office in Weilheim. Ah, what one does for a good thread! So when, early February, I was finally 'invited' to pick up (and pay for!) my January box, I was ecstatic. Quite to the bemusement of the customs officer... Back home, I gleefully inspected my threads and was delighted to find a few I had never encountered before. Since they were all green, I decided to stitch a quick turtle on canvas. I think canvas (also known as needlepoint) is a great embroidery technique to experiment with speciality threads. Anything goes! Just the green turtle on bare canvas was a bit..., well, bare! So I decided to give turtle swimming lessons. The background was stitched using a House of Embroidery perle #5. A single thread has exactly the right thickness to cover 18 TPI canvas. How clever is that?! By change I stumbled upon an exhibition in a former convent of the order of the Visitation of Holy Mary: Kloster Beuerberg. As this particular order lives in strict enclosure, it is rare that you can visit one of their houses. Since the last sisters left a couple of years ago, not much has changed. The house now belongs to the diocese and they decided to, for the time being, turn it into a museum. Throughout the exhibition, you will find lovely examples of all sorts of needlework executed by the sisters. Culminating in the display of the 'Angels Ornate'. Definitely the best part of the whole exhibition were the cope, chasuble and dalmatic of the 'Angels Ornate'. Beautifully executed vestments with silk and goldwork embroidery in the most vivid colours. Although made around 1880, they still look fresh with none of the usual wear and tear. Eye candy in its purest form. I will probably visit the exhibition again as there was so much to see. They also sell fabric, used linens (monogrammed), yarn, threads, buttons etc. from the former vestment workshop. I finished stitching Millie Marotta's fox yesterday evening late (quite late, that is...). A few months ago this whole project started when Mary Corbet mentioned Millie Marotta's new colouring book 'Animal Kingdom' on Needle 'n Thread. Me and the fox had an instant connection. Waiting for the book to arrive at the bookstore was a tantalluskwelling. Patience is not one of my virtues. Of course, no one buys this as I am an embroideress and embroiderers are patient. Yeah right. Here you'll see the fox finished bar the stumpwork elements. I've used House of Embroidery perle #12 in shades: Wildlife A, Marigold C, Maple A & C, Strelitza A, Harvest C, Sri Lanka C, Berries B and Brass A & B. Sparkly highlights were stitched using Madeira Metallic embroidery thread #40 Colour 28 and DMC Diamant #301. I love DMC Diamant. It is not your average badly behaving metallic embroidery thread. It is much nicer. And here are some of the wired stumpwork elements. I used the same threads with a red linen background. Why red? Well after cutting them out, you do tend to see a wee bit of the background fabric. Using a background fabric corresponding with your stitching thread makes thus a lot of sense. And here is the finished piece! Needless to say: I love it to bits. Can't wait to mount the piece (oh gosh, did I really write that? Wow, I've come a long way since my first mounting instructions at Hampton Court Palace...). It will then be framed in a white IKEA frame until I can scratch together enough money to have it properly framed. Here's an angled picture so one can appreciate the 'stumpiness' of the stumpwork elements better. For those of you planning to visit Nadel & Faden in Osnabrück in September, the fox will be on display!
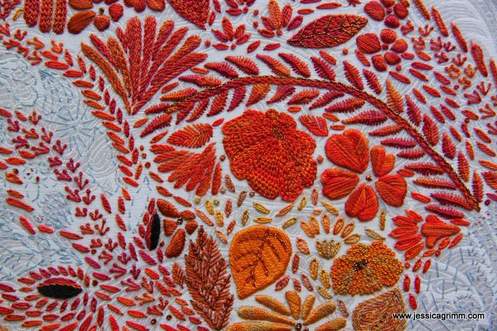
So what's next? A wee bit of homework. And then I am going to play with my Elizabeth Ward tiny container bead storage solution tray. You can read all about this genius system on Mary Corbet's Needle 'n Thread. See you next week! Due to the G7 meet-up at Elmau, about 20 km from the Pilatushaus in Oberammergau, we had a very quiet week. The legion of fearsome protesters apparently do not care for the arts :). However, four lovely young ladies, aged between 8 and 15, stitched their own lazy daisy book marks. Two older lovely ladies did the same :). I think I might have made some converts (sorry knitting and crochet community). Once I've figured out a 'boys-only' design, I'll publish a tutorial on this blog. And this is what THE fox looks like after 48 stitching hours. Isn't he cute? Even the equally bored police bore him a visit and was mightily impressed. Not even when I visited renowned police states such as Egypt have I seen so many police officers on duty in the past five weeks! And here is a close up of my stitching. So far, I've used Sri Lanka, Marigold, Brass, Berries, Maple and Wildlife perle #12 by House of Embroidery. Subtle highlights are stitched in DMC Diamant D301 and Madeira Metallic Col. 28. The piece includes lazy daisies stitched with a central back stitch for extra 'umpf', Vandyke, satin, fly, stem, berry, pistil, buttonhole needle lace, knots etc. I am also planning on working some of the leaves on the face and the tail in raised stumpwork. So stay tuned to see the fox grow! Want to read previous posts regarding this project? Simply click Millie Marotta in the categories' list on the right.
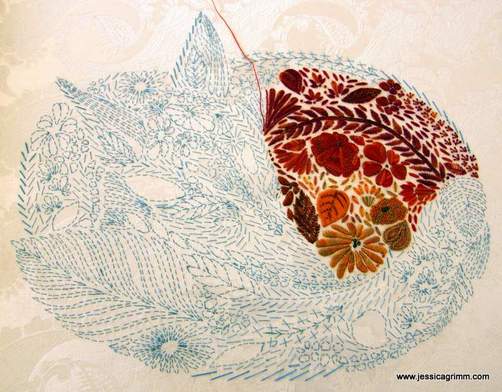
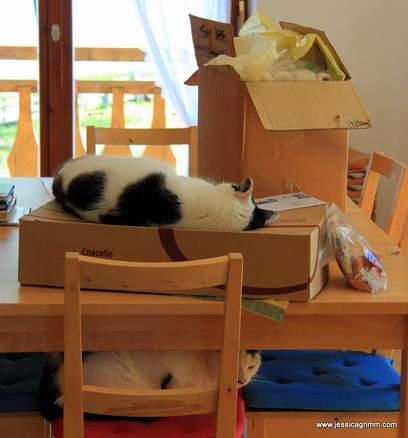
I must admit that showing off my embroidery skills to tourists each afternoon, six days in a row has proven to be a little tiring. Answering the same three questions over and over again in German, English, French and Dutch is a little repetitive to say the least... However, scientist as I am, it provides me with a perfect opportunity to study our modern global society. So what do people ask? The majority want to know how long it will take to stitch the fox? Approximately 200 hours. What will it be turned into? A piece to adorn my studio wall. For how much would you sell it? Well, 200 stitching hours times €8,50 minimum German wage + material costs would leave us at about €1800. (Note: I can not sell it as the design isn't mine, but Millie Marotta's!). A lot of people then comment that spending 200 hours on a piece that is mere art and that you can never sell is madness. Wow, do I need thick skin! Explaining to people that stitching makes me happy, didn't always make them more respectful. Quite a few did simply not get the point. It shows that our modern society is very cost driven indeed. It makes you wonder what we modern humans have lost. How many would greatly benefit from working with their hands more, instead of mainly with their heads and digital enhancements? Interesting observations and musings, don't you think? And here is my progress with Millie Marotta's fox. It really starts to grow! It is not easy to photograph, so you have to take my word for it: the colours are spectacular. So far, I have mainly used satin stitch, knots, chain stitch, Vandyke, pistil stitch and a bit of needle lace. Over the coming weeks, I will try to spend a decent amount of time on this project so that I will have it finished and framed in time for Nadel & Faden in Osnabrück at the end of September. A fellow member of the Pilatushaus and avid stitcher herself, Coletta, has kindly donated two boxes full of embroidery fabric and threads. How cool is that? I can't wait to rumage through this treasure and sort it all into my stash boxes. As you can see, Sammie seems to love the box too.
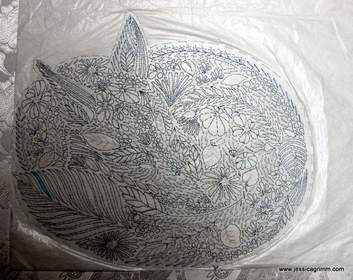
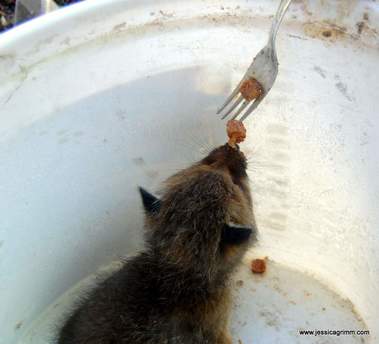
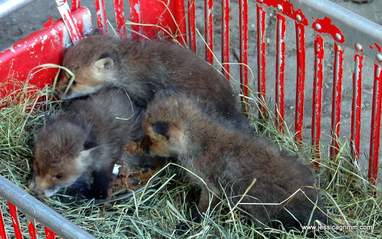
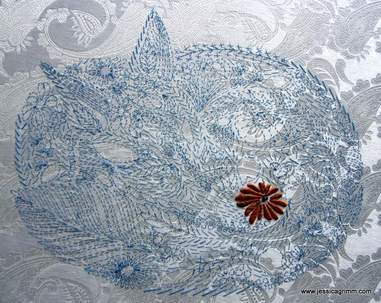
A warm welcome to all my new readers who found me through Mary Corbet's Needle 'n Thread! Today it will be all about foxes. We'll start with my progress on the Millie Marotta fox. For those of you brand new to this project, you'll find an earlier post here. It took a while, but finally I had the whole intricate design transferred onto the fabric using the paper tear method. Using larger stitches on the top and tiny stitches on back, I back stitched all along the design lines through paper and fabric. I then gently tore the paper away. Now I could finally start with the REAL stitching. Or so I thought... Then, these three orphaned baby foxes walked onto our farm. Adorable, cute and very labour intensive. No stitching in sight. You can check with Timmie & Sammie that I am a pretty decent cat mum. However, baby foxes are a whole different species. They need to be fed special formula milk and cat food every two hours and then you'll have to stroke their tummy or they'll get sick. So time to drop them off at the wildlife sanctuary. Sounds simple, was really simple too. Apart from the fact that on our way back, about 100m from the sanctuary, we hit a stone, ripped a tyre and broke the steering transmission. Aaaarrrrrrggggg! I am sure that if I had been born a bloke, I would have loved to see the car being winged on the ADAC truck. Alas, being a girl, the only thing I could think about was my lovely embroidery waiting for me at home. And this is all I've done so far. A bit of satin stitch in House of Embroidery perle #12, colour 46b Brass and three colonial knots in DMC Diamant colour D301. However, from tomorrow onwards until Sunday the 17th of May, you can see me stitch this design at the Pilatushaus in Oberammergau. Why not come along and have a chat?!
|
Want to keep up with my embroidery adventures? Sign up for my weekly Newsletter to get notified of new blogs, courses and workshops!
Liked my blog? Please consider making a donation or becoming a Patron so that I can keep up the good work and my blog ad-free!
Categories
All
Archives
July 2024
|
||||||||||||
Contact: info(at)jessicagrimm.com
Copyright Dr Jessica M. Grimm - Mandlweg 3, 82488 Ettal, Deutschland - +49(0)8822 2782219 (Monday, Tuesday, Friday & Saturday 9.00-17.00 CET)
Impressum - Legal Notice - Datenschutzerklärung - Privacy Policy - Webshop ABG - Widerrufsrecht - Disclaimer
Copyright Dr Jessica M. Grimm - Mandlweg 3, 82488 Ettal, Deutschland - +49(0)8822 2782219 (Monday, Tuesday, Friday & Saturday 9.00-17.00 CET)
Impressum - Legal Notice - Datenschutzerklärung - Privacy Policy - Webshop ABG - Widerrufsrecht - Disclaimer



 RSS Feed