|
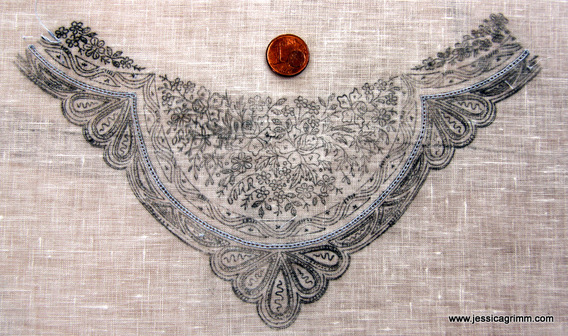
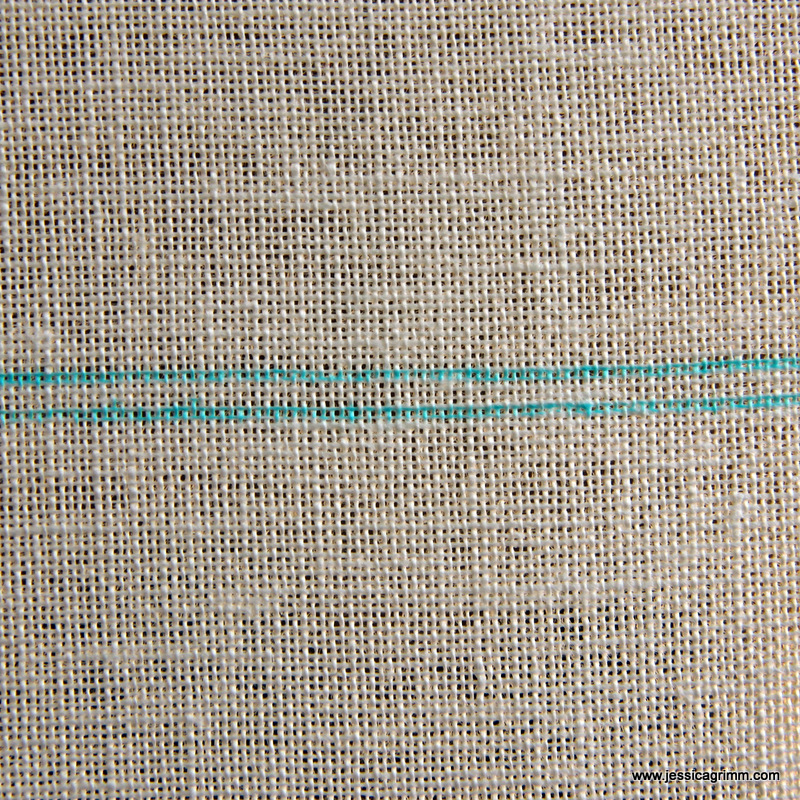
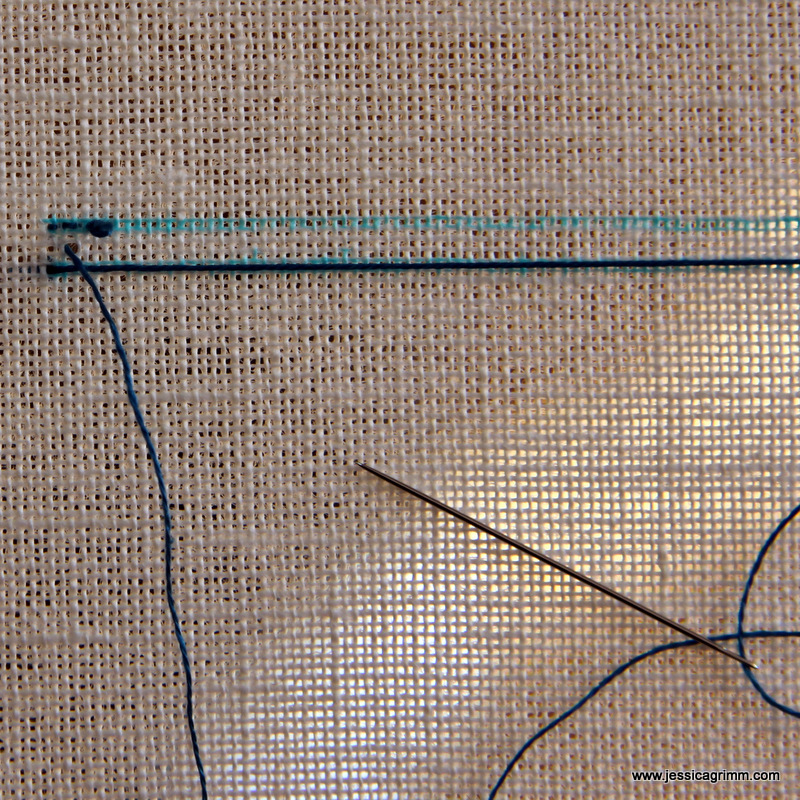
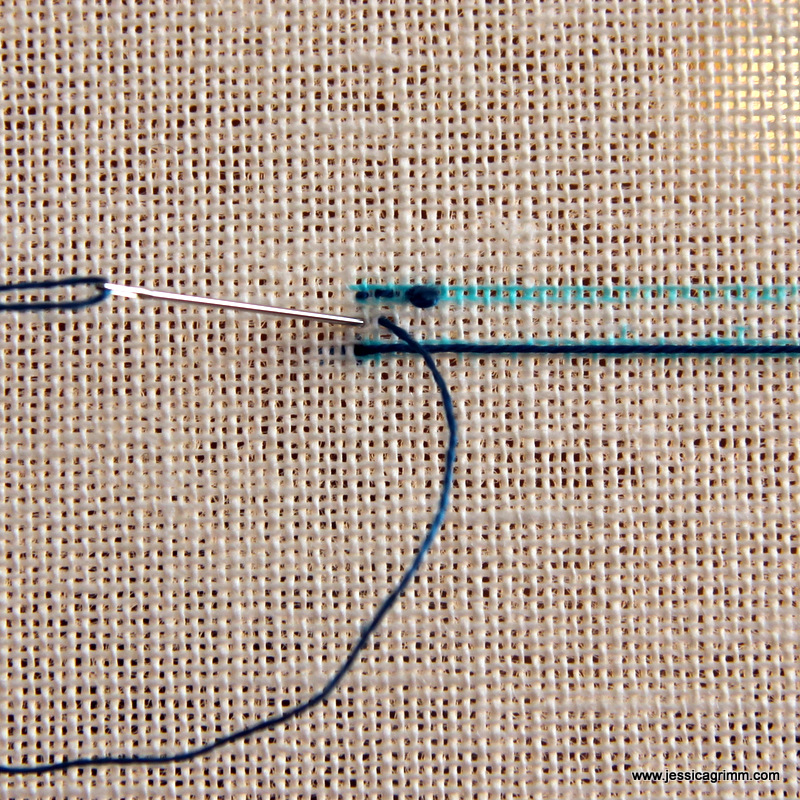
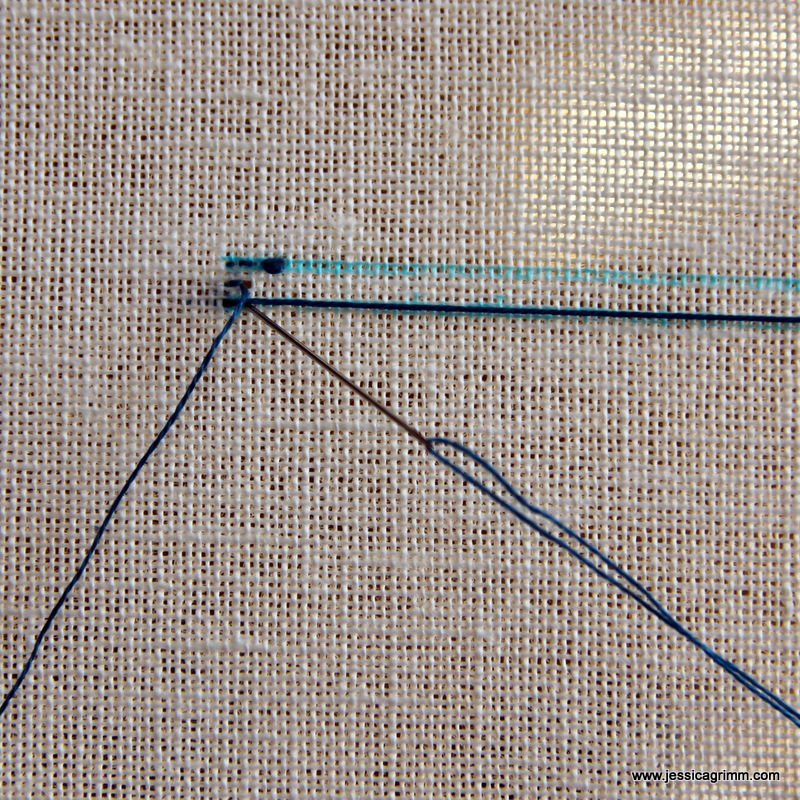
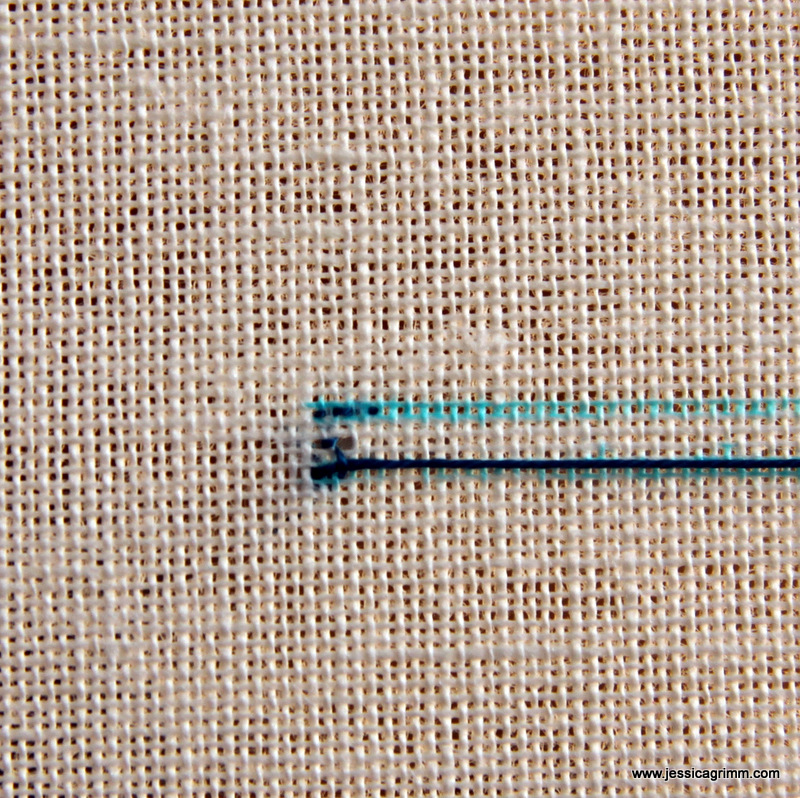
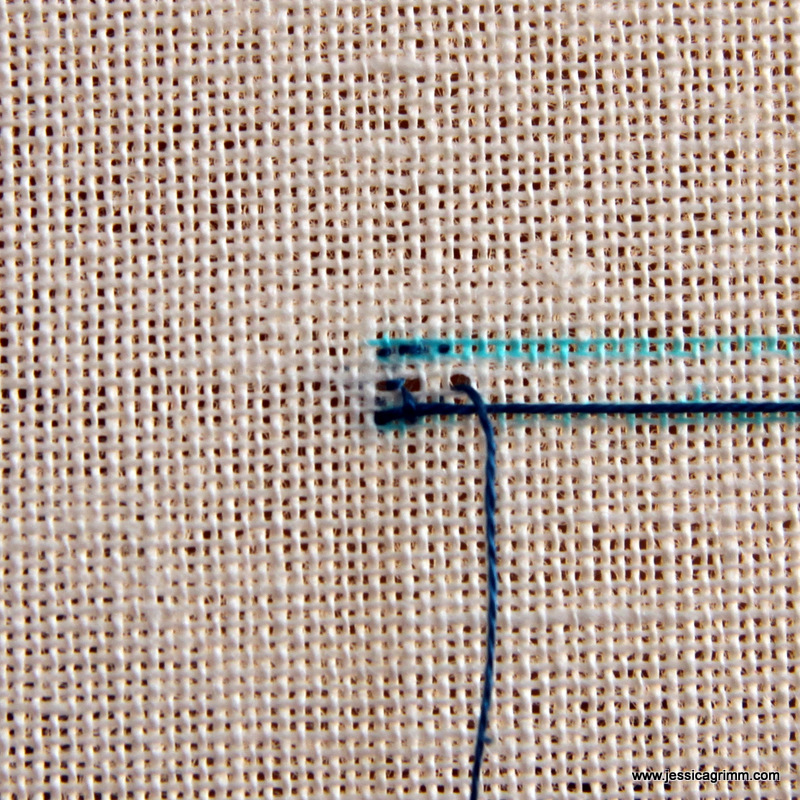
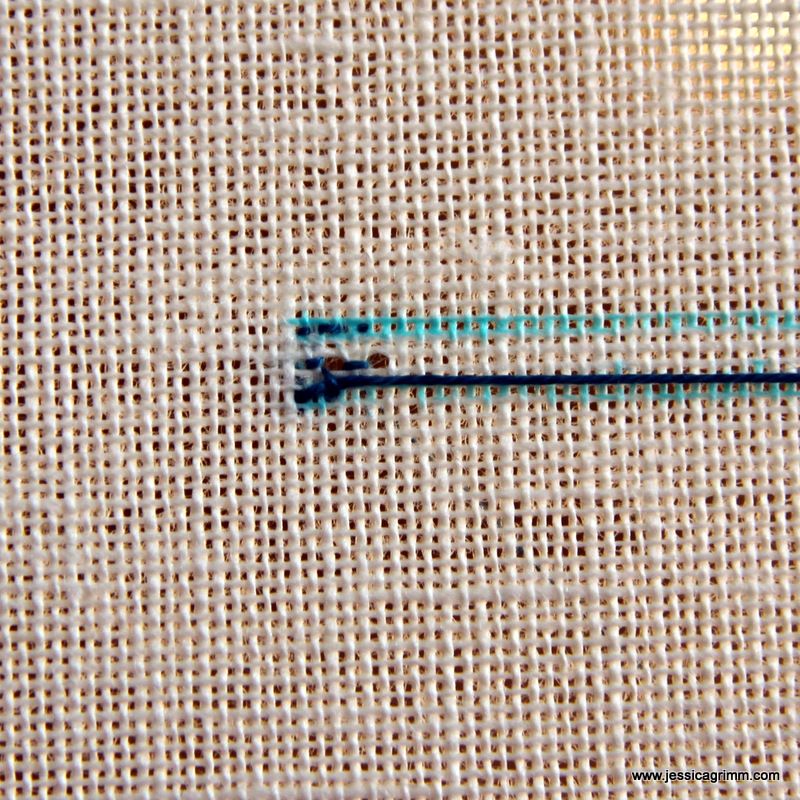
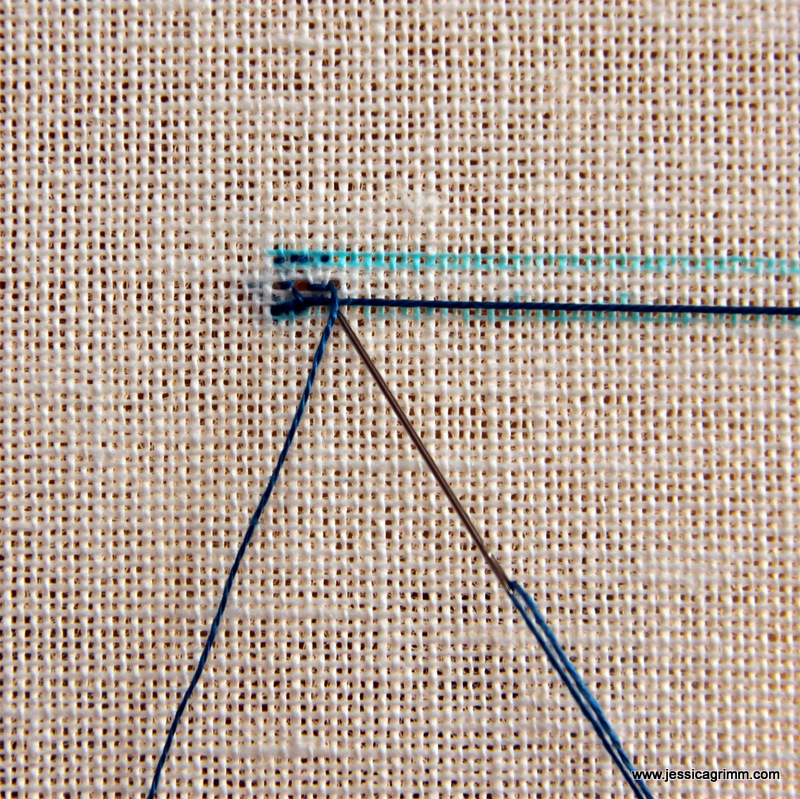
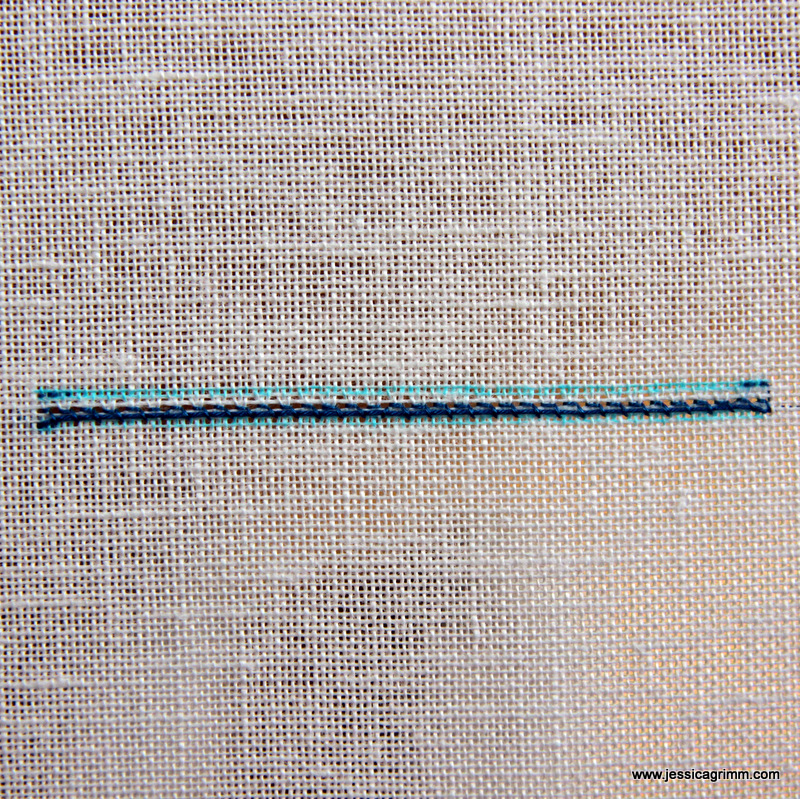
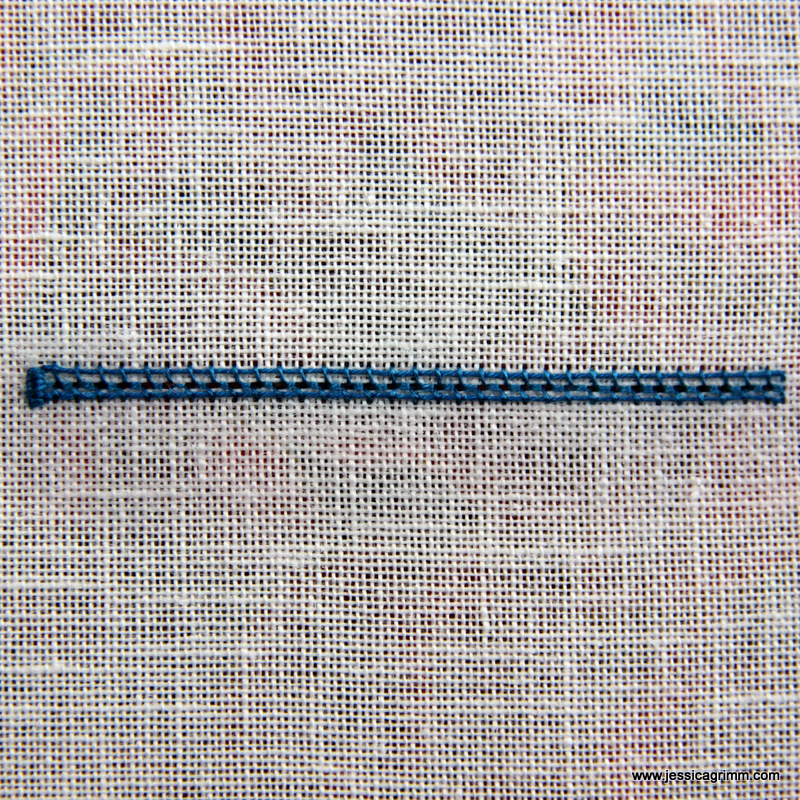
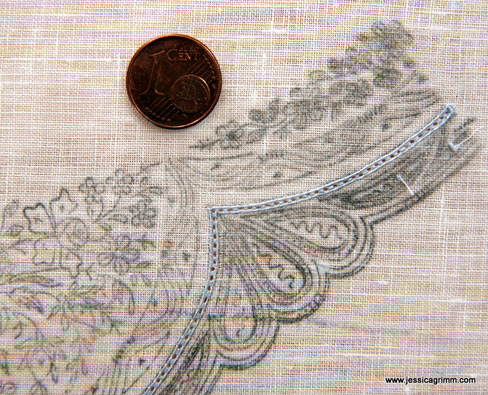
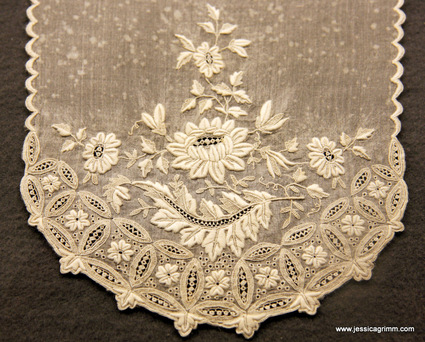
Thank you all for your kind and congratulations after last week's blog post! I am still chuffed that my fox won first prize at Beating around the Bush. And a very warm welcome to all the new readers joining after Mary Corbet mentioned my goldwork project 'St. Laurence' on her excellent blog! I hope you won't be too disappointed that today's blog is on white work :). This past Saturday, I was fortunate enough to attend another of Verena Schiegg's enjoyable classes on Appenzeller white work (for those of you new to this technique, please click 'Appenzell' in the categories list on your right for more information). So far I've learned to make padded satin stitches in the Appenzell fashion and drawn thread filling patterns. This particular class was going to be devoted to Lääteli (=Ladder). Verena had several old prickings for me to choose from and I set my eyes on the one above. It is one quarter of a very fine handkerchief. Lääteli are a combination of ajour stitches (pulled thread) and couching. You work with two different threads. A thicker one to be couched and a finer one to do the couching and ajour stitches with. In the above original, I work with a #65 for the ticker thread and a #80 for the couching stitches. Currently, I am not aware of any other white work technique using this particular stitch combination. Please do let me know if it rings a bell with you! To be clearer, I've made a tutorial for Graadi Lääteli (= straight ladder). To be able to make good pictures, I've upped the scale a little. The fabric used is a 36 ct linen. My thicker thread is a #25 DMC cotton a broder. The finer thread is one strand of DMC embroidery twist. Start by drawing two parallel lines, five threads apart, onto the linen. Take your thicker thread and cover the bottom line with a single straight stitch. Keep the stitch taut while working, but don't end it yet. Anchor your couching thread on the upper line. Come up with your needle three threads from the start and in the middle between the two lines. Wiggle your needle a bit to widen the hole (this isn't essential when working on such coarse linen, but it is when you work on very fine linen). Go down at the start in the middle between the two lines. Pull a little so that the fabric threads are pulled together. Come up in the hole you made wiggling your needle. Now place a couching stitch over the ticker thread by going down over it, parallel to the hole. Move down the middle between the lines, skip three threads and wiggle your needle to make the second hole. Come up with your thread. Go down in the first hole and gently pull the threads together. Come up in the second hole and make the parallel couching stitch over the ticker thread. Continue in this manner until you reach the end of your drawn line. Finished is the first half of your Lääteli. Turn your work upside down and start by laying your thicker thread over the other line. Thread your needle with the thinner thread and come up in the first hole. Go down at the start and repeat all the previous steps. The second half of the Lääteli works up much quicker as you don't have to count threads: the holes are already there! The 'open ends' of the Lääteli are closed with a padded button hole bar. This is a great place to start and stop your threads. As you've probably guessed, Graadi Lääteli are a counted thread technique. The Lääteli I've stitched on the handkerchief is a Chrommi Lääteli (=crooked ladder), you can't count threads here. And then there's a third form where the Lääteli gets combined with buttonhole stitching so that a sculpted edge is formed.
Lääteli would be perfect to stitch as a simple edge decoration. It works up quicker than a traditional drawn thread border as you don't have to withdraw threads first. And sometimes, your linen is not very well behaved and you can't easily withdraw threads; in comes the Lääteli! Did the Lääteli whet your appetite and would you like to learn Appenzeller whitework? Then why not join Verena's courses? She's an excellent teacher with many years of experience and one of the very few people who is proficient in this form of very fine whitework. Contact Verena for more details. If you would like to stitch Lääteli with the original materials, then send Verena an email with your requirements. As far as I know, she is the only person selling these very fine, traditionally blue, whitework threads.
8 Comments
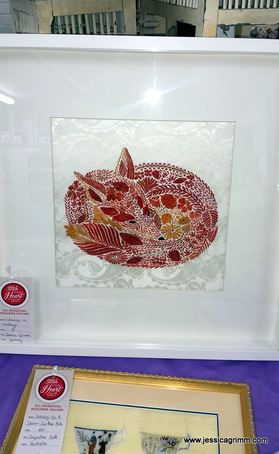
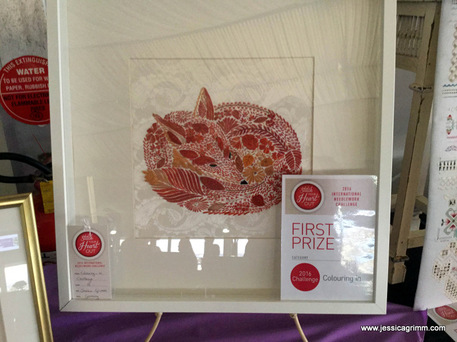
When I asked my lovely blog-readers last week to send me a picture of my embroidered fox attending Beating around the Bush in Adelaide, I just wanted to know if foxy was having fun down-under. Was he not too home-sick? Had he made friends with other embroideries? Did he behave himself? On the first picture I kindly received from Gayle, he seemed to be having a blast! And then a second picture came, kindly taken by Denise. And it made me scream like a little girl. My poor husband almost freaked out. My embroidered fox, after Millie Marotta's wonderful drawing, won me first prize in the coulouring-in category of the Inspiration's 'Stitch your Heart out' competition. I still have a broad smile on my face. This is what the lovely people of Inspiration's had to say about my entry:
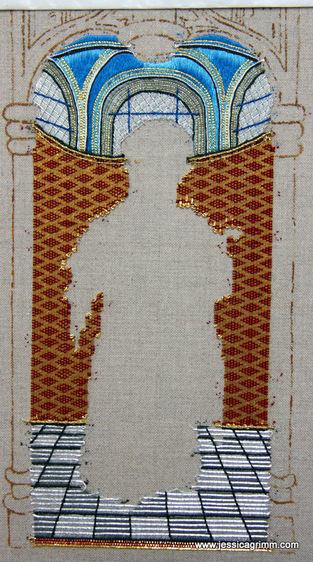
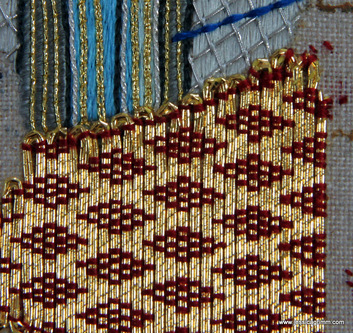
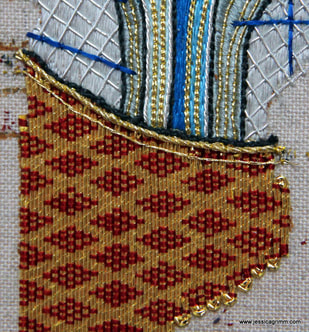
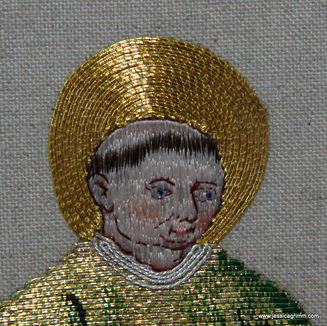
'We loved your superbly embroidered fox based on the fox from Animal Kingdom by Millie Marotta, your fabulous combination of surface and raised embroidery techniques, the placement of the colours and the subtle use of metallic thread. The background fabric, the patterned silk damask, is so complimentary to your fox – a thoughtful choice which was much commented on during the display of competition entries at our international needlework convention, Beating Around the Bush.' It is with much gratitude that I challenge you all to participate in the next competition in two years' time. And by the way: Denise won the counted/cut/drawn category with her clever three-dimensional strawberries! Oh, how I wish to be able to attend Beating around the Bush in Adelaide! That really is high on my wish list. And probably this holds true for many of you :). However, my fox after Millie Marotta's brilliant drawing, is there! So, if you are one of these very lucky people walking around the needlework convention in Adelaide, do take a picture of my fox and email it to me. Thank you very much in advance! This is what the project currently looks like (if you are new to this project, please click on St Laurence under categories on your right for previous posts). I learn so much by recreating this late medieval masterpiece! I really loved stitching the damask drapery in the background. It actually is a counted thread technique with Japanese Thread and red silk. And it is important to COUNT. How hard can it be to count to five? Well, judging from the left hand side in the picture, not as easy as you might think. So, I've learned not to eyeball this particular technique. For the right hand side, I decided to be a good good girl. And for once, it paid off. Getting a neat edge on the damask drapery, was a bit tricky. The original piece clearly used a much finer gold thread than my Japanese #12. On closer inspection it looks more like a passing thread. However, I had this really high quality Japanese Thread and decided to use that instead. But it did mean that my turns are far bulkier and thus more difficult to cover. I started by making a fine silk braid and couched it in place against the turns. This dark line gives the piece a hint of depth. Then I couched a gilt Twist #3 on the turns. And below, at a short distance, I couched a very fine gilt twist. Not bad at all. And using a thicker gold thread for the damask had an advantage too. The thinner thread in the original piece gapes a lot as it is clearly less stiff and would have needed many more couching stitches to stay put. After my previous post on St. Laurence, Mabel send me an email with a suggestion on how to improve his face. I took out the left hand side of his jaw line and moved it down a tiny bit. That was all it needed to make him even more handsome. Thank you so much Mabel! This is what I really like about my blog-followers, you are so inspirational. Working on your own can make you feel a bit isolated. However, once a week we have a kind of a meet-up with all these wonderful stitchers all over the world. Thank you all so much!
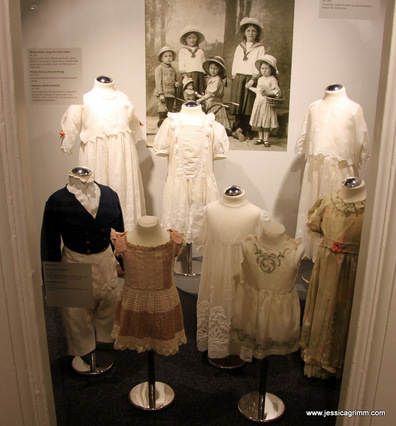
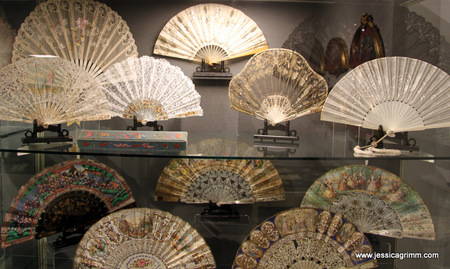
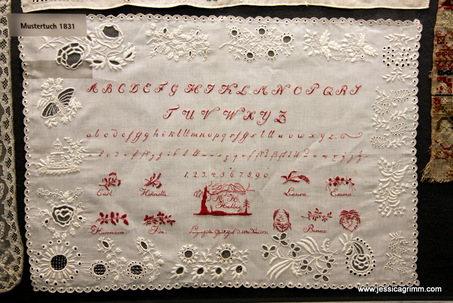
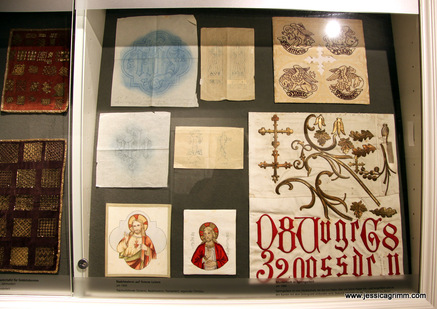
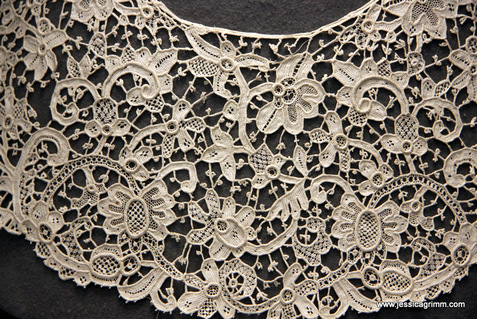
Autumn has truly arrived in this part of the world. No more summer dresses or breakfast on the balcony. Alas, the rainy weather is perfect for a little stitching. Or, for coming with me on a virtual trip. Pour yourself a cup of tea, raid the biscuit tin and enjoy! Since a couple of months, Mindelheim boosts a textile museum housed in the spectacular building of the Jesuit College. Being such a new museum, the whole collection is excellently lit by LED-technology. Not only can you actually see the individual stitches, you can even take decent pictures. And that's exactly what I did as the museum is so new, they don't sell a catalogue. The textile museum starts with a nice timeline display of fashion. Then there is a room with fashion accessories like fans, bags and gloves. Many of which sport some form of embroidery. Past the fashion displays, you land in a set of small rooms filled with different types of embroidery and (needle)lace. The museum collection is tilted heavily in the direction of whitework and lace. Not a bad thing at all, just something to keep in mind. Another display has a number of exquisite samplers. And then there is a nice little display filled with silk embroidery and goldwork. Especially the samplers and the unfinished work is really practical if you want to study this particular technique. Intersperced between the displays, are single works of embroidery. Some of really high quality, others more of the leisurely type. There are also a number of Chinese embroideries on display. After the embroidery displays, you'll enter the lace rooms. There are fantastic (and huge!) examples of needlelace. They even have a large cupboard with drawers where smaller items are stored. Pulling out the different drawers is very rewarding. So many excellent pieces. And some of the pieces even have a royal connection!
If you are ever in the area, do visit this gem of a museum. You can even bring your menfolk as the archaeology museum and the art museum are housed in the same building. Still afraid that they might bore themselves? Store them at one of the many cake shops lining the streets of this medieval town! |
Want to keep up with my embroidery adventures? Sign up for my weekly Newsletter to get notified of new blogs, courses and workshops!
Liked my blog? Please consider making a donation or becoming a Patron so that I can keep up the good work and my blog ad-free!
Categories
All
Archives
July 2024
|
Contact: info(at)jessicagrimm.com
Copyright Dr Jessica M. Grimm - Mandlweg 3, 82488 Ettal, Deutschland - +49(0)8822 2782219 (Monday, Tuesday, Friday & Saturday 9.00-17.00 CET)
Impressum - Legal Notice - Datenschutzerklärung - Privacy Policy - Webshop ABG - Widerrufsrecht - Disclaimer
Copyright Dr Jessica M. Grimm - Mandlweg 3, 82488 Ettal, Deutschland - +49(0)8822 2782219 (Monday, Tuesday, Friday & Saturday 9.00-17.00 CET)
Impressum - Legal Notice - Datenschutzerklärung - Privacy Policy - Webshop ABG - Widerrufsrecht - Disclaimer



 RSS Feed