|
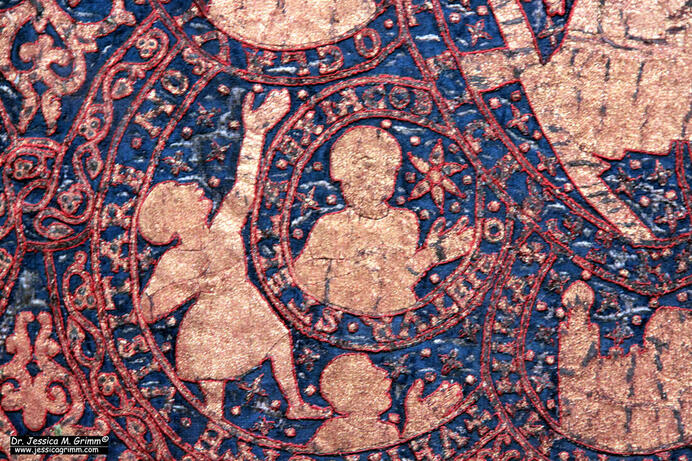
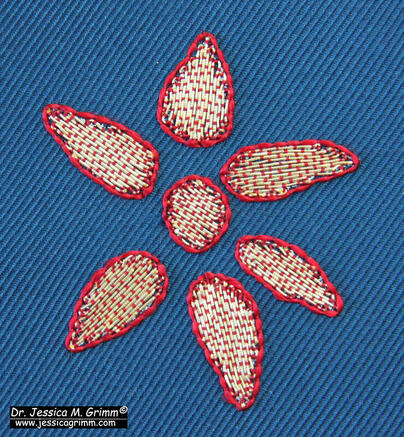
Are you interested in medieval goldwork embroidery? If yes, you might be interested in two upcoming events I am co-hosting. On the 16th of May, I will be giving a one-hour workshop through Zoom for the Diözesan Museum of Bamberg as part of the Internationaler Museumstag. And on the 1st of December, I will be giving a lecture as part of the San Francisco School of Needlework and Design's lecture series. The Diözesanmuseum of Bamberg has asked me to create a beginner's goldwork workshop inspired by their Kaisergewänder. I've taken a small star from the blue Kunigunde Mantle (stitched around AD 1014). The little star is part of the central design in which the antiphons and responses of the Christmas liturgy are depicted. The text around the bust with the star reads: "orietur stella ex iacob" (a star out of Jacob). The little star will be stitched with gilt passing thread and silk onto a heavy silk twill backed with calico. The original star is about 3.3 cm high. The workshop version is about double that. Attending the workshop is free and held in German. However, since the material pack needs to be mailed to you, only residents of Germany can attend. Sorry! That said, I am pondering the idea of turning this into a kit using the real goldthread with the silken core (that's what I actually used in the picture above). Just let me know if you would be interested by leaving a comment below!
22 Comments
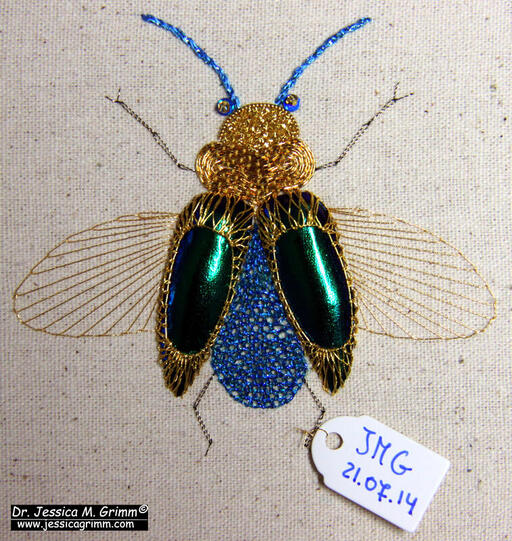
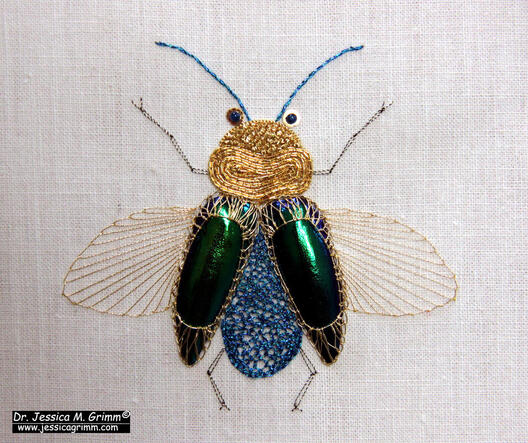
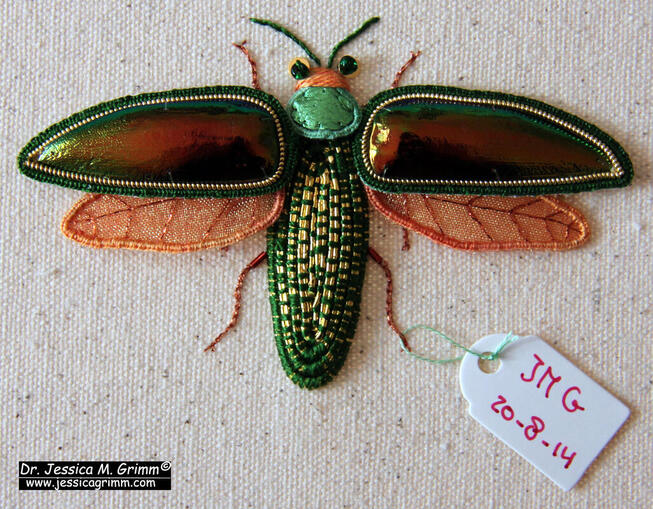
In 2014, I embroidered a couple of beetles with real beetle wings. The blue one was named Wilhelmina and I taught her successfully to students in Germany. A couple of days before I opened my first solo exhibition in 2019, I sold my beetles. I was happy as pie! However, earlier this year, my mum confessed that she would have bought the beetles off me had she known that I was selling them. OOPS! Time to get my old instructions out and make a new Wilhelmina beetle :). The original beetles were worked on a piece of heavy calico. Unfortunately, I did not have enough left to work Wilhelmina II on it as well. Instead, I opted for a piece of antique linen. It is a lovely, large piece of hand-woven linen. Unfortunately, it has quite a few nasty spots, especially along the folds. I always knew that I would have to cut out the good bits and use the rest as backing fabric. Using it on a beetle for my mum sounds like a worthy cause! It is so no longer 2014! Back then, I was able to stitch all of Wilhelmina without magnification. That is no longer the case. Bummer. However, I do love my TriSpektrum LED-magnifier from Cross-Stitch Corner! For years, I only used the extra light (both daylight and warm), but now I had to peek through the magnifier regularly too. Interestingly, I am still fine with working my medieval goldwork on 40ct linen. Although thinking of it, I am probably so adept at those stitches that I do not notice that I do not see as well anymore ...
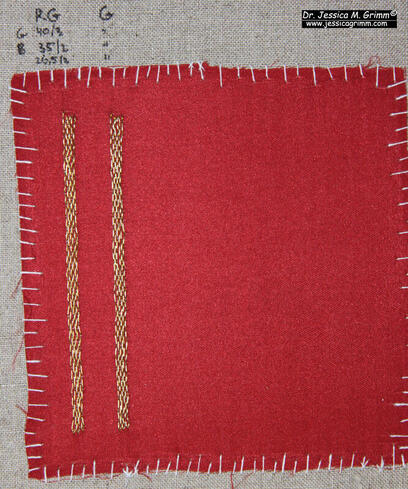
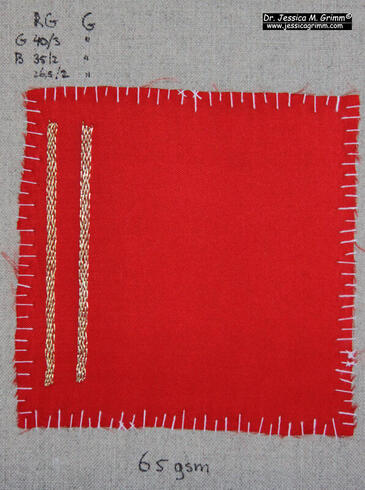
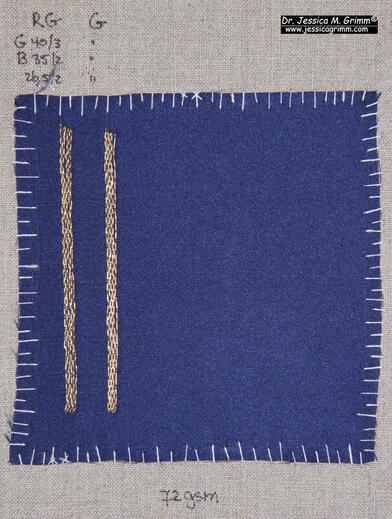
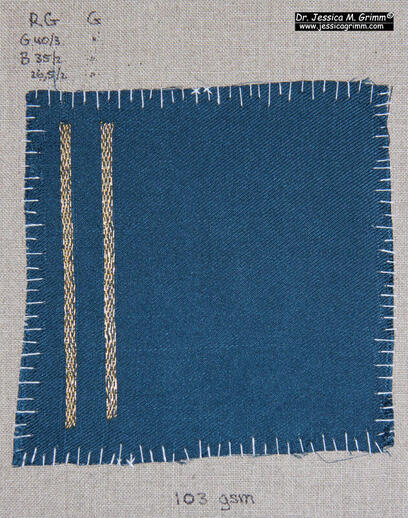
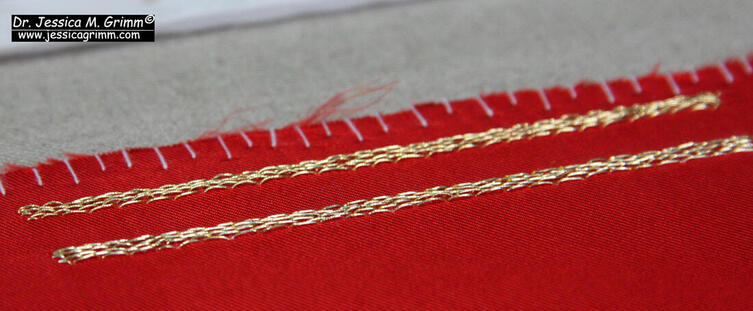
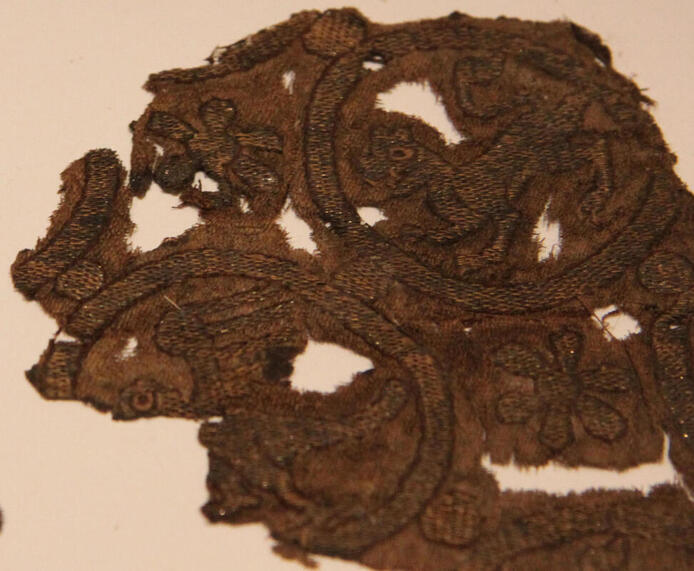
Last week, I showed you the set-up of my little experiment with underside couching. Today, I'll show you the exciting results. Show exciting results? Hmm, you probably need to take my word for it. This is goldwork after all and it does not photograph well. But first I need to make a confession. When I first experimented with underside couching for the epigraphy conference early last year, I took a thicker piece of chevron woven silk as my base. You can read all about my stitching nightmare here. The bottom line was that I needed a rather strong/thick 3-ply linen thread for the stitching. This made the back of my sample rock-solid and hard to stitch through when ending my threads. I thus concluded that you would always need a rather thick 3-ply linen thread. The 2-ply linen thread used in the Middle Ages must have been something of a super thread to withstand the force of underside couching. Nope. Wrong. Let me explain: This time, I tested four different types of silk twill, two different types of goldthread and three different types of linen thread. They all worked. I only broke my linen thread once (!). Conclusion: my very first piece of red chevron woven silk was probably not suitable for underside couching. What did I use this time?: - "G" in the pictures stands for Goldschild 40/3 linen thread (3-ply). - "B" stands for Bockens 35/2 linen thread (2-ply). - nameless 26,5/2 bio-linen thread (2-ply) from Egon Heger. - "RG" stands for real gold thread with a silk core (Stech 80/90 from Maurer) - "G" stands for gilt thread with a polyester core (Stech 80/90 from Maurer) - 65, 72 and 103 are the weights of the different silk twills I ordered from Sator - one piece of madder-dyed silk twill lighter in weight than the lightest (red) silk twill from Sator. - #22 chenille needle and 40ct Zweigart Newcastle linen base. I worked two rows with each linen thread, six rows in total for each type of goldthread. As said: all combinations work. However, I do have my preferences. Firstly, the 3-ply Goldschild and 2-ply Bockens linen threads are very round and stiff/hard. They don't compress easily. Whilst this probably is not much of an issue for underside couching, it is with normal couching. The linen thread pushes my goldthreads away from one another. In comes the more loosely plied bio-linen thread from Egon Heger. This thread is flat and compresses easily. Definitely my first choice! Added bonus of the 2-ply versus the 3-ply thread, the back of your embroidery is softer and it is now totally possible to end your threads on the back by weaving them in. The weight and actual weave of the silk twill also plays a major role. Again: it all works. However, the thickest silk twill (103 gms, petrol coloured) is my favourite. The "hills-and-valleys" of the twill weave are very pronounced and can thus be easily followed to accurately space your stitches. This pronounced twill pattern is also seen in the historical pieces and from the drape, you can clearly see that the historical pieces used a heavier weight silk too. The madder-dyed silk and the red silk (65 gms) were okay to work with too. However, I didn't like the blue 72 gms silk as I had trouble stitching back into the same hole. What I liked the best though, is the real goldthread with the real silken core. It is stiffer than the gilt thread with the polyester core. This means that the stitches form a slight arch (see picture above). The embroidery becomes more textured. Just like in the originals. Combine these little arches with the more pronounced "hills-and-valleys" of the thicker silk twill and you come pretty close to the historical pieces (see picture below). In addition, the real goldthread did not stress the silks or my linen thread so much. It was therefore easier to work with. So, why then did we switch from real goldthreads with a real silken core to gilt threads with a polyester core? Costs. Whilst a 10 gr spool of the "fake" thread costs about €14, the same amount of the real deal will set you back at about €64. I can now hear you think "well the difference in the pictures is not THAT spectacular, so why spend the money?". Me answers: but the stitching experience and the results ARE very different and better. It just does not show up well in a photograph. In my ever-quest to get closer and closer to the historical pieces, I have decided to use this real goldthread with the real silken core for the next run of my Medieval Goldwork Course (I hope I can get hold of enough of it). I am pretty sure that I will make a few more converts :).
P.S. For those of you who are EU-citizens, you might want to consider signing the petition for new fundamental rights in Europe, initiated by Ferdinand von Schirach. Thanks! |
Want to keep up with my embroidery adventures? Sign up for my weekly Newsletter to get notified of new blogs, courses and workshops!
Liked my blog? Please consider making a donation or becoming a Patron so that I can keep up the good work and my blog ad-free!
Categories
All
Archives
July 2024
|
Contact: info(at)jessicagrimm.com
Copyright Dr Jessica M. Grimm - Mandlweg 3, 82488 Ettal, Deutschland - +49(0)8822 2782219 (Monday, Tuesday, Friday & Saturday 9.00-17.00 CET)
Impressum - Legal Notice - Datenschutzerklärung - Privacy Policy - Webshop ABG - Widerrufsrecht - Disclaimer
Copyright Dr Jessica M. Grimm - Mandlweg 3, 82488 Ettal, Deutschland - +49(0)8822 2782219 (Monday, Tuesday, Friday & Saturday 9.00-17.00 CET)
Impressum - Legal Notice - Datenschutzerklärung - Privacy Policy - Webshop ABG - Widerrufsrecht - Disclaimer



 RSS Feed