|
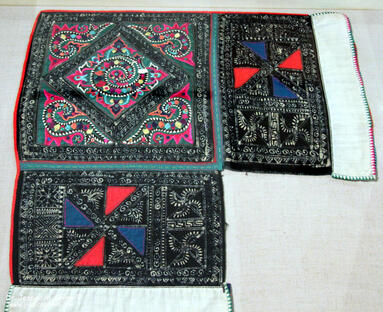
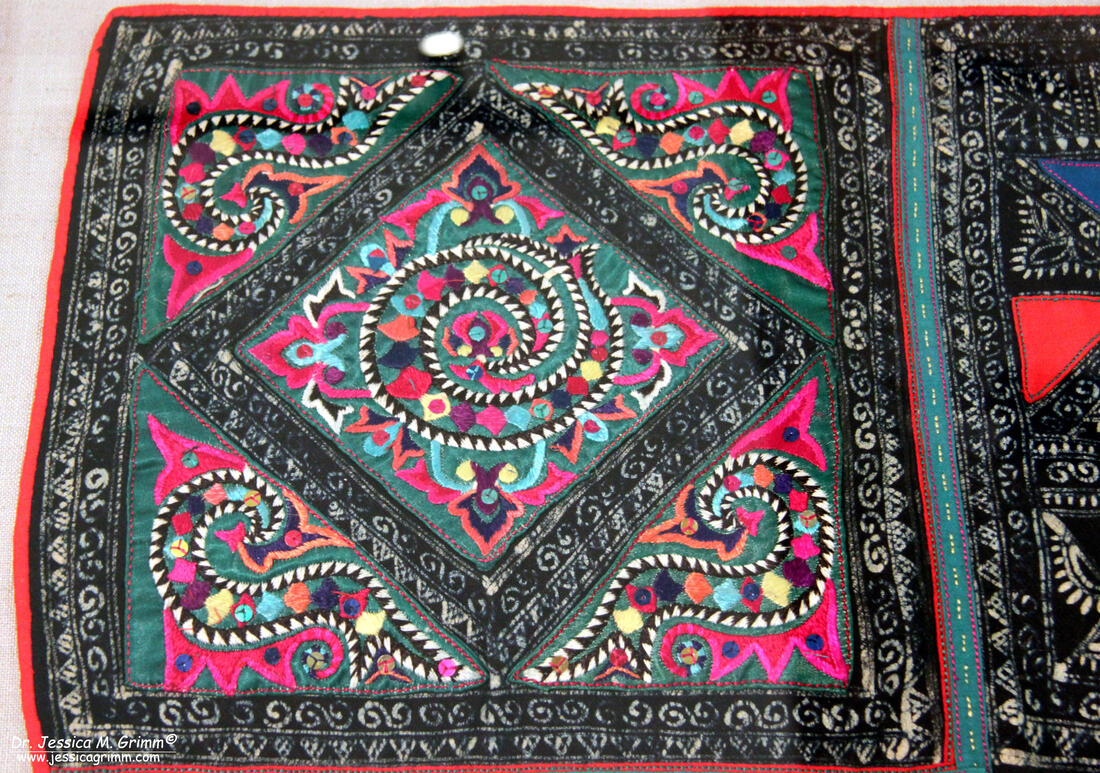
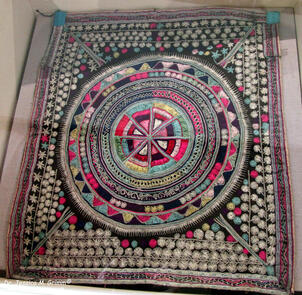
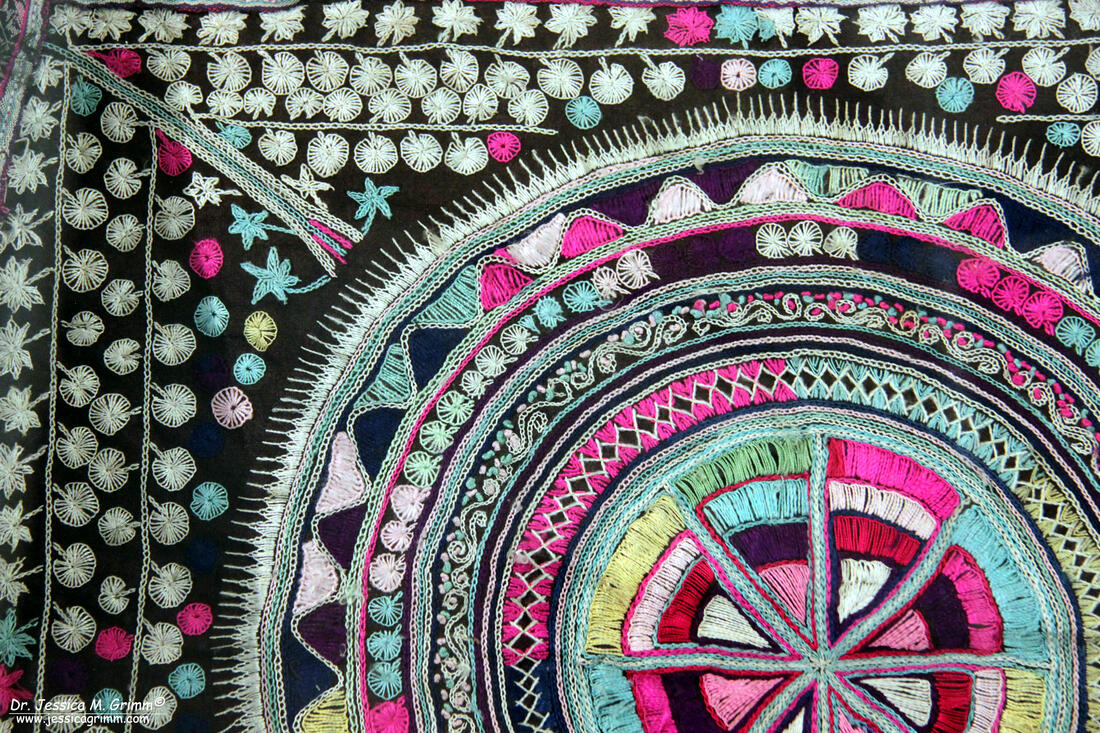
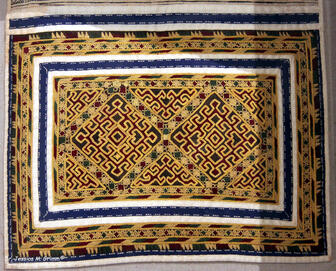
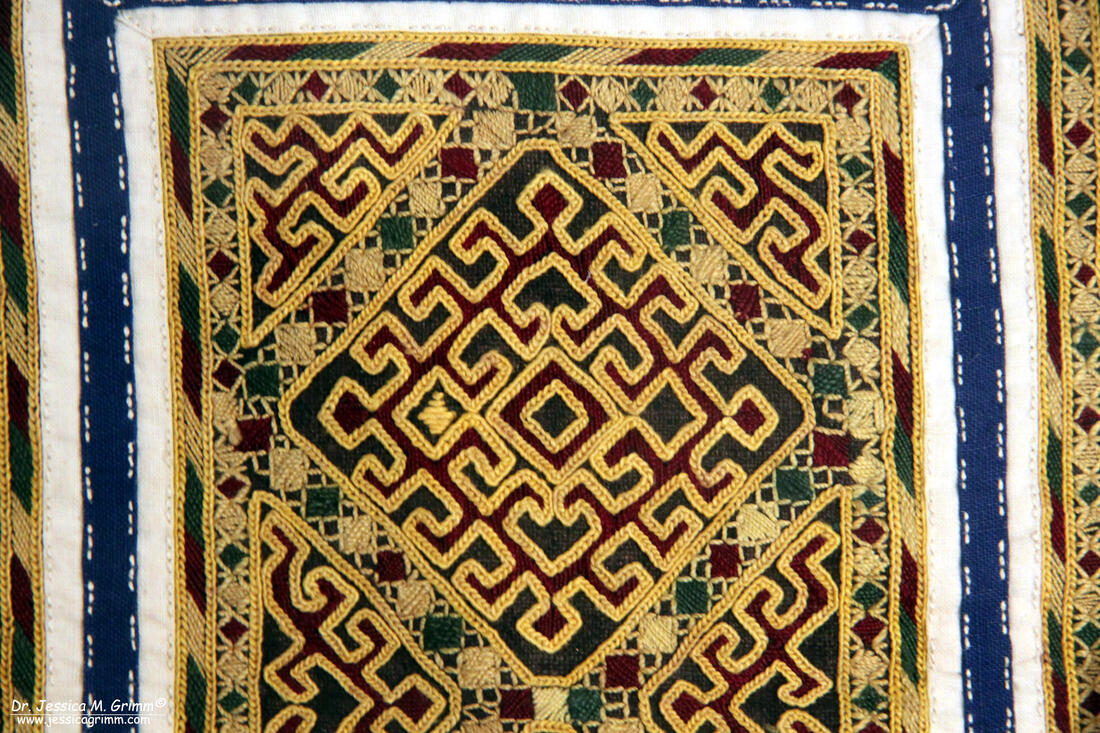
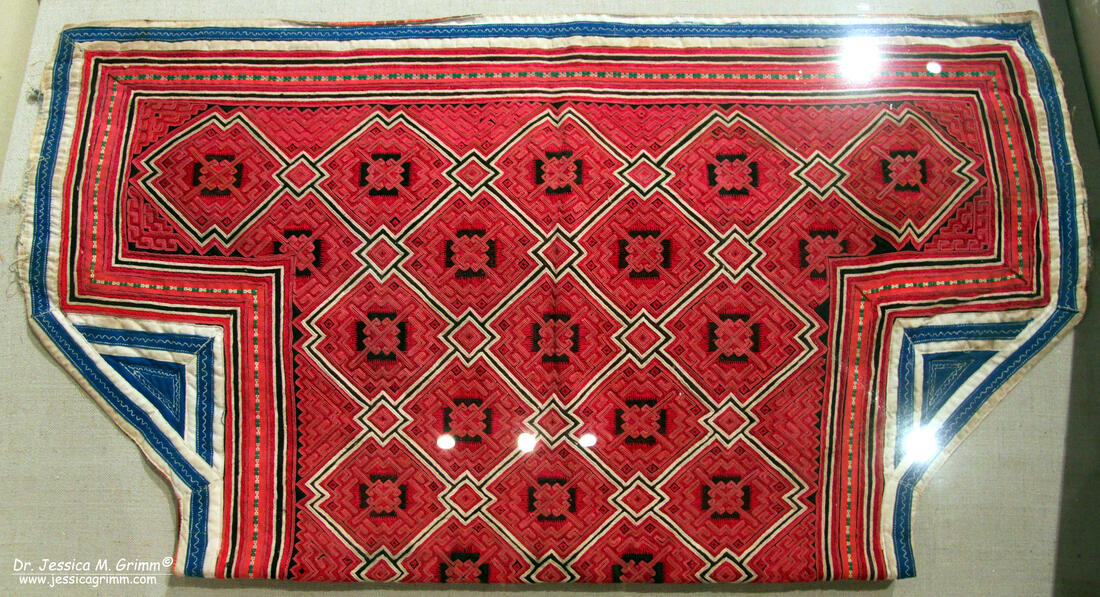
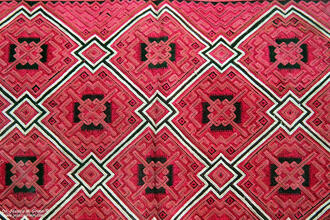
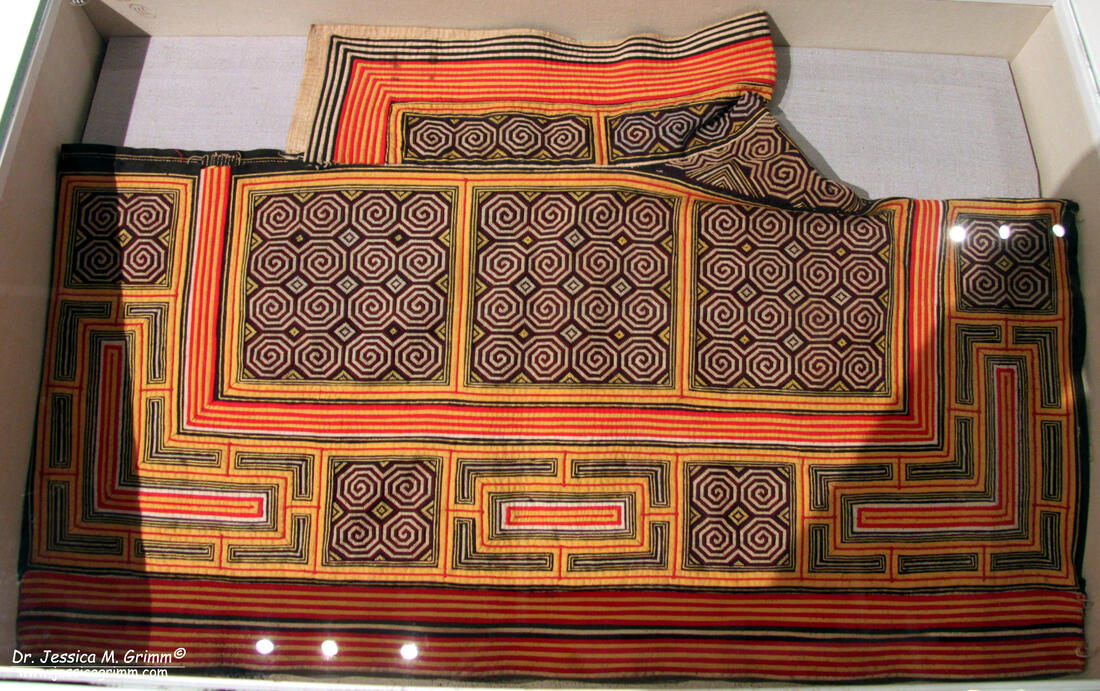
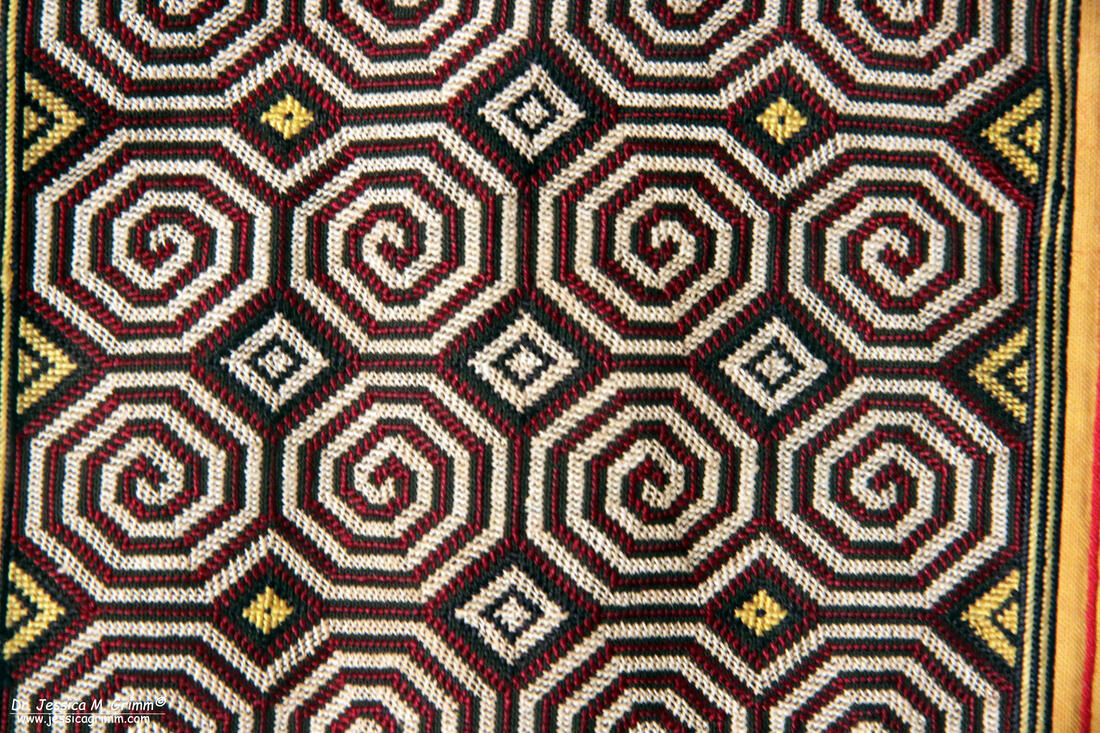
The National Silk Museum in Hangzhou had a small number of embroideries made by several ethnic minorities on display. After last week's book review on the textile traditions of one of these minorities, the Miao (Hmong), I thought it a good idea to share my pictures with you! First up is an embroidered apron worn by women of the Dong minority. The Dong are matrilinear people from the south of China. The embroidery on this apron consists of brightly coloured satin stitches (possibly over a cut paper template) and some applique. The pattern is made up of stylised flowers and the sun symbol (probably the swirls; Chinese explanations at museums are notoriously vague ...). Other parts of the apron consist of strips of wax-resist dyeing. Unfortunately, the only thing stated on this apron is that it was worn by an ethnic minority from Guizhou province. What I understand from the museum's description is that this is a single panel and that several of these embroidered panels would make up the actual apron. Do you see all these white buttonhole wheels? There are also chain stitches and knots. I think they used chain stitches to create the star shapes on the left and the maple leaves on the far right. Quite a clever and visually pleasing piece, I think! This panel was embroidered by the Ge people who also live in Guizhou province and who are officially considered to be a sub-group within the Miao. This piece mainly consists of outlines stitched with fine and very regular chain stitches. There is also some back stitch and some satin stitch visible. This piece of clothing (called 'braces' in the description) was also embroidered by the Ge people. It is again covered with very regular chain stitches and interspersed with satin stitches. The regularity of both pattern and stitching is absolutely stunning! The last piece on display was an embroidered shawl made by the Miao. The geometric pattern is based on an old song and represents flower beds. The stitching is entirely done in a form of long-armed cross-stitch. This is even a better close-up of the flower bed pattern. The movement created with the stitching is absolutely sublime! Keep staring at it and see how many different patterns you are able to see :).
6 Comments
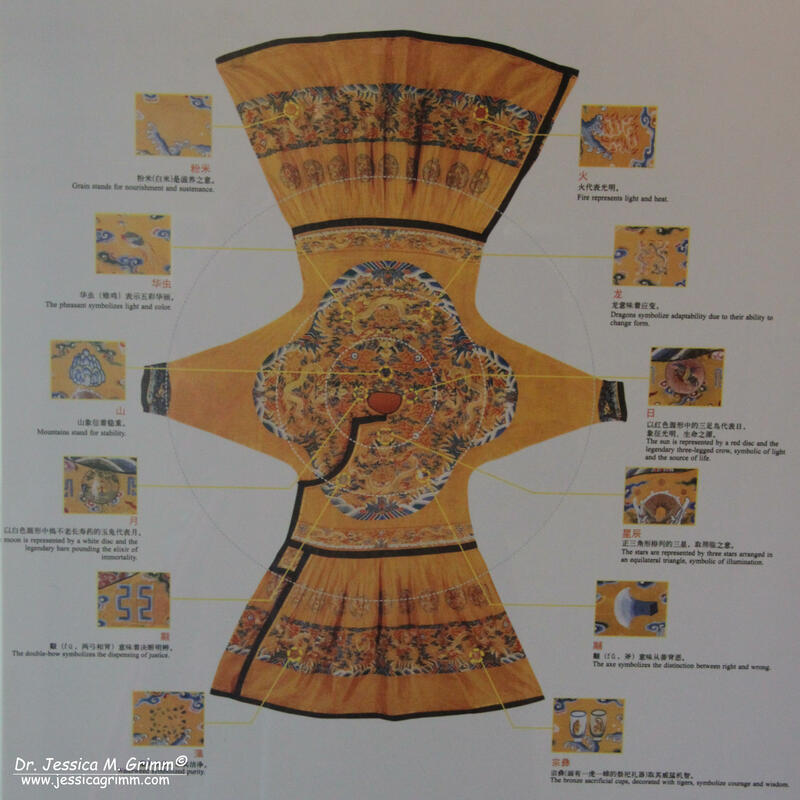
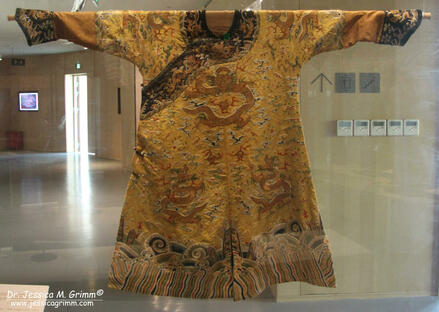
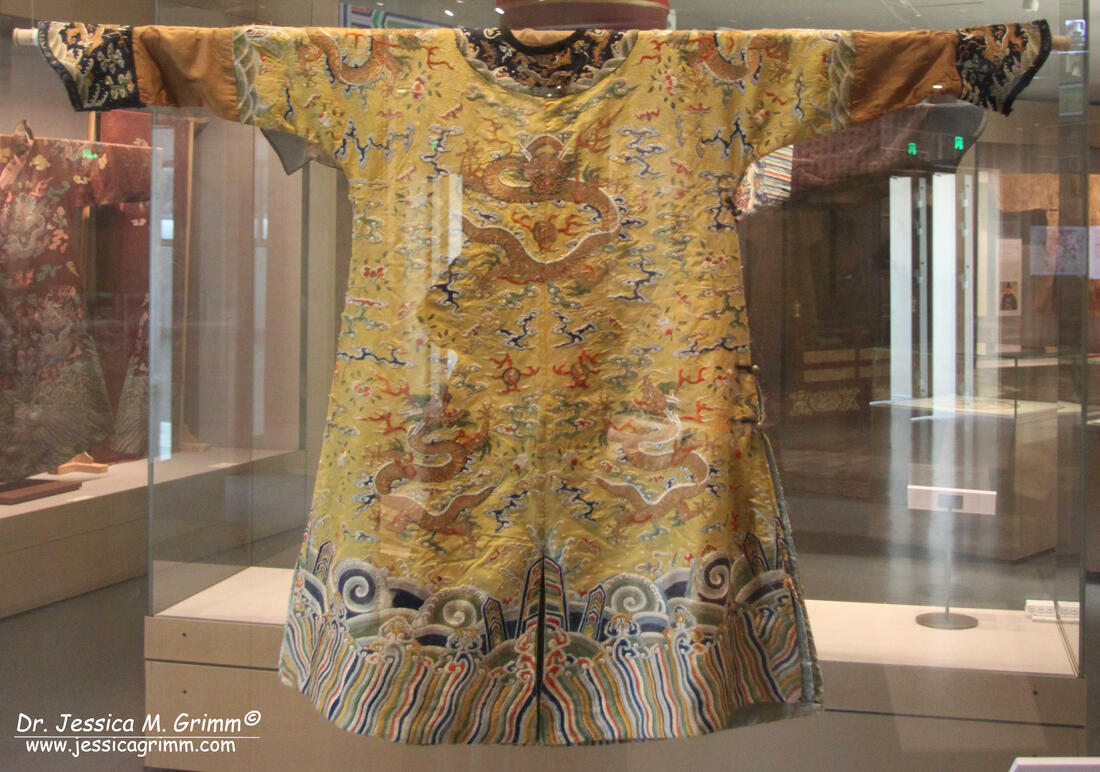
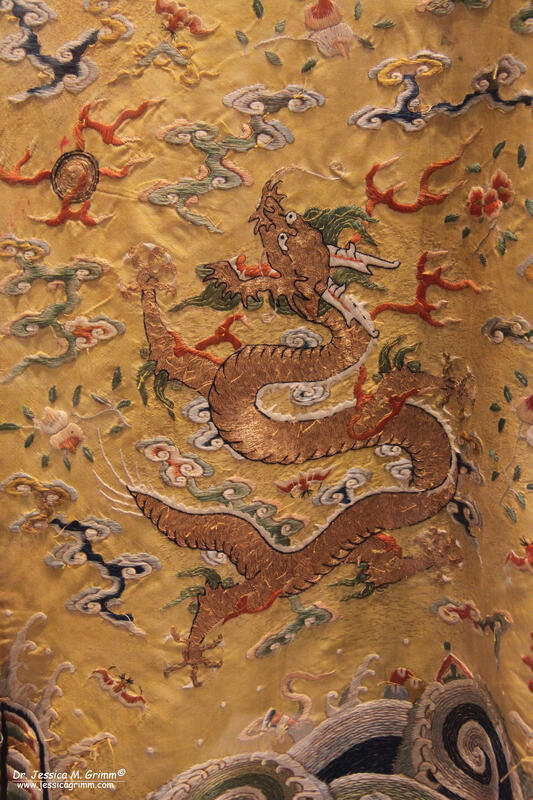
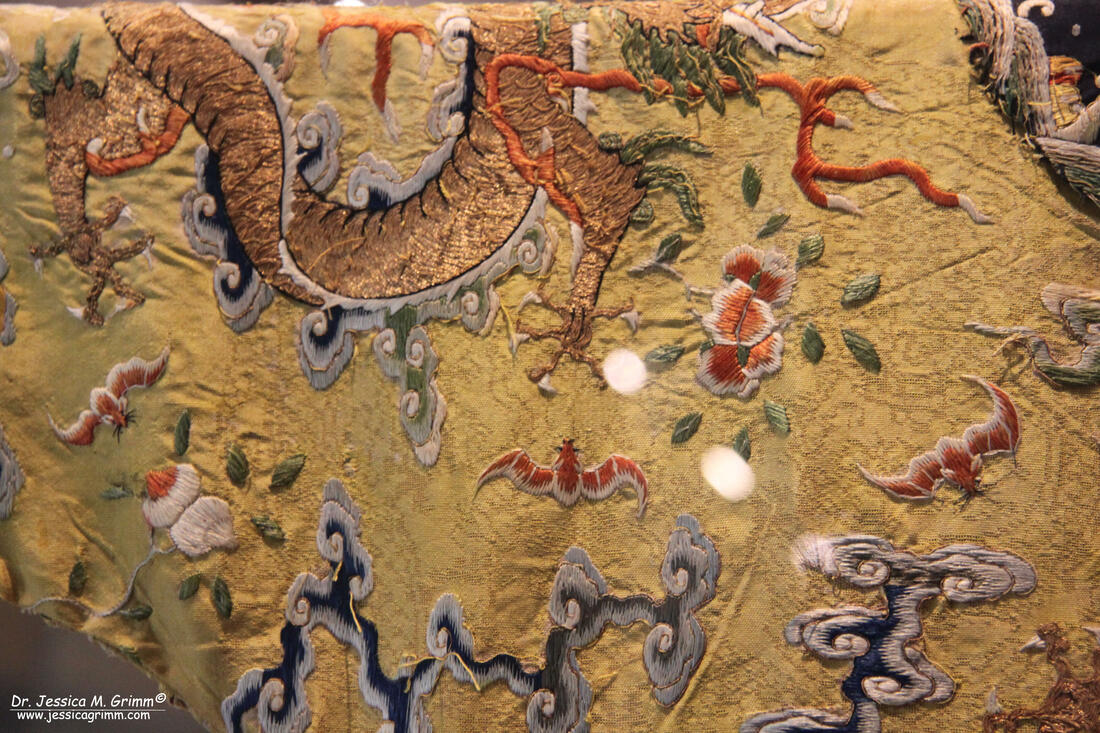
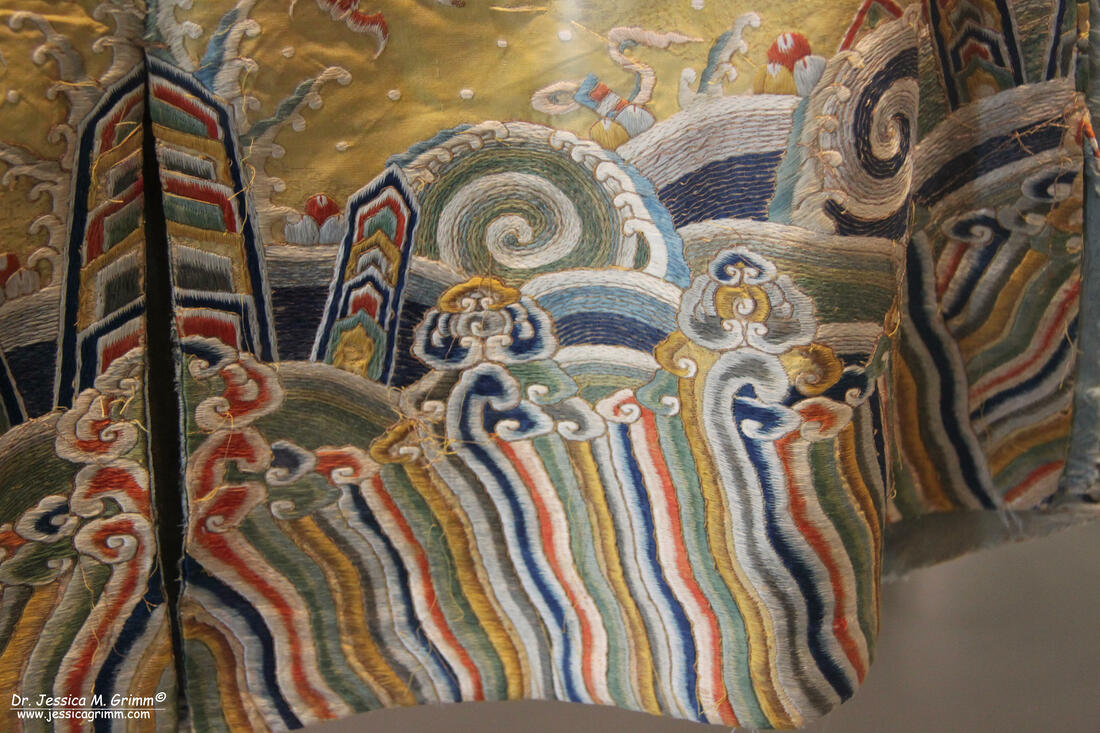
Before we dive into more exquisite embroidery from China, just a little shout-out to the Fiber Talk podcasts. On Sunday, I had my second lovely conversation with Gary discussing my ongoing journey from craftsperson to textile artist, my trip to China, the reality of turning your skill into your business and so on. We laughed a lot and hope that you`ll enjoy the conversation too! You can listen via the player on the Fiber Talk website (were you'll find hundreds of other engaging podcasts with fellow embroidery people!) or you can watch the episode on FlossTube. In previous blog posts I have shown you the oldest pieces of embroidery I saw in China as well as beautifully embroidered rank badges. Today we will examine the court robes worn by the Qing emperor (AD 1644-1911) and his closest relatives. These lavish robes are decorated with the symbol of the emperor: the dragon. Hence their name: dragon robes. But there is more than just gorgeously embroidered dragons on these robes. After all, we are in China :). These robes are packed with meaning. Luckily, there was a very helpful picture in the National Silk Museum, Hangzhou pointing out the different motives and their meaning: The different symbols are arranged in three distinct circles. Around the neck you'll find the sun (life force) and the moon on the shoulders and constellation of three stars (the handle of the sign Ursa Major; illumination) and the rock (stability) on the front and the back. The next circle runs over the chest and features the axe (distinction between right and wrong) and double bow (dispensing of justice) on the front, as well as a pair of dragons and a pheasant (light and colour). The third circle at knee-level sports a pair of bronze sacrificial cups (courage and wisdom), waterweed (purity), grain (nourishment and sustenance) and fire (warmth and light). When the emperor conducted certain important ceremonies he would sit facing south. The major symbols on his dragon robe would then allign with the wider architecture of the Forbidden City: the sun on his left shoulder with the Altar of the Sun in the East, the constillation of the three stars on his chest with the Altar of Heaven in the South, the moon on his right shoulder with the Altar of the Moon in the West and the Rock at the nape with the Altar of Earth in the North. And this is the real thing: a dragon robe featuring nine dragons. This particular robe would have been worn by an imperial prince during the summer. The background cloth is imperial yellow silk only to be used by the emperor and very close relatives. Above is a picture of one of the dragons featuring in the third circle just above the seam. The dragon mainly consists of couched gold threads (Japanese thread) and accents in silk embroidery. The small motives surrounding the dragon are stitched with silk in satin stitch. Among these small motives are bats (left of the right hind-leg of the dragon), pairs of peaches (at the top of the picture, right above the head of the dragon) and flaming pearls (the couched roundel with red silk embroidery, left of the head of the dragon) and many clouds. The hem is decorated with ocean waves, mountains, coral and rocks. Here you'll see the tiny bats, peaches and clouds in more detail. I particularly love the bats. Aren't they geniusly stitched? They are tiny, but there is so much characteristic detail. Just look at the ears and the whiskers! The Chinese word for bat and for happiness are the same. Red coloured bats are even better as the colour red and the word for majestic/subleme are also the same. Bats depicted together with peaches confer the wish `May you live long and happy`. And here is a detail of the seam of the prince's dragon robe. I particularly like the way the circular wave in the middle is embroidered. Very effective shaded split stitch for the spiral, surrounded by satin stitched `white heads`. The design lines of the `white heads` are further defined by couching down a single gold thread. The vertical stripes at the bottom represent deep water. Stylished multi-coloured rocks rise from the waters. The ancient Chinese preceived the world as being surrounded by four oceans.
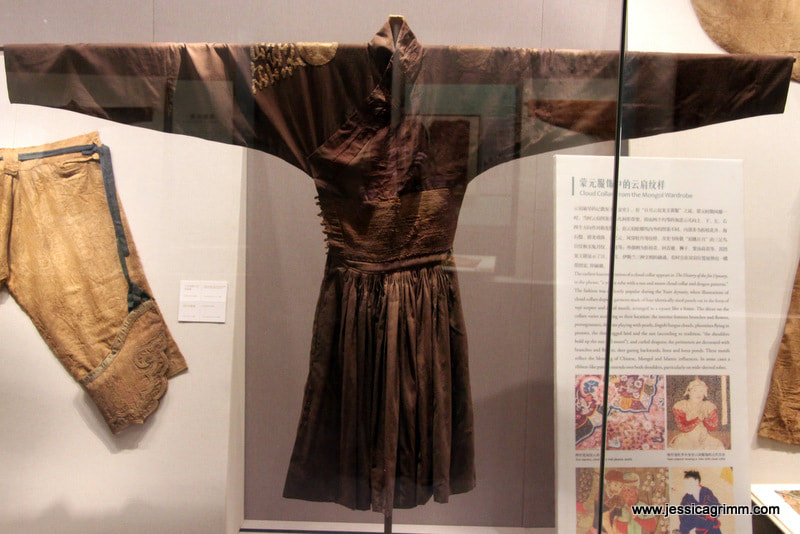
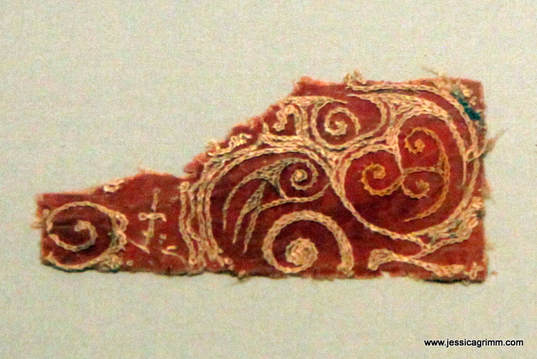
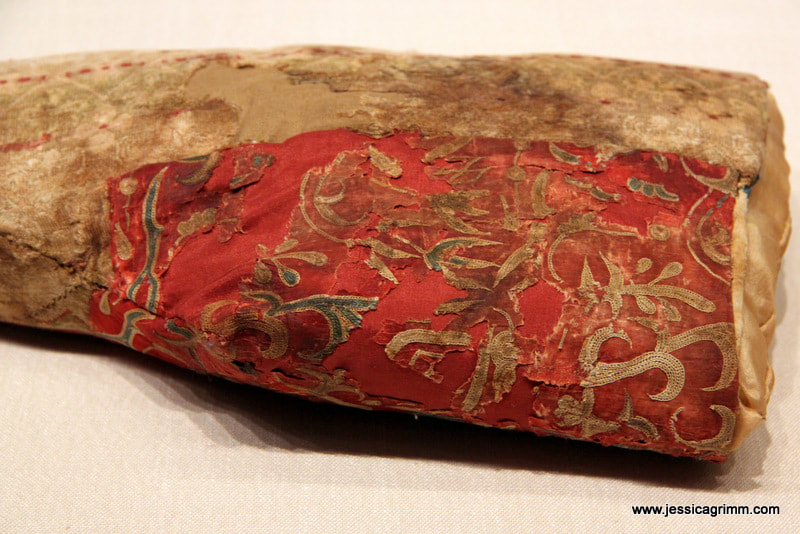
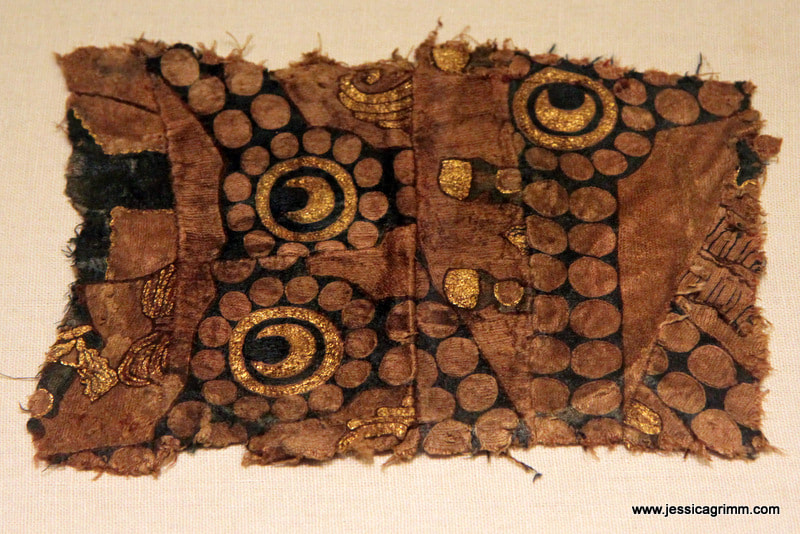
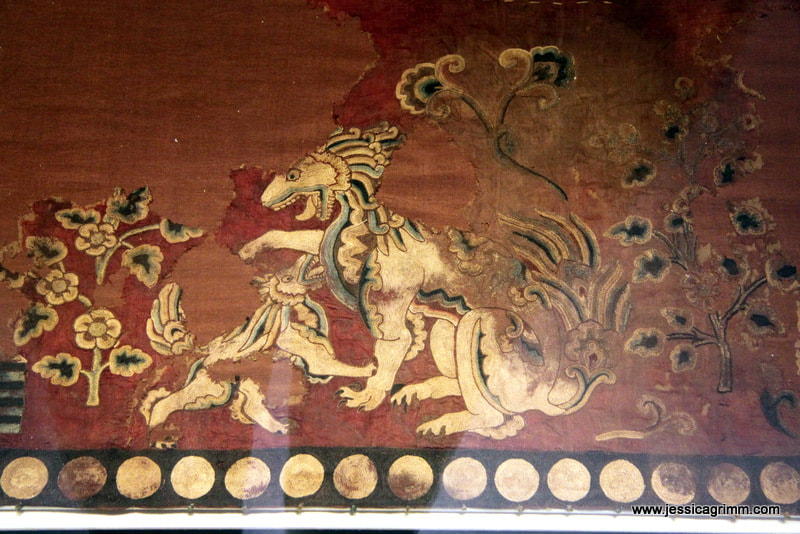
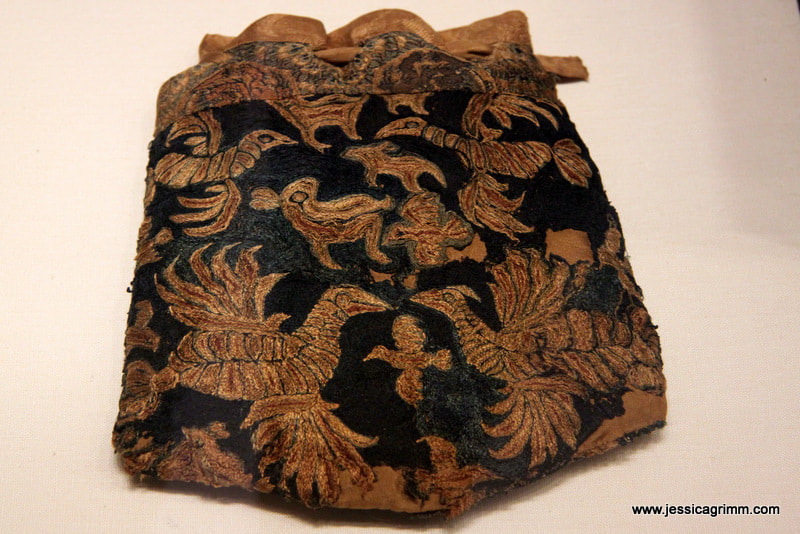
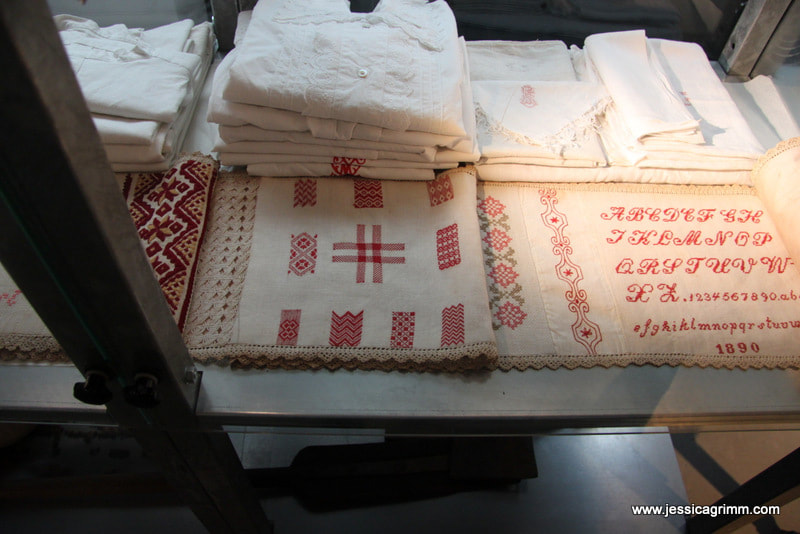
You can find more information on dragon robes and embroidered symbols in: Bertin-Guest, J. 2003. Chinese Embroidery traditional techniques, Krause Publications, ISBN 087349718-X. This book also explains the embroidery techniques in detail and comes with 16 (increasingly difficult!) designs to work yourself. Two cents for your thoughts when you read the above blog title. Highly likely that you now have a picture of these hyper-realistic silk embroideries in your mind :). But that's not what we are going to explore in this blog post. Chinese embroidery is so much more! There's the intricate and colourful embroidery from the many ethnic minorities we will explore in a future blog post. And then there are these magnificent dragon robes worn by the emperor and his close relatives. Equally food for a future blog post. But how did it all began? A question I never really asked myself before I went to China. As an archaeologist I am all too aware that the evidence we have for really old textiles adorned with embroidery is scant. You need very favourable preservation conditions for them to survive. So the mantra instilled in me as an archaeology student: absence of evidence is not the same as evidence of absence, holds very true in the case of ancient textiles. But traveling to China and talking to Chinese embroiderers, the question of how it all began is paramount to them. The humiliation at the hands of the Western powers in the 19th century is still a national trauma. Being the inventor of something which was subsequently adopted by the West, thus counts! The National Silk Museum in Hangzhou has a very modern exhibition on the textiles form the Silk Road. The exhibition includes many textile fragments from recent large scale excavations of tombs. A new exhibition titled 'Countless stitching and marvellous threads' was opened when I taught my workshop at the end of October. Unfortunately, this exhibition has no captions in English (unlike the Silk Road exhibition which is entirely bi-lingual). From what my phone was able to translate, the new exhibition focusses on stitches and how they emerged and developed. Starting with archaeological remains and ending with modern embroideries by contemporary masters. Taking pictures of the embroideries on display posed its own problems. The lighting was understandably dim and flash equally understandably not allowed. Usually not a problem when you are patient and have a steady hand. What was a problem, was the bad quality glass used for the display cases. And the fact that they were very (I mean VERY) dirty from the touching of countless hands. China is this delightful combination of a developing country and a highly digitally developed world nation. This means that they laughed at me when I explained that in my rural village of 1200 people, probably 600 or so don't have a mobile phone, nor an email address. Digital 'illiteracy' is high here and not only among the elderly. At the same time, all 1200 of us would shake our heads in pity at the many Chinese who don't have a private toilet in their home and need to use the public toilet. How to use a museum is something they are in the process of figuring out :). Let's explore the embroideries! The oldest embroideries on display, date to the period of the Han Dynasty (206 BC-220 AD) and the Northern Dynasties (386-581 AD). However, in the publications on embroidery I bought at the museum, it is stated that embroidery already existed in the Xia dynasty (2200-1800 BC). But, this is from oral tradition rather than archaeological finds. The first archaeological evidence seems to date from the late Shang dynasty, around 1300 BC. The above fragment dates from the much later Han Dynasty (206 BC-220 AD) and shows longevity symbols stitched with several colours of silk using chain stitch on a red silk background. This small fragment is all that is left from an all-over embroidered female dress. Other embroidered items include a pair of red socks from the first-third century AD. The stitch used seems to be very fine chain stitch. And here is a piece with goldwork embroidery (couching) depicting animal masks and dating to the Northern Dynasties (386-581 AD). This very large piece depicting lions dates from China's golden age, the Tang dynasty (7th century AD). This lovely piece is an embroidered leather pouch with twill damask and samite border. It dates to the Liao dynasty (907-1125 AD). The upper part is a twill damask border, the middle is of leather, completely covered with chain stitch embroidery, with different patterns on each side: birds, butterflies and peonies on one side and flying birds and hunting motifs on the other.
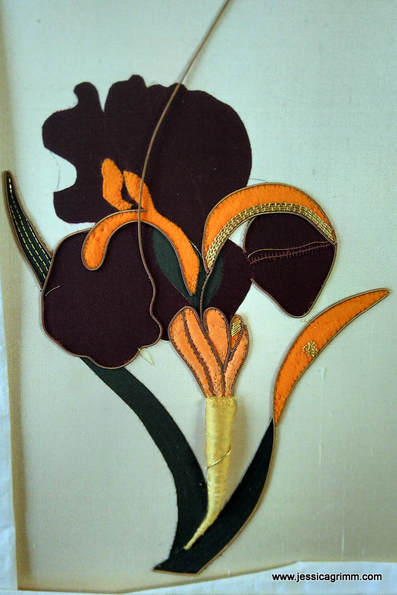
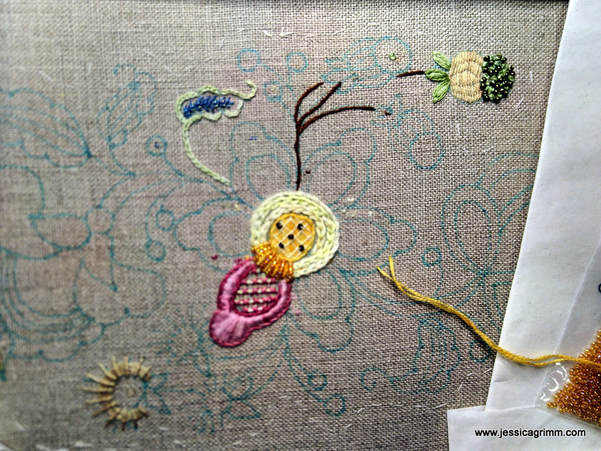
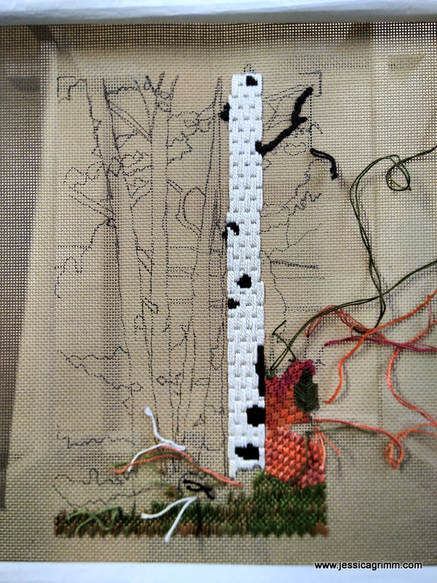
P.S. If you are interested in the history of Chinese embroidery, I recommend the book 'Silken Threads. A history of embroidery in China, Korea, Japan and Vietnam' written by Young Yang Chung in 2005, ISBN 0-8109-4330-1. This is an epic volume with beautiful pictures and of the highest scientific standard. Last week I ran my last five-day embroidery workshop of the year. Due to my trip to China, I had to move some students to this new date. I thus ended up with one person doing crewel embroidery, one person doing canvas and one person doing goldwork. And that was actually really nice and varied! Let's have a look at what the ladies worked on. Unfortunately, my good camera gave up the ghost in China, so I had to take these pictures with my phone. Today my good camera was returned to me all cleaned and with a brand new diaphragm. Can't wait to shoot with it again! First up is Elena from Switzerland. She worked a design from an older RSN book. As she is originally from Russia, the copy of the book is in Russian too. Luckily for me, the names and sizes of the gold threads were not being translated. In the original design, the petals and leaves are coloured in with aquarelle pencils. We opted for silk appliques instead. Unfortunately, the picture does not really do justice to the very elegant feel of this design. I can't wait to see it when it is finished! Anja L. worked a crewel embroidery design from a book by Hazel Blomkamp 'Crewel Twists'. It was her first encounter with embroidery since primary school. Getting to grips with the fact that this type of embroidery is not very productive, took some time. But she persisted and I think we have our latest convert! It will be lovely to see Anja develop her own style when she gains confidence in her own stitching abilities. And then there was Anja D. from the Netherlands. She worked on her first canvas piece and really loved it. And so did we all! Once completely stitched, the beech trees will form a stark contrast with the beautiful autumn background. Instead of blending each colour shade in the needle, we opted for the variegated threads by House of Embroidery. This brand just happened to have such beautiful autumny colour combinations that it would have been a waste of time not to use them. And last but not least, you can watch my talk on historical embroideries I held at the National Silk Museum last month. As the whole talk is being translated into Chinese, I really needed to stick to my text so as not to throw off my lovely translator Clover. Pretty quickly we established a good rhythm and the whole presentation went rather smoothly. Enjoy!
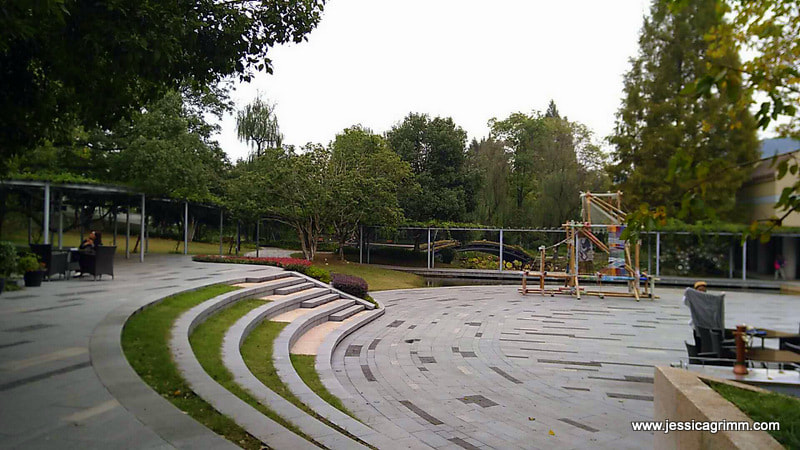
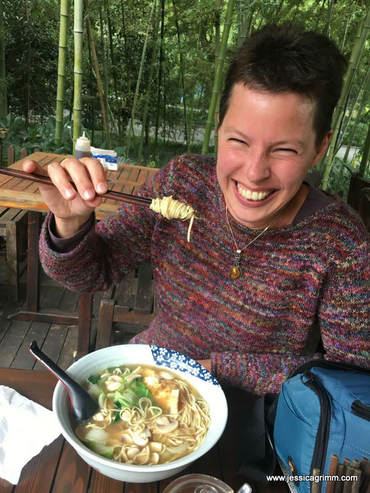
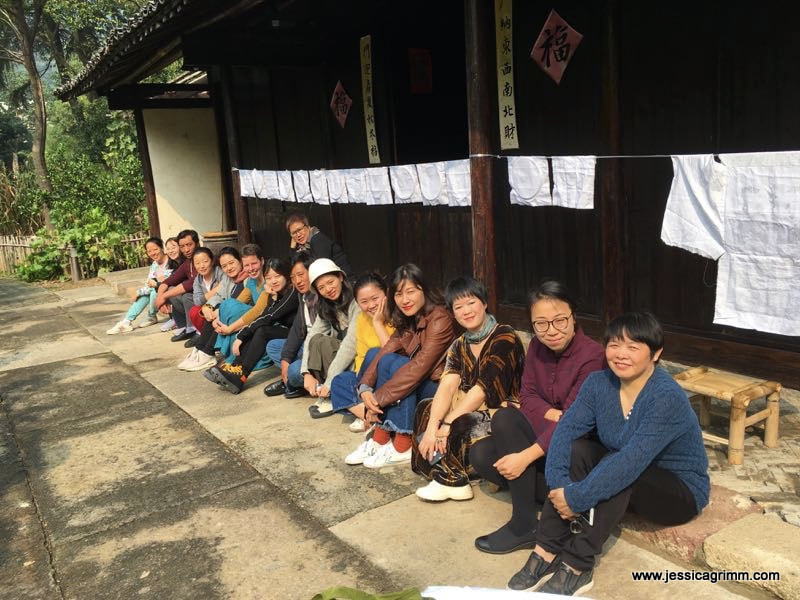
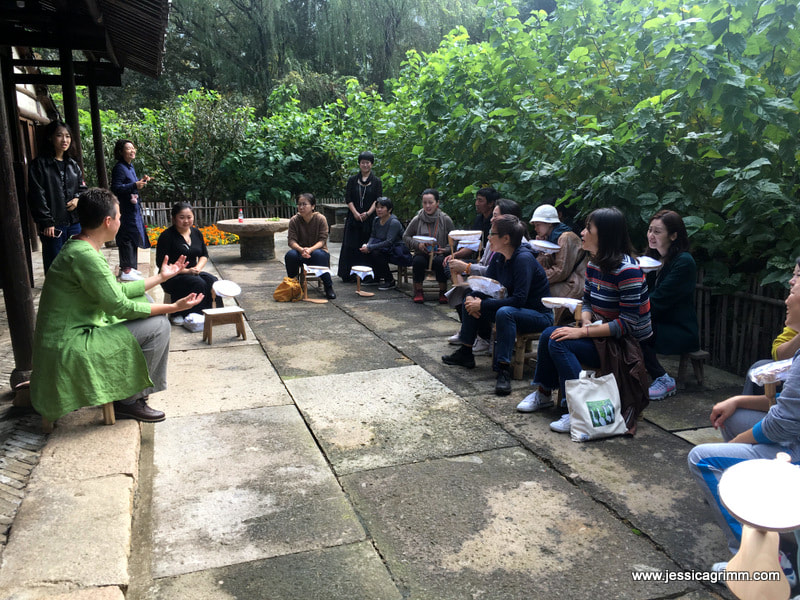
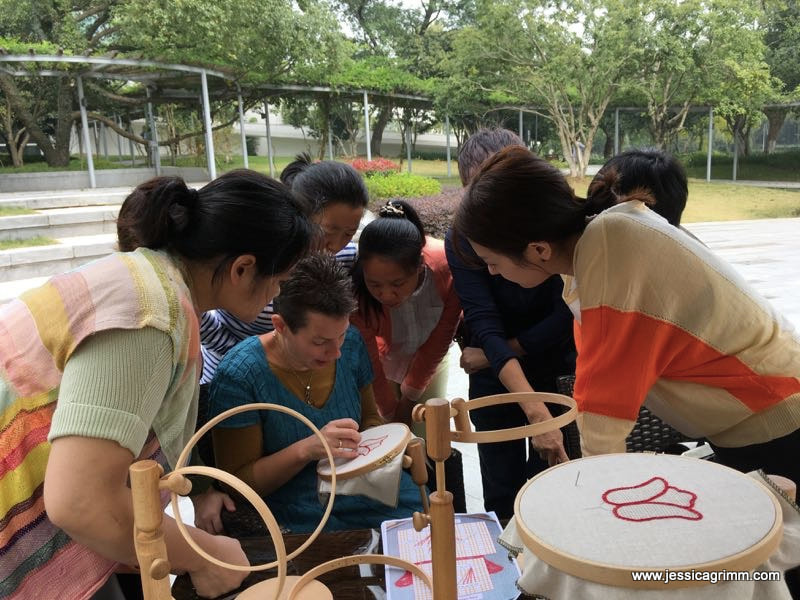
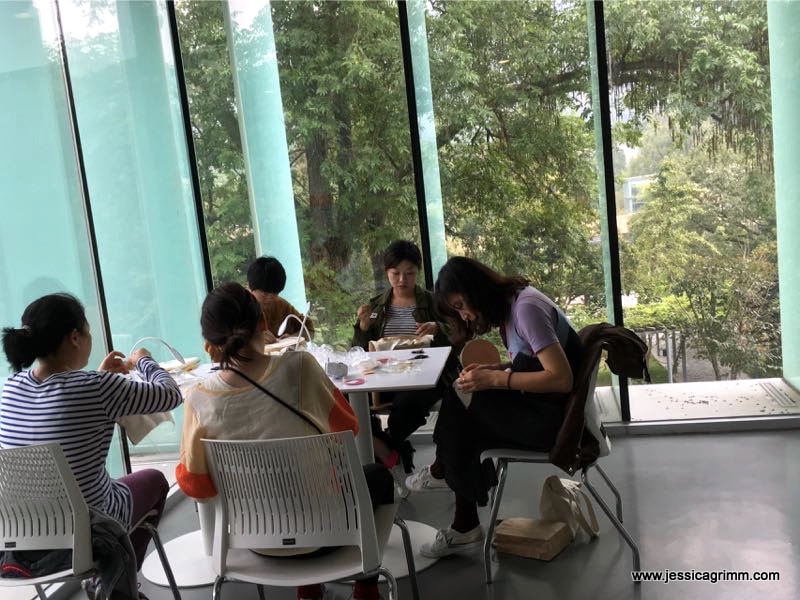
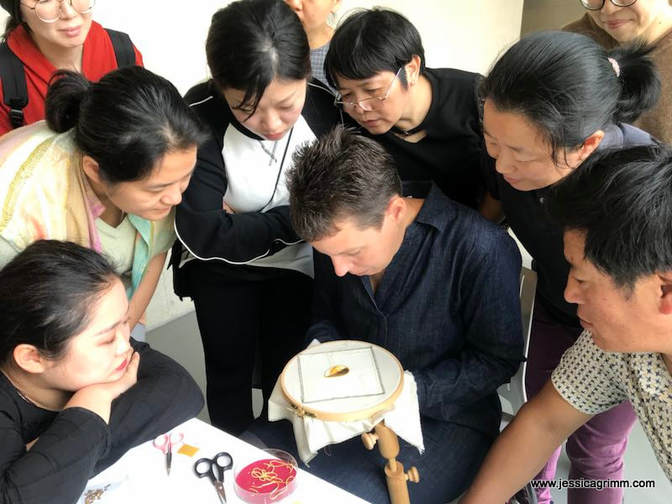
Jetlagged and with a nasty cold, but full of wonderful stories about my recent teaching trip to China, I sluggishly slump behind my laptop. To add insult to injury, my dearest coffee machine died on me when we got home from Beijing on Saturday night. I nearly killed someone this morning who carelessly suggested that I could easily survive on instant coffee until my beloved machine gets repaired... Let's talk of happier things, shall we!? Packing my 24 days in China into one blog post might be a little too much :). Instead, I will write several posts in the coming weeks on my adventures in the far East. We'll start today with the actual teaching. I arrived a few days early in Shanghai and was picked up by Edith, a textile enthusiast from Hong Kong, who had organised the workshop. We immediately got on really well! We decided to take the bus to Hangzhou; my first taste of the excellent public transport services in China. After being dropped off in the centre of Hangzhou, we took a taxi to the hotel situated near the famous West Lake. As Bad Bayersoien - Hangzhou takes nearly 24 hours, I was ready to slip between the covers in my lovely hotel room. After a delicious breakfast the next morning, we crossed the street to visit the National Silk Museum. The museum is quite large with several buildings housing different exhibitions related to silk. The buildings sit in a beautifully landscaped park. Exploring the ground floor of the silk road exhibition alone took me about two hours! In the afternoon, I decided to take a walk and explore the famous West Lake. As it was the weekend, many Chinese holiday makers had the same idea. The place is famous for getting your wedding pictures taken and the whole area is an important inland holiday destination. I ended up visiting a Buddhist temple, the tombs of some revolutionaries and ended with Jasmin tea overlooking the lake. As there where not many other Westerners, the Chinese looked upon me with great curiosity :). On Sunday, we prepped the classroom for the workshop starting on Monday. I met my assistant and translator Clover who has studied weaving in London. She did a great job translating my English into Chinese during the workshop! And in between, we ate :). Not only breakfast was a treat, the local eateries were fabulous too! Me using chopsticks for the first time was hilarious and I must confess that I don't miss them... On Monday, the teaching started. The group of students was very divers. I had museum staff, art teachers, fashion designers and even two craftsmen from Tibet. They were all very eager to start! Although the official classroom was in the basement, we decided to use the lovely weather and stitched outside a lot. Sitting in front of an old sericulture farm was a favourite with all of us until the mosquitos found out about it too... We strung a line and hung up the result of the previous day to talk about the experience. I was very impressed with my students as most of them had finished their projects overnight! However, getting them to critique their work publicly or express their experiences with the particular embroidery technique, wasn't easy. Other favourite stitching spots were the cafe... ...and the gallery of the fashion building. Those large windows were fantastic. When teaching the goldwork leaf on Thursday, I discovered a mistake with the scale of the leaf. Oopsy! Time for a last-minute change: add some chipping to the original design and all was well again. It shows that no matter how well you prepare, mistakes can always happen. Adapt and carry on! We ended the day with a Chinese high-tea organised by the students. They had brought all sorts of delicacies for me to try. Yummy! The schedule on Friday and Saturday changed a little. We had the opportunity to pair my talk on medieval embroidery with that of a local master embroiderer on Friday. We had all hoped that she would talk on the techniques she used in her embroideries or the thought process that went into them. Unfortunately, she didn't. It was more a sales talk. However, some of her work was really nice and unusual. It showed that she also experienced difficulties with branding her work as art. My talk went really well. The museum did record it on video and as soon as I know where it is available, I will let you know. If it does not become available, I will put up the original presentation and let you know where to find that. However, it is much more fun to hear a Dutch person talk in English and have that translated into Chinese by Clover :). As one afternoon of the original five-day workshop was high jacked by the presentations, we decided to meet again on Saturday morning (in the original plan I would have given my presentation on Saturday). I was completely blown away by the fact that quite a few students had completed all four projects! That's the best praise a teacher can get. It shows that they really enjoyed themselves and loved the tasks I had set them. Those six days were immensely gratifying and I really had a blast! Seeing people figuring things out and going on helping others is such a great experience. I really hope they can implement the things they have learned in one way or the other.
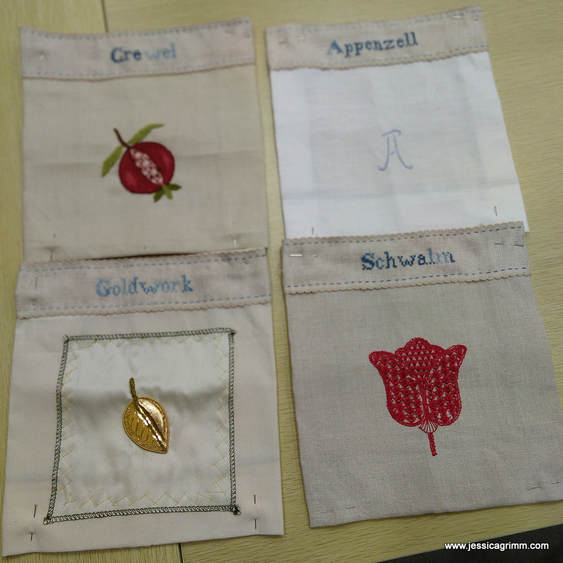
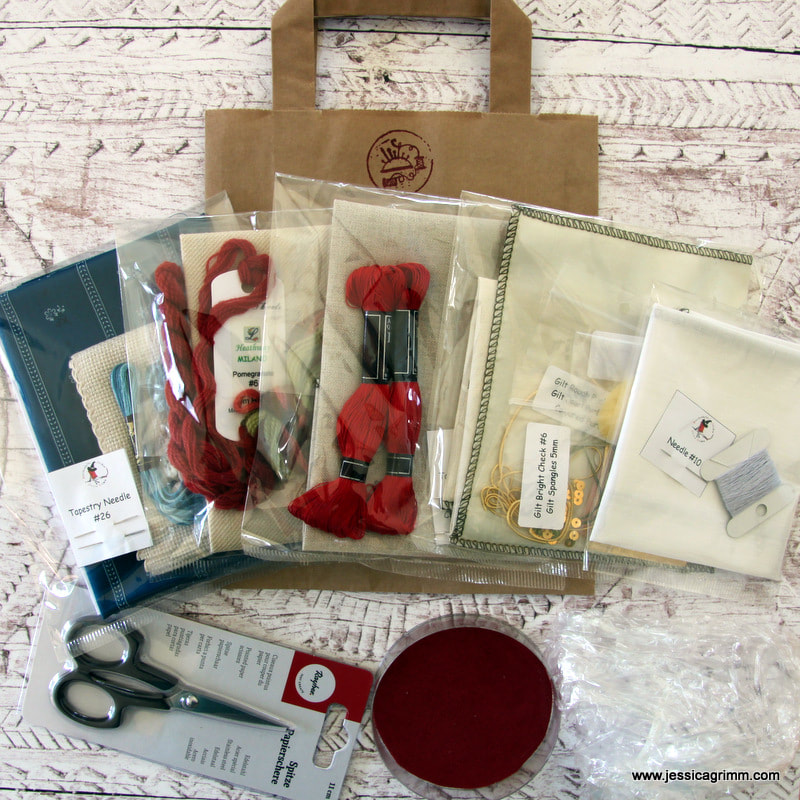
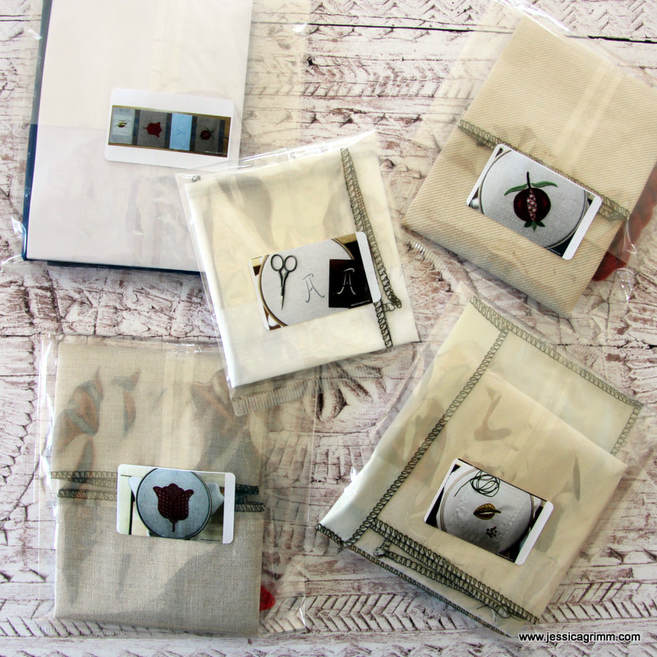
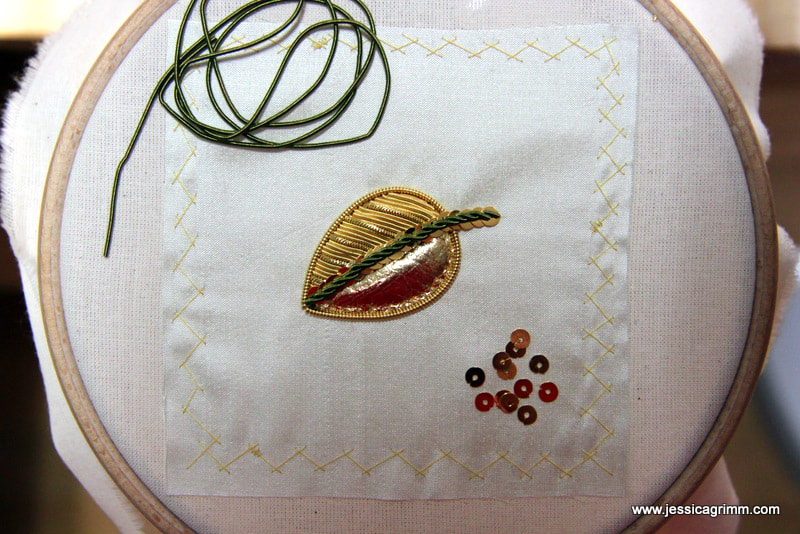
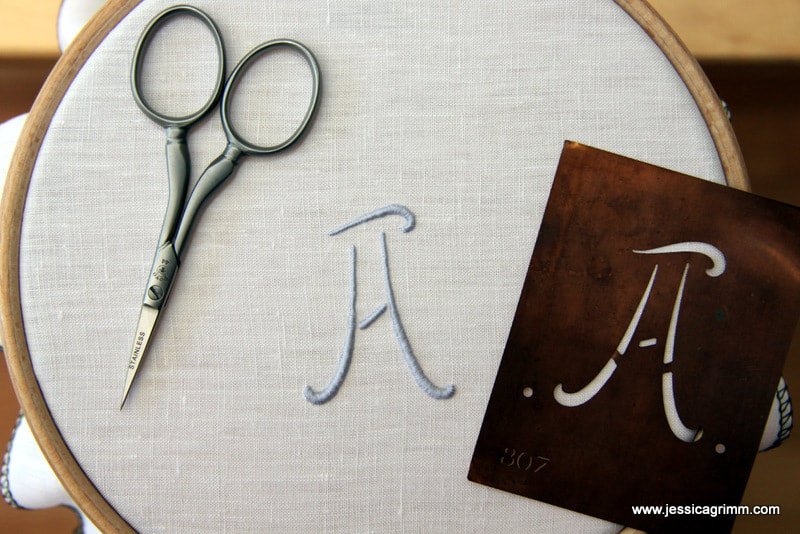
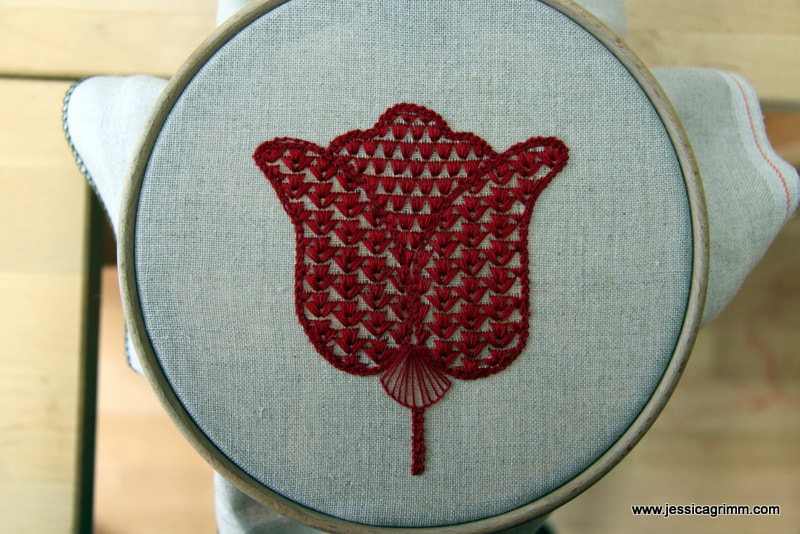
With a bit of luck I will get my passport back this week stamped with a shiny visa for China! Getting one was my first encounter with Chinese bureaucracy :). I will also see my doctor tomorrow for a refresher jab to protect me against nasty diseases. We embroidery artists lead exciting lives! Although I am not sure if I am an artist. I have been denied this title by the German authorities. They basically say that embroidery is not an art form, but firmly belongs in the realm of craftsmanship. At first I was knocked off my feet by this, but now I am preparing to defend my case. Getting recognition as an artist means that I am able to afford social security fees again and that my health insurance bills are almost cut in half. This would mean that my business could finally make a modest plus instead of a monthly loss... What you see here is the kit for my week-long series of workshops at the National Silk Museum in Hangzhou, China later this year. As the workshop-series is open to anyone, it is highly likely that I will have a wide variety of abilities in my class. Apart from the four techniques (Appenzeller whitework, crewel, goldwork and Schwalm), they will have four pieces of Aida band on which they can cross-stitch the names of the techniques. The bands are later used in construction to hide the seams between the different fabrics. Although it is highly likely that there are people in my class who have never done cross-stitching, explaining is easy and people can soon work on their own. With 15 people in class, I won't always be immediately on hand. Having something easy on the side you can always return too whilst waiting will probably come in handy. One thing I have learned over the years is that people mean wildly different things when you ask them to bring fine-tipped embroidery or craft scissors. Especially beginners manage to bring whopping big blunt paper scissors for goldwork classes. I have therefore included a pair of decent craft scissors in my kit. It is exactly the same pair of scissors I bought all those years ago when starting the RSN Certificate as an absolute beginner. And they are still my favourite goldwork scissors! Thanks to Google Images, I found my non-name scissors and was able to buy them for my Chinese students. As the kit includes many different materials, I packed each project separately. I printed a picture of the finished project onto re-usable labels. This makes them easily identifiable for non-English speakers and people can re-seal the bag and so keep supplies together. All kit materials will be packed together into a paper bag. I will urge each student to write her/his name onto the bag to avoid misunderstandings.
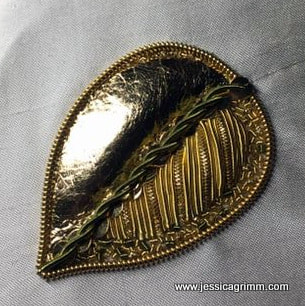
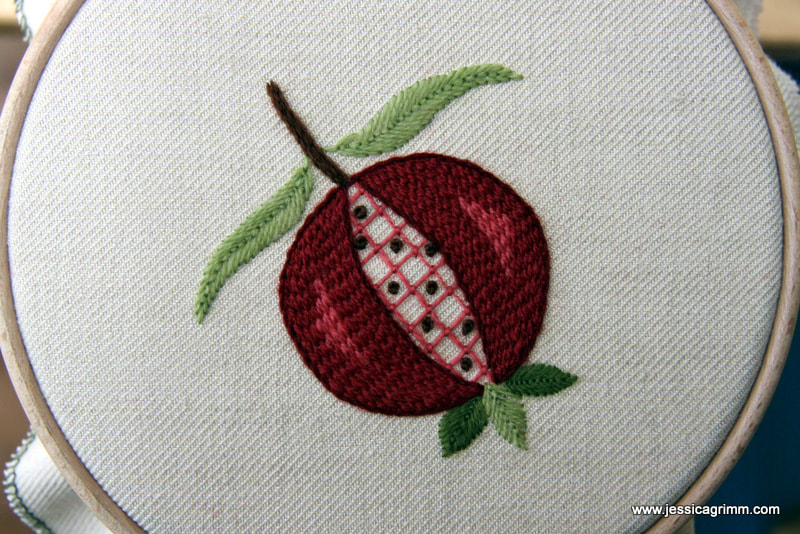
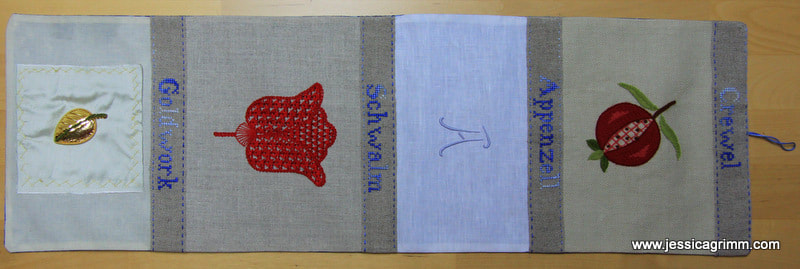
I've also included a shower-cap into the kit. The museum will provide embroidery hoops with seat frames for each student. The free shower-caps you often get in hotels are perfect to protect your work when you are not actively stitching. The other thing I have included is a simple goldwork cutting board. It is one half of a round plastic containers my dad used to house his screws, bolts and whatnots in. I lined the base with a piece of red velour and presto you have a cutting board. If I had more space in my suitcase, I would prefer to give each student a small round tin (I always upcycle my hair-clay tins this way!). Being able to cut your threads and then screw the tin close is even better. What else will I have at my disposal in the classroom? I've asked for an iron an ironing board. After all, I had to fold the fabrics to be able to get them into my suitcase. In preparation, I have already drawn all (bar one) patterns onto the fabric using a normal lead pencil. Unfortunately, the lines of aqua trick markers might not be stable when flying. I landed in America once with very faint lines... The only pattern I will have to draw before class, is the Appenzeller monogram. I'll use a trick marker and a copper stencil. It just doesn't work well with a lead pencil. And last but not least, I will have a sewing machine in my classroom. Although I am not sure any of my students will be able to finish all four projects in time to start the construction of the pronkrol, when some so, they can use the sewing machine for quicker construction. I am getting so excited! P.S. I've been interviewed for an article by Crafts Industry Alliance on the 'Benefits of limiting your time on Social Media'. Unfortunately, they left out my remark on the dangers of particularly Facebook using our data for commercial gain and the undermining of democracy. This was an important reason why I deleted my accounts after being hacked. For my upcoming teaching trip to China, I was asked to demonstrate several European embroidery techniques. Finding the techniques was not a problem, after all we have a rather rich embroidery tradition. But what to do with the stitched samples? And how to manage pace in a medium-sized diverse group of students? I came up with the idea of making a band sampler or a 'pronkrol' (pronken = to show off) as they are called in Dutch. This is a type of band sampler which became popular in the late 19th and early 20th century and was worked at private boarding schools for girls. As French was the preferred language of the well-to-do, these band samplers are often called 'Souvenir de ma Jeunesse'. What will my students learn? They will start with making a pomegranate with a few key embroidery stitches used in Jacobean crewel embroidery. Then they will explore Schwalm embroidery. This is a drawn-thread whitework technique from the Hessian region of Germany. Students will fill a classic tulip design with tulip patterns. Next up is a monogram using the fine whitework technique from Appenzell in Switzerland. And last but not least, they will learn couching, padding and cutwork to produce a goldwork leaf. Each technique will be separated by a small linen band sporting the name of the technique in cross stitch. After all, the humble cross stitch plays a very significant role in European embroidery. Both past and present. And these bands are great for students to work on on their own when I am not immediately available to solve a problem. The finished pronkrol will serve the same purpose as the antique ones did: show off a student's work. In the old days, the pronkrol would also inform the prospective mother-in-law about the housewife qualities of the bride-to-be... This is what the finished pronkrol will look like: I am very much looking forward to this great adventure. Not only will I be passing on time-honoured knowledge to new students, but I will also have the opportunity to learn from the Chinese about their magnificent embroidery culture!
|
Want to keep up with my embroidery adventures? Sign up for my weekly Newsletter to get notified of new blogs, courses and workshops!
Liked my blog? Please consider making a donation or becoming a Patron so that I can keep up the good work and my blog ad-free!
Categories
All
Archives
July 2024
|
Contact: info(at)jessicagrimm.com
Copyright Dr Jessica M. Grimm - Mandlweg 3, 82488 Ettal, Deutschland - +49(0)8822 2782219 (Monday, Tuesday, Friday & Saturday 9.00-17.00 CET)
Impressum - Legal Notice - Datenschutzerklärung - Privacy Policy - Webshop ABG - Widerrufsrecht - Disclaimer
Copyright Dr Jessica M. Grimm - Mandlweg 3, 82488 Ettal, Deutschland - +49(0)8822 2782219 (Monday, Tuesday, Friday & Saturday 9.00-17.00 CET)
Impressum - Legal Notice - Datenschutzerklärung - Privacy Policy - Webshop ABG - Widerrufsrecht - Disclaimer



 RSS Feed