|
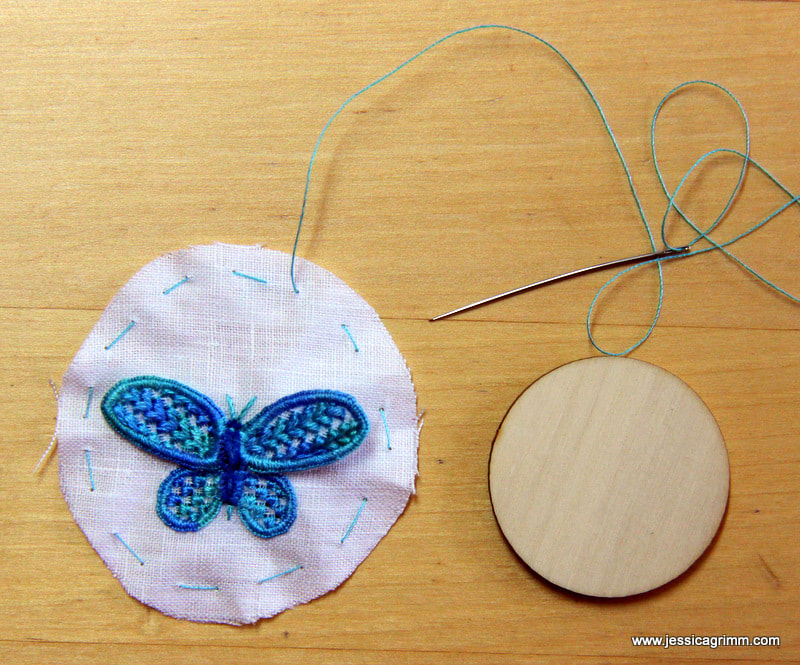
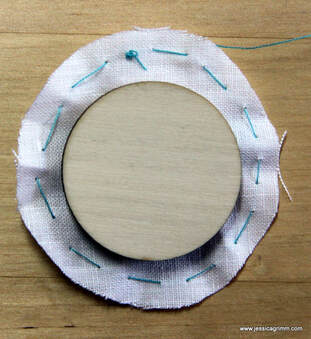
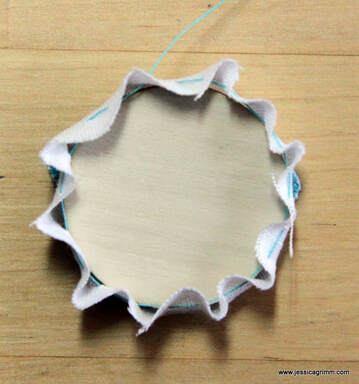
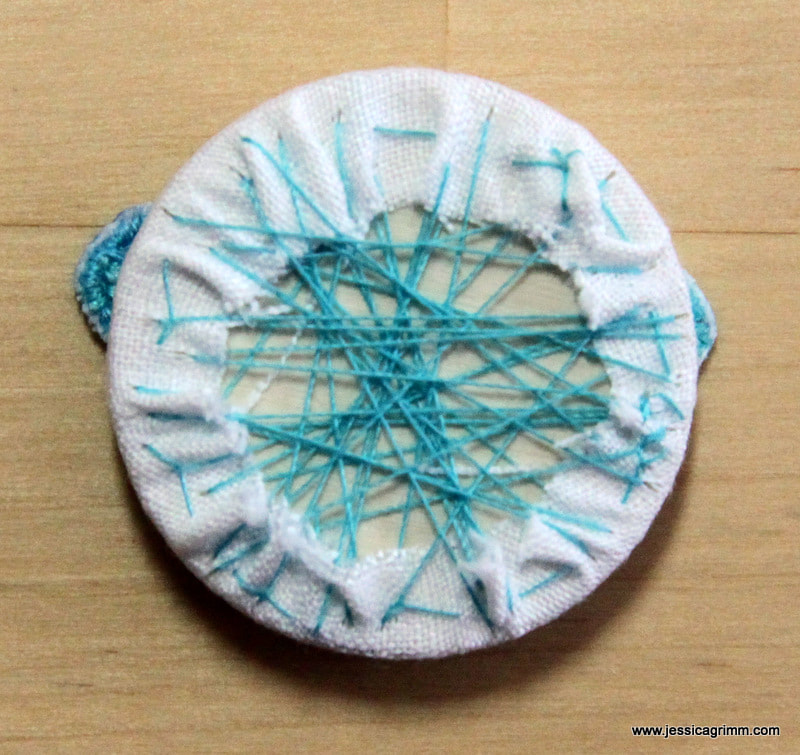
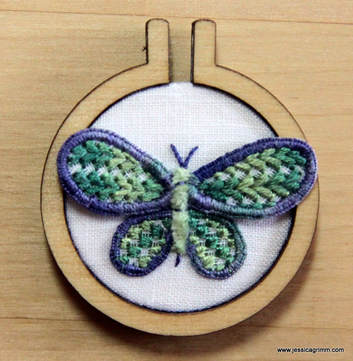
As promised in an earlier post, here's how I load-up my tiny masterpieces into those clever Dandelyne mini-hoops. Although your mini-hoop comes with mounting instructions, I did not find them very useful for heavily embroidered pieces. You see, Dandelyne advises you to just push your masterpiece in from the back using the wooden centre piece. Then you glue your excess fabric onto the back of this wooden centre piece. I am sure this works just fine when you use a printed fabric or something quite sturdy like an aida with some cross-stitch embroidery. However, it does not work so brilliantly with heavily embroidered slippery fabric. Fear not! Here's the solution. And it is pretty simple too! Once you've cut out your mini-masterpiece (including the seam allowance!), stitch a running stitch along the edge using sewing thread. Use a knot to anchor your thread and don't place your stitches too close to the fabric edge (fraying!). Place the wooden centre piece on the back of your embroidery. Pull your thread taut so the fabric folds around the wooden centre piece. Check the front, adjust if necessary, then start lacing. I am sure there is a pretty looking orderly way to do this, but that's just not me I am afraid. When sufficiently laced, secure your thread well. Now you can carefully push your mounted embroidery into the Dandelyne hoop from the front. This gives you maximum control over where it is going. And the whole lacing prevents it puckering, especially near the screw at the top. Once your embroidery is in, follow the Dandelyne instructions for adding the screw. Masterpiece finished!
5 Comments
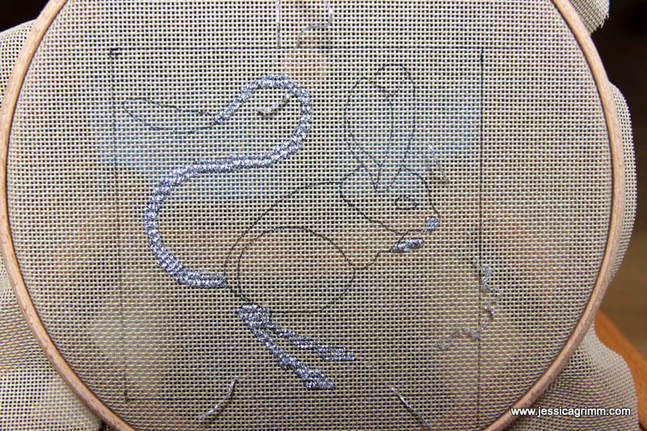
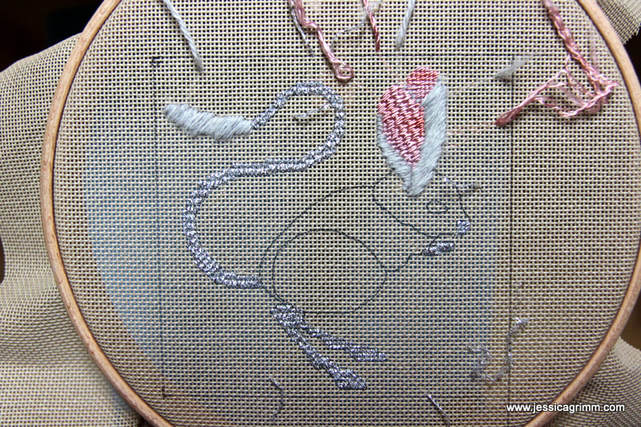
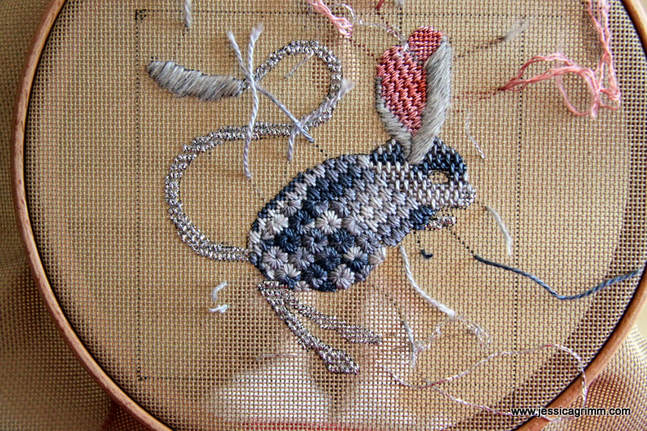
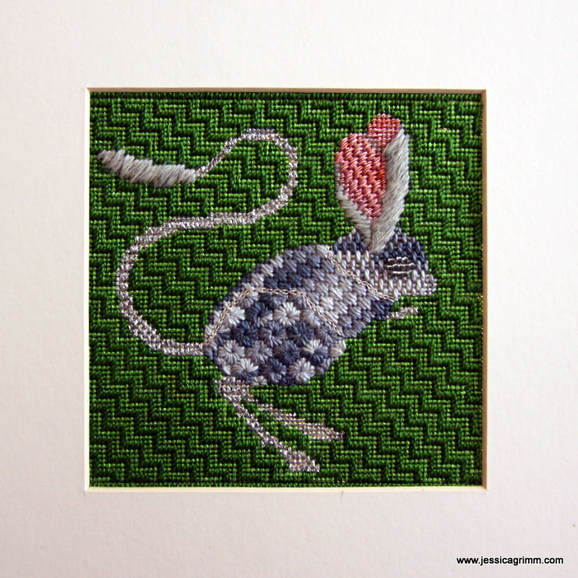
A couple of days ago, I received my July broderibox from Nordic Needle. It contained grey and silver metallic threads, silver beads, beading thread and a bead nabber (more on the tool, further down). Flicking through my Millie Marotta colouring books, I came across Euchoreutes naso or long-eared Jerboa. A kind of mouse with large ears, a tuff on its tail and the ability to jump high, living in China and Mongolia. Although the creature is light reddish-brown with a white underside, I decided to make mine grey. As usual, I worked my embroidery doodle on 18 TPI Antique canvas. The pattern was transferred using a fine black permanent marker. First thread to play with: Nordic Gold by Rainbow Gallery. The bobbin it comes on advertises it as 'Very fine, easy-to-use metallic stronger than blending filament'. It is a blend of metallized polyester and nylon. The thread is not stranded, but knitted. Using long cross-stitches and normal cross-stitches, I filled the Jerboa's tail, right foot and paw. To create the illusion of the left foot being further to the back, I used the smaller tent stitch. The Jerboa's nose was also stitched in tent stitch. This metallic thread works well indeed and stitches went in quickly. Just take care not to pull too much as the knitted structure might unravel. Next up were the ears and the tuff on the tail. My broderibox contained another Rainbow Gallery thread: Alpaca 18. This is a 100% fluffy Alpaca thread; perfect for recreating the illusion of hair. After all, it IS hair :). To let the thread express its fluffiness, I decided to use simple straight stitches to fill the fluffy bit on the tail and the rims of the ears. I LOVE this thread. It is so soft and has such a perfect structure. Certainly a thread to remember for future projects! By the way, the pink inside of the Jerboa's ears was stitched with a three-ply rayon thread from my stash. I think it might have been an Oliver Twist thread. This thread unravelled itself faster than I could stitch. So glad the Jerboa comes with tiny ears... Again, I used a slightly larger stitch (condensed cashmere stitch) for the ear closest to the viewer and the smaller tent stitch on the ear further to the back. This approach creates the illusion of depth. Next up was one of my favourite threads: Vineyard Silk. A two-ply non-strandable spun silk. Before the whole broderibox adventure, I had never heard of this brand of silk thread. What a shame! It is a really good thread for Silk Virgins as it is so well behaved. It doesn't snatch; just a dream to stitch with! I started by stitching the curved thigh with circular eyelet stitch. I don't think I ever used this particular stitch before. It is quite a textured stitch and it screams 'floral'. However, I think it works well for this particular area. Following the thigh, I filled the main body with condensed scotch stitch. This diagonal stitch fits the elongated curved back of my mouse perfectly. Last, I filled the head with Parisian stitch. This straight stitch contrasts very nicely with the diagonal stitch of the main body. I could have left it at that. The different areas of the body of my Jerboa are distinct enough through the use of different stitches (diagonal, straight and composite). However, my broderibox contained one more embroidery thread: Kreinik Metallics very fine (#4) braid. A great test to see how a particular metallic thread holds up, is to use it on top of already embroidered areas. I decided to stitch a chain stitch edge between the different areas of my mouse's body. The thread holds up well and didn't snatch on the previous stitches. However, compared to the Nordic Gold thread, this one unravels far quicker.
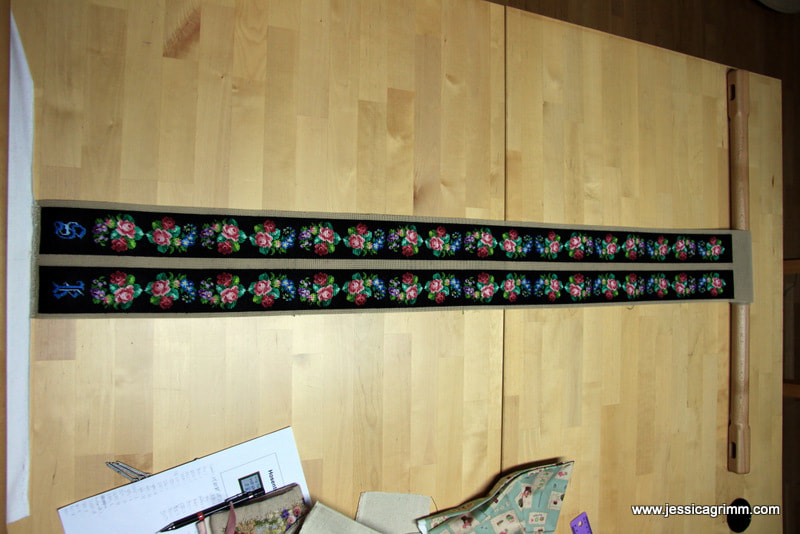
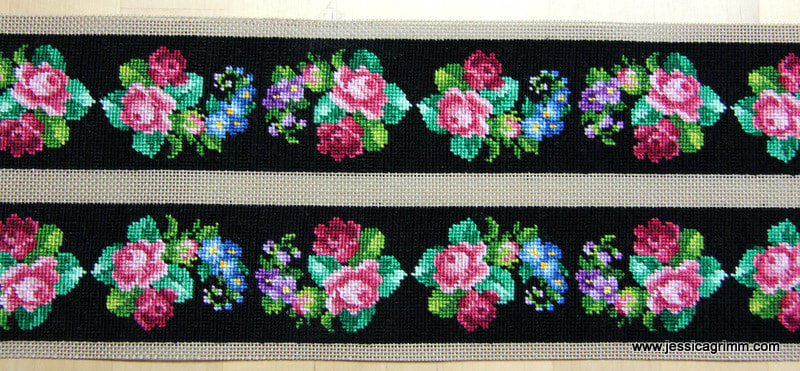
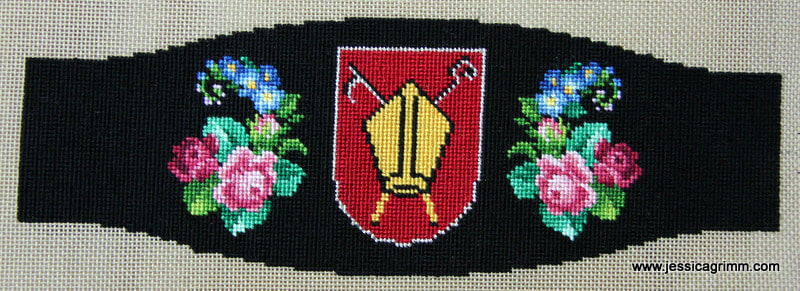
The Jerboa's eye is made up of a base layer of tent stitches using the Kreinik braid. Then I used the YLI Silamide beading thread to stitch down the silver Mill Hill glass sees beads; both part of the broderibox. I planned to try the bead nabber tool on this part of the project, but I forgot... I will keep the tool in mind for my next beading job. Since it looks like a thimble with a sticky tip, I am particularly interested to find out if the stickiness affects the beads. For the background of my Jerboa doodle, I used two shades of green Anchor perle #5 thread from my stash. The stitch used is Jaquard stitch and in real life, it creates such depth and movement! That's another broderibox doodle finished. I hope to have inspired you to try your own doodles. Using colouring book graphics as a base, you can easily create fun embroideries. Look at your subject carefully to decide which stitch fits best where. Remember to use smaller stitches towards the back and more bold stitches towards the front. It is easier than you think! And great fun too :). They're done! After 174,5 hours of stitching, my traditional Bavarian braces/suspenders were picked up by a very happy customer yesterday. I used 82 skeins of DMC and Anchor stranded cotton and 18 TPI brown canvas. Here are some pictures for you to enjoy: This is the total length of them: 115 cm. It's a tall lad :). And a close-up of the re-drawn antique pattern used. And the breast piece with the coat of arms of the village of residence. Now my embroidered 'raw material' goes to the saddler to get its leather backing and matching corded trims. Time to get one of my other embroidery projects out!
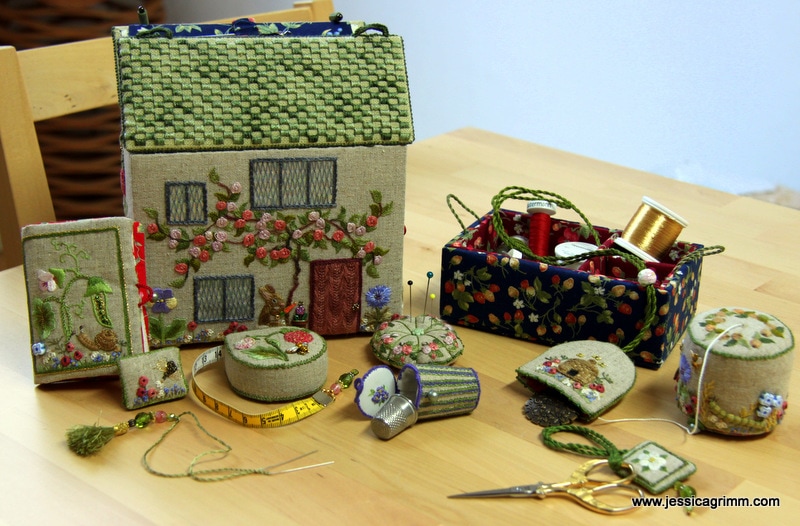
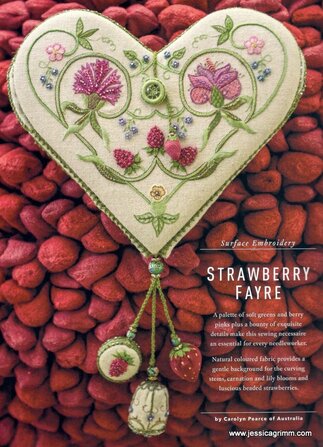
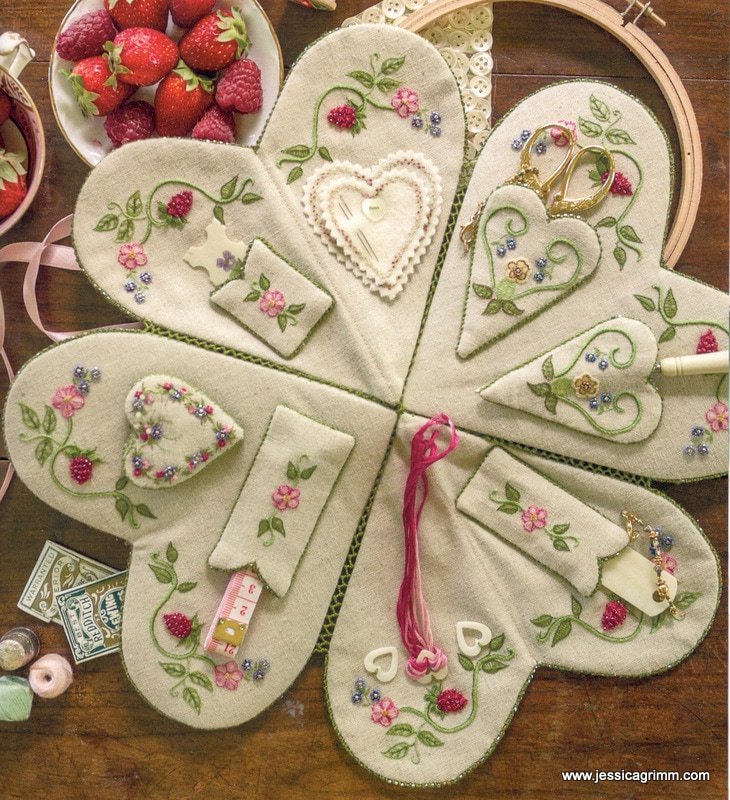
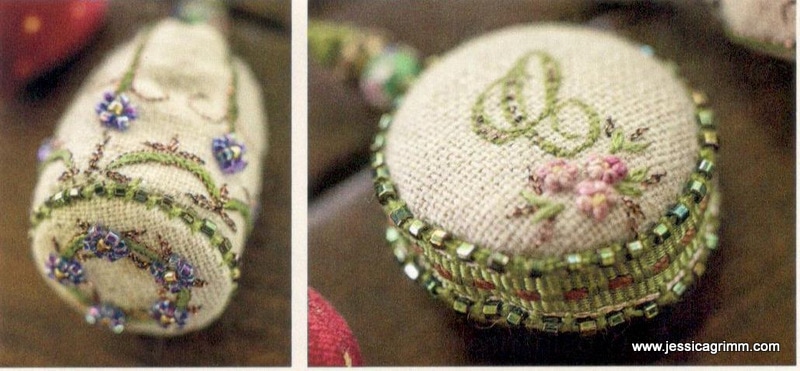
Last week, I received my copy of Inspirations Magazine #95. And wow what a beautiful issue it is! Packed with great embroidery projects exploring a wide range of embroidery techniques. Clear favourite for me: Strawberry Fayre, a heart-shaped sewing necessaire designed by Carolyn Pearce. Carolyn is one of my favourite embroidery designers. A couple of years ago, I stitched her famous Home Sweet Home needlework box. The sewing necessaire is packed full of lovely stitched details in green, pink and blue. This projects uses 40 embroidery stitches ranging from the well-known French knot to the more exotic cable plait stitch. Equally, it uses a whole array of yummy embroidery threads in cotton, silk, rayon and metallic. And the design uses beads as well! A perfect project to learn new embroidery skills. Not unlike a sampler, but then way more useful. Inside the sewing necessaire there is ample room for your scissors, stiletto, tape measure, needle pages, pincushion and thread rings. The heart-shaped necessaire closes with a pretty Dorset button. Another pretty technique you will learn from this project! Dangling from the necessaire are exquisite little needlework essentials: a pinwheel, an emery strawberry and a thimble holder.
I so love this new Carolyn Pearce design, that I ordered the kit as my birthday present (I'll turn 39 on Friday!) from Inspirations. As an Inspirations subscriber, I paid €146 + €26 shipping. Yup, that isn't cheap. However, Carolyn Pearce is known for using many different components in her designs. Trying to gather them yourself from suppliers all over the world isn't necessary any cheaper. That said, if you have a large stash and you don't mind swapping things out, you will be perfectly fine stitching this necessaire with your own supplies! As the kit is on pre-order at the moment (it will probably ship at the end of July) and will take 3-4 weeks to arrive in Germany, enough time to see if there are others who plan on stitching this project. Wouldn't it be great to hook up online and stitch this project together? Like a Stitch Along (SAL)! Please leave your comment below if you are up for the game. Looking forward to start... Note: I have never finished this project as the instructions turned out to be faulty and the materials in the kit were not sufficient. |
Want to keep up with my embroidery adventures? Sign up for my weekly Newsletter to get notified of new blogs, courses and workshops!
Liked my blog? Please consider making a donation or becoming a Patron so that I can keep up the good work and my blog ad-free!
Categories
All
Archives
July 2024
|
Contact: info(at)jessicagrimm.com
Copyright Dr Jessica M. Grimm - Mandlweg 3, 82488 Ettal, Deutschland - +49(0)8822 2782219 (Monday, Tuesday, Friday & Saturday 9.00-17.00 CET)
Impressum - Legal Notice - Datenschutzerklärung - Privacy Policy - Webshop ABG - Widerrufsrecht - Disclaimer
Copyright Dr Jessica M. Grimm - Mandlweg 3, 82488 Ettal, Deutschland - +49(0)8822 2782219 (Monday, Tuesday, Friday & Saturday 9.00-17.00 CET)
Impressum - Legal Notice - Datenschutzerklärung - Privacy Policy - Webshop ABG - Widerrufsrecht - Disclaimer



 RSS Feed