|
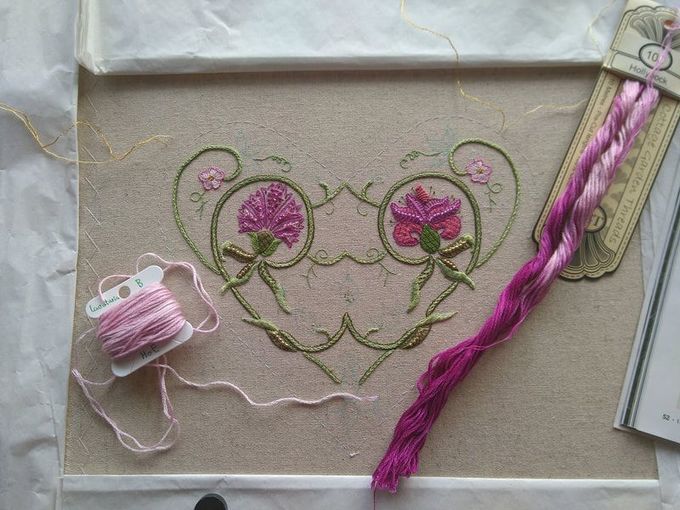
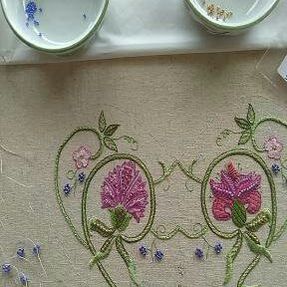
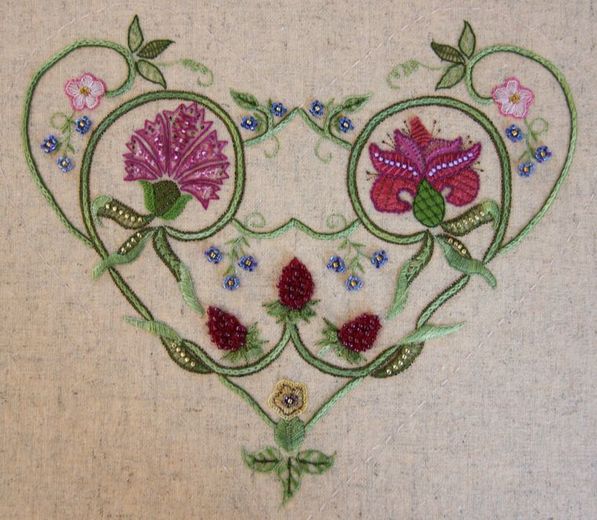
With the snowflakes gently falling in front of my studio windows, I decided to crack on with Carolyn Pearce's Strawberry Fayre. Next up were the small pink flowers. The instructions advice to only use the lighter parts of a variegated stranded cotton (Hollyhock by Cottage Garden Threads). Unfortunately, these are pre-cut threads and the lighter part is the one-third in the middle... What a waste! However, I can't just use the whole thread, as the other parts are far too dark and of a non-compatible shade. I decided to save the Hollyhock thread for another day and substitute for House of Embroidery stranded cotton Lavataria B. The small leaves were filled using chained feather stitch. This is an interesting filling stitch I would normally not remember to use. Stitching the yellow primrose at the bottom, I made a few changes too. The instructions tell you to whip each blanket stitch with a pesky metallic thread. That's sound advice if you really hate yourself :). The metallic fibres constantly catch on your silk blanket stitches. Instead, I worked a few arbitrary back stitches to add the required sparkle. Much easier. Then the instructions want you to use a different silk thread to add two detached blanket stitches into every other blanket stitch. Now again, if you don't like yourself too much... Instead, I worked a normal blanket stitch edge around the whole flower. This produces pretty much the same look as the pictures in Inspirations do. It seems that the Strawberry Fayre project follows a certain mantra: be as complicated with your needle and thread as you can be in tight spaces! This does not make for an enjoyable nor easily achievable stitching project. Struggling on your own can be quite disheartening. So, I stopped being hard on myself and I dived into the forget-me-not sprays. You make the tiny beaded flower heads separately and then you couch them into place. I really fell back in love whit the project. Maybe beads are the solution for everything? To finish off the front heart, only the three strawberries remained. They are quite fun to do as well. What do you expect? They contain beads as well :). However, once these gorgeous red fruits were finished, my husband started an argument about them being raspberries rather than strawberries.
P.S. If you would like to see how others tackle Raspberry Fayre, hop over to Janet Granger's blog for another detailed stitch along.
10 Comments
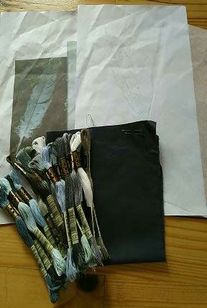
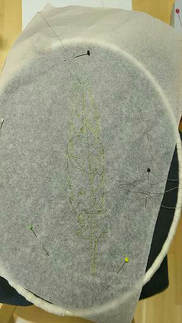
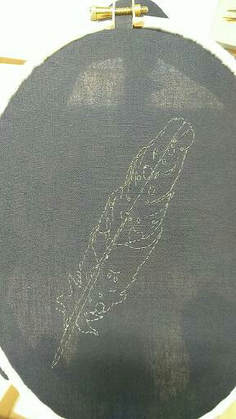
I signed up for a distance class in silk shading with Jen Goodwin. Why did I sign up for this particular class? Well, the design sports a feather with quite irregular edges AND has water droplets. As I have no idea how to stitch droplets, I really like to learn from a fellow pro. It is also another great opportunity for me to see how I could possibly run an online class in the future. The class runs for eight weeks and is, at GBP 195/$ 284/€ 229, not cheap. The class should have started on the 20th of January, but due to Jen not being very organised, I actually received my kit on the 23rd and the first instruction email on Sunday morning the 28th. This can happen to the best of us. My kit contained a colour photocopy/printout of the feather, an outline drawing of the pattern, a piece of tissue paper for the transfer, a piece of dark-navy cotton, 2 #10 sewing needles and 20 skeins of DMC stranded cotton in the most fabulous colours. However, due to the fact that it was shipped in a plastic seal bag, it arrived rather wrinkled and dishevelled. Oddly, there wasn't a note or compliment slip either. The dropbox Jen uses for her teaching videos also contained a high-resolution original picture of the feather. So before any stitching commenced, I ordered a proper photo printout of the feather. The printout in the kit is, in my eyes, just not very defined and has a green tinge to it. But above all, it is wrinkled. And I don't find it very practical to work from a dropbox/computer screen. Next thing I did was watching Jen's video's on binding a hoop and tissue transferring a design. I was hoping the videos would be of the same quality as Mary Corbet's 'How to' videos. Unfortunately, they are not. Important things and actions are frequently out of focus, text is sometimes blocking the action, important action is going on outside the video frame and action in the video contradicts the text in the video. I really hope that the actual stitching videos provide enough detail to be able to clearly see Jen's stitching. Before starting the tissue transfer method, I ironed the piece of fabric and ran the edges under my Babylock machine. I hate disintegrated fabric edges whilst stitching. I faithfully copied Jen's outline drawing onto the tissue paper and started tacking. About half-way through I came upon an uncertainty and wanted to check on the picture printout... SHIT!!! The outline drawing Jen provided in the kit is a mirror image of the picture we are supposed to stitch... I very carefully unstitched, flipped the tissue paper, traced the lines again and started tacking again. I also immediately warned Jen so she could warn the other students. I really hope they hadn't started. As there is no email-list, forum or group to 'meet' the other students. I have no means of getting into contact with them directly. This is my first ever online-class that does not provide for contact with my fellow students. It is a bit of a shame as I can't learn from their progress or get inspired by them either. Finally, I was able to remove the tissue paper and to have my feather all set up for my next lesson. I'll keep you posted on my progress. Rather than week-by-week, it will probably be a summary of several weeks in one post. After all, it is not my intention to spill the beans on Jen's project and provide very detailed information so my readers could just stitch the project too from reading my blog. However, if you were thinking of doing an online class with Jen, you will be able to make an informed decision based on the testimonials on her website and my blog posts.
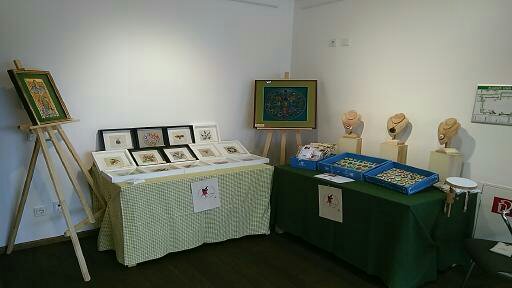
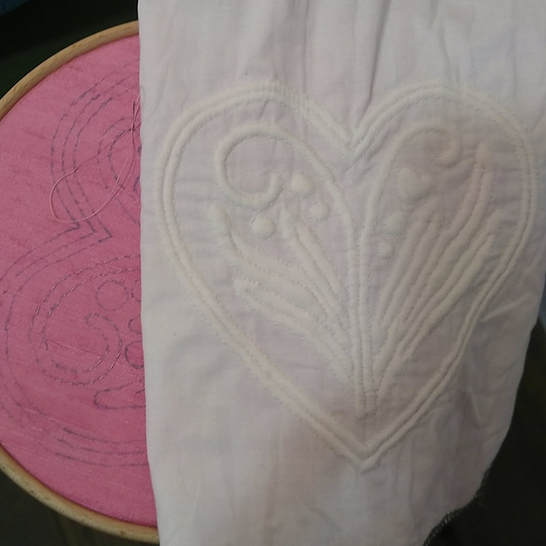
Last weekend, I participated in another crafts market organised by Faszination Handwerk. Markets are held twice a year in differing locations roughly in the Tegernsee-area. This allows for people from Munich to visit without the very high-costs associated with organising such a market in a central location in Munich. Since we were allocated a corner between two doors, the above became the set-up of my stand. I even managed to eke out a small corner of one of the tables to clamp an embroidery hoop on. Although the lighting was really good, the location was your standard conference building with little to no charm. Since the organisation does not provide tables, we take our own. The above is all our Toyota Auris can hold :). Thanks to your excellent feed-back after last year's Leonhardimarkt, I think I achieved a better overall set-up. My stand was no longer so flat and had more 'explaining' going on regarding time and skill involved. I also added a cheaper category of pendants. Since the car was really full, I couldn't bring trestles and a slate frame. Instead, I demonstrated some French boutis. I still had the 'heart' kit by Averyclaire. This type of whitework embroidery is both 'large' enough and not too complicated; ideal for demonstration purposes. Unfortunately, people were not at all impressed. Mental note: only bring goldwork.
The show ran for three days and was really well attended. Many of my colleagues reported good sales and/or follow-up trade possibilities. Unfortunately, my embroideries did hardly sell and I did not even recoup my entry fee. I can only hope that there will be follow-up trade this time. Overall feed-back of the visitors was that my embroideries were perceived as being 'foreign' and not of 'local tradition'. Many did not understand what it was all about and were not happy for me to explain. It was generally really hard to get into contact with people about what I make. What they did pick up on was my accent. And some were really not cool about it. I was even asked if I could understand and speak German... I could almost hear grandpa Grimm turn in his grave! So. I will no longer exhibit at these particular fairs. Costs are too high and I am not a charity. However, I will try to attend at least one local market a year as I do understand that I need to meet the locals. But these markets must have low entry fees. And luckily for me, one such market stood on my doorstep last week! Or at least its organisers did. In May, I will join sculptor Marion Werner and two other artisans at Marion's home at Steingaden for a crafts market. Marion and her husband have been organising these for many years and have built quite a following. I feel honoured that they'll allow me to join them this year! And the entry fee? Two home-made cakes to sell to the visitors. I can live with that :). |
Want to keep up with my embroidery adventures? Sign up for my weekly Newsletter to get notified of new blogs, courses and workshops!
Liked my blog? Please consider making a donation or becoming a Patron so that I can keep up the good work and my blog ad-free!
Categories
All
Archives
July 2024
|
Contact: info(at)jessicagrimm.com
Copyright Dr Jessica M. Grimm - Mandlweg 3, 82488 Ettal, Deutschland - +49(0)8822 2782219 (Monday, Tuesday, Friday & Saturday 9.00-17.00 CET)
Impressum - Legal Notice - Datenschutzerklärung - Privacy Policy - Webshop ABG - Widerrufsrecht - Disclaimer
Copyright Dr Jessica M. Grimm - Mandlweg 3, 82488 Ettal, Deutschland - +49(0)8822 2782219 (Monday, Tuesday, Friday & Saturday 9.00-17.00 CET)
Impressum - Legal Notice - Datenschutzerklärung - Privacy Policy - Webshop ABG - Widerrufsrecht - Disclaimer



 RSS Feed