|
A couple of years ago, I saw the so-called Wolfgang's chasuble at the Diocesan Museum Regensburg (you can read my blog about my 2015 visit). It had this lovely embroidered cross with birds and a four-legged animal amidst scrolling foliage. Although the goldwork embroidery is quite damaged, it is clear that it was once a very high-quality piece of medieval goldwork and silk embroidery. Its design would make for a lovely (online) embroidery class. I've asked my husband to clean up one of the bird designs and this is what he came up with. 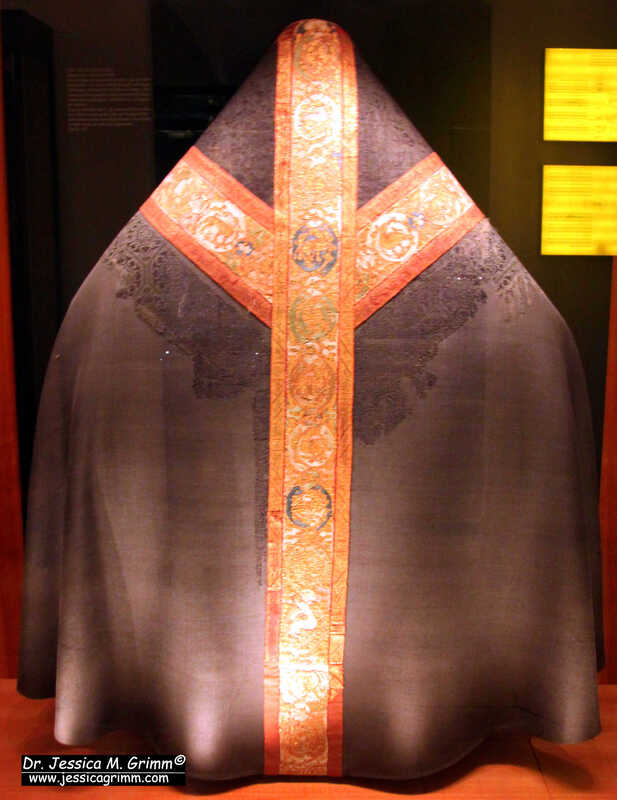 Wolfgang's chasuble part of the Regensburg Domschatz (Inv. Nr. D 1974/101) made shortly after AD 1050 in Regensburg. The original embroidery was made shortly after AD 1050, probably in Regensburg. A royal residency at the time, Regensburg likely housed the royal workshops when the court was in residence. The way this embroidery, and indeed the whole garment, was made differs markedly from most contemporary pieces. Those pieces are usually all over embroidered and the embroidery is directly worked onto a precious silken fabric or a linen fabric. Good examples of these are the Imperial Vestments, the Uta chasuble and the vestments from Saint Blaise now held in St. Paul im Lavanttal. Many heyday Opus anglicanum vestments also fall into this category. Not so Wolfgang's chasuble. This one has a strip of separately worked embroidery adorning the precious silken vestment. This would become the way forward for the rest of the medieval period and beyond. It is essentially the birth of the orphrey. These smaller pieces of embroidery were far more manageable and could be prepared in advance. Goldwork embroidery could move out of the specially equipped royal workshops and into, probably smaller and simpler, commercial workshops in the emerging towns. 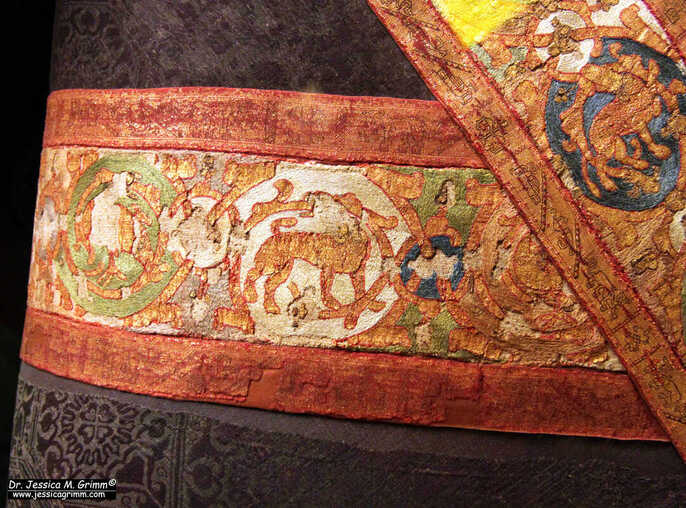 Detail of the goldwork and silk embroidery on the Wolfgang's chasuble (Domschatz Regensburg, Inv. Nr. D 1974/101). But we can clearly tell that the process of 'how to make an orphrey' was not yet set in stone. In this case, the embroidery seems awfully complex when it comes to its backing fabrics. What had the embroiderer done? It started with a piece of natural coloured silk twill/samite on top of a fine linen. All goldwork embroidery (and probably the stem stitch outlines) was worked that way. Then the piece was backed again with an extra layer of linen before the fine silken split stitches were worked. Curious don't you think? I was told that you back your embroidery when the stitching is particularly heavy. That would be the goldwork and not the silk. Just imagine the sore fingers from pushing a fine needle with silk through three layers of fabric... But I have an idea why the extra layer of linen was added: stiffness. Later, orphreys were routinely backed by gluing recycled paper on the back or simply stiffening the back with a layer of glue.  Design drawing for the goldwork and silk embroidery class. This design is now available as a self-paced online class. The class includes video instructions, a downloadable PDF with instructions and a full kit with authentic materials. You can order your class here.
34 Comments
Organising the Imperial Goldwork Course during the lock-down posed a real challenge. I couldn't send out course materials due to international mail not going out. I needed to invest in a high-spec webcam and software at a time when our household income was low due to the pandemic. Teaching live on Zoom for an international crowd in which often three languages were spoken, was new for me too. But I tremendously enjoyed sharing my knowledge and skills. And I learned a lot. Which changed the way I will do similar things in the future.  As my husband lost 40% of his already meagre income at the start of the lock-down, I was very aware of the struggle many people were in. Especially those who do not live in a welfare state like Germany. That's why I came up with a donation payment structure for the course. The idea is that people with disposable income donate when they take the course and those who lost (part) of their income can join for free. As the warmth and the solidarity of the embroidery community is so often praised, it should not have been a problem for me to draw an income from my efforts. But it was and still is. Of the 108 stitchers who have taken the course to date, 30 made a donation. Donations range from €10 to €265, with an average of €59. Producing each lesson and supporting students via email took me to date about 3,5 days per lesson. If we subtract the cost for the webcam and the software, I am left with €484. If we divide this by the working hours I invested, I worked for €2,16 per hour before taxes.  As most people took the course during or immediately after the live zoom classes, I sent out a survey to those who downloaded the PDF-handouts. After all, I wanted to learn from my mistakes. And I thank all who took the trouble to respond and provide me with valuable feedback. One of the questions asked why people did or did not pay for the course. And the replies where illuminating. Reasons for not paying in order of their frequency: 1) others don't pay so why should I?, 2) when I cannot attend (all) of the live zoom classes and need to watch (some of) the recordings, I am not really participating in the course so I do not need to pay and 3) only wanted to see how you do it so that I can use your format for my own offerings/report format back to my organisation. From the above, it becomes clear that the donation payment structure does not work. Thanks to Social Media, I could watch people, who took my course without paying, showing-off their latest buys and sign-ups for embroidery courses. I will thus not use this payment structure again. For all future courses, I will make a proper costing. If you want to take the course, that is what you will need to pay. I am aware that some will probably not be able to afford my future courses. However, if all 108 students, who have taken the course so far, would each have donated €32,64, I would have earned the German legal minimum wage of €10 per hour. That's for a person without qualifications and experience, by the way. 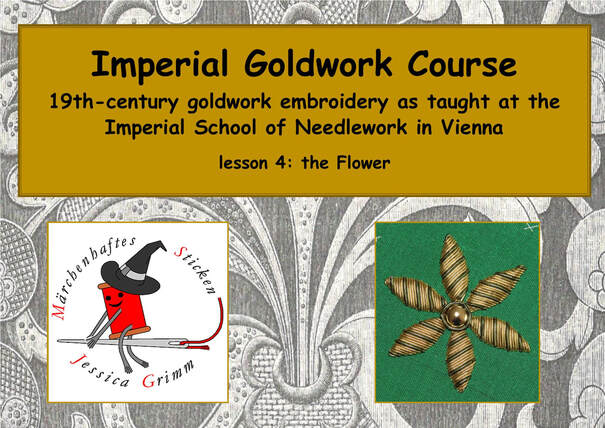 Before the pandemic, but certainly now during the pandemic, some colleagues and stitchers have started to 'shop' for ideas from my blog, Instagram and YouTube channel. Thank you to those of you who have warned me. I had seen it with my own eyes too. As you probably have noticed, I am posting very sparingly on Instagram and I am not sure if I will make more FlossTube videos. I am also struggling with how much detail to post on my blog. It is a real dilemma. On the one hand, I need to be engaging so that I keep myself in the picture and sell my products and services. But on the other hand, it is soul-destroying to see others turn your ideas into blockbusters.
My academic background and language skills should give me an edge over many of my colleagues. But this only works if the potential costumers are able to distinguish the difference in quality. But fake news and alternative facts show that increasingly people are unable to do so. Quality news outlets suffer and so do quality embroidery tutors. I took the course off-line on the 31st of December 2021. Although the course was still regularly downloaded, I only received two donations during 2021. As explained above, the donation model sadly does not work. During my break from blog writing and after the success of the first online goldwork course, I have come up with a new online course: Medieval goldwork techniques - a journey through 500-years of embroidered history. In this new ten-week online course we will explore different forms of couching: underside couching, pattern couching, couching over padding and the queen of couching techniques: or nue. We will explore each technique in its (art) historical setting. In each sample worked we will use as authentic materials as feasible. The beautiful goldwork techniques of the Middle Ages deserve precious gilt threads and real silk! 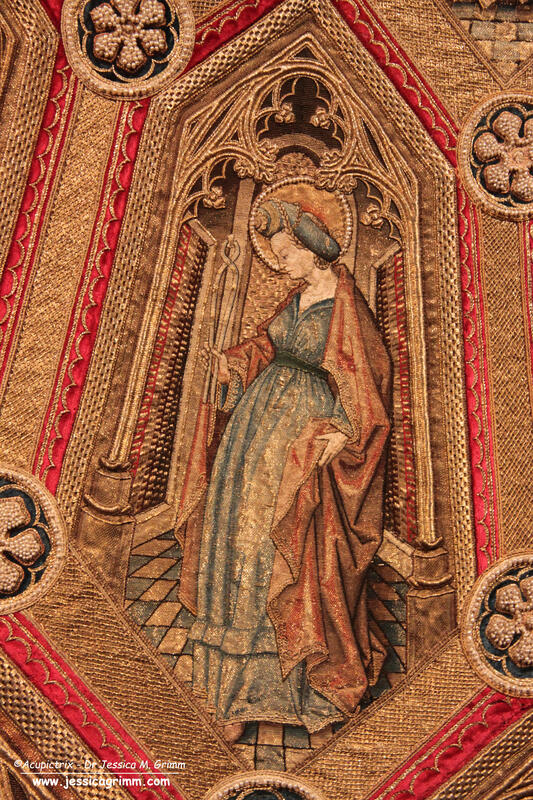 Detail of the so-called Marienmantel of the Order of the Golden Fleece showing Saint Apollonia. The or nue on the paraments of the Order of the Golden Fleece, made before AD 1477 in the Southern Netherlands, is of a very high quality. Over the past five years, I have travelled extensively to visit museum exhibitions, research facilities and libraries in Germany, the Netherlands, France, Austria, England, Italy and Lithuania. Many of these trips were covered on this blog. The resulting research now forms the basis of the course. By attending the course you will gain in-depth knowledge of how medieval goldwork embroideries were made. What technical inventions revolutionised the process and the workshop setup. What inspired the stylistic language? You will learn about the close relationships between embroiderers, goldsmiths, painters and sculptors. Who were these embroiderers? Did they see themselves as artists? How were they organised? Who did they work for?  Alba feauturing goldwork embroidery made in the court workshops of Palermo in AD 1181. Housed at the Kaiserliche Schatzkammer Vienna. The core of the course form the embroidery samples you will work. They are all inspired by actual medieval embroideries. You will handle luxury fabrics like samite and silk twill, as well as high-quality gilt threads and different kinds of beautiful silk yarn. After taking this course, you will know the benefits of using madder, sienna and iron gall ink. This course is directed at embroiderers of all levels. With the possible exception of or nue, none of the techniques are (technically) difficult. The techniques covered will form the basis for future (online) historical goldwork embroidery course I am developing. 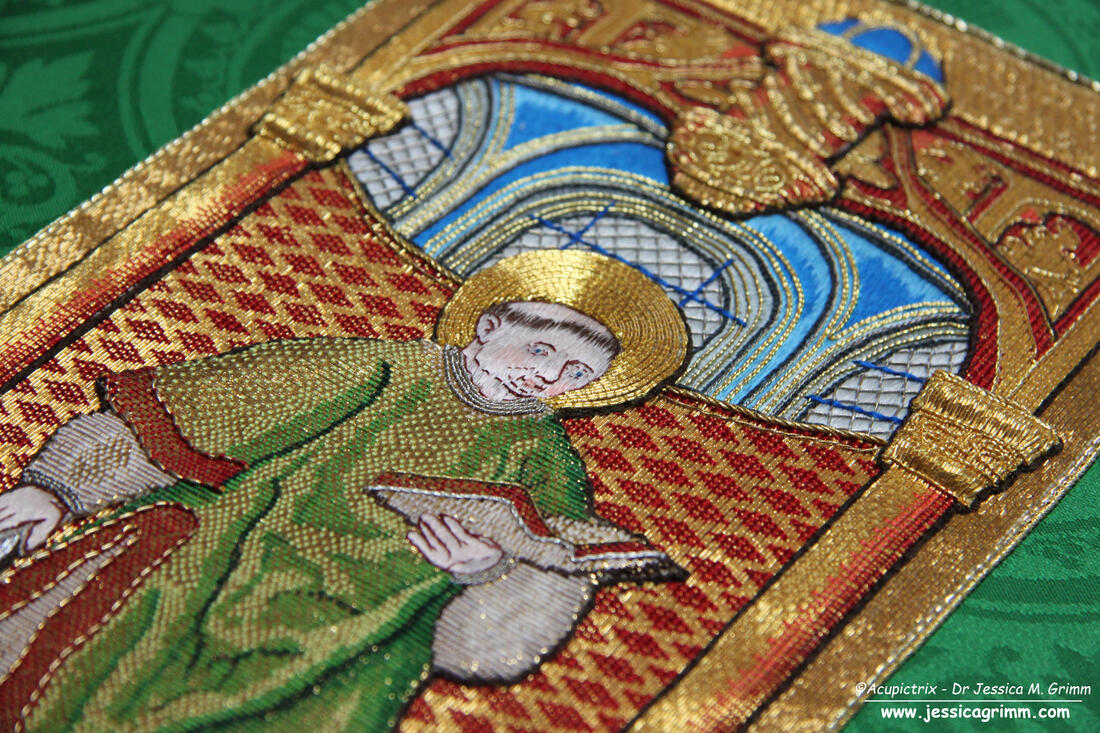 St. Lawrence orphrey (2017) showing pattern couching and or nue. The medieval goldwork course will start February 2021 (registration will start 1st November). This enables me to assemble a full kit and get it shipped in time to all participants. Class size will be limited to 15 to enable me to give proper attention to each of the students. Each lesson will comprise of a PDF-download with all the historical and technical information on the particular technique explored, a video abstract of that information, a video of me working the sample and giving tips, a zoom-meeting where you can meet fellow students and discuss the lesson and a classroom on NING where you can find all the course material and keep in touch with your fellow students. And as always, I am only an email away!
Updates on the course and registration will be disseminated through this blog and my newsletter. Looking forward to sharing my enthusiasm for medieval goldwork embroidery with you in this new course! I am getting really excited as the vernissage of my first-ever solo-exhibition draws nearer! As this is my first time organising and promoting such an event myself, I really do hope I have managed to think of everything :). Apart from sending invitations to important people, gallery owners and friends; I and my husband also spent two days dropping them in every mailbox in our village. The only things left: hanging the exhibition posters around the village for the tourists to see, signing the insurance papers, preparing my speech and hanging the exhibition. So cool! 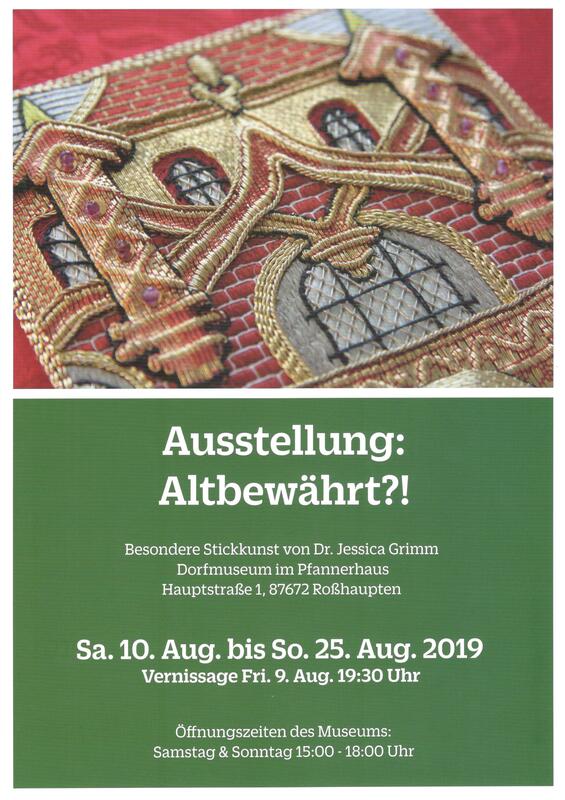 But that's not all that has been happening in my embroidery life! Last week, I taught crewel embroidery to Kristin from Berlin and Elena from Switzerland. As the three of us were born in the 70s, love to travel, have no kids, love our men (but think they are a rather peculiar species), we had a lot of fun! And cake, of course. Oh, and we stitched too :). 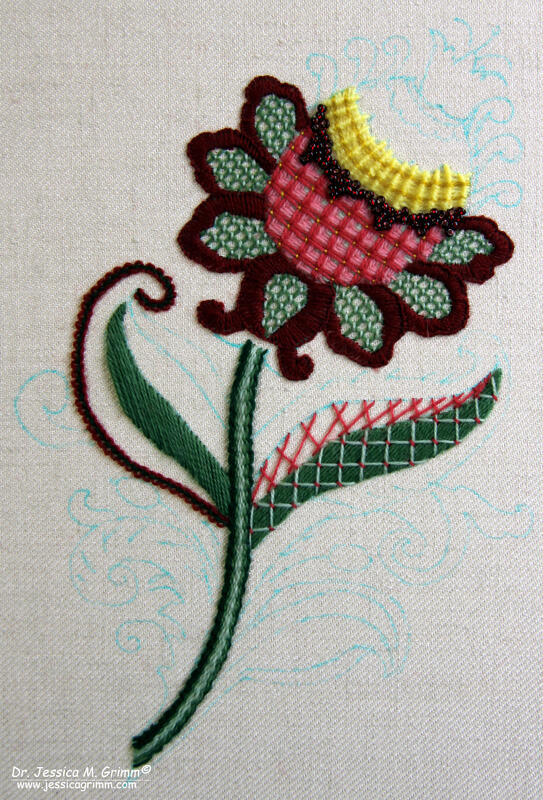 Kristin Lorenz Kristin chose an image from one of these generic pattern books you can find in most bookshops. You can use these patterns for a variety of crafts and they are an especially good starting point for embroidery. Picking colours from the full range of Heathway Milano super-quality crewel wool was a true Qual der Wahl (the agony of choice). But she chose well in combining Pomegranate with Laurel and a dash of Daffodil! Kristin really wanted to incorporate lots of colours and even some pearls. Way out of her comfort zone, but working so well! I can't wait to see this piece getting finished. 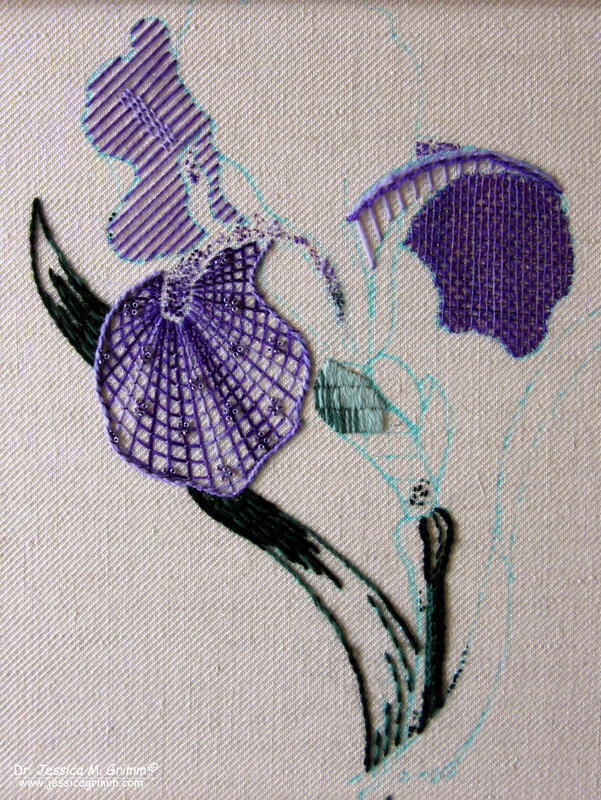 Elena Golovkina Elena has been working the same image for years. Don't get me wrong, she isn't slow or anything, but she works the same image in different techniques :). As a base, she uses a Russian translation of the RSN-embroidery book. So far she has worked two beautiful irises: one in goldwork and one in blackwork. It was now time to tackle the crewelwork one! Beautiful Heathway Milano Violet and Gobelin Green were the perfect colours for the job. As the original piece in the book is made with variegated threads, we also added some hand-dyed raw silk by House of Embroidery. The fluffy nature of the wool combines very well with the spun silk. And of course, we added some sparkly pearls as well. As Elena really liked working with the wool and filling areas with trellis stitch, I am hoping for a speedy finish :).
That's all for now! I hope to see at least some of you during the vernissage or the opening hours of the exhibition. All my work will be on display and I will be present during the opening hours. Last week I ran my last five-day embroidery workshop of the year. Due to my trip to China, I had to move some students to this new date. I thus ended up with one person doing crewel embroidery, one person doing canvas and one person doing goldwork. And that was actually really nice and varied! Let's have a look at what the ladies worked on. Unfortunately, my good camera gave up the ghost in China, so I had to take these pictures with my phone. Today my good camera was returned to me all cleaned and with a brand new diaphragm. Can't wait to shoot with it again! 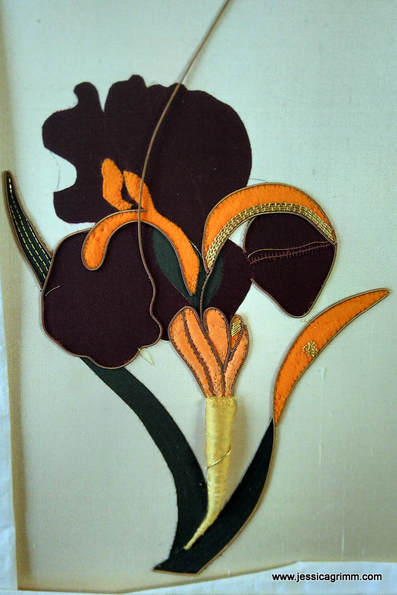 First up is Elena from Switzerland. She worked a design from an older RSN book. As she is originally from Russia, the copy of the book is in Russian too. Luckily for me, the names and sizes of the gold threads were not being translated. In the original design, the petals and leaves are coloured in with aquarelle pencils. We opted for silk appliques instead. Unfortunately, the picture does not really do justice to the very elegant feel of this design. I can't wait to see it when it is finished! 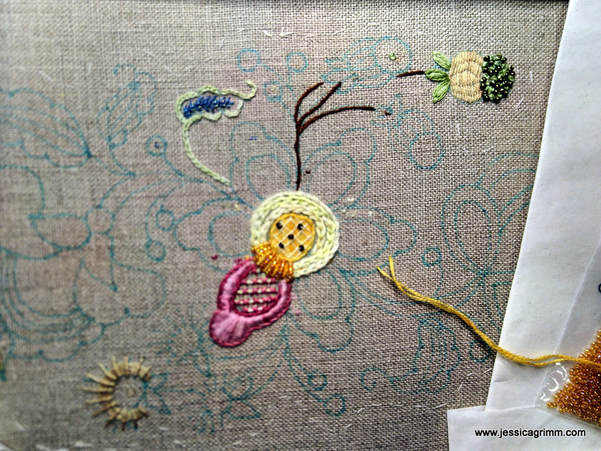 Anja L. worked a crewel embroidery design from a book by Hazel Blomkamp 'Crewel Twists'. It was her first encounter with embroidery since primary school. Getting to grips with the fact that this type of embroidery is not very productive, took some time. But she persisted and I think we have our latest convert! It will be lovely to see Anja develop her own style when she gains confidence in her own stitching abilities.  And then there was Anja D. from the Netherlands. She worked on her first canvas piece and really loved it. And so did we all! Once completely stitched, the beech trees will form a stark contrast with the beautiful autumn background. Instead of blending each colour shade in the needle, we opted for the variegated threads by House of Embroidery. This brand just happened to have such beautiful autumny colour combinations that it would have been a waste of time not to use them. And last but not least, you can watch my talk on historical embroideries I held at the National Silk Museum last month. As the whole talk is being translated into Chinese, I really needed to stick to my text so as not to throw off my lovely translator Clover. Pretty quickly we established a good rhythm and the whole presentation went rather smoothly. Enjoy!
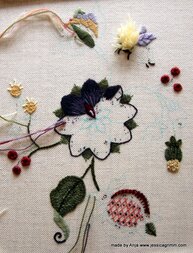
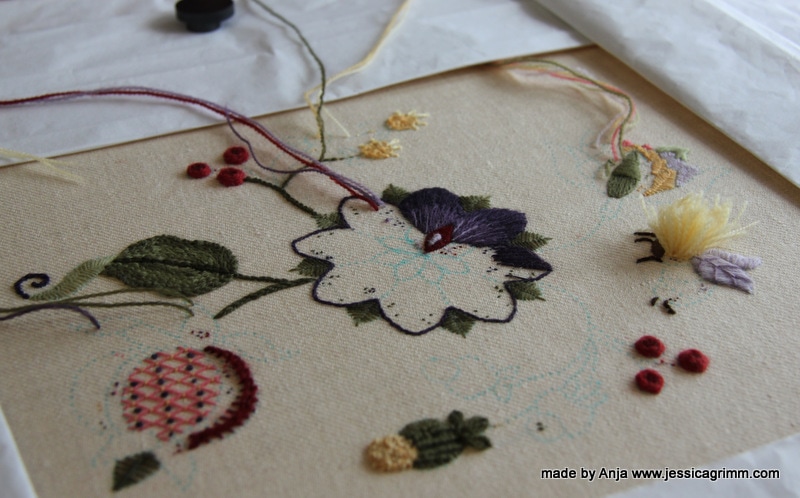
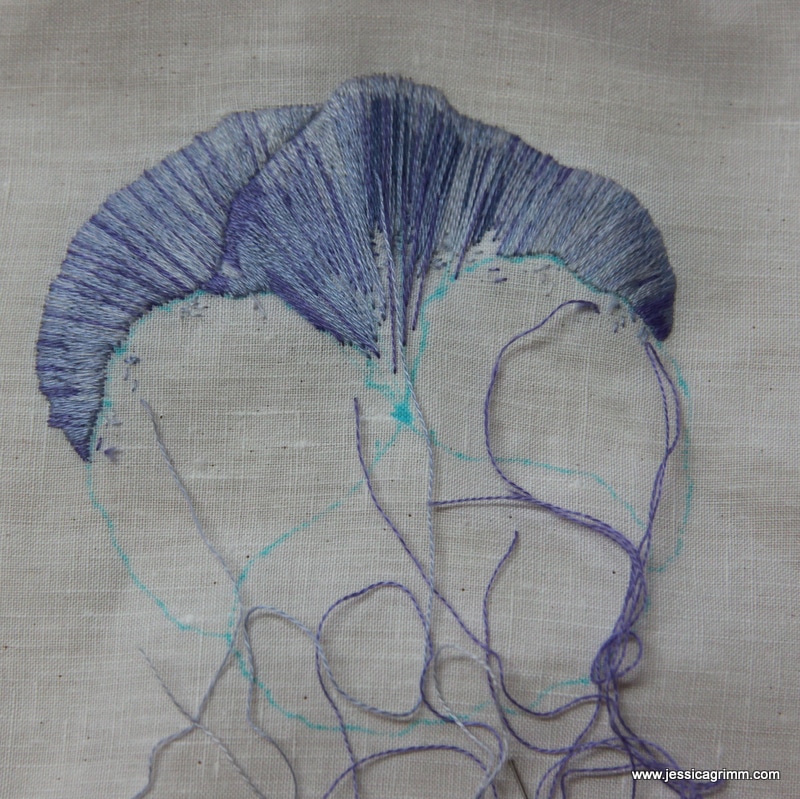
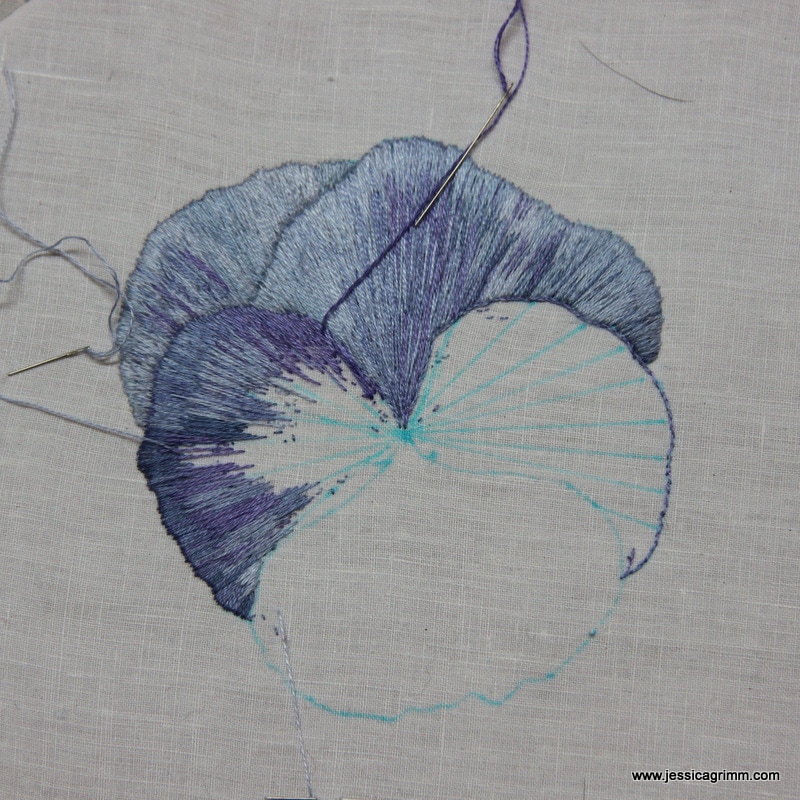
Before I open the candy tin, I would like to voice a big thank you to all who left comments of encouragement on last week's blogpost. I also received many personal emails. Thank you very much! What will happen next? The farm building is beyond help and will be demolished. The cattle will be sold over the next weeks. The Lötschmüllerhof will no longer be a farm. That's a strange idea. As reference to 'the farm' in my family was always to this particular place. However, we are all settling in to our new lives and the help from others is balsam to our souls. 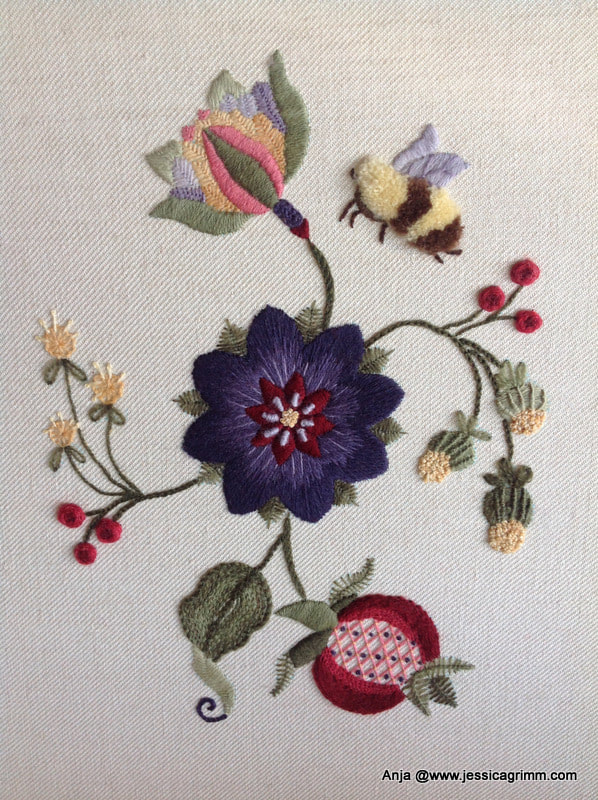 On to the eye candy! Remember this piece by Anja from the Netherlands? She started it earlier this year during one of my stitching retreats. I think she did a terrific job! The piece is balanced and the purple flower is such a beautiful centre piece. So proud of her :). Note: I no longer run this course.
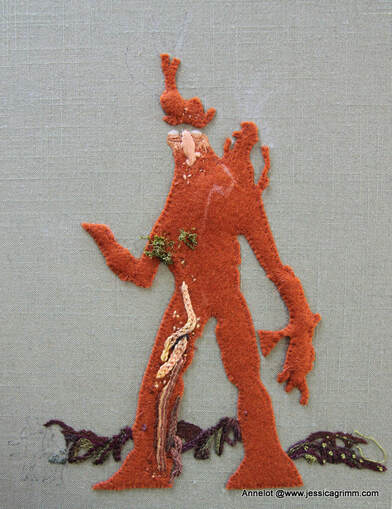
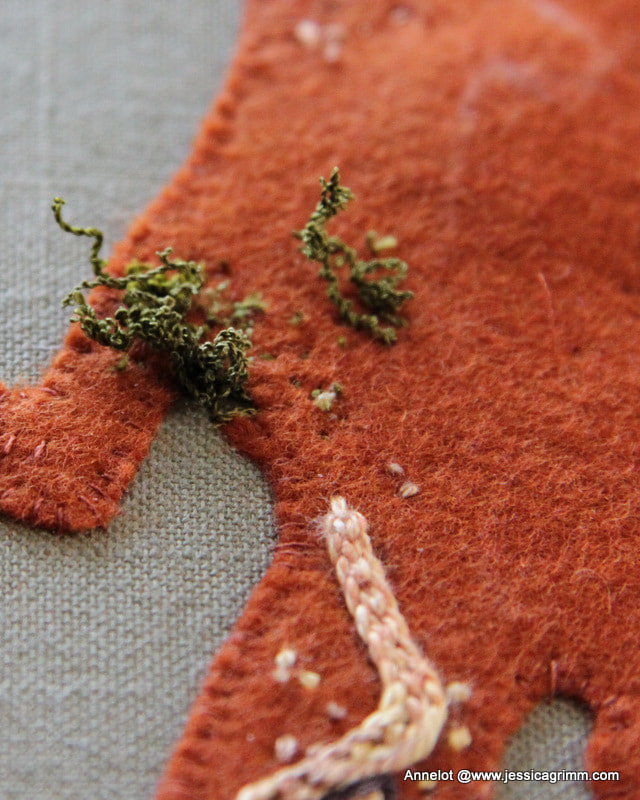
Next up is a stumpwork piece by Annelot from the Netherlands. She started it last week during my stumpwork stitching retreat. Annelot is creating a stitched version of Treebeard, the oldest Ent from the tales of J.R.R. Tolkien. For his mossy beard we tried the overtwisting method as described by Alison Cole in her great book on stumpwork (you can read my review here). This is a fun method with great texture. Can't wait for the piece to be finished. 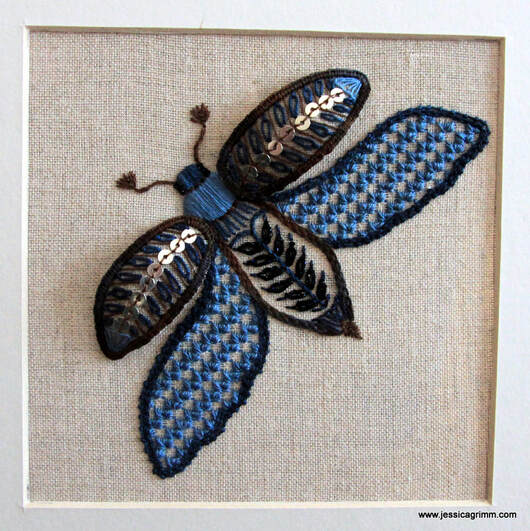 Over the years, I have learned that embroidery calms and sooths my soul. So I was particularly happy to find the September broderibox by Nordic Needle in my mail last week. With this month's threads I worked a moth from one of Millie Marotta's books. I used Snow by Caron, Watercolours by Caron, Kreinik Silk, Colour variations by DMC, Londonderry linen thread and silver plated spangles. The moth is stitched using a combination of Schwalm drawn-thread work, surface embroidery and stumpwork. 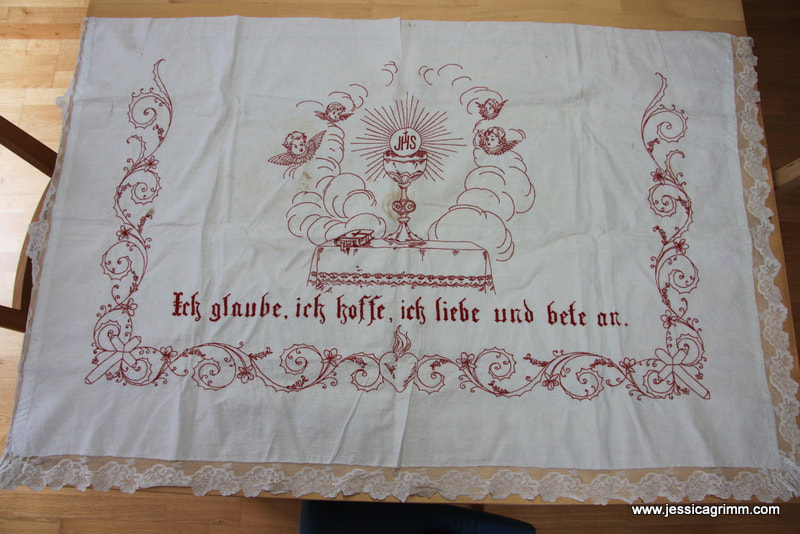 And last but not least, this altar frontal or antependium was saved from the fire. It used to adorn the Corpus Christi altar put up in front of the farm every other year. It is a little dirty, so I will try to gently clean it. Since the altar did burn, we need to construct a new one. But the antependium will still adorn it!
And that's it. All candy distributed :). See you next week! Today I am going to share some lovely embroidery pieces with you. We'll start off with the work of one of my students, then we'll have a look at some new pieces I made and we'll finish with a new initiative to bring Mastercrafts People together. Let's start with a stunning blackwork piece: 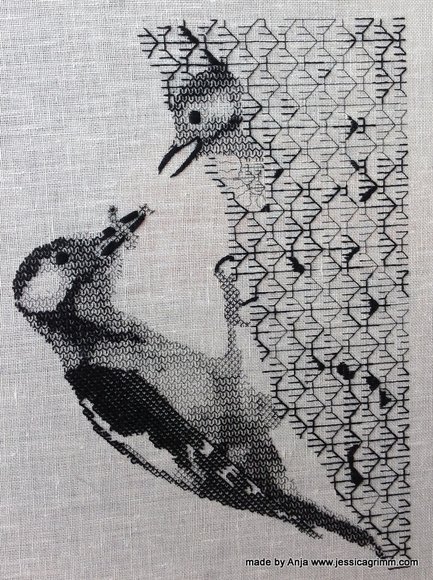 Blackwork embroidery by Anja This piece has been embroidered by Anja from the Netherlands. She started it last year during one of my week-long embroidery retreats. Anja worked from a picture and translated the different textures and shades beautifully into blackwork's geometric patterns. Anja will add some white highlights to the eyes to make the birds even more life-like. I so enjoy seeing a finished piece which started under my tuition!
Next up is another piece by Anja. She started it last week during another one of my embroidery retreats. We had great fun designing this piece by using a piece by Hazel Blomkamp as the base. Then we added two flowers from a colouring book by Millie Marotta and a pomegranate from an older embroidery book. Just to illustrate that you don't need to be able to draw your own design from scratch. Mix and match often produces a stunning new design. I have a feeling this piece will turn out great as well!
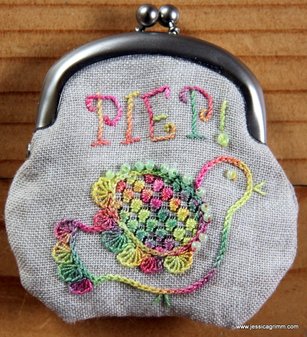
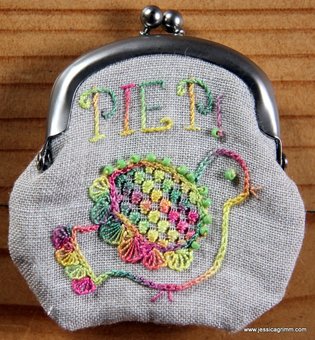
As most of you know by now, I have a subscription to the Broderibox by Nordic Needle. Although I used all threads present in the May box, I wasn't sure what to do with the purse clasp. I am an embroideress and I can mount a finished piece satisfactorily. However, I am not good at finishing. Mainly because I do it so rarely. Time to change that! There are so many lovely products out there to turn your embroidery into something other than a framed picture. Time to become acquainted with the clasp. Luckily for me, there was a website listed on the back of the clasp's packaging: Zakka Workshop. Do visit their website as they have some adorable stuff on there. And best of all, they have a really good Youtube video on how to install the clasp. As I wasn't confident that I could come up with the right size embroidered purse, I ordered their instructions for the simple patchwork pouch. It provided me with a template for the purse and then it was just a matter of adding a cute bird, do some Schwalm embroidery, add some beads and best of all: use a House of Embroidery hand-dyed perle #12 in a colour combination that's totally out of your comfort zone :). Worked a treat so far. Installing the clasp wasn't as easy as the video makes you believe. Especially not as I've probably used the wrong interfacing between the embroidery and the lining of the purse. Mine is probably too thick/stiff. That's the challenge when using instructions from another country. However, I am quite pleased with the result! 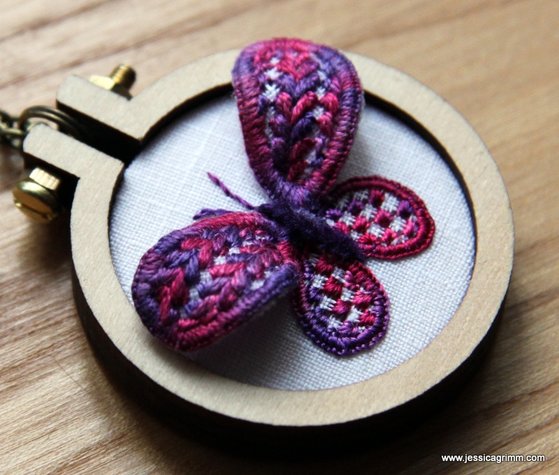 Schwalm whitework embroidery and stumpwork embroidery Another great way to finish your embroidery is to use a tiny wooden hoop by Dandelyne. Since I really like my Schwalm butterfly, I wondered if I could shrink the piece enough to go into a 4cm hoop. Guess what? I could! I used a combination of House of Embroidery hand-dyed fine silk and raw silk as well as paper covered wire to stiffen the upper-wings. I've now worn the piece around my neck for two days straight (I did put it down for sleeping...) and it holds up beautifully. By the way, you can get your Dandelyne hoops here in Germany from the lovely Nadine from Zur lila Pampelmuse. That's where I got mine :).
Today we are going to have a look at a few embroidery pieces my students work on. As I have only two hands and there are only so many hours in the day, tutoring others to embroider is THE solution. It is the perfect way to see some of my ideas put to work, without me actually stitching them :). First up is a crewel piece by Elisabeth Stix, which was started during one of my crewel embroidery courses. Please note: I no longer offer these courses. 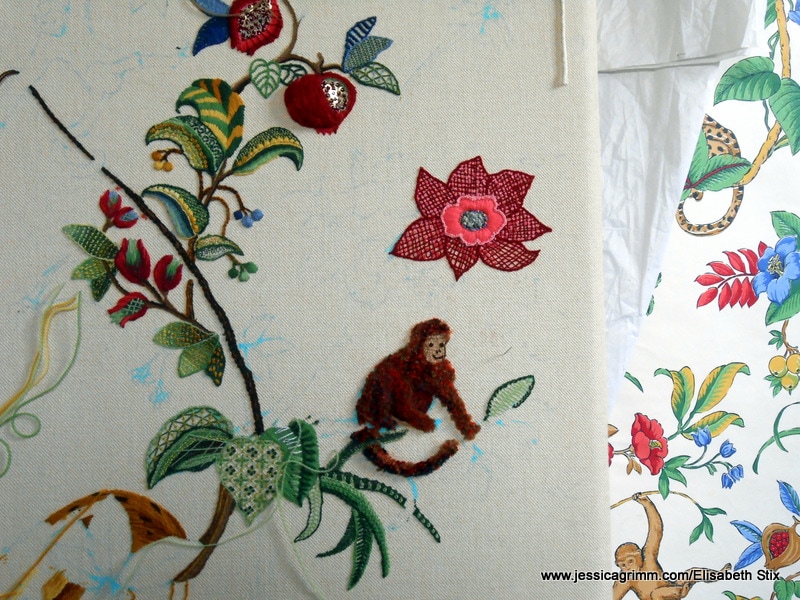 Elisabeth's piece is really big. It has been inspired by a beautiful piece of wall paper. You can see a glimpse of it on the right in the above picture. Elisabeth works on and off on this epic piece. Just stitching what takes her fancy. She mainly uses Heathway Milano crewel wool, but beads and other threads are also included. 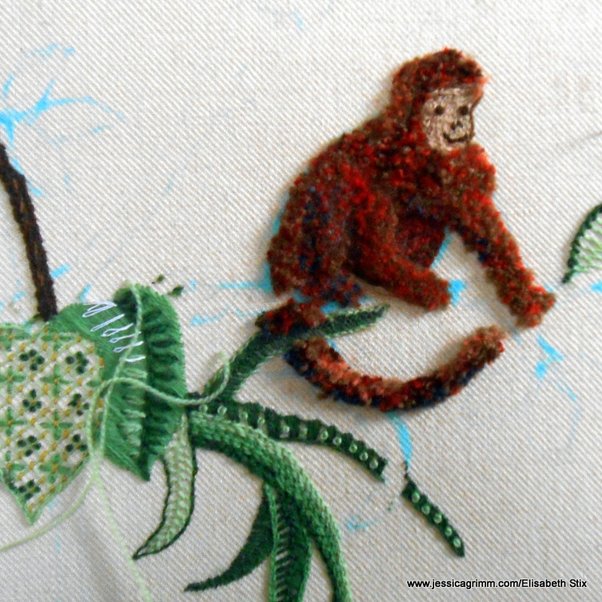 Latest addition to the piece is this adorable monkey in Turkey rug stitch. He is just such a lively chap amongst all the greenery! And I love the fact that his coat is so nicely mottled. Elisabeth must have had great patience whilst filling such a large area with Turkey rug stitch. And a lot of courage cutting it into shape :). 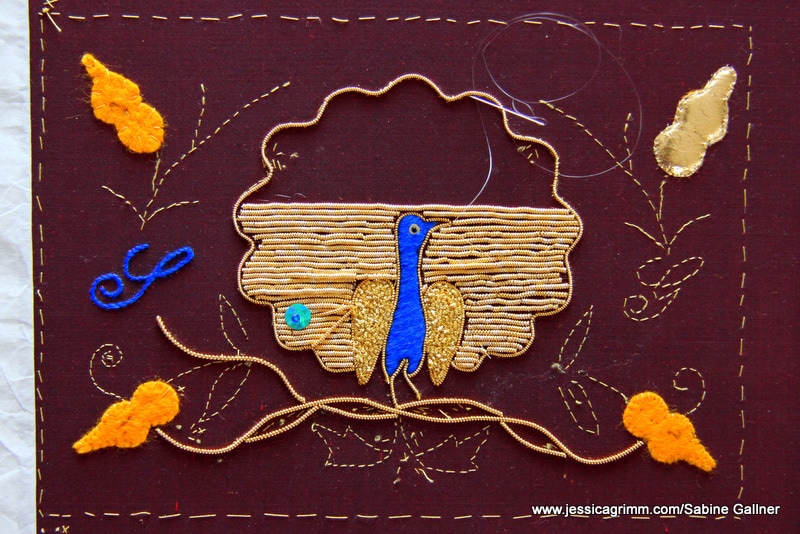 Next up is Sabine Gallner's peacock clutch bag in the making. This piece was started during my goldwork embroidery course a few weeks ago. Although it was originally inspired by an antique clutch bag, we have moved away form an exact copy. It is quite a challenge to use these long stretches of wire check to fill the peacock's tail. They later get secured with pearl purl and a blue spangle with a bead. You can get the idea from the one in the left-hand corner. This will be a real showstopper once finished!
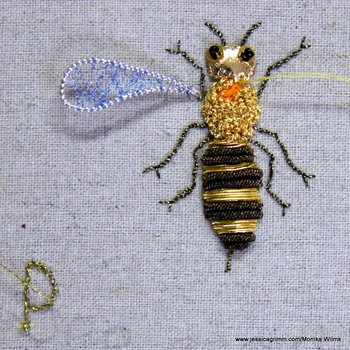
And last, but not least: two creative bees made during yesterday's goldwork embroidery workshop. The left bee was stitched by Monika Wilms. She is now planning to stitch a larger floral-with-creepy-crawlies-piece which will combine stumpwork embroidery and goldwork embroidery. So looking forward to mentor her on that one!
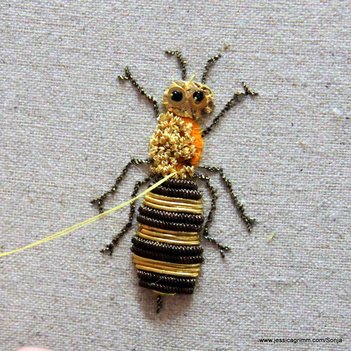
The bee on the left was started by Sonja, a lace-making friend of Monika and Sabine. Sonja had not embroidered in a long time and had never done any goldwork embroidery. I think she did a terrific job! Let's start with a joyful 'Happy Easter' to you all! Then we talk a bit about embroidery. And at the bottom of this blog article there will be, very aptly, naked bottoms. I won't judge you if you scroll :). 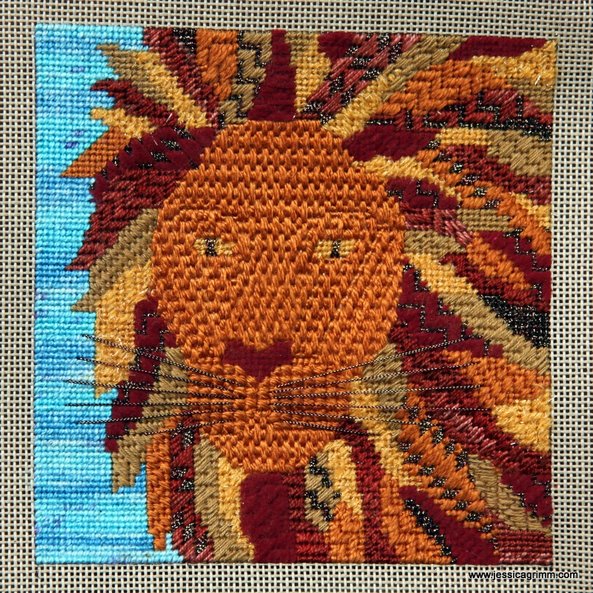 Let's kick-off with my canvas lion who somehow reminds me of Lenny Kravitz. So now the piece is referred to as Lenny the Lion :). Early April, I received another broderi box from Nordic Needle. This time filled with pretty golden, yellow and rustic red threads. When I saw the threads, I knew they would suit a lion well. Luckily for me, Millie Marotta has issued a new colouring book called: Wild Savannah. It took me quite a while to get Lenny's face right. I wanted to use a single colour and only generate some definition through the use of different stitches. I used an amber coloured 100% silk called Autumn Orange by Vineyardsilk. I so love this twisted spun silk with a pretty lustre! It is such a well-behaved thread. For Lenny's manes, I ran riot with stitches and threads. So much fun! I used a variegated rustic red cotton thread called Chili of the Wildflowers range by Caron. And a dark red velvet thread by Rainbow Gallery. Also from them is the yellow thread aptly called 'Fuzzy Stuff'. I feared the worst, but you can actually stitch with it :). Also in my broderibox and thus in Lenny's manes: Londonderry Linen thread 'Maple Sugar'. Quite nice to stitch with and a real 'calmer' in the manes-craze. But best of all, was a spool with a metallic thread called Bijoux 'Tiger Eye'. Since my family widely believes there are magpies in our ancestry, it is no wonder I like threads with a sparkle! I finished Lenny by filling in the African sky behind him with a thread from February's broderibox: Tropic Seas from the Watercolours range by Caron. As you can probably guess by now, I thoroughly enjoy my monthly broderiboxes. It is the perfect way to learn about new materials. And in order to prevent these lovely goodies from cluttering up my stash, I've set myself the challenge of using them straight away. So far, I stuck to my plan!
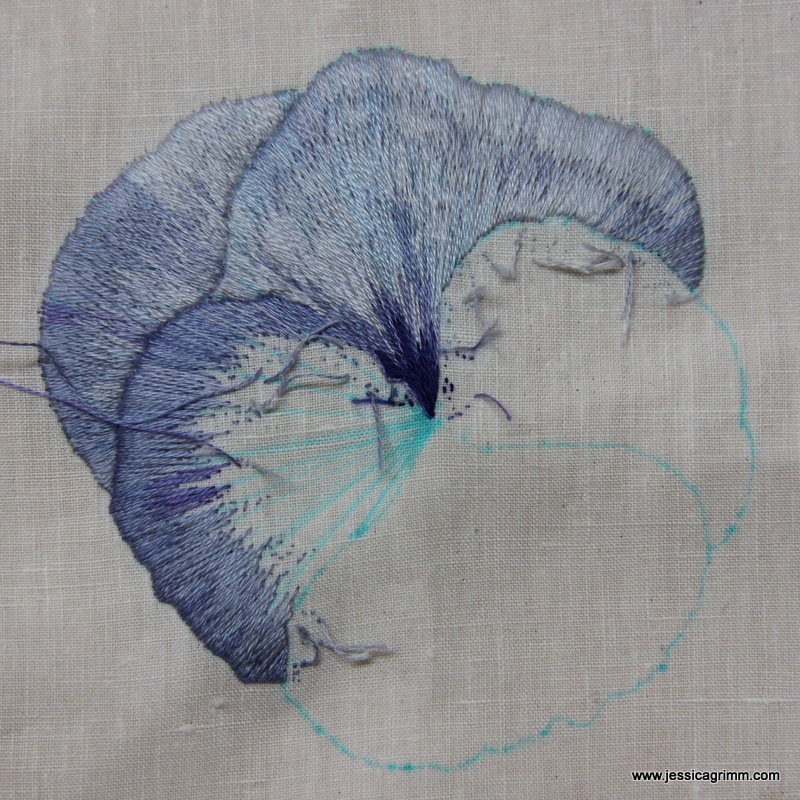
Let's move on to the pansies, shall we? Last week saw three women stitching away in my studio. They took part in my silk shading embroidery retreat. Personally, I think silk shading is an embroidery technique which you either love or hate, you can or you can't. It is deeply personal and progress is slow. My lovely ladies worked from a picture of a large blue-violet pansy. After five days of stitching diligently, eating lots of cake and laughing until our bellies hurt; you can see Elena's pansy on the left, Sabine's in the middle and Monika's on the right. I think they did a great job! Hopefully, I get to see the finished results upon their next visit. Now: THE naked bottoms! As probably many of you know, my husband is a Catholic and I am a Protestant. Since we live in a predominantly Catholic environment, I sing in a Catholic church choir and worship in the same church. Although both Christian denominations, there are some differences and I am not always getting it. I usually blame that on John Calvin :). However, this Easter Mass, I wasn't the only one who was confused... This is what happened:
Due to a severe lack of priests, we got the 'monk-who-never-smiles' on loan from the local abbey. So far so good. However, he compared integrating the Lord's resurrection into our everyday lives with an ad for the protection of the environment. And you guessed it: This ad featured naked bottoms on a bench. With his ever-straight-face he even described these naked bottoms as being: Greek, Roman or of such making that they 'needed a little more space'... This left us very, very confused! Happy Monday to all my old and new readers! There has been a surge in newsletter subscribers recently thanks to Mary Corbet's excellent blog on copper monogram stencils. And I've been featured in Nordic Needle's newsletter too. Very grateful for this #communityovercompetition attitude!
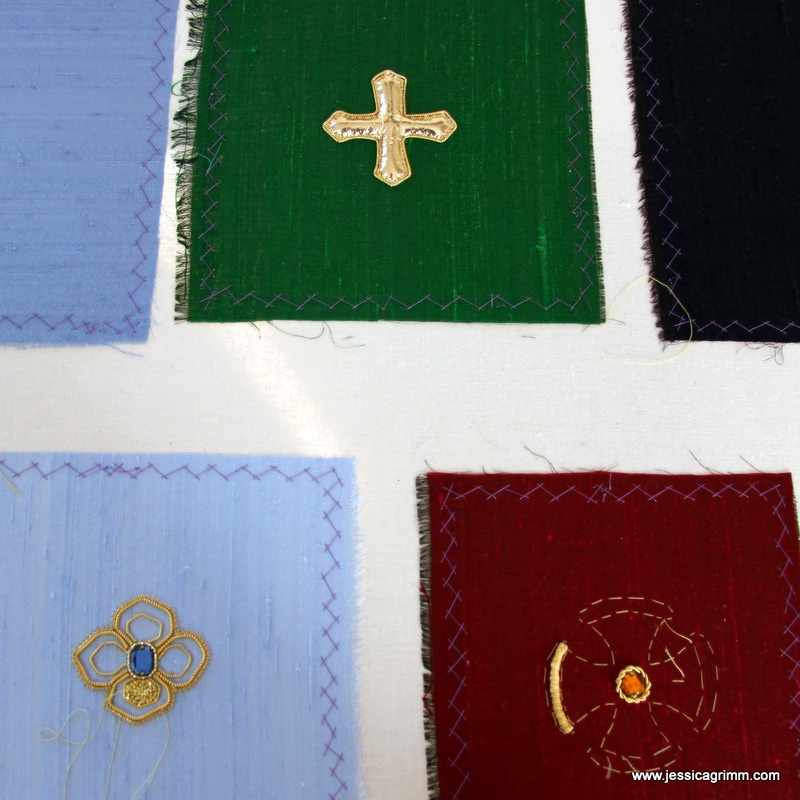
As promised last week, today I will share with you the projects my goldwork course students started last week. Please keep in mind that they only had five days to plan, frame-up and start stitching their projects! First up are Erika's Madonna and Monika's Iris. For the Madonna we took an actual picture of the wooden figure and transferred it onto Zweigart Newcastle linen. The Madonna will be mainly stitched using the or nue method with Japanese Tread #12 and an array of Chinese flat silks. Her face, hands and baby Jesus will be silk shaded using flat silk. The Iris stitched by Monika actually comes from an older Inspirations issue. It is a terrific piece to learn basic goldwork techniques. And we even found a quicker way to do the burden stitch filling of the petals that does not involve plunging :)! Can you figure out what it is?
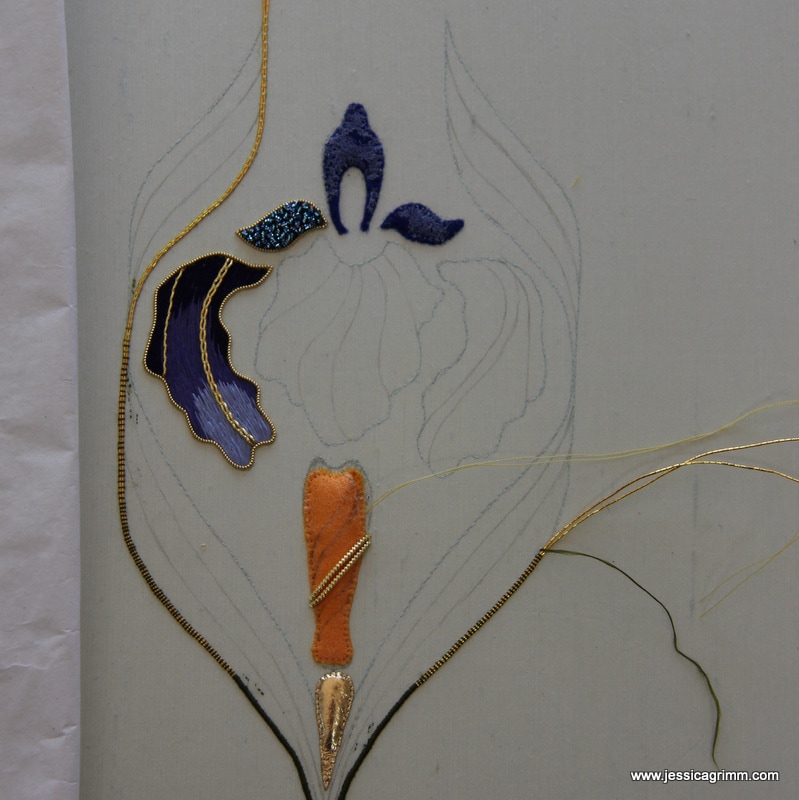
Next up are Kristin's Christmas ornaments from Hazel Everett's excellent book on goldwork embroidery. At first she wanted to do a much simpler design, but as I know her to be a good stitcher, we plunged right in. And the outcome is really good! So much so, that we all decided to spent Christmas with her in Berlin this year :)! Mari-jan came with a very beautiful stylised design of an iris. It is exactly the kind of design I would like to stitch up myself one day. We decided to not only use a variety of metal threads, but also to incorporate silk shading using Chinese flat silk. As Mari-jan is also a student of Chinse Embroidery with Margaret Lee, she knew how to handle these 'threads-with-a-personality'. Follow Mari-jan on Instagram to see this project develop: @marijanbakker. 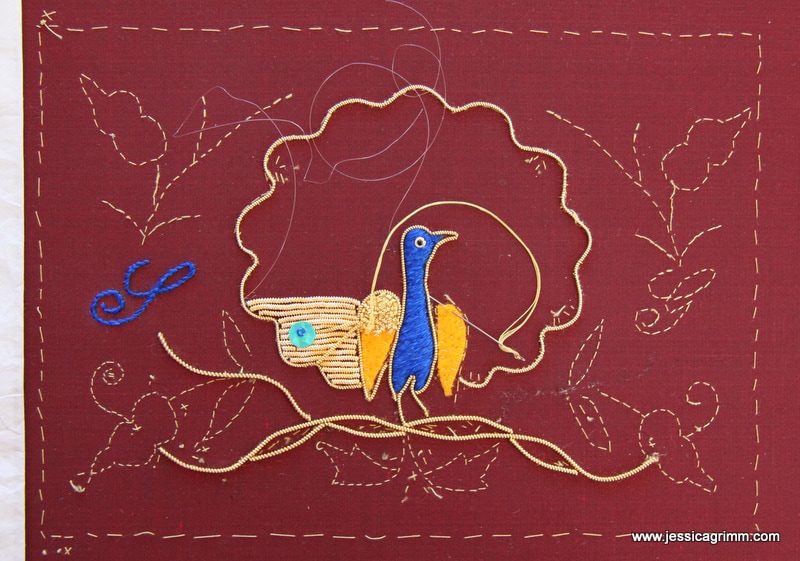 And last, but not least: Sabine's version of the peacock clutch bag! This is going to be such a stunning piece when finished. As we could all see that happen, we ordered five more peacock clutch bags from her :)! I will try to nudge my dear ladies into sharing project updates with me. I can then bundle them up and publish them on this blog every once in a while!
|

Want to keep up with my embroidery adventures? Sign up for my weekly Newsletter to get notified of new blogs, courses and workshops!
Liked my blog? Please consider making a donation or becoming a Patron so that I can keep up the good work and my blog ad-free!

Categories
All
Archives
July 2024
|


 RSS Feed
Contact: info(at)jessicagrimm.com
Copyright Dr Jessica M. Grimm - Mandlweg 3, 82488 Ettal, Deutschland - +49(0)8822 2782219 (Monday, Tuesday, Friday & Saturday 9.00-17.00 CET)
Impressum - Legal Notice - Datenschutzerklärung - Privacy Policy - Webshop ABG - Widerrufsrecht - Disclaimer
Copyright Dr Jessica M. Grimm - Mandlweg 3, 82488 Ettal, Deutschland - +49(0)8822 2782219 (Monday, Tuesday, Friday & Saturday 9.00-17.00 CET)
Impressum - Legal Notice - Datenschutzerklärung - Privacy Policy - Webshop ABG - Widerrufsrecht - Disclaimer