|
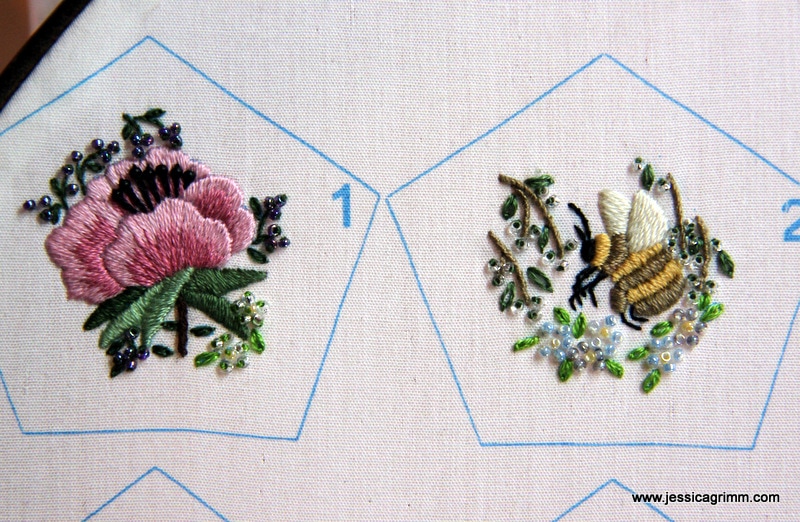
As a teenager, I loved Bob Ross' television painting classes. Not only do I really like his painting style, but I also like his way of performing on screen. Especially those episodes in which he brought an animal, are my favourites! And all things he painted were always 'happy' by his own words. So today, I am introducing to you: a happy blue snail, a happy honey bee and a happy pink flower :). Feel the happy vibes dear reader (epecially the newly-signed-up readers from Belgium!).
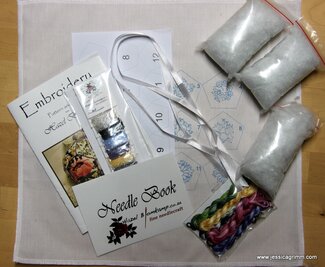
Let's start with the bee and the flower. As most of you know, I have a rather large commission on my hands with another pair of traditional Bavarian suspenders. Canvaswork is tough on your hands, so a little gently stitching in between sessions is a good thing. When I saw a picture of the Floral Pomander by Hazel Blomkamp on Pinterest, I so wanted to stitch this project. Not only is the stitching and beading adorable, but I really like this finishing technique. I've never used it before, but I can see great potential for it with a different design and embroidery style... It is a rather 'old' kit by Hazel Blomkamp and the instructions are not as perfect as I know they are today. Personally, I can live with the fact that she calls the same colour thread by more than one name. And, since I can stitch, I do not need a step by step instruction on how to embroider the little scenes. However, if you are a newbie, maybe not the best kit to start with. When my kit arrived, I was positively surprised by the fact that German customs had missed it :). Vielen, vielen dank ! Hazel has not only packaged the kit supplies beautifully; there seems to be plenty of them. Especially of the beads. As you might remember, I'd run out of threads when stitching a kit by Pascal Jaouen. Although I contacted him in several ways, I haven't heard back from him ever since. Interestingly, Mary Corbet is addressing the issue on her blog today.
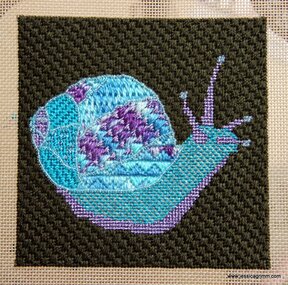
On to the happy blue snail. Every now and then, I just need to play. That's why I like Nordic Needle's broderibox subscription plan so much! My February box was released by customs on Saturday, so I had some quality playtime over the weekend. I decided to stitch up a happy blue snail on 18 TPI antique canvas. I found this particularly adorable snail in one of Millie Marotta's colouring-in books. Great resources for instant embroidery designs.
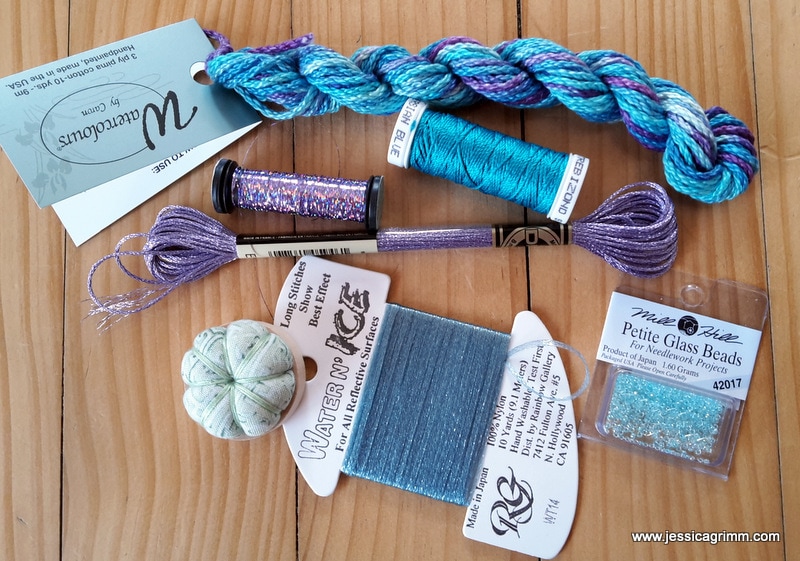
Again, this month's broderibox contained a few threads I had never encountered before. Yummy! New to me was the trebizond silk (the blue spool in the picture above). I had come across it on Mary Corbet's blog, but I had never seen it in person, let alone stitched with it. It is a really nice twisted silk thread similar to a #8 perle. It does not cover a 18 TPI canvas completely, however. Using two threads wasn't an option as that was too bulky and thread fatigue was horrendous after only a few stitches. So I decided to use it only for relatively small diagonal stitches and live with the fact that the canvas shimmers through. The thread reminds me a lot of a silk perle and it indeed comes with the same disadvantage: the plies untwist faster than you and I can stitch :)! Also new to me was the Water 'n Ice yarn. It is a flat translucent braid said perfect for long stitches. I decided to weave it through pre-stitched trebizond tent stitches on the body of the snail. It gives a really lovely, yet subtle 'wet' impression. I can see this work well for watery scenes in canvaswork. Or maybe even couched down in regular surface stitching. Other nice goodies in February's broderibox were a skein of DMC metallics, a spool of Kreinik blending filament and a gorgeous skein of Watercolours by Caron. The lovely people at Nordic Needle also included some petite Mill Hill beads and a really handy pincushion with a magnet on the bottom. To finish the background on my happy blue snail, I used a dark green Vineyard silk from January's broderibox. I have really fallen in love with this lovely silk thread. It is so soft and hardly wears when stitching on canvas. Can't wait for my next broderibox to arrive! Until then, it is back to my beautiful Bavarian suspenders.
2 Comments
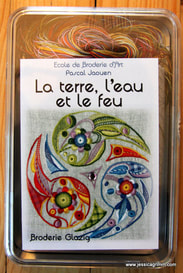
First of all, thanks to you all for the many supportive comments regarding my husband's job hunt! So very kind of you. We'll keep working on it and I am sure somewhere a door will open again. And secondly: I received my prize today from the Stitch your heart out competition of Inspirations Magazine. The lovingly wrapped parcel contained a copy of the book 'The redwork circus' by Jenny McWhinney, one of my favourite embroidery designers and the ONLY book I didn't already have by her on my shelves :). Furthermore, the parcel contained the 'Robin' embroidery kit by the very talented Nicola Jarvis. And to top it off, I also received a packet of postcards and a tea towel with the 'Frosty Garden' design by Nicola Jarvis. It really felt like Christmas. The fox itself is still down-under enjoying the warm sunshine. Inspirations is planning a really wonderful thing for you all; fingers crossed it will come to fruition! So, let's now explore the main objective of this blog post, shall we? 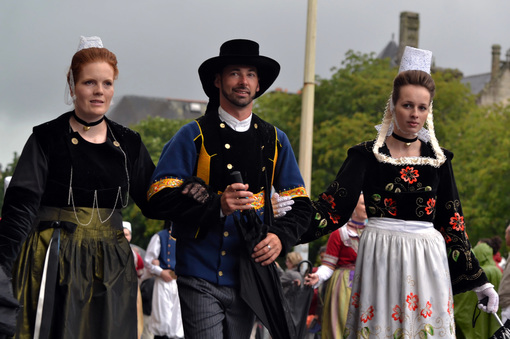 Brittany folk costumes with colourful Glazig embroidery As many of you know, I love exploring different embroidery techniques. A couple of weeks ago, I wrote about French boutis embroidery and my good friend and fellow embroidery tutor Marina Berts from Switzerland suggested that I'll give Glazig embroidery a go. When you say Glazig you say Pascal Jaouen. He is a designer and embroiderer from France who developed historical Glazig surface embroidery from Brittany into a vibrant modern art form. Do explore his website as the beautiful pictures of his haute-couture creations are stunning! So, as I really liked his designs and was up for a new challenge, I ordered one of his kits. Thanks to Google translate and my very rusty school French, I managed the ordering process just fine. A couple of days later, my shiny kit arrived. Now I had to tackle even more French :).
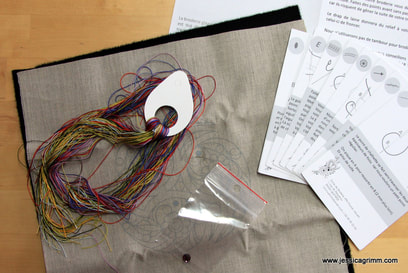
The kit contains a piece of linen with the design screen-printed on. I am not a huge fan of this as it means that I'll need to cover all the lines and can't adapt the design much (in fact, when I started stitching I soon noticed that there are design lines on my fabric, that are not to be found on the photograph of the design...). It further contained a piece of thick woollen cloth, a needle, a crystal cabochon, pre-cut silk #12 perle threads and instructions. All prettily packed in a super handy tin. I started by translating the instructions. There isn't much there. Apart from a short note on Pascal and Glazig embroidery, it only tells you that you shouldn't use a hoop, you should baste the two layers of fabric together, keep your threads short, start with the chain stitches and don't wash afterwards as the wool will shrink. And that's it. On the back of the instructions is a clear picture of the finished design (the one that doesn't exactly exactly match the lines on my pre-printed fabric) and a working sketch detailing which stitches go where. The instructions to the 10 different stitches used in the design can be found on separate cards also packed into the kit. This is of course a clever solution to keep your kits, and especially your instructions, economical. 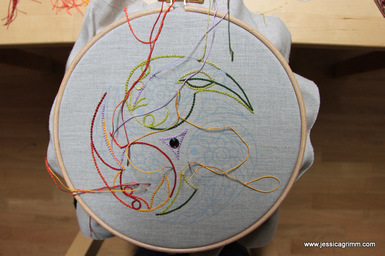 Glazig embroidery kit by Pascal Jaouen And this is how far I've come after I sorted the threads and cut them to the recommended length. And yes, I do use a hoop :). The fact that I can't wash the piece after I've embroidered it, made me decide to use a hoop. This will mean that I am not exactly following Pascal's instructions as apparently you stitch the chain stitches only through the linen and not through the wool. I can't quite envisage this, not even when I would hold the piece in my hands. I suspect that you do scoop up some wool every now and then.
The wool is a mystery to me, to be honest. In the instructions it says that the wool prevents puckering and gives a dimensional effect to the embroidery. Hmmm, actually, the non-puckering and the dimensional effect exclude each other, in my opinion. And looking at the picture of the finished design, it doesn't quite work. What I suspect is that using the linen onto the wool recreates the original feeling of stitching on traditional clothing. Glazig embroidery was used to adorn the men's clothes of the Quimper region in Brittany. And see all the thread tails hanging on my piece? Although the instructions say that you should start with the chain stitches and then commence into the more complicated stitches, I could tell from the picture that one and the same thread was used in going from one type of stitch to the next. So, I will finish all my chain stitches first, but will still be able to continue into the next type of stitch with the same thread. And I do like the stitching! The colours are so vibrant and the design is so much fun. I can't wait to start some of the stitches specific to this type of embroidery! I'll keep you posted on my progress in a further post. Meanwhile, would this kit be for you? Not being fluent in French isn't a problem as Google translate provides you with a decent enough translation. However, if you are used to step-by-step instructions, this kit doesn't provide that. You have to figure out a lot for yourself and fix a few flaws here and there. So, if you like Pascal's vibrant designs as much as I do, you love an interpretational challenge and you are prepared to fork out between €35 and €75 plus pricey shipping, then go for it! In the meantime, I would love to hear if you know of other embroidery designers offering kits in a special 'old' embroidery technique. Please do leave a comment below! |

Want to keep up with my embroidery adventures? Sign up for my weekly Newsletter to get notified of new blogs, courses and workshops!
Liked my blog? Please consider making a donation or becoming a Patron so that I can keep up the good work and my blog ad-free!

Categories
All
Archives
July 2024
|

 RSS Feed
Contact: info(at)jessicagrimm.com
Copyright Dr Jessica M. Grimm - Mandlweg 3, 82488 Ettal, Deutschland - +49(0)8822 2782219 (Monday, Tuesday, Friday & Saturday 9.00-17.00 CET)
Impressum - Legal Notice - Datenschutzerklärung - Privacy Policy - Webshop ABG - Widerrufsrecht - Disclaimer
Copyright Dr Jessica M. Grimm - Mandlweg 3, 82488 Ettal, Deutschland - +49(0)8822 2782219 (Monday, Tuesday, Friday & Saturday 9.00-17.00 CET)
Impressum - Legal Notice - Datenschutzerklärung - Privacy Policy - Webshop ABG - Widerrufsrecht - Disclaimer