|
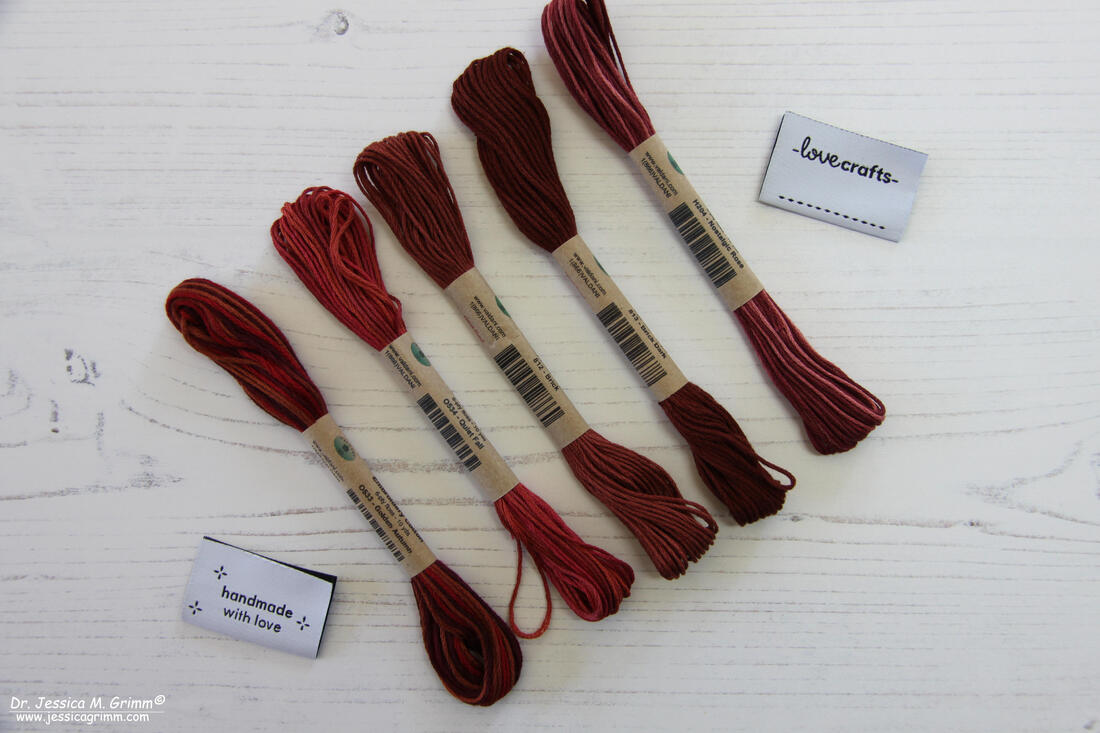
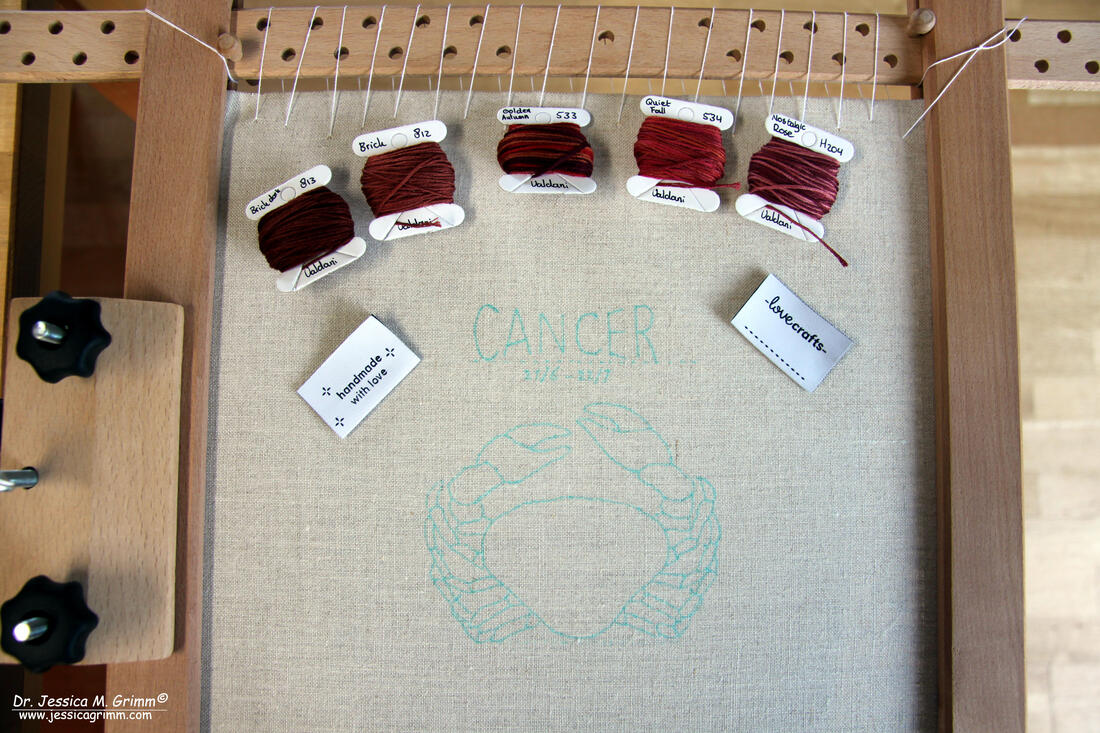
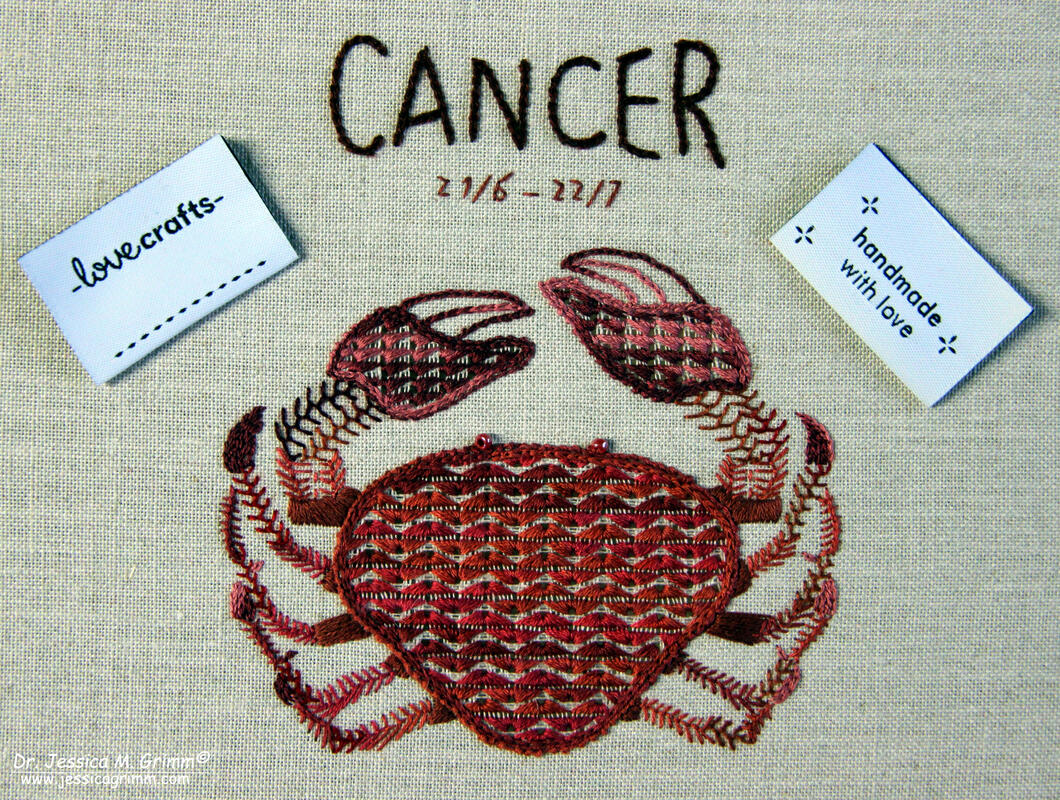
The lovely Sarah from LoveCrafts sent me some embroidery threads to play with. And since I am a self-proclaimed thread-addict, I was up for the challenge. Browsing the LoveCafts website, I came across the beautiful hand-dyed stranded cotton by the Roumanian brand Valdani. Now I had heard that name before but never seen these threads, let alone played with them. So I picked some reds and pinks as I already had a design in mind: a Millie Marotta crab. You see, not only do I love her designs, but I and my husband happen to be Cancerians. These are the lovely variegated threads I picked: 0533 Golden Autumn, 0534 Quiet Fall, 812 Brick, 813 Brick Dark and H204 Nostalgic Rose. Even the two 'bricks' are ever so subtly variegated. These would be perfect for those of you who recreate historical samplers. And what I really like about theses skeins? The wrapper is made of recycled paper. Not those horrible plastic wrappers the more modern DMC skeins have. We all need to do our bit to preserve our planet and I am glad Valdani does their bit. So how does one go from the intricate Millie Marotta drawing to a stitch-able pattern? In this case, as I approach the whole project as a doodle rather than a thoroughly pre-planned affair, I simply copied the outlines of the crab. I decided upon the size of the project (I like to use a particular brand of frames, so I decided on 14 x 14 cm) and I added some lettering. Apart from wanting to use some Schwalm embroidery on the main body of the crab and simple surface embroidery for all the other parts, nothing was planned. The combination of Schwalm and surface embroidery determined the fabric I was going to use: not too fine, as that would make the cutting of threads for the Schwalm too much of a challenge, but not too coarse either so as not to hamper the surface embroidery. I settled for 40 ct (16 threads/centimetre) Zweigart Newcastle natural coloured linen. As the label says that the Valdani threads are colourfast, I used an aqua-trick marker for the pattern transfer. And here are my stitching steps: - lettering 'Cancer' chain stitch with three strands Brick Dark - lettering dates simple backstitch with two strands Brick - outline body of the crab in the classic Schwalm way of doing things: chain stitch with three strands of Quiet Fall followed by coral stitch with three strands of Quiet Fall - preparing the grid for the Schwalm filling pattern by cutting out every fourth fabric thread in both directions - filling the grid with the Schwalm filling pattern 'Pfauenauge' (from Limetrosen I by Luzine Happel) using two strands of Quiet Fall. I've picked this particular pattern as it mimics the shape of the crab's body - filling the first segment of the legs with satin stitch using two strands of Brick - the second segment is filled with fly stitch using two strands of Quiet Fall - the third segment is filled with Cretan stitch using two strands of Golden Autumn - the fourth segment on the lower legs is filled with Van Dyke stitch using two strands of Quiet Fall - the claws were filled with chain stitch using two strands of Nostalgic Rose - at this point, I realised that the bottom parts of the upper claws would lend itself well to being filled with Schwalm embroidery too - again I made sure that the Schwalm filling pattern resembled the shape I was filling: 'Rippen nach links' and 'Rippen nach rechts'. I used two strands of Nostalgic Rose Behold the result: I added two matching beads for the crab's eyes. So what do I think of Valdani stranded cotton? Firstly, I really like the colours of these hand-dyed variegated threads. Nostalgic Rose and Quiet Fall were my favourites. Secondly, I love the more environmentally friendly packaging compared with other brands. Thirdly, each skein holds 10 yards consisting of six strands. That's over a meter more than DMC or Anchor :).
Any disadvantages? Unfortunately, yes. I have found that the single strands of the stranded cotton are a bit more irregular and a bit fuzzier than those of either DMC or Anchor. This was especially noticeable with the darker colours: Brick Dark and Golden Autumn. Although I switched to a bigger needle, the appearance of my stitching is slightly fuzzy. This becomes especially noticeable when you compare the chain stitch + coral stitch edge around the Schwalm filling of the crab's main body. The stitches look dull on the edge, but there is a nice sheen on the filling stitch. As the filling stitch is worked in a grid, friction is much less and the thread keeps its sheen. Furthermore, you definitely can't re-use a thread when you made a mistake and stitches needed to come out. The thread will shred. What are your experiences with Valdani stranded cotton? Have you used other Valdani threads? I've seen that they do perle and silks as well. How do they compare to the leading brands? Do let me know in the comments below! Once again a huge thank-you to the lovely people of LoveCrafts.com who were kind enough to let me play with the Valdani stranded cotton! Be sure to check out their website for lots of embroidery threads, embroidery kits and amazing free inspiration.
7 Comments
Last week, I and my husband, my parents and my younger sister with husband and two kids met up in Lauterbach for a family holiday. I quickly realised that this is 'little red riding hood country'. Apparently, my namesakes the brothers Grimm were inspired by the embroidered little red caps of the Schwalm folklore dress worn by young girls. A small, but dedicated museum with lots of Schwalm embroidery can be found in nearby Schwalmstadt. And since so many of you live too far away to go visit, I am happy to take you there by means of this blog! Let's start with the red caps ... For most embroiderers, Schwalm embroidery is a whitework technique. We will get to that in a moment. Let's start with the more colourful embroidered pieces of the Schwalm folk dress. As you can see in the pictures above, there are not only red caps (Betzel in the local dialect). The colour depends on the age and marital status of the female wearer. Red is only worn by girls before they get married. The embroidery on the caps consists of satin stitch over cardboard padding. Making these cut cardboards was a special craft and usually performed by men. Similar to the prickings made for Appenzell embroidery; that's men's business too. No wonder these crafts disappeared as soon as they were no longer economically viable ... The Ecken (squares) are embroidered in the same style. These extra decorations were worn on feast days over the apron on the hips. The stomachers are also embroidered the same way. As are some bits of the highly decorative endings of the bands which keep the caps in place. These also sport elaborate needlelace. And last but not least, highly decorative garters. All the above pictures show folk dress items from the 18th till the 20th century. Those pieces also sporting goldwork embroidery, are at the later end of the spectrum. Let's end our trip to the museum with some beautiful 'typical' Schwalm embroidery in white. The Schwalm whitework does incorporate a little colour every now and then. And some pieces where actually dyed with indigo blue or even dyed black. All depending on the age of the wearer and the occasion. Male and female blouses were typically decorated with this type of embroidery. As are very fine and highly decorated handkerchiefs. And bedlinen. Probably not practical, but boy I want one! The museum also has modern Schwalm embroidery on display. Many pieces are even for sale. They also organise special exhibitions every other year. The beautiful catalogues of the past exhibitions can be obtained in the museum shop. And best of all: they sell antique linen. And they have a whole big cupboard full of the stuff. I was really good and only bought about four meters :). Two different qualities and rather fine. Someday they will inspire me to a beautiful whitework piece!
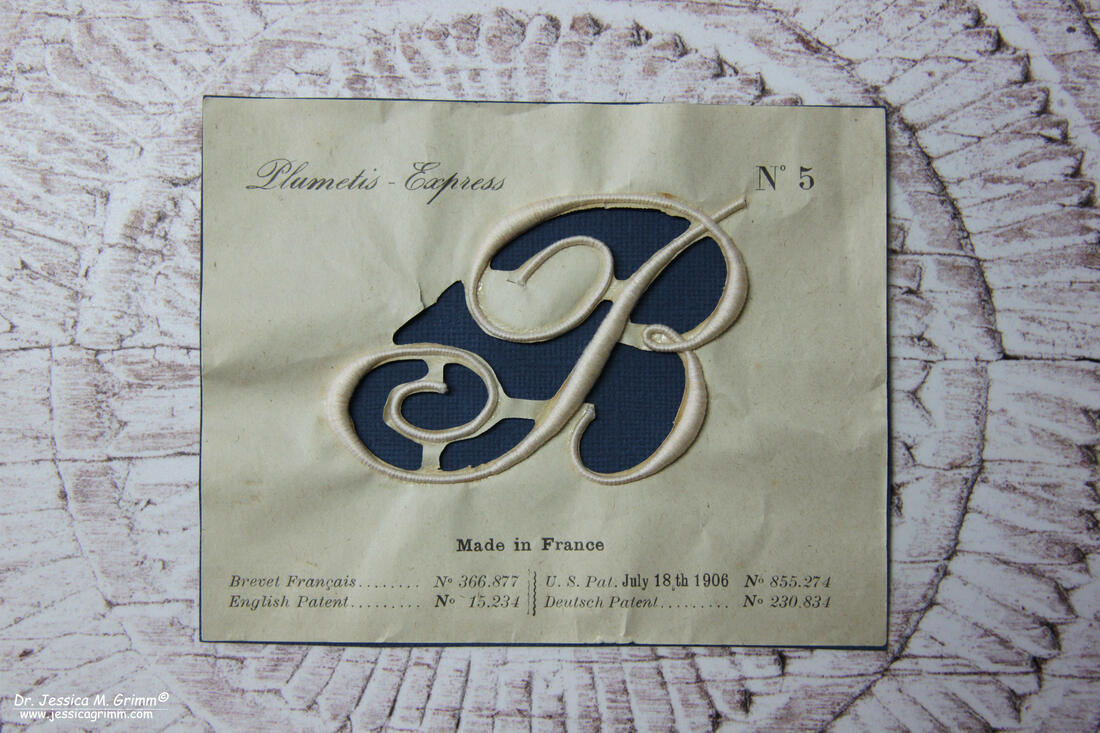
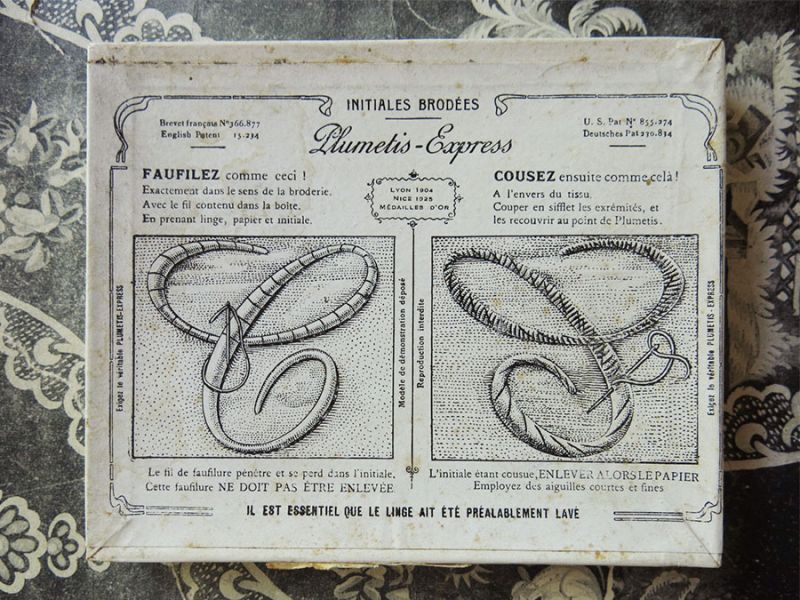
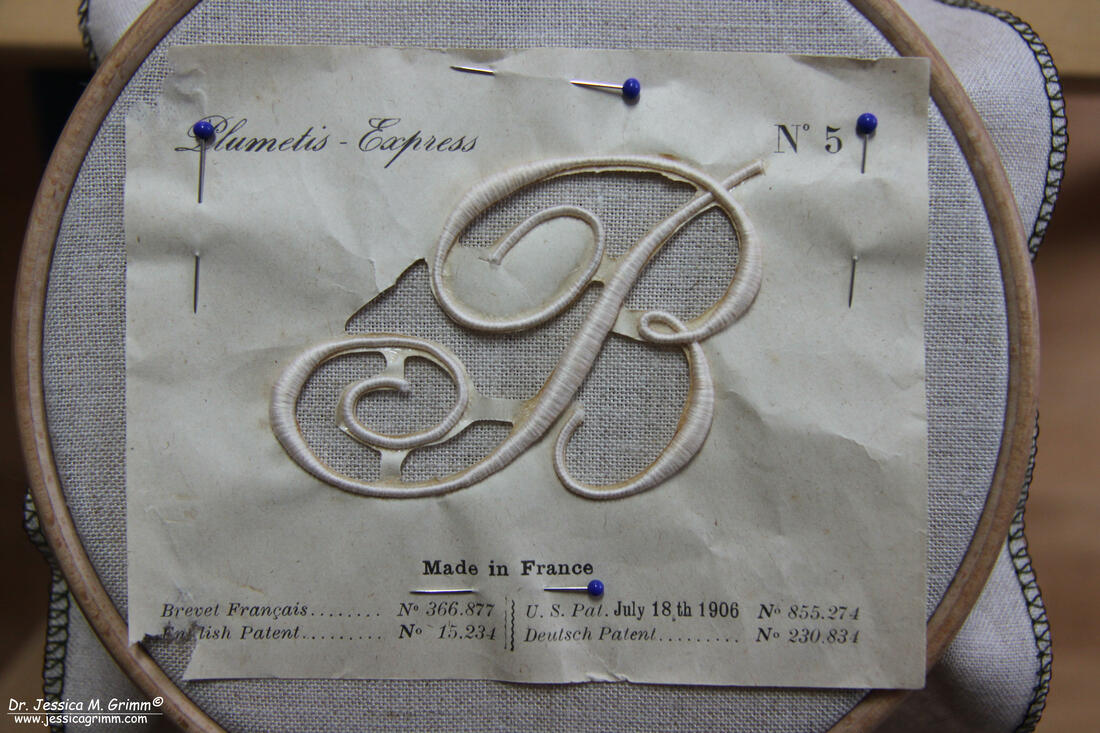
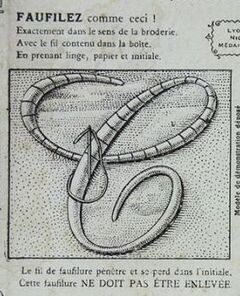
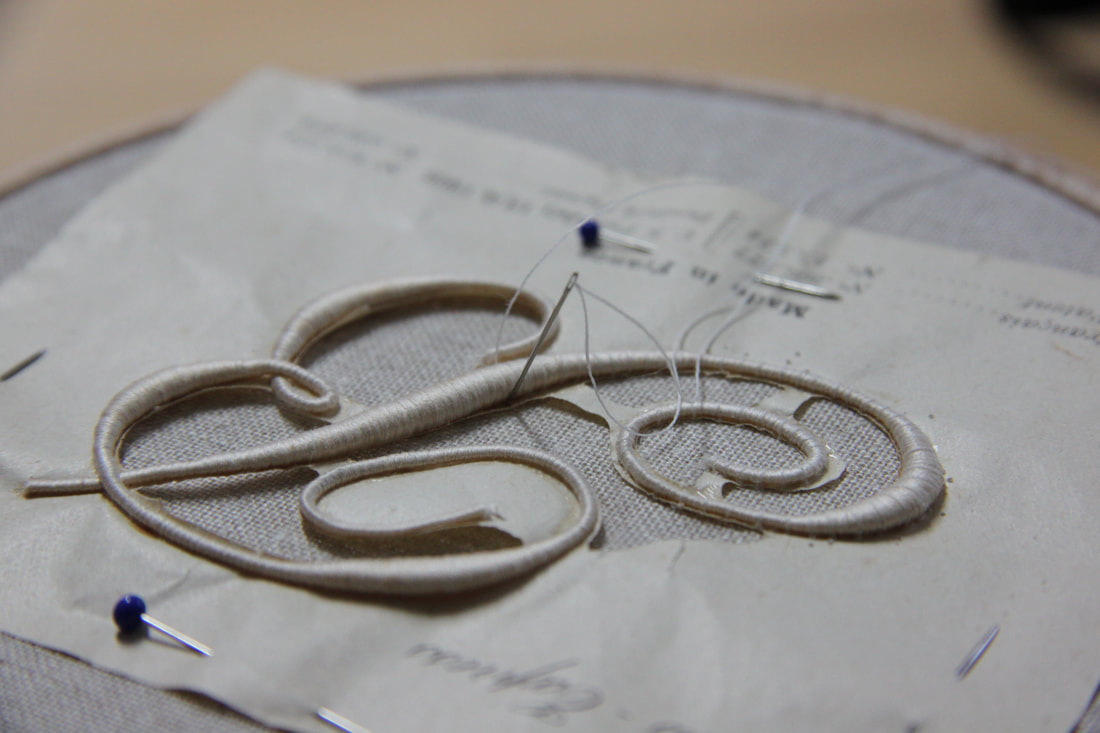
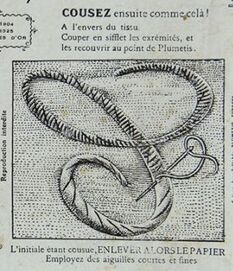
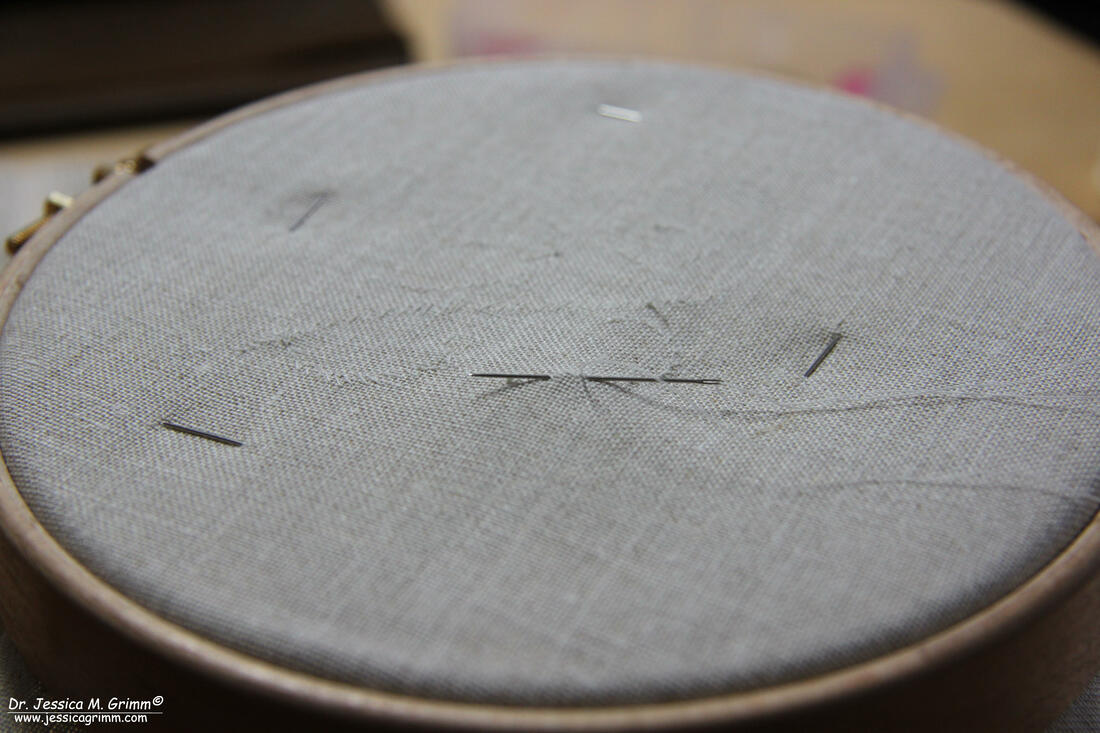
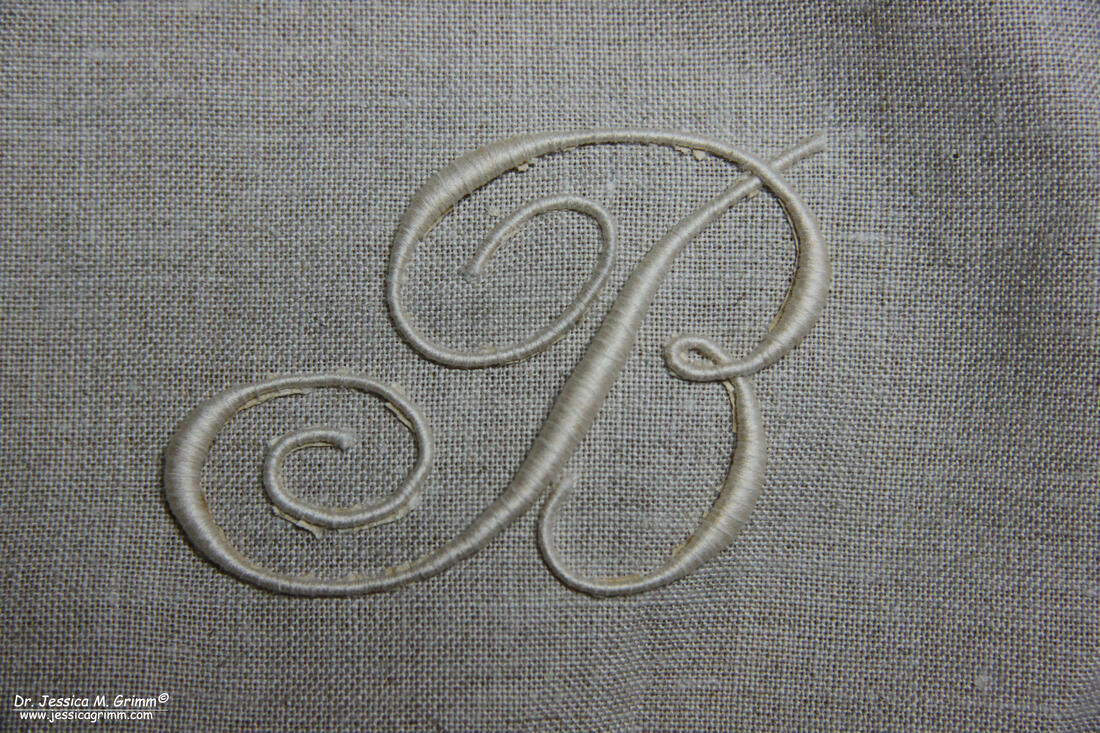
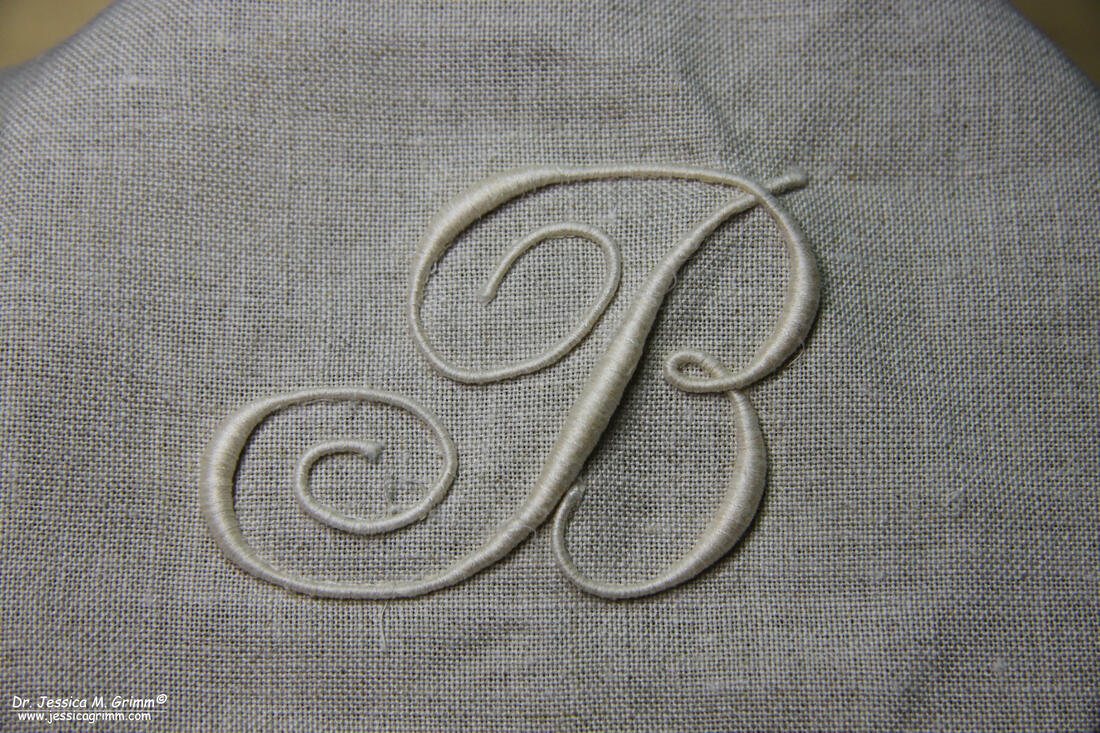
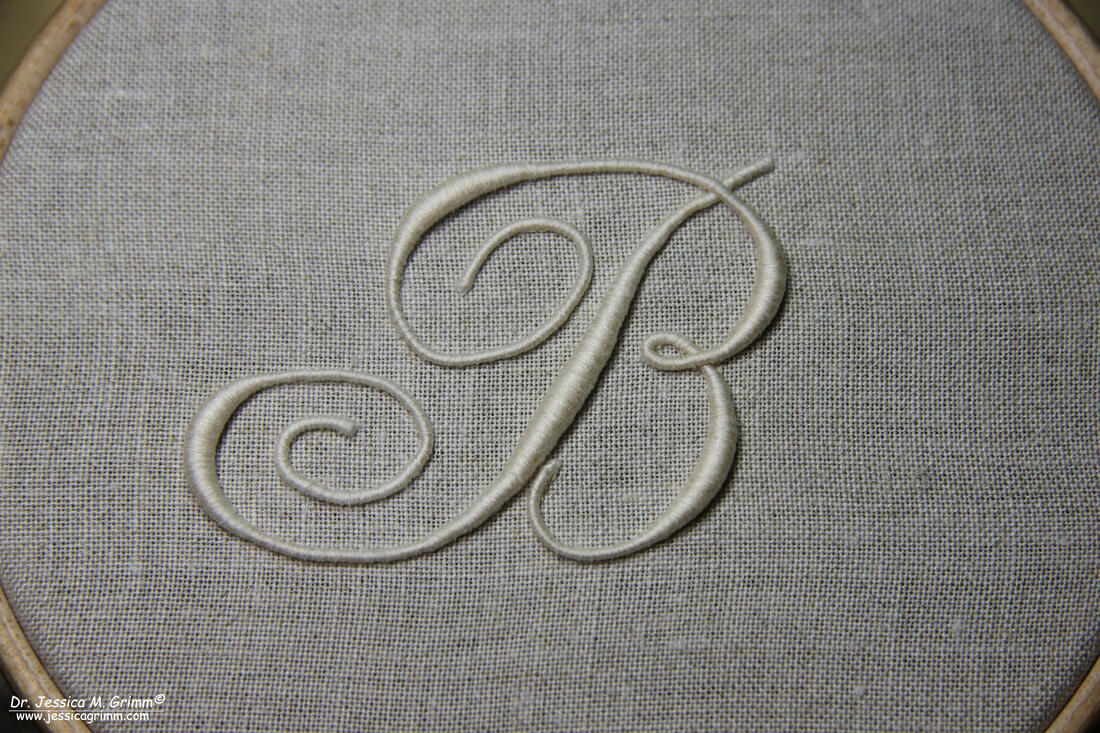
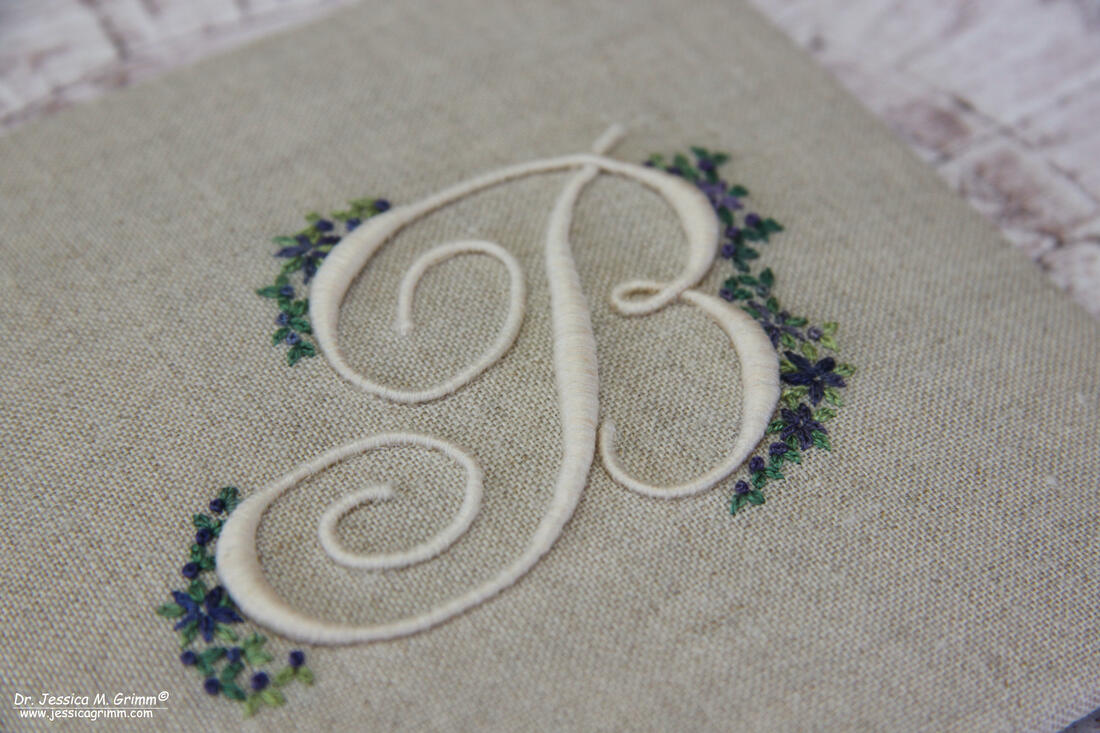
P.S. Please visit Luzine Happel's blog if you would like to know more on Schwalm embroidery and Schwalm folk dress. Make yourself a cuppa and prepare for a fall down the rabbit hole ... My parents love to go to flea markets! My dad searches for postcards and letters written by World War I soldiers and my mum finds all sorts of lovely vintage stuff and the occasional ceramics. But more importantly, they come across needlework! And their latest find is this: It is a "B" monogram made with very fine shiny cotton thread. The monogram is glued onto an ordinary light weight backing paper (the thicker blue card glued to the original paper has nothing to do with it). It is stated on the paper that the monogram was made in France and patented in France, England, the US and Germany. The date for the US patent is July 18th 1906. I had never encountered them before, but a quick search for 'Plumetis Express" on Google will show you that these vintage monograms can be had a plenty. I and my mum were immediately intrigued, but quite unsure how these monograms worked. Plumetis Express could be translated as "Quick Satin Stitch". Now that I knew that these monograms are not at all rare, I really wanted to try to use my B! I started by removing the blue backing paper. This is what the thing now looks from the back. The monogram measures 7,8x5,4cm and rises to about 3mm in height at the plumpest parts. Now, what is one supposed to do with these monograms? Luckily, some of these monograms have the instructions printed on them. One version goes like this: Ne pas decoller de la feuille support. Faufilez exactement dans le sens de la broderie en prenant initiale papier et linge. Cousez ensuite à l'envers du tissu à points de surjet avec une aguille fine. Ne pas enlever la faufilure. L'initiale étant cousue enlever le papier. and the other like this: Faufiler le tulle supportant la letter sur le tissue à la place exacte que devra occupier la letter. Par intervalles rapprochés, faufiler la letter. Déchirer et enlever le tulle, arrêter solidement les extrémités de la lettre et finir de la fixer en cousant à l’envers de l’étoffe à points de surget, en ayant soin de bien pendre toule la lar geur de la letter. Nota – Si le linge est neuf, le mouiller afin d’éviter tout gondolement qui pourrait resulted du retrait de la toile. Pour la couture de ces lettres, employer des aiguilles courtes et fines. Although I had french in school and in later life even took classes at the Open University, I couldn't quite understand what they were going on about. Feeding the text to Google Translate doesn't help either, but will probably make you roar with laughter (it works equally 'well' for translations into EN, DE or NL!). Luckily, the original boxes these monograms came in, had instructional pictures with the text. The above picture comes from a Japanese website who sold these monograms at some point. A quick chat with Friar Markus, who grew up in Saarland near the French border, confirmed that by now I probably knew how to do this... One starts by washing the linen fabric (I am using my favourite: Zweigart 40ct Newcastle) the monogram will be attached to. Omitting this pre-shrinking will result in wrinkles as soon as the finished piece is laundered. Then one arranges the paper onto the linen and presumably pins in place. So far so good! Now I ran into a problem. According to the instructions I should use the yarn from the box the monogram came in... Bummer. Reading the rest of the instructions, I came to understand that the yarn in the box probably was the same as used for the monogram in the first place. The instructions say that one should place one's stitches in such a way that they fall in line with the thread direction of the monogram. Aha! Let's see if my stash harbours a yarn similar to the stuff used for the monogram. I ended up picking Gütermann Polyester sewing thread Col. 1. Although it seems that the original yarn used is even a bit finer, the Gütermann isn't a bad match. The monogram has aged and stained, so in some places, the Gütermann will be too white. Alas, it is a strong polyester thread and I have a feeling I will need its relative strength compared to cotton or silk. Because the instructions say that I should stitch through the edges of the monogram, the paper and the linen background fabric! I should use a short and sharp needle for the task. I'll better also wear a thimble :). Now let's do as the picture says. It is actually quite easy to pierce through the paper and the monogram. Only the ends unravel a bit. But this might be due to ageing. In the next step, we'll turn the work and work from the back. With small stitches, we secure the initial even further. This step was rather difficult and really hard on the fingers. Changing to a curved needle did help a little. But especially the thinner parts of the monogram were quite difficult to 'catch' from the back. Now it was time to remove the paper. That didn't go well. Short pieces soaked in glue close to the initial were almost impossible to remove. Tweezers and a magnifier didn't help much either. I ended up hand-washing the piece with a little clear dishwashing liquid and scratching the paper away with my nails as best as I could. I assume that either the paper came off much better when the initial was first produced or the little bits of paper didn't bother too much as they would probably come off after a few laundry cycles. The difficulties to remove the paper resulted in some of my stitches having snapped. I ended up carefully removing them and securing the loose parts of the monogram again. By now I am not sure if the additive Express is very appropriate for this Plumetis Monogram... Once the monogram was secure again, I decided to embellish it further with some simple flower embroidery. After all, there is not a whole lot of embroidery going on in a Plumetis Express. I used a lovely variegated silk thread by Caron called Black Iris. My flowers were stitched with two strands using detached chain stitch and French knots. As the variegation is distinctively either greens or purples, it worked very well for the petals and the leaves.
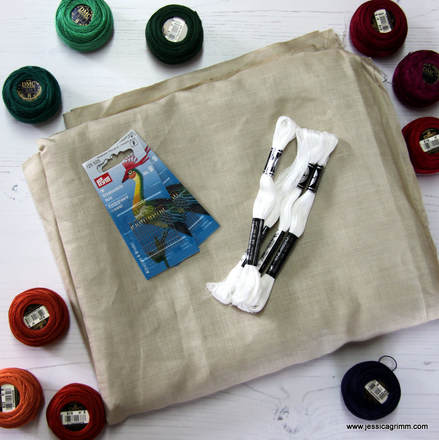
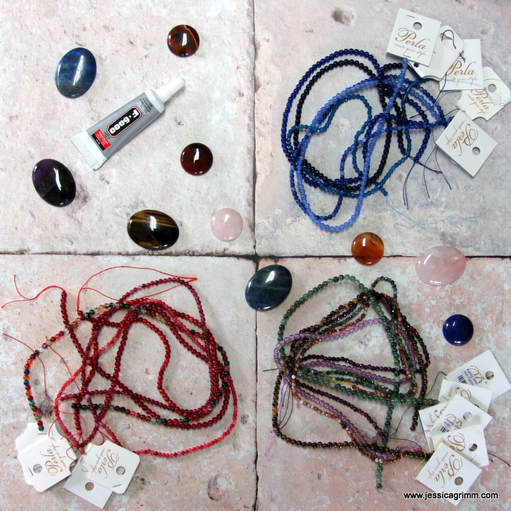
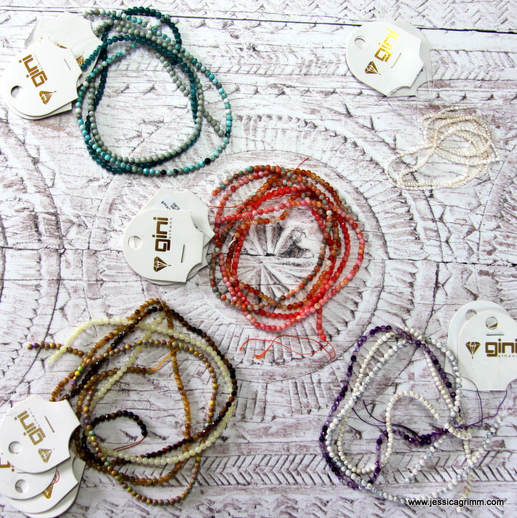
I hope my blog post has inspired you to pick up one of these vintage monograms yourself! Mounted and framed they make for stylish French-style embroideries on your wall. P.S. One thing remains: how were these monograms made? Surely they are machine made. But how did that work? If you have the answers, please comment below! I am back from a lovely holiday to beautiful Crete! Apart from incredibly hospitable people, fascinating archaeological sites, good food and wild landscapes, Crete is an island full of embroidery. You'll encounter beautifully embroidered household linens in homes, hotels, restaurants and churches. It consists mainly of whitework, cross stitch and bright folklore embroidery. Goldwork embroidery is the almost exclusive domain of the Greek Orthodox Church. Apart from seeing beautiful embroidery, I love meeting fellow embroidery enthusiasts and buying local embroidery supplies. So this first blog post on Crete is on embroidery shops. Where does one buy embroidery supplies? At the local mini-market for instance. We stayed in Enagron ecovillage near Axos and the mini-market in Axos sported a decent supply of DMC stranded cotton, perle and crochet yarns. As I did not see any fabric, I enquired at our accommodation to find out about any other shops in the vicinity. Our hosts turned out to be avid embroiderers themselves, so we had a pleasant conversation on embroidery. I even taught them how to do a bullion knot as they were mesmerized by the bullion roses on my needlecase. Armed with an embroidery shop address in Perama, me and my husband hunted it down. Not so easy. Shops have a very different look on Crete compared to over-orderly Western Europe :)! The Cretan version of an embroidery shop is a long and narrow dark room stuffed with supplies. You can hardly walk in there. And it is interesting to see what other items are on sale: towels, bed linens, socks and nylons, etc. Explaining what you want is difficult too. The ladies in the shops are elderly and very helpful, but only speak Greek. As they also sell finished embroideries (watch out: not necessarily made in Greece!, more likely cheap and cheerful China and Tunisia), they assume you come for that. It helped that I carried some finished embroidery myself to show them. The embroidery shops in Perama mainly sold DMC stranded cotton, perle and cotton a broder. Fabric-wise, they have aida, coarse linen, sparkly canvasses, pre-printed canvasses and simple embroidery kits. They also have books full of embroidery designs (cross stitch, richelieu and folklore) of which they can make a copy for you. You can also find needles, sewing thread, crochet yarn, wool, etc. It is best to carefully browse the heaps of supplies. I was lucky and found a piece of sand-coloured 100% fine linen from France. I also bought some perle yarn. After all, these ladies can really use the money as the consequences of the austerity measures are clearly visible. You can find one shop on the Palea EO Rethimnou Irakliou next to the National Bank and the other one almost opposite on Epar. Od. Peramatos-Exantis. Apparently, beading and making jewellery is incredibly hot among young people in Greece! The shops where you can find beading supplies are bright and organised with a hip and urban feel. My favourite was Perla in Rethymno. I was especially taken with the wide selection of beads and cabochons made of semi-precious stones. The young woman running the store is a maker herself and speaks excellent English. She told me that she will soon open a webshop. If you'd like to stay in the loop on that, why not visit her facebook page? I also located an embroidery shop on Eth. Antistaseos, also located in the old town centre. Two young women ran the store when I visited and they were very helpful. They had a heap of old DMC pattern leaflets in Greek. They weren't selling them, but I was allowed to take photographs. In return, I bought some #9 needles and some cotton a broder #30. They also sold linen fabric for richelieu embroidery. I saw the traced patterns behind the counter. Apparently, you buy the fabric and threads and have the pattern of your choice transferred onto the linen using blue carbon paper. The ladies told me that cotton a broder #30 is the finest thread they stock nowadays as this type of embroidery is not so popular anymore. The last shop I visited was Gini in Heraklion on Kalokairinou Avenue. For me personally, this shop was a little too loud! The girls behind the counter where of the giggling type. Nevertheless, I managed to buy some more beads made of semi-precious stones and some fresh-water pearls. Gini has several shops throughout Greece and sells online too.
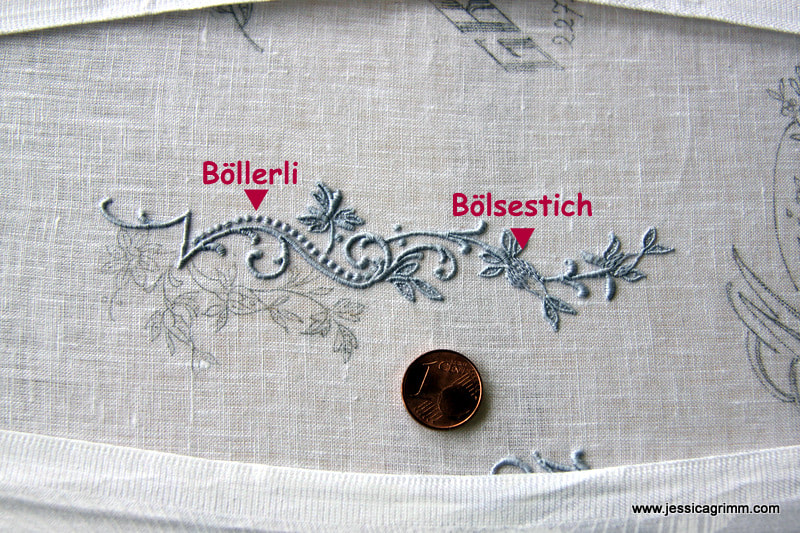
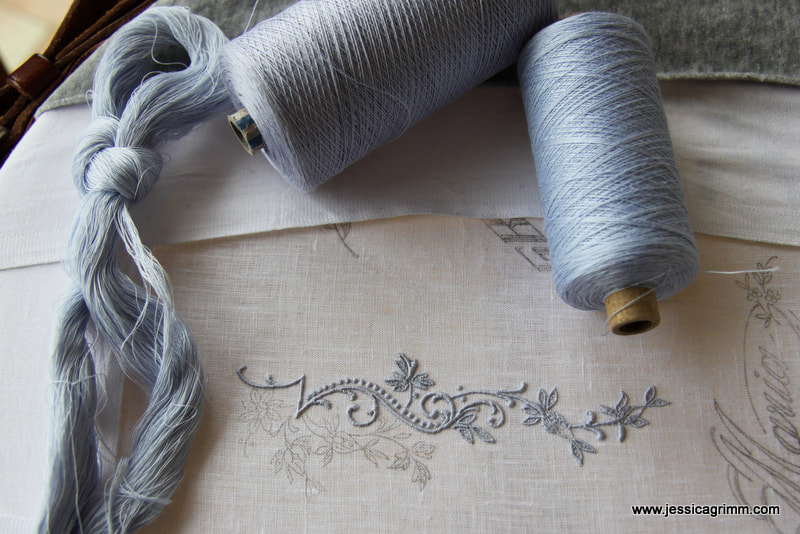
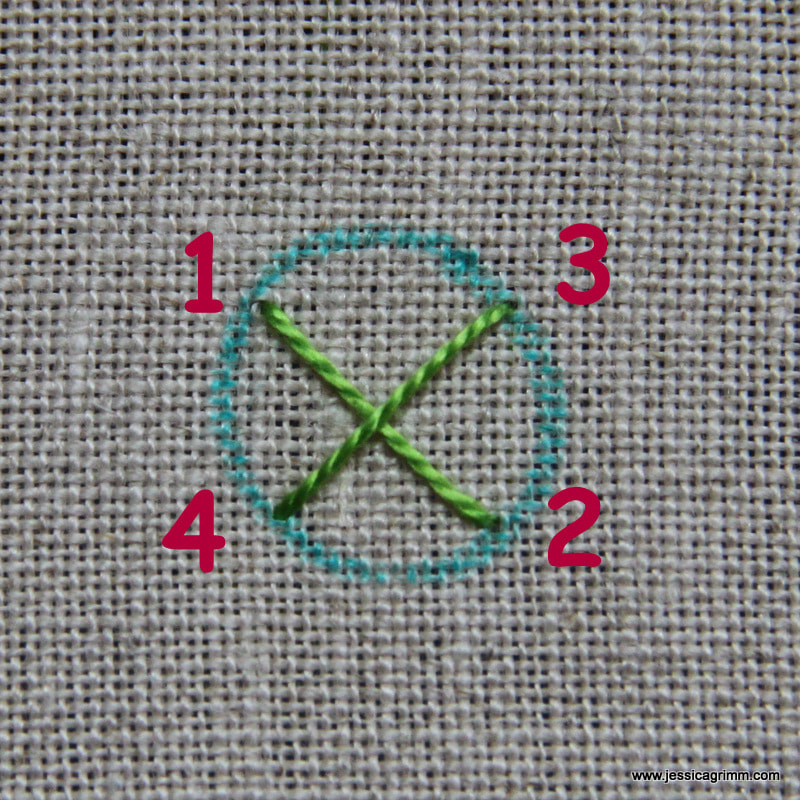
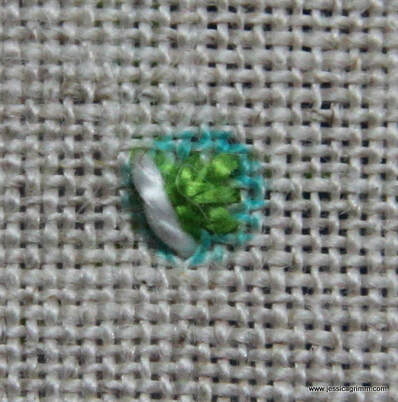
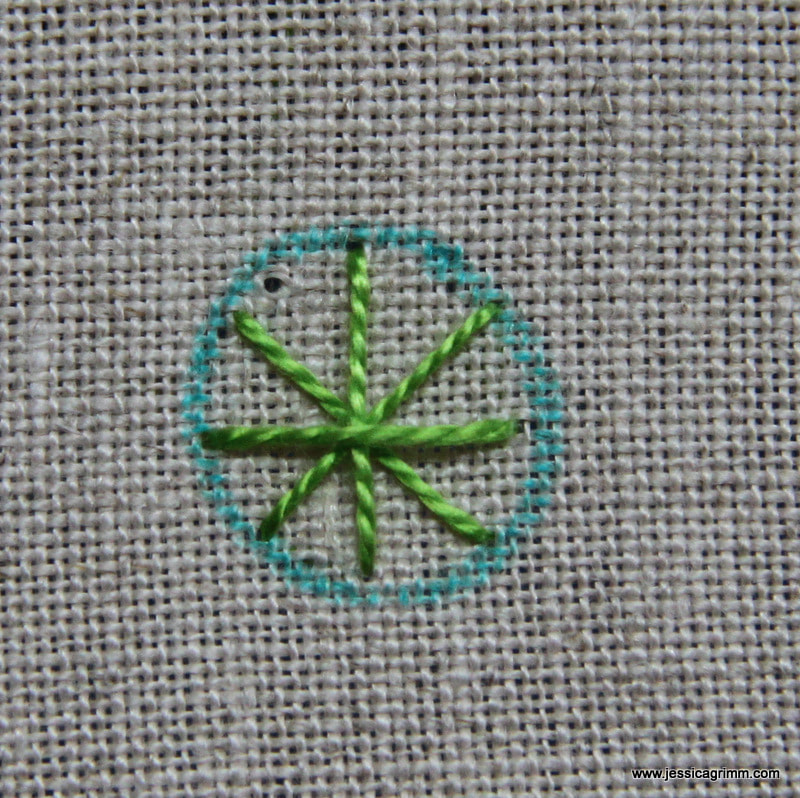
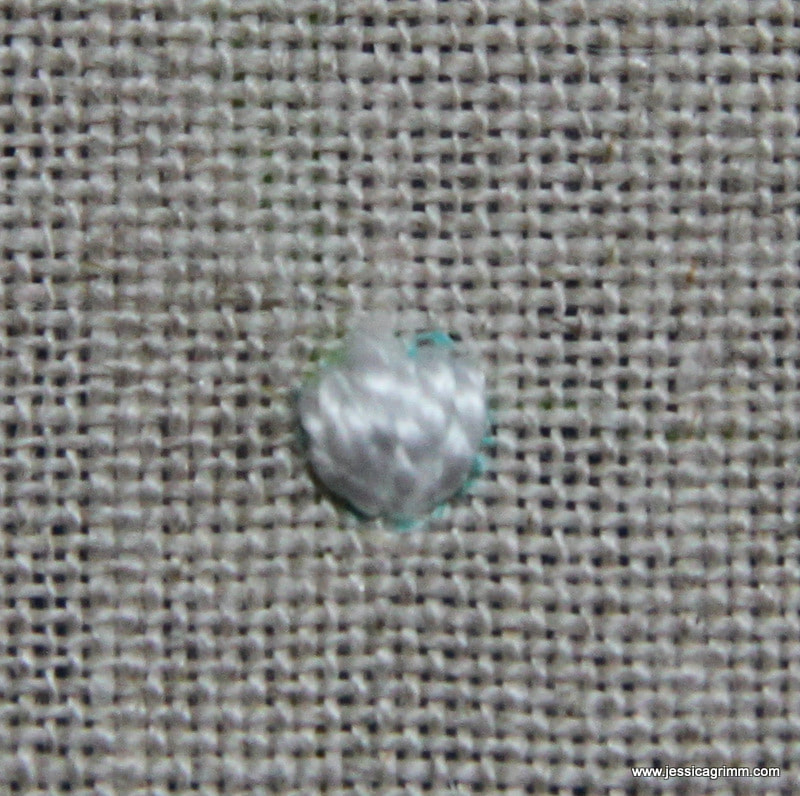
If you know of any other embroidery shops on Crete, please leave your recommendation in a comment below. It would be lovely if this blog post becomes a reference for all who plan a holiday on Crete! Next week, we'll have a look at some of the beautiful embroideries I encountered. Did you miss me last week? Sorry for not writing a blog post. However, I had a pretty good excuse: another four-day course in Appenzeller fine whitework embroidery with Verena Schiegg. But before we dive into that, I'd like to invite you to listen to my Fibertalk podcast I did with Gary and Christine. What fun we had discussing bones, academic careers and lots of embroidery! For my four days with Verena, I choose to continue working on my sampler. There are still a few techniques characteristic for Appenzeller fine whitework which I haven't touched. One of them is the 'Figurenstich' or 'Bölsestich'. It is used to fill areas, but it isn't padded (as most of the other elements in this type of embroidery are). It is a very formal stitch, not unlike some of the filling stitches in traditional Chinese embroidery. It creates a brick pattern, and unlike needle painting, stitches aren't split. But you can stitch the drape of clothing with it as you can subtly change the direction of your stitches. You can see the Bölsestich in action on the rosebuds in the picture above. Second new thing I learned were the 'Böllerli'. A way to create a dot of padded satin stitch. As described in a previous post on this type of embroidery made for international export, it was very important to be economical with your threads. The creation of a Böllerli explains this concept very well. So, how does one create a Böllerli? Not by laying your layer of padded satin stitches in one direction and then, starting from the middle, laying your layer of satin stitches at an angle on top. Far too much waste of material! Instead you start with a cross-stitch inside the lines of your dot. You execute the stitches in such a way, that there is as little thread carrying on the back as possible. Add a second cross-stitch on top at an angle. Again, as little thread as possible on the back. Now you start your satin stitches on the left-hand side. You work from top to bottom and you angle your first stitch in. Add as many stitches as needed to completely cover your dot. Your last stitch, on the far right, is angled in too. NOTE: in order for you to be able to see what goes on in these pictures, I used perle #8 and worked at two different colours. The original Böllerli in the picture further above where stitched using cotton threads size #55 and are less than 1mm in diameter... Another big difference between the two ways of stitching a padded satin dot is, that due to all the padding stitches crossing in the middle, the dot is more domed. If you would like to try your hand at a Böllerli, you could use a 2mm circle template and one strand of stranded cotton. You can learn more about Appenzeller fine whitework from my previous blog posts: Appenzell Embroidery (with a link to a documentary), Diligence on white part I, Diligence on white part II & Appenzell re-loaded.
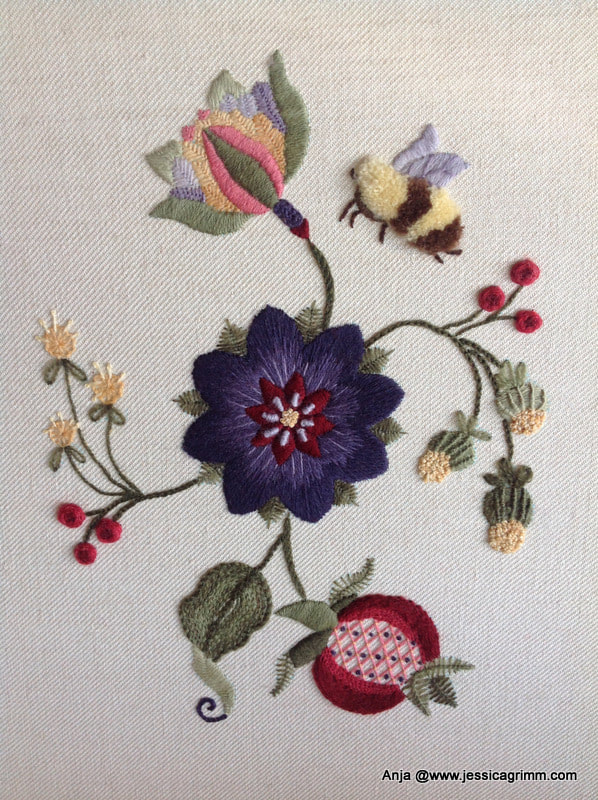
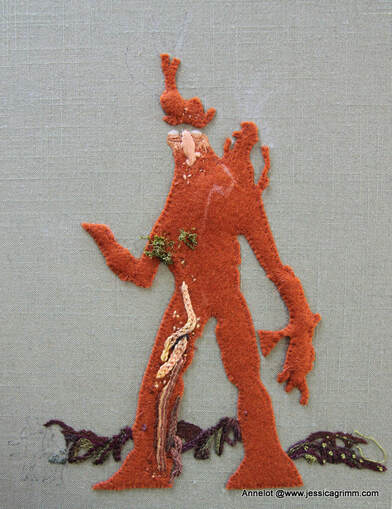
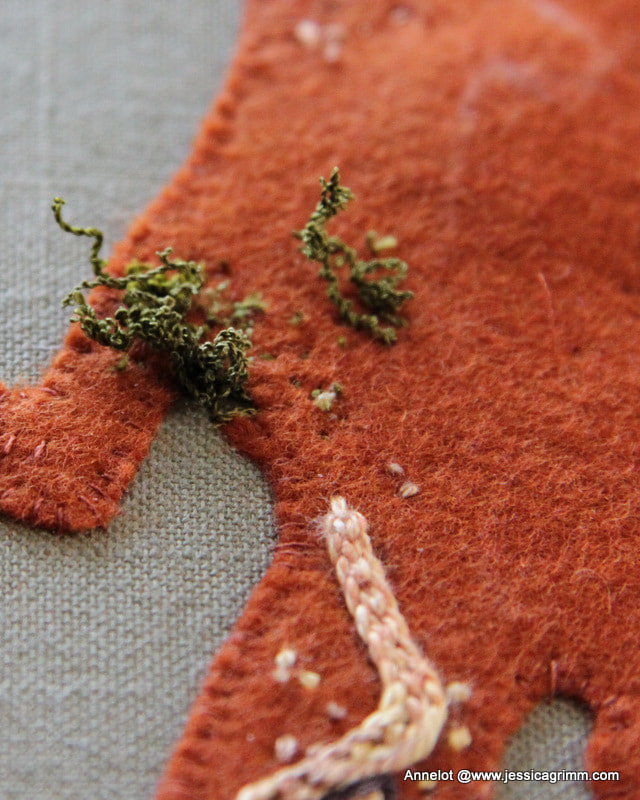
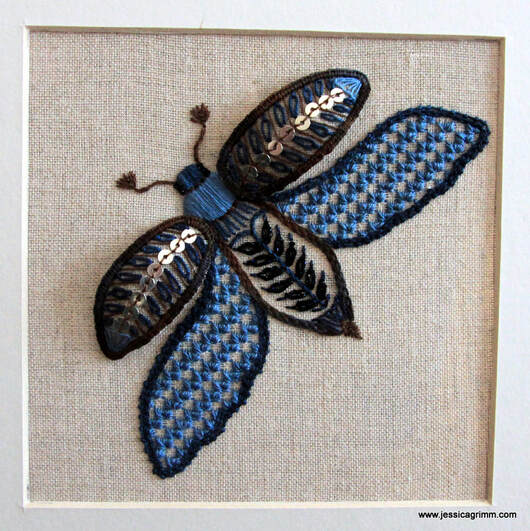
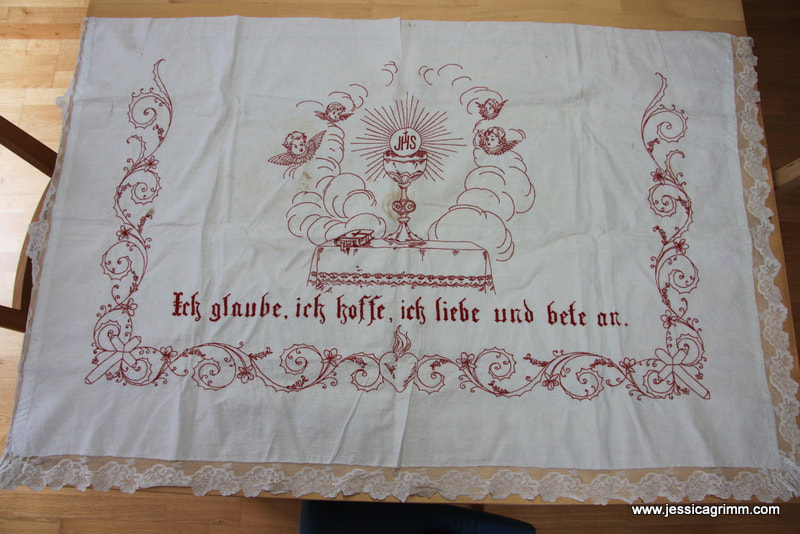
Before I open the candy tin, I would like to voice a big thank you to all who left comments of encouragement on last week's blogpost. I also received many personal emails. Thank you very much! What will happen next? The farm building is beyond help and will be demolished. The cattle will be sold over the next weeks. The Lötschmüllerhof will no longer be a farm. That's a strange idea. As reference to 'the farm' in my family was always to this particular place. However, we are all settling in to our new lives and the help from others is balsam to our souls. On to the eye candy! Remember this piece by Anja from the Netherlands? She started it earlier this year during one of my stitching retreats. I think she did a terrific job! The piece is balanced and the purple flower is such a beautiful centre piece. So proud of her :). Note: I no longer run this course. Next up is a stumpwork piece by Annelot from the Netherlands. She started it last week during my stumpwork stitching retreat. Annelot is creating a stitched version of Treebeard, the oldest Ent from the tales of J.R.R. Tolkien. For his mossy beard we tried the overtwisting method as described by Alison Cole in her great book on stumpwork (you can read my review here). This is a fun method with great texture. Can't wait for the piece to be finished. Over the years, I have learned that embroidery calms and sooths my soul. So I was particularly happy to find the September broderibox by Nordic Needle in my mail last week. With this month's threads I worked a moth from one of Millie Marotta's books. I used Snow by Caron, Watercolours by Caron, Kreinik Silk, Colour variations by DMC, Londonderry linen thread and silver plated spangles. The moth is stitched using a combination of Schwalm drawn-thread work, surface embroidery and stumpwork. And last but not least, this altar frontal or antependium was saved from the fire. It used to adorn the Corpus Christi altar put up in front of the farm every other year. It is a little dirty, so I will try to gently clean it. Since the altar did burn, we need to construct a new one. But the antependium will still adorn it!
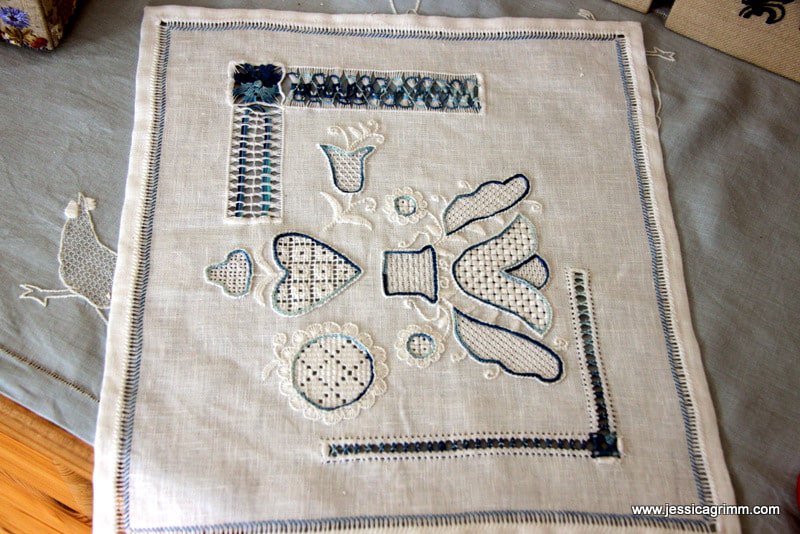
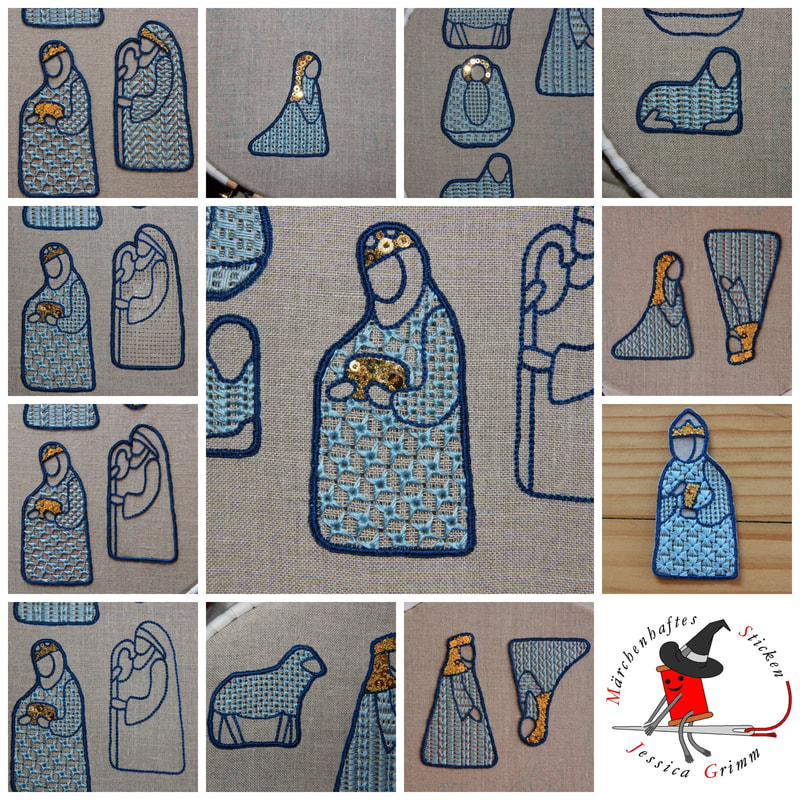
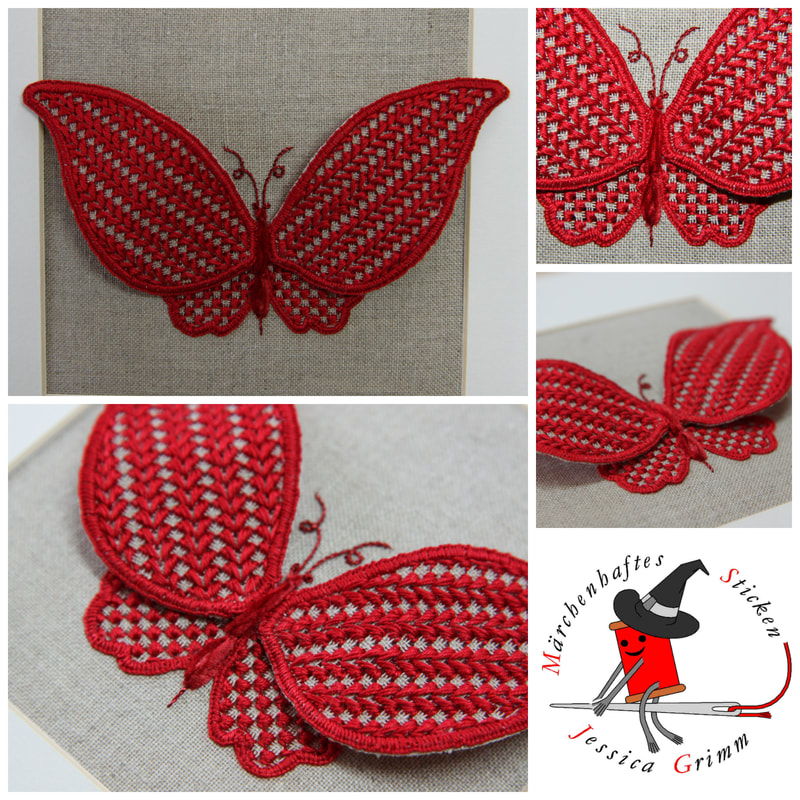
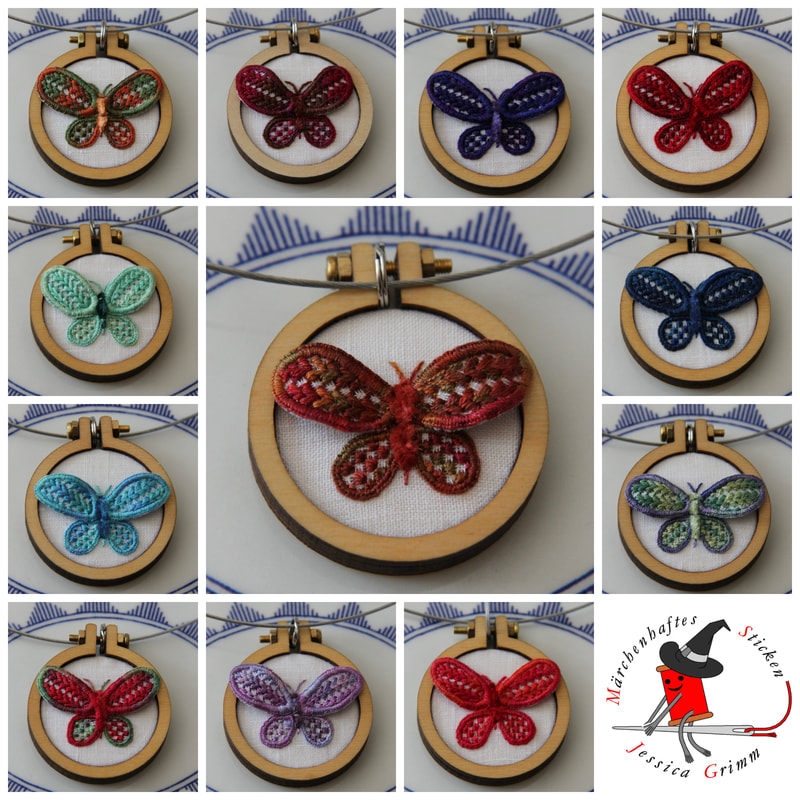
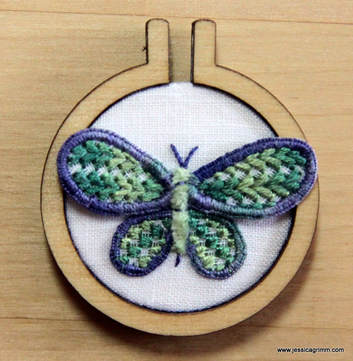
And that's it. All candy distributed :). See you next week! Today I am going to write a bit about my love affair with Schwalm embroidery. You see, I can pinpoint exactly where I encountered this pretty whitework embroidery technique for the first time. Not in its native Hessia, one of the federal states of Germany. Nope. It was Inspirations issue 69 in the spring of 2011. The beautiful 'Sense of Place' by Luzine Happel featured hearts, sunflowers and tulips filled with pretty patterns. I so wanted to learn this embroidery technique! But, I had never done any whitework embroidery other than a huge Richelieu window pane featured in an embroidery special of the Dutch Libelle. Luckily, I had just started my Royal School of Needlework Diploma course. And it happened to include a whitework module. Little did I know that they had never heard of this type of embroidery. And my tutors weren't thrilled at the prospect of teaching me something they were not familiar with. So I ended up with a whitework sampler featuring only a little bit of true Schwalm embroidery. And yes, I didn't like the prospect of an all-white piece either :). Now most of you will by now know that I don't like table cloths. Although, to be honest, there is nothing wrong with these pieces of textile. It is just that when I tell people that I embroider for a living, THEY picture me amidst heaps of neatly stacked embroidered table cloths. Now that gives me goose bumps. But for the wrong reasons. It truly freaks me out. Embroidery is so much more than just a means to adore a table cloth! Instead, one of the Schwalm-things I made was a nativity scene to be hung in front of my kitchen window. It is an ongoing process and I hope to add camels, a donkey and an ox this year. And although I like white, I like colour better. White reminds me of those pretty shoes I once had as a girl. They were lovely, but not so white for long. The same with those pretty lacily white stockings me and my younger sister wore under our Sunday dresses as girls. They attracted dirt like nobody's business. So in came the use of colour in my Schwalm embroidery projects. Now, traditional Schwalm embroidery is done with cotton a broder. A not so shiny non-strandable cotton thread. It is nice, but cotton perle and silk threads are nicer. Or at least in my opinion they are. I especially like to use variegated threads as they form pretty colour patterns when used with the many different Schwalm filling stitches. So, by now, I had changed the colour of things, the materials and the stitching topic. What's next? How about adding a stumpwork technique to the mix? Using wired elements with Schwalm embroidery really tickled my fancy! It looks so elegant and yet isn't too hard to create at all. But I wasn't quite finished yet! How about one shrinks the butterfly? For instance, until it fits a tiny 4cm Dandelyne wooden hoop. Thanks to my training in Appenzeller whitework embroidery, I knew that you can add tiny filling stitches (some the same as in Schwalm embroidery; after all there is only so much you can do with a blank grid) into a tiny grid of withdrawn threads. Born where the elegant butterfly pendants! Still using original heritage skills, but sans the table cloth. After weeks of stitching (one butterfly takes about six hours to create), I now have a colourful bunch of lovely butterfly pendants.
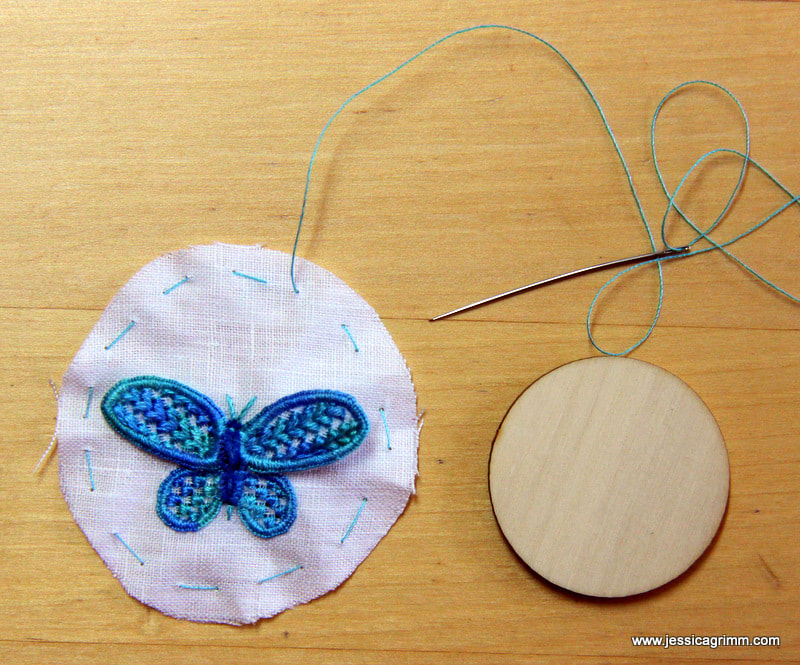
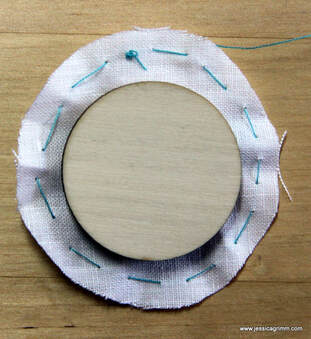
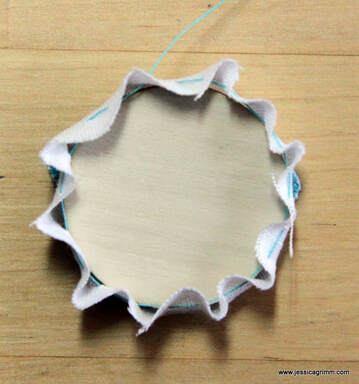
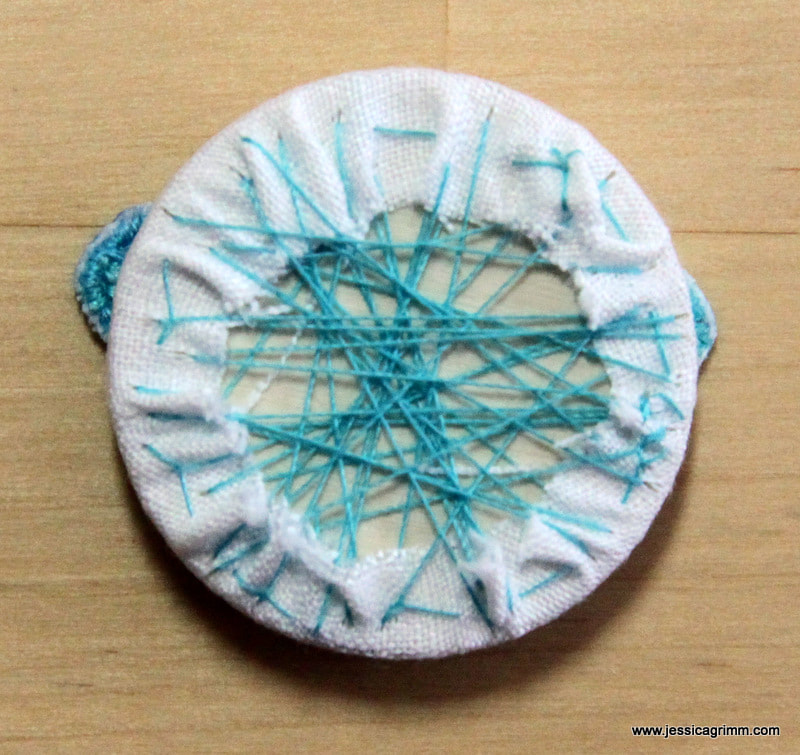
If you would like to know more about the traditional form of Schwalm embroidery (including its use on folk costumes), check out Luzine Happel's website and blog. Also available in English. Luzine self-published a whole library on Schwalm embroidery. These are very good books if you want to learn this pretty whitework technique. I highly recommend them! The books are available in German, English and even French. Happy stitching! As promised in an earlier post, here's how I load-up my tiny masterpieces into those clever Dandelyne mini-hoops. Although your mini-hoop comes with mounting instructions, I did not find them very useful for heavily embroidered pieces. You see, Dandelyne advises you to just push your masterpiece in from the back using the wooden centre piece. Then you glue your excess fabric onto the back of this wooden centre piece. I am sure this works just fine when you use a printed fabric or something quite sturdy like an aida with some cross-stitch embroidery. However, it does not work so brilliantly with heavily embroidered slippery fabric. Fear not! Here's the solution. And it is pretty simple too! Once you've cut out your mini-masterpiece (including the seam allowance!), stitch a running stitch along the edge using sewing thread. Use a knot to anchor your thread and don't place your stitches too close to the fabric edge (fraying!). Place the wooden centre piece on the back of your embroidery. Pull your thread taut so the fabric folds around the wooden centre piece. Check the front, adjust if necessary, then start lacing. I am sure there is a pretty looking orderly way to do this, but that's just not me I am afraid. When sufficiently laced, secure your thread well. Now you can carefully push your mounted embroidery into the Dandelyne hoop from the front. This gives you maximum control over where it is going. And the whole lacing prevents it puckering, especially near the screw at the top. Once your embroidery is in, follow the Dandelyne instructions for adding the screw. Masterpiece finished!
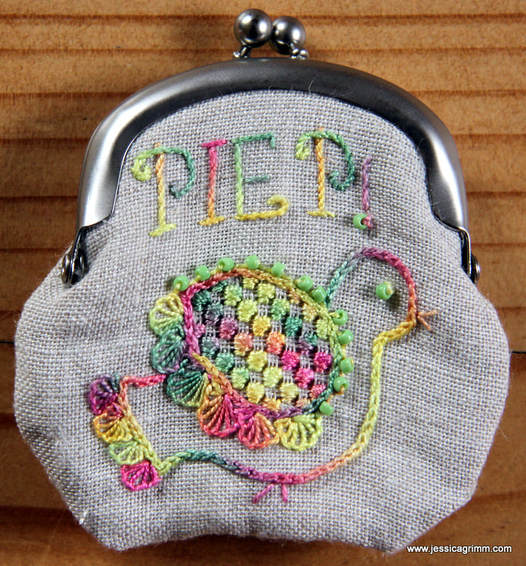
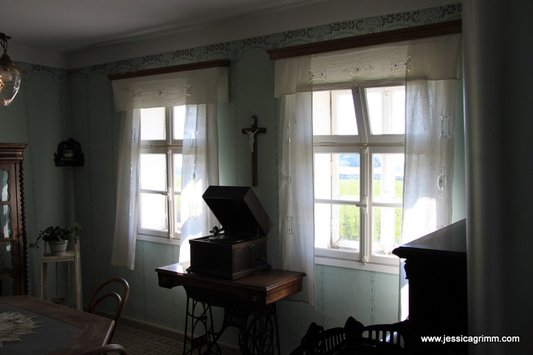
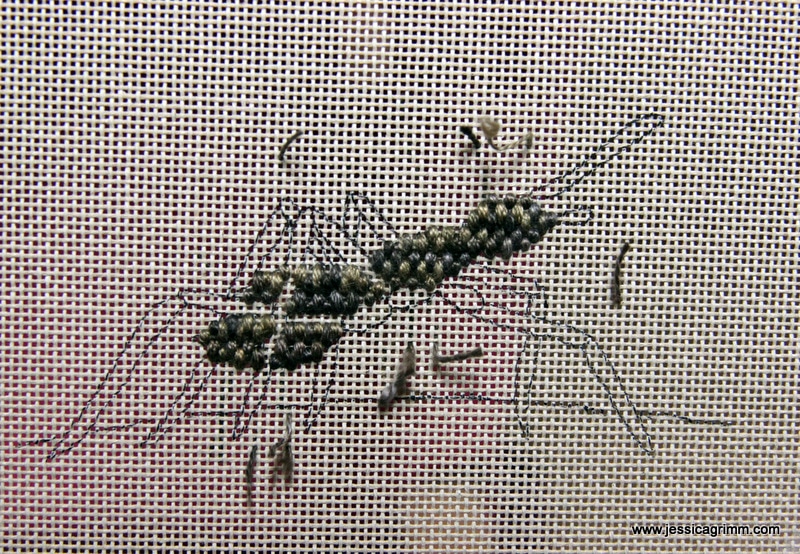
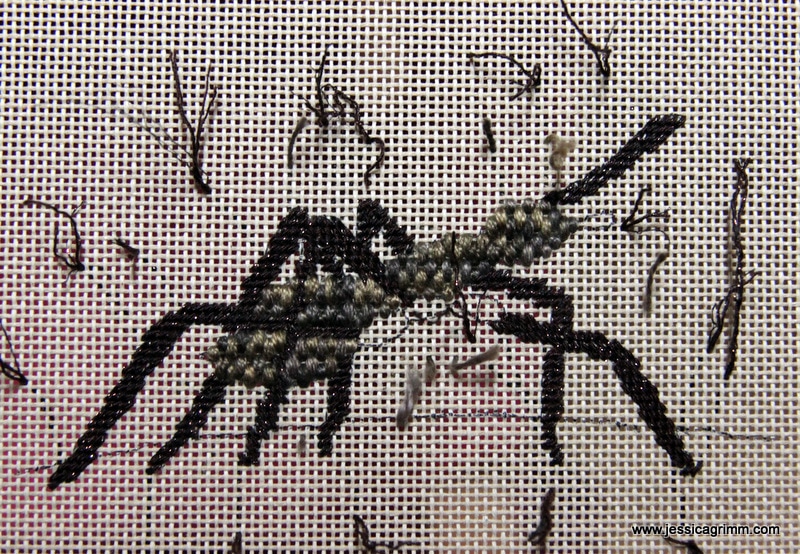
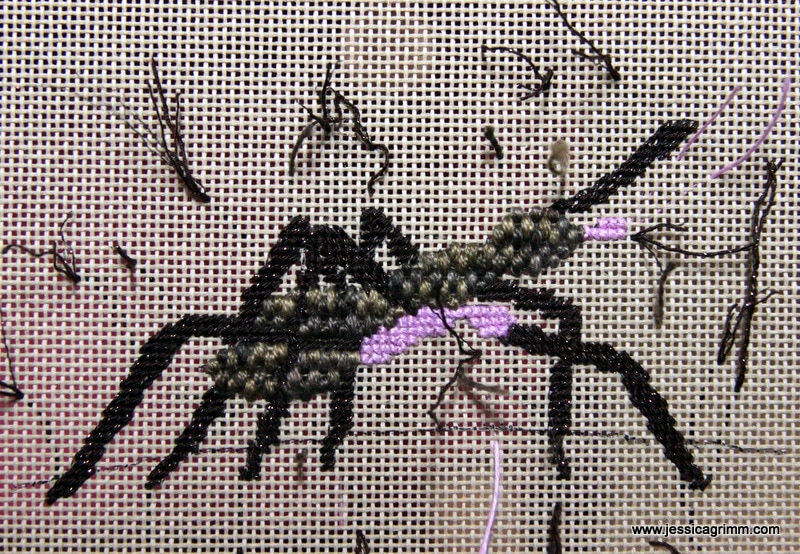
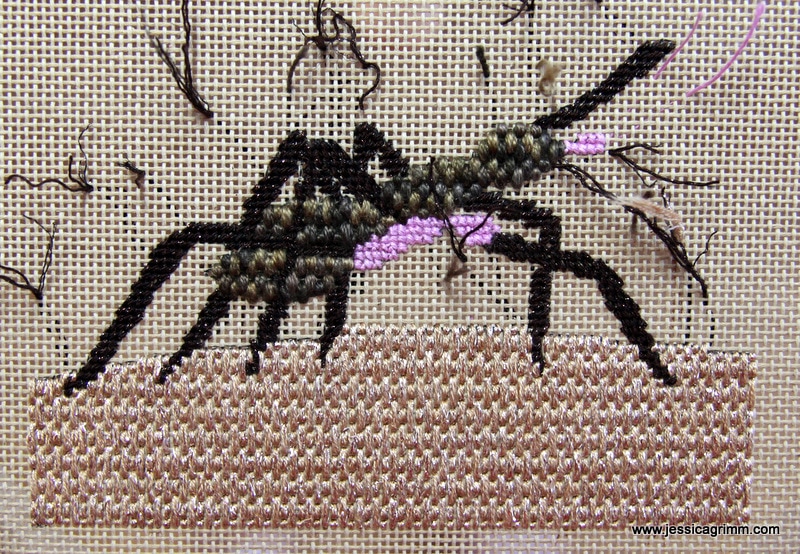
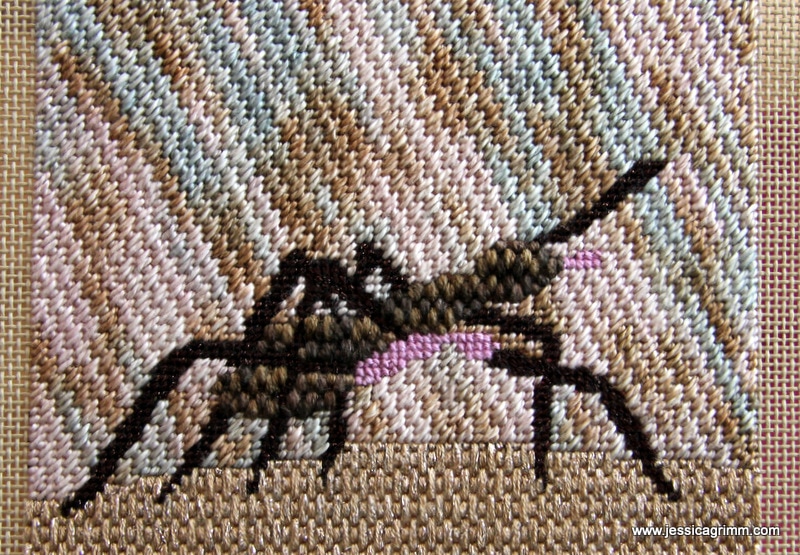
Happy start of the week dear reader! I am back from a week full of wonderful sight-seeing with my family. And one of the sites we visited was the Bauernhofmuseum in Illerbeuren. A pretty open air museum showcasing farm life from the Swabia area of Germany. And of course, there was some lovely embroidery on display as well. Mostly on household linens and mainly involving monogramming and whitework embroidery. How about these gorgeous Richelieu embroidered curtains featured in an inn? In between family commitments, I sneaked in enough embroidery moments to complete my next broderibox project. The broderibox is a monthly embroidery threads subscription put together by the lovely people of Nordic Needle. This month's box contained: five embroidery threads, beads and a purse clasp. Since the threads had a lot of browns in them; an ant sprang to my mind. Lucky for me, the amazing Millie Marotta has drawings of ants included in her colouring-in book 'Wild Savannah'. As many of you probably know, canvaswork or needlepoint embroidery is stitched front to back. Or: object first, background later. Now be good and do not ever do that with your silk shading ;)! So, in this case, I started with my ant. She is called Truus de Mier, by the way. A favourite ant from a children's tv-show in the Netherlands. For Truus' body, I used a variegated perle #8 by Valdani. I really wanted to try this brand of embroidery threads. It worked a treat! No 'typical-low-grade-Eastern-European-Quality' here. As I wanted Truus to have a little 'body' to her body, I used the raised spot to fill it. As this stitch required me to pass 8-times through the same hole, I expected the thread to wear beyond pretty. But it didn't. They surely do know how to produce a fine perle in Romania! Next up were Truus' legs. I stitched them in tent stitch and used both directions for different legs. This made the whole thing a little less tangled-up when legs crossed. The legs were stitched using Vineyard Silk shimmer. It is a silk thread with a shimmering filament added. It does not have a nice feel and it unfortunately stitched accordingly. A bit disappointing as I really liked the previous 100% silk threads by Vineyard Silk! Apparently, ants have segmented legs that start with a bit of a bulky part. And ants have a mouth piece with which they cut leaves in handy transportable portions. Since this month's broderibox had a violet Londonderry linen thread in it, I decided to use it to stitch these parts in cross-stitch. Lovely thread! I do stitch some whitework embroidery with linen threads and really love it. That's Ms Truus de Mier sorted. On to the background. I decided to stitch the earth on witch Truus walks with Silk Lame Braid by Rainbow Gallery. Despite it being a silk thread mixed with metalized polyester and some rayon, it felt and stitched fantastically. Very well suited for the vertical Parisian stitch. As the variegated cotton thread Watercolours by Caron had some blue in it, that was going to be turned into the sky. I separated the three plies and stitched the diagonal Cashmere stitch with one ply. I really love these cotton threads by Caron! They are so soft and hold up so well whilst stitching on canvas.
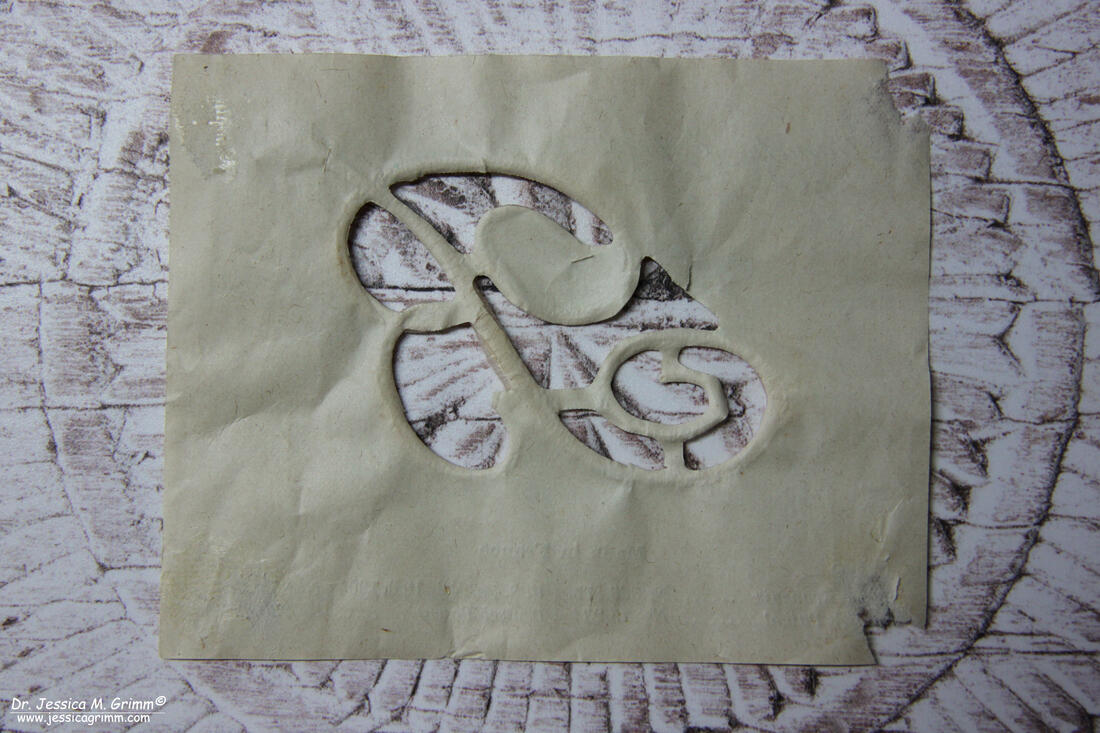
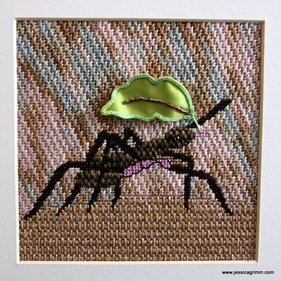
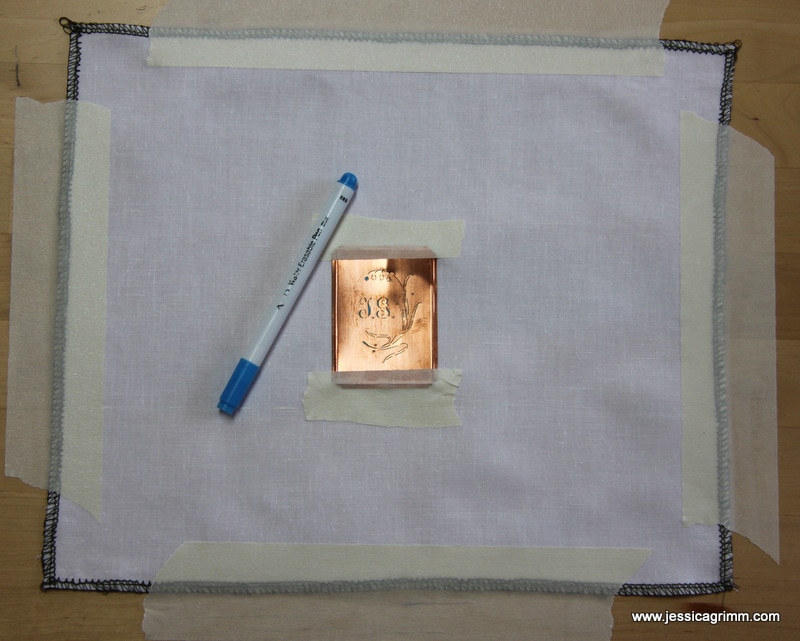
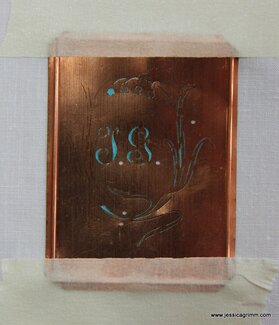
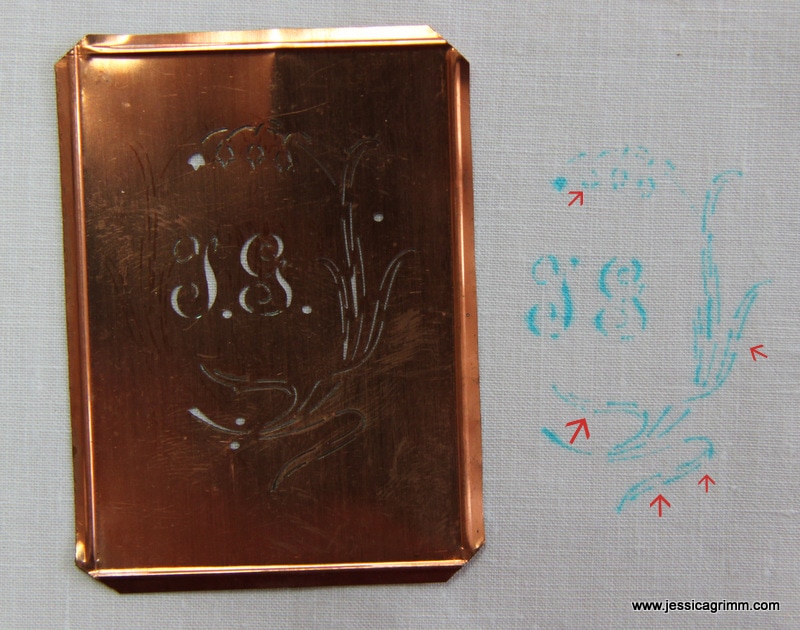
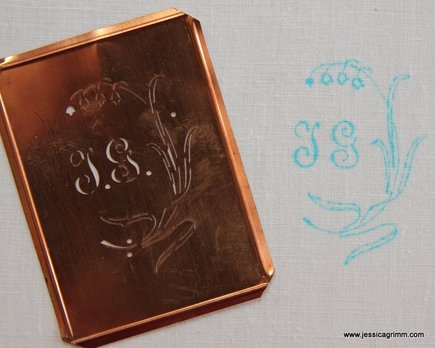
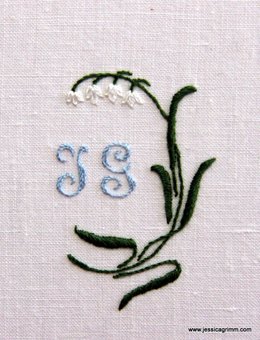
To finish my Truus de Mier, I decided that she needed a bright green stumpwork leaf. I wired a piece of dupion silk backed with calico. The buttonhole edging was stitched using a #12 House of Embroidery perle from my stash. I added the Mill Hill magnifica beads provided in the broderibox to my leaf. Subsequently, I stitched a few beads onto Truus for an eye. And that's another broderibox project finished satisfactorily! P.S.: Us dummies did take the camera with us to the Bunter Markt craft fair in Wessobrunn on Sunday, however, we forgot to take a picture of our stand... On the up-side, we did manage to sell two pendants and shed a few flyers and business cards! A couple of months ago, I wrote about antique monogram stencils produced by Johann Merkenthaler. In the meantime, I started experimenting with using these stencils. First, I wanted to use some sort of water-based paint as was used originally. Although, you should be able to wash-out watercolours by Caran d'Ache, my experiments weren't satisfactory. When fresh, the marks do wash-out, but not after they have completely dried and are a few weeks old. Now, I am a fast stitcher, but you can't always predict how soon you will be able to finish a project! By the way, you can find my original blog about the stencils here; it includes a free download of an old Merkenthaler catalogue. So, what to use? In comes the best invention since sliced bread: the aqua trick marker! I had thought of using a marker before, but dismissed it in my head as some of the lines in the stencils are soooooo tiny. However, I was getting desperate. Out came the marker, fine white linen, the stencil and some masking tape. But first things first, iron your linen flat until it resembles a sheet. Tape it onto a surface using masking tape. Position your stencil sheet and tape that too. Now you are all set to go! The stencil sheets are so waver-thin that you CAN easily trace those tiny lines with your marker. Remove the masking tape and the stencil. One of the things you need to remember, is that these stencils mostly don't produce continuous lines. For reasons of stability, most elements produce an interrupted design line. I've marked some of the interruptions with red arrows in the left picture above. In comes your handy marker again! Look carefully at the original stencil and complete any breaks in the lines. It can take some getting used to in order to be able to read the design correctly. Especially with very elaborate and floral script. You can see the enhanced design in the right picture above. And this is the embroidered design after rinsing. I used one strand of stranded cotton throughout. The initials are stitched using rows of stem stitch. The flower heads are made up of a central larger lazy daisy flanked by two smaller lazy daisies. The stem is also stitched in stem stitch and the leaves are satin stitch over a split stitch border. A pretty design just right for spring!
|
Want to keep up with my embroidery adventures? Sign up for my weekly Newsletter to get notified of new blogs, courses and workshops!
Liked my blog? Please consider making a donation or becoming a Patron so that I can keep up the good work and my blog ad-free!
Categories
All
Archives
July 2024
|
Contact: info(at)jessicagrimm.com
Copyright Dr Jessica M. Grimm - Mandlweg 3, 82488 Ettal, Deutschland - +49(0)8822 2782219 (Monday, Tuesday, Friday & Saturday 9.00-17.00 CET)
Impressum - Legal Notice - Datenschutzerklärung - Privacy Policy - Webshop ABG - Widerrufsrecht - Disclaimer
Copyright Dr Jessica M. Grimm - Mandlweg 3, 82488 Ettal, Deutschland - +49(0)8822 2782219 (Monday, Tuesday, Friday & Saturday 9.00-17.00 CET)
Impressum - Legal Notice - Datenschutzerklärung - Privacy Policy - Webshop ABG - Widerrufsrecht - Disclaimer



 RSS Feed