|
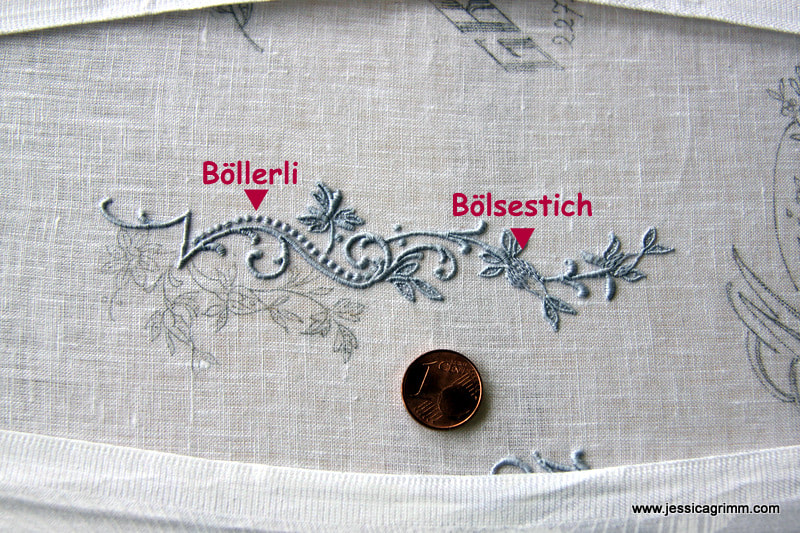
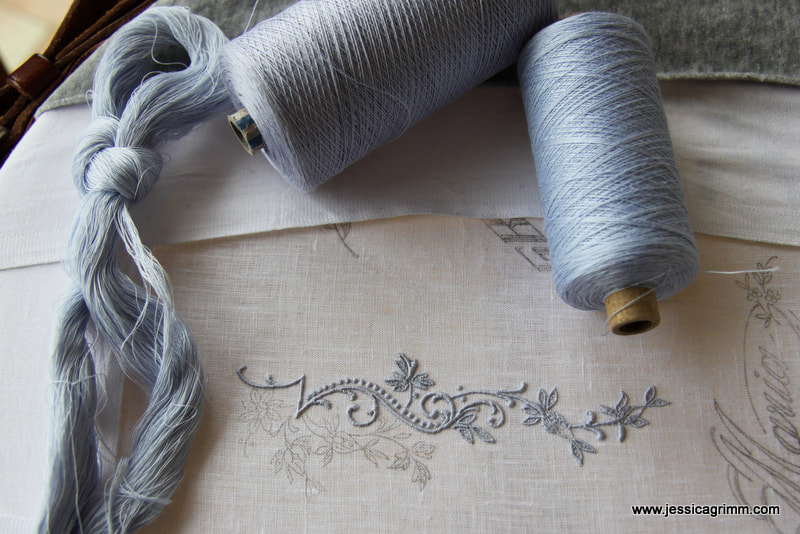
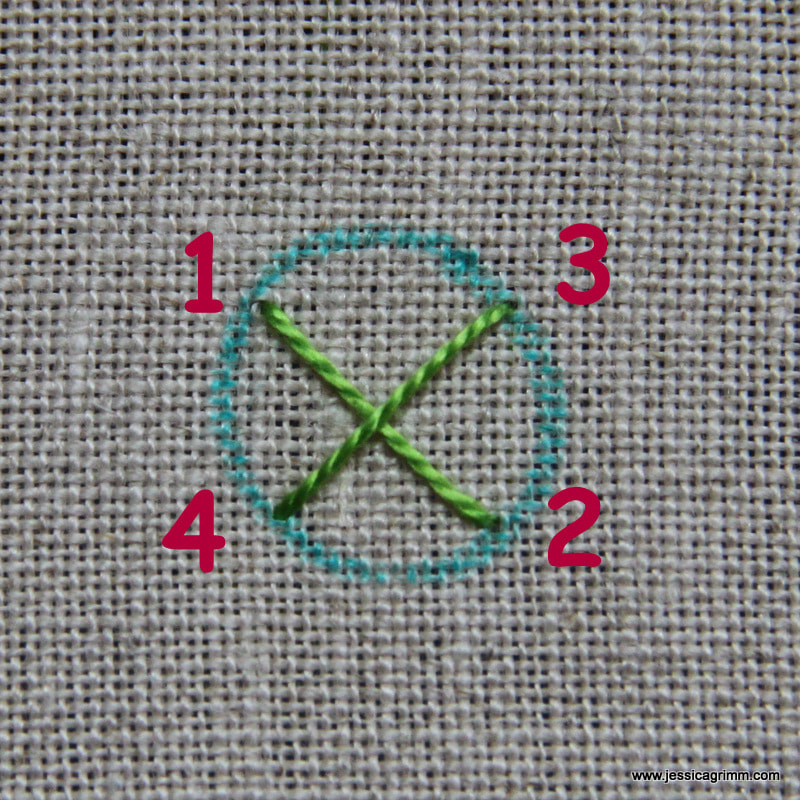
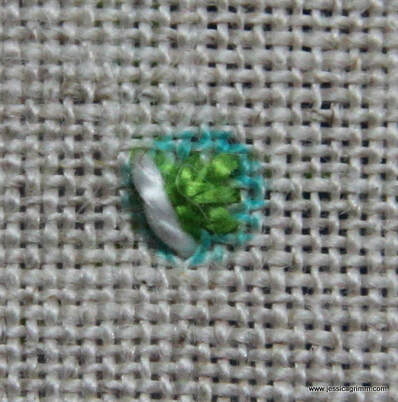
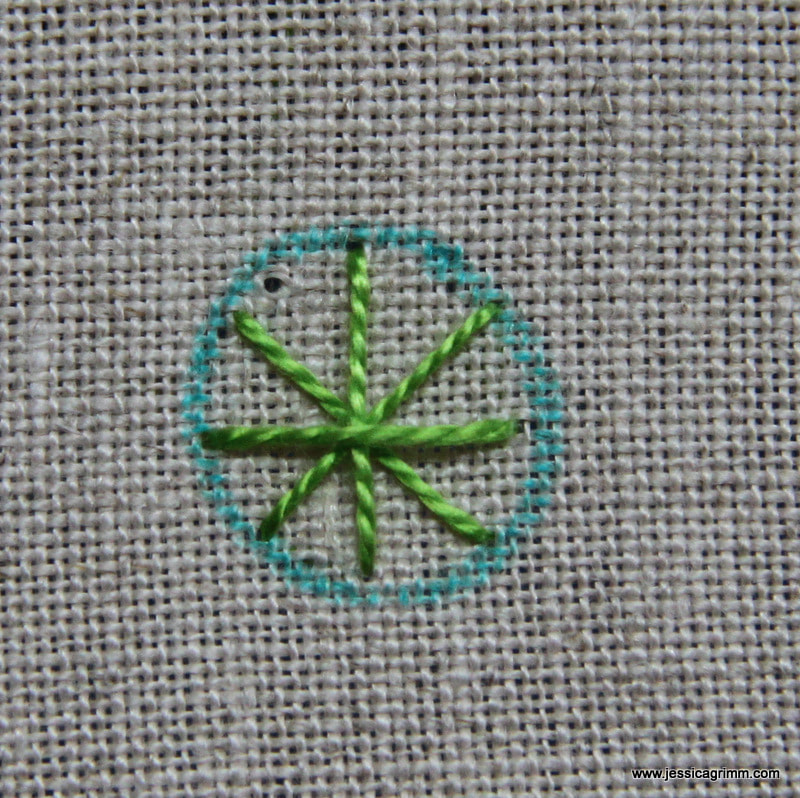
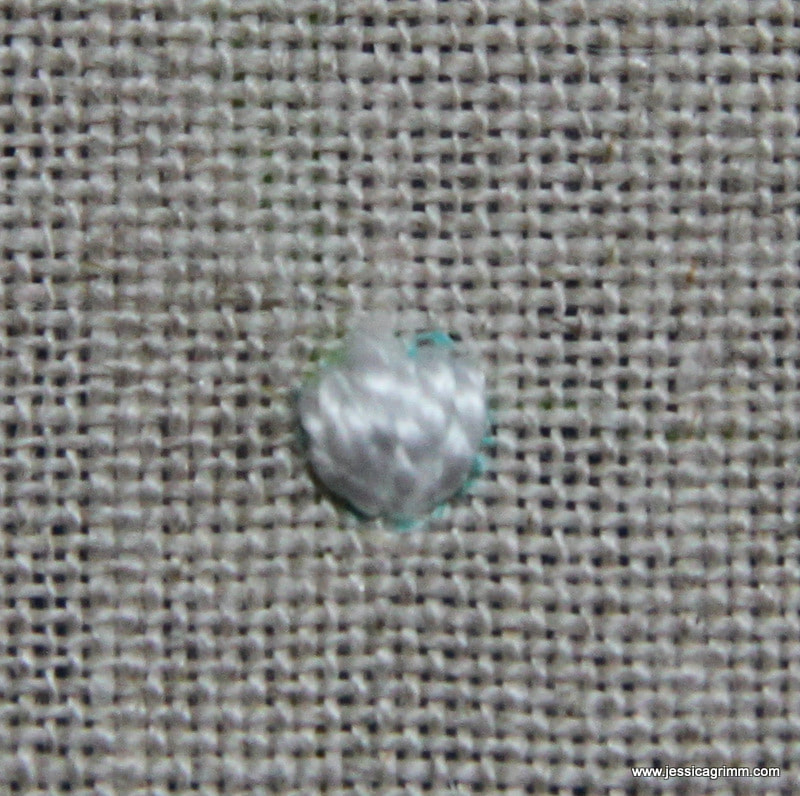
Did you miss me last week? Sorry for not writing a blog post. However, I had a pretty good excuse: another four-day course in Appenzeller fine whitework embroidery with Verena Schiegg. But before we dive into that, I'd like to invite you to listen to my Fibertalk podcast I did with Gary and Christine. What fun we had discussing bones, academic careers and lots of embroidery! For my four days with Verena, I choose to continue working on my sampler. There are still a few techniques characteristic for Appenzeller fine whitework which I haven't touched. One of them is the 'Figurenstich' or 'Bölsestich'. It is used to fill areas, but it isn't padded (as most of the other elements in this type of embroidery are). It is a very formal stitch, not unlike some of the filling stitches in traditional Chinese embroidery. It creates a brick pattern, and unlike needle painting, stitches aren't split. But you can stitch the drape of clothing with it as you can subtly change the direction of your stitches. You can see the Bölsestich in action on the rosebuds in the picture above. Second new thing I learned were the 'Böllerli'. A way to create a dot of padded satin stitch. As described in a previous post on this type of embroidery made for international export, it was very important to be economical with your threads. The creation of a Böllerli explains this concept very well. So, how does one create a Böllerli? Not by laying your layer of padded satin stitches in one direction and then, starting from the middle, laying your layer of satin stitches at an angle on top. Far too much waste of material! Instead you start with a cross-stitch inside the lines of your dot. You execute the stitches in such a way, that there is as little thread carrying on the back as possible. Add a second cross-stitch on top at an angle. Again, as little thread as possible on the back. Now you start your satin stitches on the left-hand side. You work from top to bottom and you angle your first stitch in. Add as many stitches as needed to completely cover your dot. Your last stitch, on the far right, is angled in too. NOTE: in order for you to be able to see what goes on in these pictures, I used perle #8 and worked at two different colours. The original Böllerli in the picture further above where stitched using cotton threads size #55 and are less than 1mm in diameter... Another big difference between the two ways of stitching a padded satin dot is, that due to all the padding stitches crossing in the middle, the dot is more domed. If you would like to try your hand at a Böllerli, you could use a 2mm circle template and one strand of stranded cotton. You can learn more about Appenzeller fine whitework from my previous blog posts: Appenzell Embroidery (with a link to a documentary), Diligence on white part I, Diligence on white part II & Appenzell re-loaded.
7 Comments
It sounds (and looks!) like you had a fabulous four days. I'm sure they were long days, but full of so much interest.
Reply
Mary Z
20/11/2017 16:37:24
Jessica,
Reply
20/11/2017 19:27:52
Yes, Rachel, some of the antique pieces have such high padding in such tiny spaces!
Reply
JYOTISARDARE
5/12/2017 04:06:42
Ur work is so beautiful
Reply
Your comment will be posted after it is approved.
Leave a Reply. |
Want to keep up with my embroidery adventures? Sign up for my weekly Newsletter to get notified of new blogs, courses and workshops!
Liked my blog? Please consider making a donation or becoming a Patron so that I can keep up the good work and my blog ad-free!
Categories
All
Archives
July 2024
|
Contact: info(at)jessicagrimm.com
Copyright Dr Jessica M. Grimm - Mandlweg 3, 82488 Ettal, Deutschland - +49(0)8822 2782219 (Monday, Tuesday, Friday & Saturday 9.00-17.00 CET)
Impressum - Legal Notice - Datenschutzerklärung - Privacy Policy - Webshop ABG - Widerrufsrecht - Disclaimer
Copyright Dr Jessica M. Grimm - Mandlweg 3, 82488 Ettal, Deutschland - +49(0)8822 2782219 (Monday, Tuesday, Friday & Saturday 9.00-17.00 CET)
Impressum - Legal Notice - Datenschutzerklärung - Privacy Policy - Webshop ABG - Widerrufsrecht - Disclaimer



 RSS Feed