|
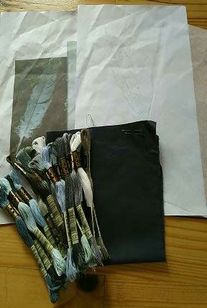
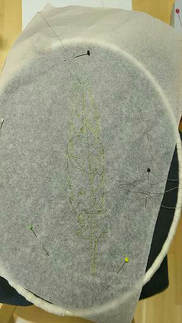
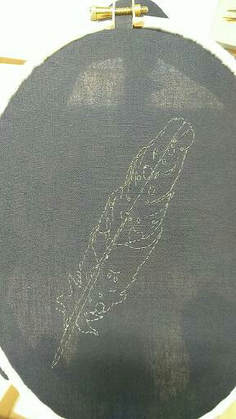
I signed up for a distance class in silk shading with Jen Goodwin. Why did I sign up for this particular class? Well, the design sports a feather with quite irregular edges AND has water droplets. As I have no idea how to stitch droplets, I really like to learn from a fellow pro. It is also another great opportunity for me to see how I could possibly run an online class in the future. The class runs for eight weeks and is, at GBP 195/$ 284/€ 229, not cheap. The class should have started on the 20th of January, but due to Jen not being very organised, I actually received my kit on the 23rd and the first instruction email on Sunday morning the 28th. This can happen to the best of us. My kit contained a colour photocopy/printout of the feather, an outline drawing of the pattern, a piece of tissue paper for the transfer, a piece of dark-navy cotton, 2 #10 sewing needles and 20 skeins of DMC stranded cotton in the most fabulous colours. However, due to the fact that it was shipped in a plastic seal bag, it arrived rather wrinkled and dishevelled. Oddly, there wasn't a note or compliment slip either. The dropbox Jen uses for her teaching videos also contained a high-resolution original picture of the feather. So before any stitching commenced, I ordered a proper photo printout of the feather. The printout in the kit is, in my eyes, just not very defined and has a green tinge to it. But above all, it is wrinkled. And I don't find it very practical to work from a dropbox/computer screen. Next thing I did was watching Jen's video's on binding a hoop and tissue transferring a design. I was hoping the videos would be of the same quality as Mary Corbet's 'How to' videos. Unfortunately, they are not. Important things and actions are frequently out of focus, text is sometimes blocking the action, important action is going on outside the video frame and action in the video contradicts the text in the video. I really hope that the actual stitching videos provide enough detail to be able to clearly see Jen's stitching. Before starting the tissue transfer method, I ironed the piece of fabric and ran the edges under my Babylock machine. I hate disintegrated fabric edges whilst stitching. I faithfully copied Jen's outline drawing onto the tissue paper and started tacking. About half-way through I came upon an uncertainty and wanted to check on the picture printout... SHIT!!! The outline drawing Jen provided in the kit is a mirror image of the picture we are supposed to stitch... I very carefully unstitched, flipped the tissue paper, traced the lines again and started tacking again. I also immediately warned Jen so she could warn the other students. I really hope they hadn't started. As there is no email-list, forum or group to 'meet' the other students. I have no means of getting into contact with them directly. This is my first ever online-class that does not provide for contact with my fellow students. It is a bit of a shame as I can't learn from their progress or get inspired by them either. Finally, I was able to remove the tissue paper and to have my feather all set up for my next lesson. I'll keep you posted on my progress. Rather than week-by-week, it will probably be a summary of several weeks in one post. After all, it is not my intention to spill the beans on Jen's project and provide very detailed information so my readers could just stitch the project too from reading my blog. However, if you were thinking of doing an online class with Jen, you will be able to make an informed decision based on the testimonials on her website and my blog posts.
18 Comments
|
Want to keep up with my embroidery adventures? Sign up for my weekly Newsletter to get notified of new blogs, courses and workshops!
Liked my blog? Please consider making a donation or becoming a Patron so that I can keep up the good work and my blog ad-free!
Categories
All
Archives
July 2024
|
Contact: info(at)jessicagrimm.com
Copyright Dr Jessica M. Grimm - Mandlweg 3, 82488 Ettal, Deutschland - +49(0)8822 2782219 (Monday, Tuesday, Friday & Saturday 9.00-17.00 CET)
Impressum - Legal Notice - Datenschutzerklärung - Privacy Policy - Webshop ABG - Widerrufsrecht - Disclaimer
Copyright Dr Jessica M. Grimm - Mandlweg 3, 82488 Ettal, Deutschland - +49(0)8822 2782219 (Monday, Tuesday, Friday & Saturday 9.00-17.00 CET)
Impressum - Legal Notice - Datenschutzerklärung - Privacy Policy - Webshop ABG - Widerrufsrecht - Disclaimer


 RSS Feed