|
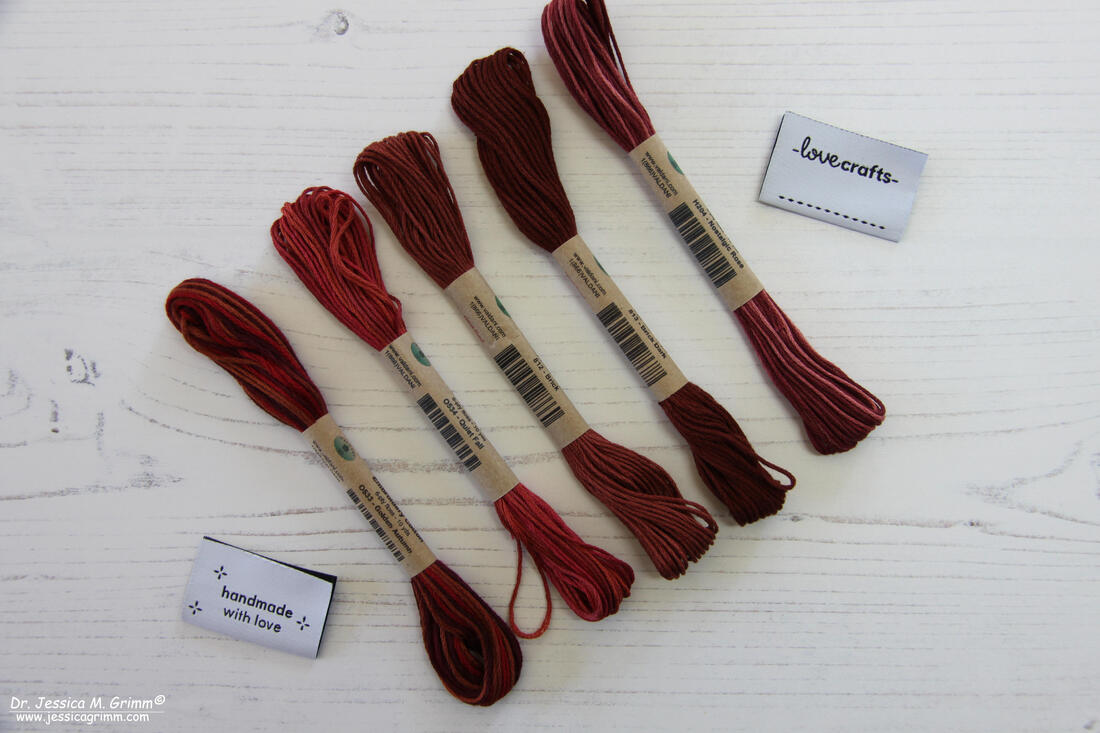
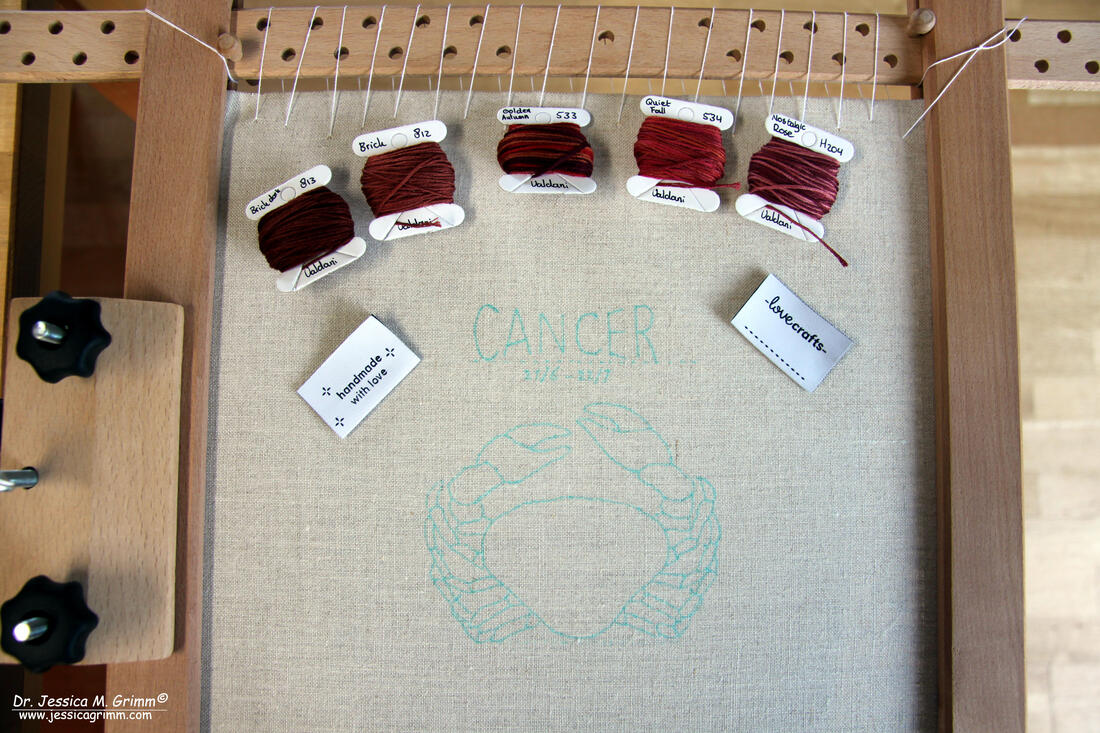
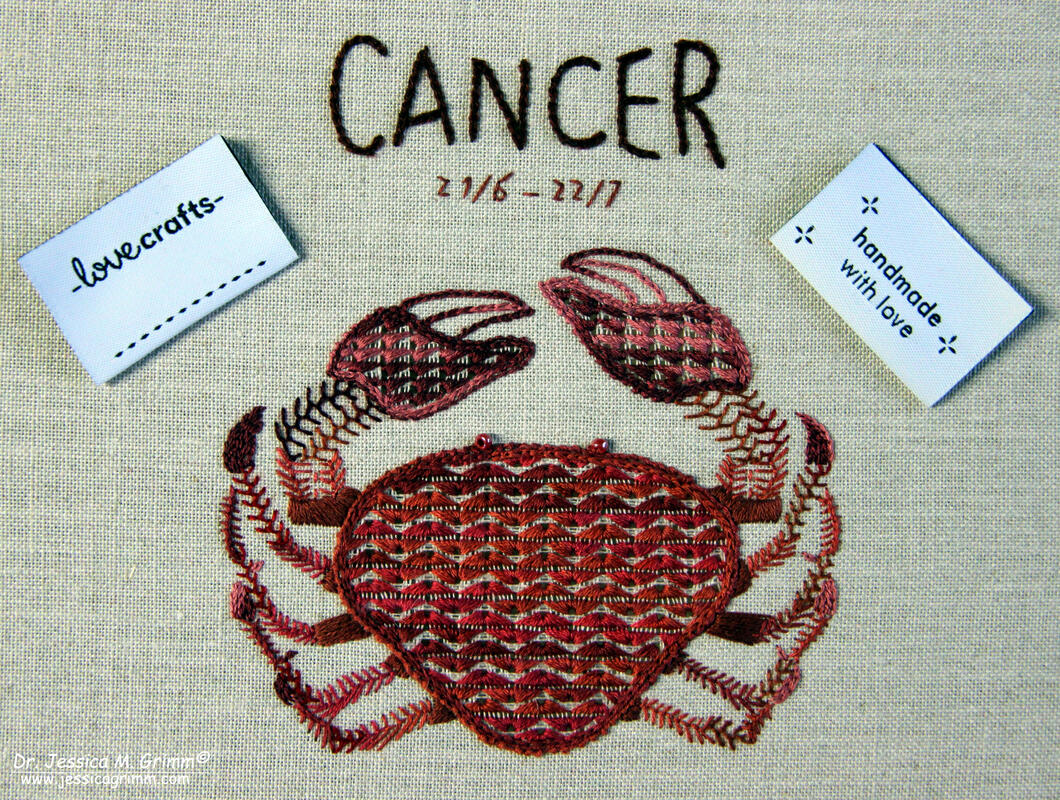
The lovely Sarah from LoveCrafts sent me some embroidery threads to play with. And since I am a self-proclaimed thread-addict, I was up for the challenge. Browsing the LoveCafts website, I came across the beautiful hand-dyed stranded cotton by the Roumanian brand Valdani. Now I had heard that name before but never seen these threads, let alone played with them. So I picked some reds and pinks as I already had a design in mind: a Millie Marotta crab. You see, not only do I love her designs, but I and my husband happen to be Cancerians. These are the lovely variegated threads I picked: 0533 Golden Autumn, 0534 Quiet Fall, 812 Brick, 813 Brick Dark and H204 Nostalgic Rose. Even the two 'bricks' are ever so subtly variegated. These would be perfect for those of you who recreate historical samplers. And what I really like about theses skeins? The wrapper is made of recycled paper. Not those horrible plastic wrappers the more modern DMC skeins have. We all need to do our bit to preserve our planet and I am glad Valdani does their bit. So how does one go from the intricate Millie Marotta drawing to a stitch-able pattern? In this case, as I approach the whole project as a doodle rather than a thoroughly pre-planned affair, I simply copied the outlines of the crab. I decided upon the size of the project (I like to use a particular brand of frames, so I decided on 14 x 14 cm) and I added some lettering. Apart from wanting to use some Schwalm embroidery on the main body of the crab and simple surface embroidery for all the other parts, nothing was planned. The combination of Schwalm and surface embroidery determined the fabric I was going to use: not too fine, as that would make the cutting of threads for the Schwalm too much of a challenge, but not too coarse either so as not to hamper the surface embroidery. I settled for 40 ct (16 threads/centimetre) Zweigart Newcastle natural coloured linen. As the label says that the Valdani threads are colourfast, I used an aqua-trick marker for the pattern transfer. And here are my stitching steps: - lettering 'Cancer' chain stitch with three strands Brick Dark - lettering dates simple backstitch with two strands Brick - outline body of the crab in the classic Schwalm way of doing things: chain stitch with three strands of Quiet Fall followed by coral stitch with three strands of Quiet Fall - preparing the grid for the Schwalm filling pattern by cutting out every fourth fabric thread in both directions - filling the grid with the Schwalm filling pattern 'Pfauenauge' (from Limetrosen I by Luzine Happel) using two strands of Quiet Fall. I've picked this particular pattern as it mimics the shape of the crab's body - filling the first segment of the legs with satin stitch using two strands of Brick - the second segment is filled with fly stitch using two strands of Quiet Fall - the third segment is filled with Cretan stitch using two strands of Golden Autumn - the fourth segment on the lower legs is filled with Van Dyke stitch using two strands of Quiet Fall - the claws were filled with chain stitch using two strands of Nostalgic Rose - at this point, I realised that the bottom parts of the upper claws would lend itself well to being filled with Schwalm embroidery too - again I made sure that the Schwalm filling pattern resembled the shape I was filling: 'Rippen nach links' and 'Rippen nach rechts'. I used two strands of Nostalgic Rose Behold the result: I added two matching beads for the crab's eyes. So what do I think of Valdani stranded cotton? Firstly, I really like the colours of these hand-dyed variegated threads. Nostalgic Rose and Quiet Fall were my favourites. Secondly, I love the more environmentally friendly packaging compared with other brands. Thirdly, each skein holds 10 yards consisting of six strands. That's over a meter more than DMC or Anchor :).
Any disadvantages? Unfortunately, yes. I have found that the single strands of the stranded cotton are a bit more irregular and a bit fuzzier than those of either DMC or Anchor. This was especially noticeable with the darker colours: Brick Dark and Golden Autumn. Although I switched to a bigger needle, the appearance of my stitching is slightly fuzzy. This becomes especially noticeable when you compare the chain stitch + coral stitch edge around the Schwalm filling of the crab's main body. The stitches look dull on the edge, but there is a nice sheen on the filling stitch. As the filling stitch is worked in a grid, friction is much less and the thread keeps its sheen. Furthermore, you definitely can't re-use a thread when you made a mistake and stitches needed to come out. The thread will shred. What are your experiences with Valdani stranded cotton? Have you used other Valdani threads? I've seen that they do perle and silks as well. How do they compare to the leading brands? Do let me know in the comments below! Once again a huge thank-you to the lovely people of LoveCrafts.com who were kind enough to let me play with the Valdani stranded cotton! Be sure to check out their website for lots of embroidery threads, embroidery kits and amazing free inspiration.
7 Comments
Last week, I and my husband, my parents and my younger sister with husband and two kids met up in Lauterbach for a family holiday. I quickly realised that this is 'little red riding hood country'. Apparently, my namesakes the brothers Grimm were inspired by the embroidered little red caps of the Schwalm folklore dress worn by young girls. A small, but dedicated museum with lots of Schwalm embroidery can be found in nearby Schwalmstadt. And since so many of you live too far away to go visit, I am happy to take you there by means of this blog! Let's start with the red caps ... For most embroiderers, Schwalm embroidery is a whitework technique. We will get to that in a moment. Let's start with the more colourful embroidered pieces of the Schwalm folk dress. As you can see in the pictures above, there are not only red caps (Betzel in the local dialect). The colour depends on the age and marital status of the female wearer. Red is only worn by girls before they get married. The embroidery on the caps consists of satin stitch over cardboard padding. Making these cut cardboards was a special craft and usually performed by men. Similar to the prickings made for Appenzell embroidery; that's men's business too. No wonder these crafts disappeared as soon as they were no longer economically viable ... The Ecken (squares) are embroidered in the same style. These extra decorations were worn on feast days over the apron on the hips. The stomachers are also embroidered the same way. As are some bits of the highly decorative endings of the bands which keep the caps in place. These also sport elaborate needlelace. And last but not least, highly decorative garters. All the above pictures show folk dress items from the 18th till the 20th century. Those pieces also sporting goldwork embroidery, are at the later end of the spectrum. Let's end our trip to the museum with some beautiful 'typical' Schwalm embroidery in white. The Schwalm whitework does incorporate a little colour every now and then. And some pieces where actually dyed with indigo blue or even dyed black. All depending on the age of the wearer and the occasion. Male and female blouses were typically decorated with this type of embroidery. As are very fine and highly decorated handkerchiefs. And bedlinen. Probably not practical, but boy I want one! The museum also has modern Schwalm embroidery on display. Many pieces are even for sale. They also organise special exhibitions every other year. The beautiful catalogues of the past exhibitions can be obtained in the museum shop. And best of all: they sell antique linen. And they have a whole big cupboard full of the stuff. I was really good and only bought about four meters :). Two different qualities and rather fine. Someday they will inspire me to a beautiful whitework piece!
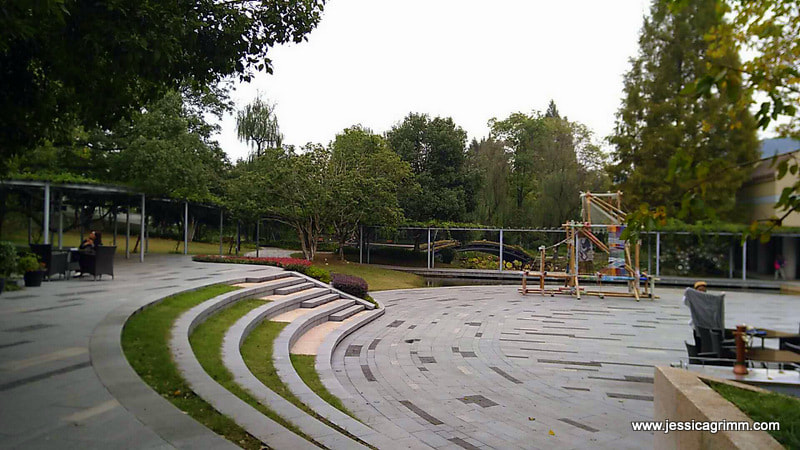
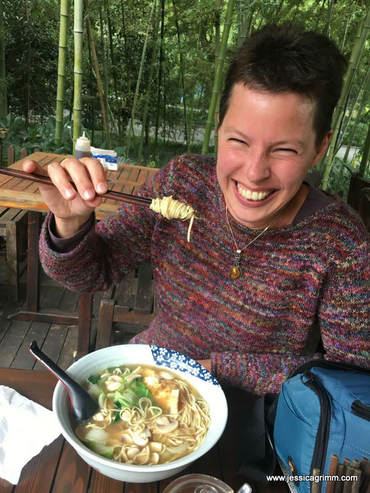
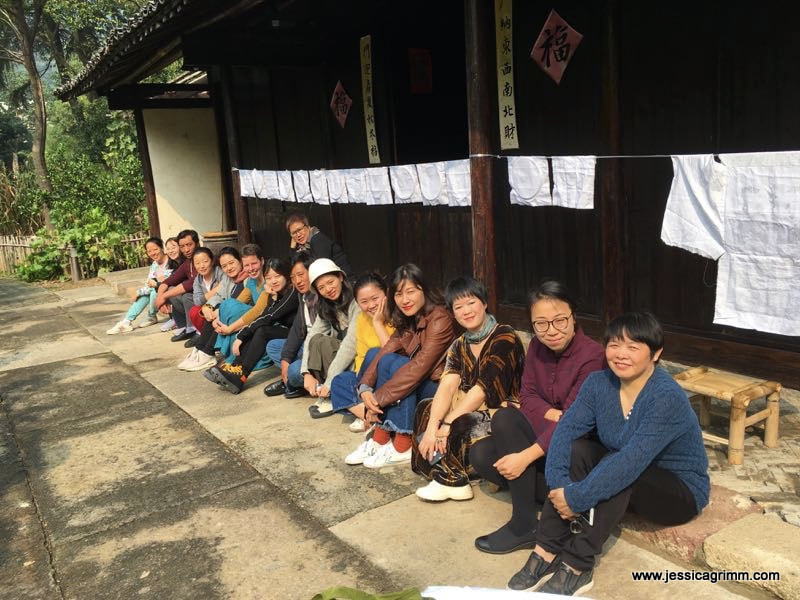
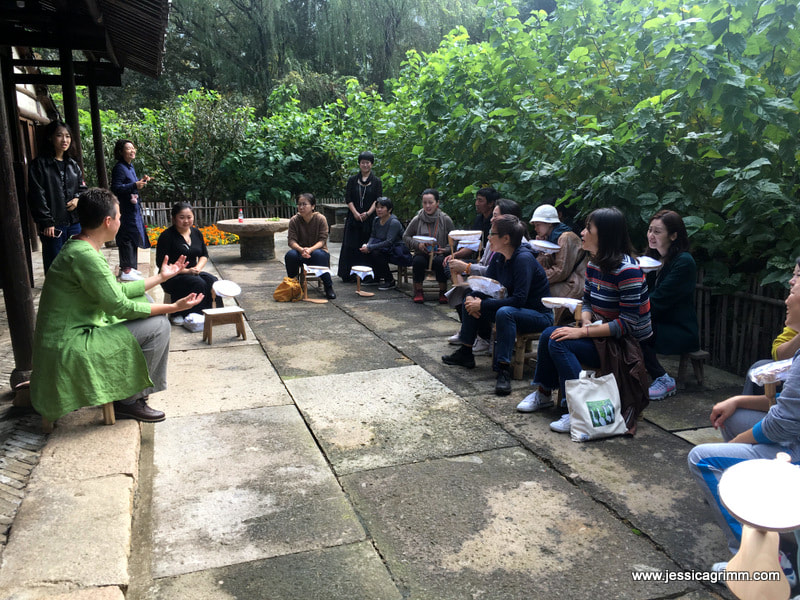
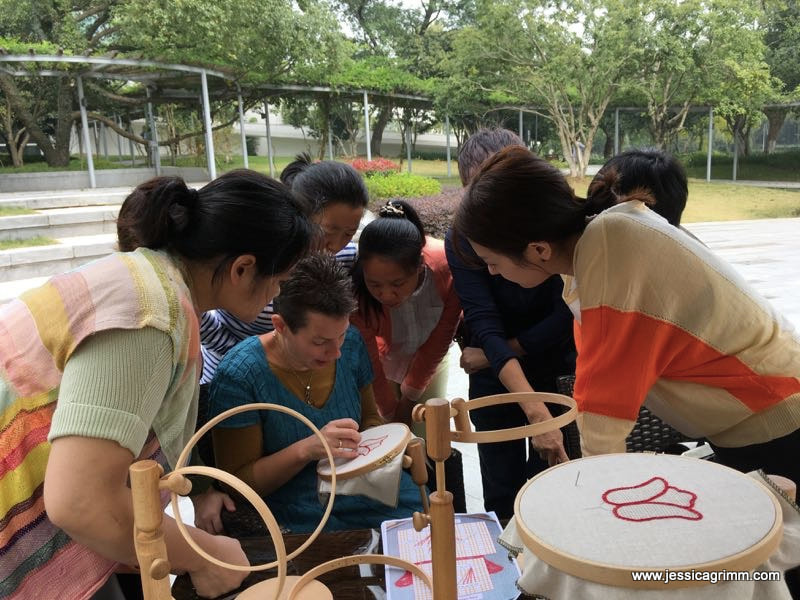
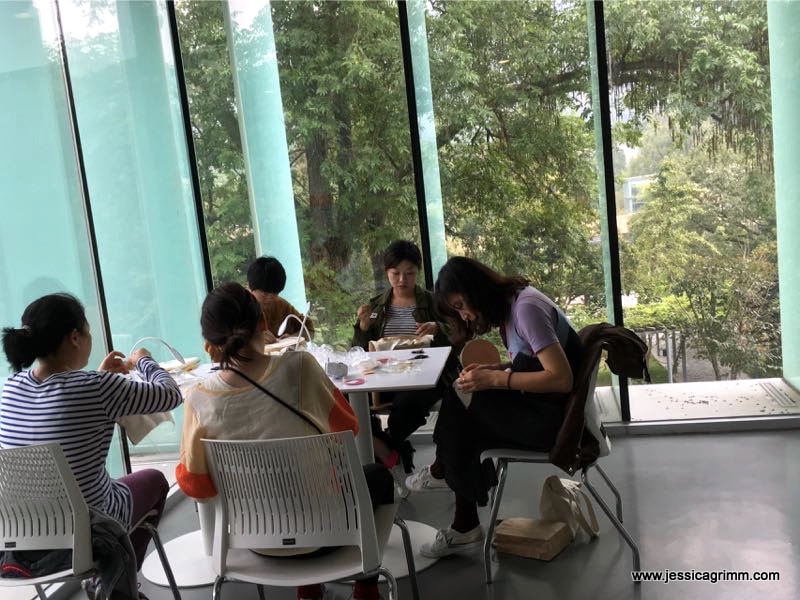
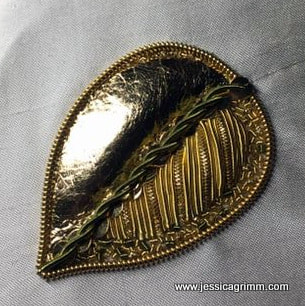
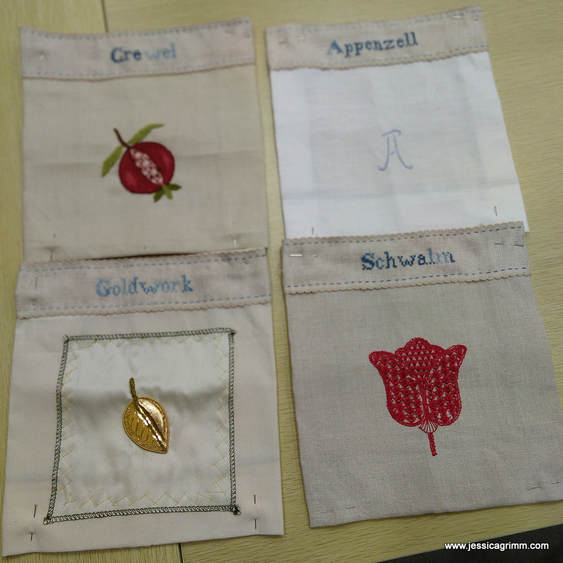
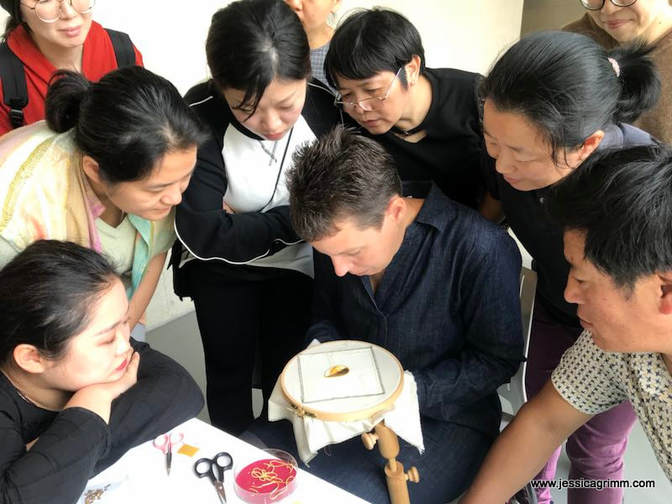
P.S. Please visit Luzine Happel's blog if you would like to know more on Schwalm embroidery and Schwalm folk dress. Make yourself a cuppa and prepare for a fall down the rabbit hole ... Jetlagged and with a nasty cold, but full of wonderful stories about my recent teaching trip to China, I sluggishly slump behind my laptop. To add insult to injury, my dearest coffee machine died on me when we got home from Beijing on Saturday night. I nearly killed someone this morning who carelessly suggested that I could easily survive on instant coffee until my beloved machine gets repaired... Let's talk of happier things, shall we!? Packing my 24 days in China into one blog post might be a little too much :). Instead, I will write several posts in the coming weeks on my adventures in the far East. We'll start today with the actual teaching. I arrived a few days early in Shanghai and was picked up by Edith, a textile enthusiast from Hong Kong, who had organised the workshop. We immediately got on really well! We decided to take the bus to Hangzhou; my first taste of the excellent public transport services in China. After being dropped off in the centre of Hangzhou, we took a taxi to the hotel situated near the famous West Lake. As Bad Bayersoien - Hangzhou takes nearly 24 hours, I was ready to slip between the covers in my lovely hotel room. After a delicious breakfast the next morning, we crossed the street to visit the National Silk Museum. The museum is quite large with several buildings housing different exhibitions related to silk. The buildings sit in a beautifully landscaped park. Exploring the ground floor of the silk road exhibition alone took me about two hours! In the afternoon, I decided to take a walk and explore the famous West Lake. As it was the weekend, many Chinese holiday makers had the same idea. The place is famous for getting your wedding pictures taken and the whole area is an important inland holiday destination. I ended up visiting a Buddhist temple, the tombs of some revolutionaries and ended with Jasmin tea overlooking the lake. As there where not many other Westerners, the Chinese looked upon me with great curiosity :). On Sunday, we prepped the classroom for the workshop starting on Monday. I met my assistant and translator Clover who has studied weaving in London. She did a great job translating my English into Chinese during the workshop! And in between, we ate :). Not only breakfast was a treat, the local eateries were fabulous too! Me using chopsticks for the first time was hilarious and I must confess that I don't miss them... On Monday, the teaching started. The group of students was very divers. I had museum staff, art teachers, fashion designers and even two craftsmen from Tibet. They were all very eager to start! Although the official classroom was in the basement, we decided to use the lovely weather and stitched outside a lot. Sitting in front of an old sericulture farm was a favourite with all of us until the mosquitos found out about it too... We strung a line and hung up the result of the previous day to talk about the experience. I was very impressed with my students as most of them had finished their projects overnight! However, getting them to critique their work publicly or express their experiences with the particular embroidery technique, wasn't easy. Other favourite stitching spots were the cafe... ...and the gallery of the fashion building. Those large windows were fantastic. When teaching the goldwork leaf on Thursday, I discovered a mistake with the scale of the leaf. Oopsy! Time for a last-minute change: add some chipping to the original design and all was well again. It shows that no matter how well you prepare, mistakes can always happen. Adapt and carry on! We ended the day with a Chinese high-tea organised by the students. They had brought all sorts of delicacies for me to try. Yummy! The schedule on Friday and Saturday changed a little. We had the opportunity to pair my talk on medieval embroidery with that of a local master embroiderer on Friday. We had all hoped that she would talk on the techniques she used in her embroideries or the thought process that went into them. Unfortunately, she didn't. It was more a sales talk. However, some of her work was really nice and unusual. It showed that she also experienced difficulties with branding her work as art. My talk went really well. The museum did record it on video and as soon as I know where it is available, I will let you know. If it does not become available, I will put up the original presentation and let you know where to find that. However, it is much more fun to hear a Dutch person talk in English and have that translated into Chinese by Clover :). As one afternoon of the original five-day workshop was high jacked by the presentations, we decided to meet again on Saturday morning (in the original plan I would have given my presentation on Saturday). I was completely blown away by the fact that quite a few students had completed all four projects! That's the best praise a teacher can get. It shows that they really enjoyed themselves and loved the tasks I had set them. Those six days were immensely gratifying and I really had a blast! Seeing people figuring things out and going on helping others is such a great experience. I really hope they can implement the things they have learned in one way or the other.
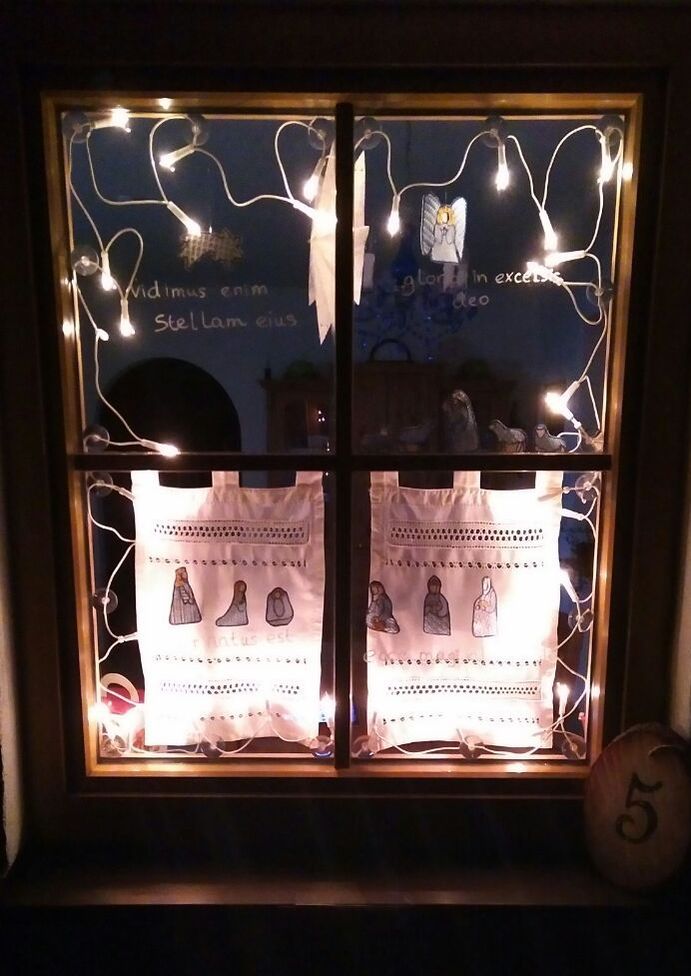
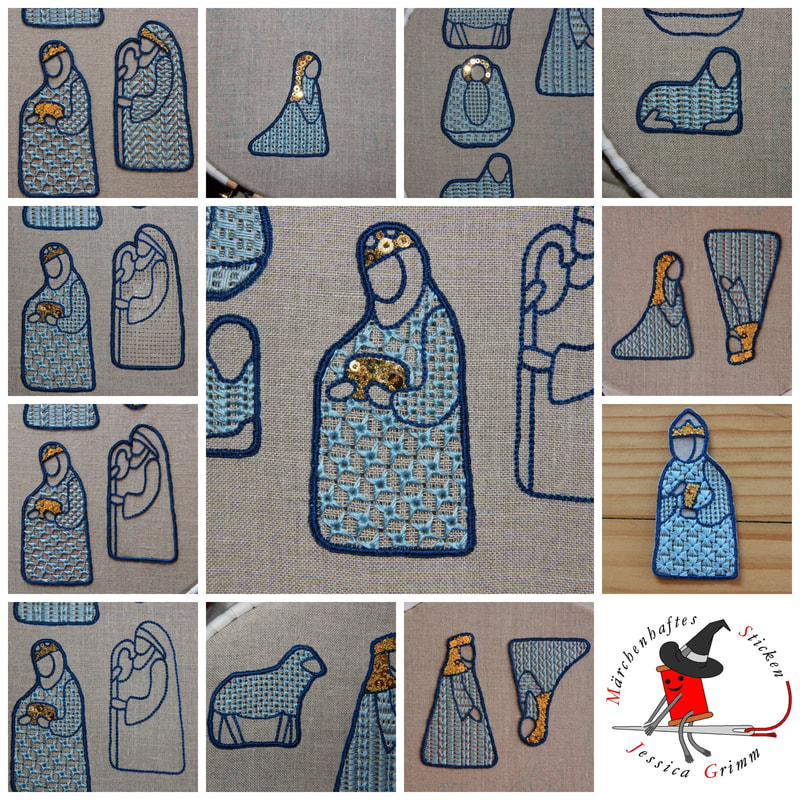
It has become a bit of a tradition that my kitchen window participates in our village Adventkalendar. This year we opened on the 5th; that's when the Dutch celebrate St. Nicholas. So apart from my decorated window and large amounts of Glühwein, we also had pepernoten, speculaas and taai-taai. This year, I decorated my window with the Schwalm embroidery nativity. Having a partitioned window, we ended up with four scenes. If you would like to know how the figures were made, check out these older blog posts. More information on Schwalm embroidery can be found on Luzine Happel's website (available in German and English).
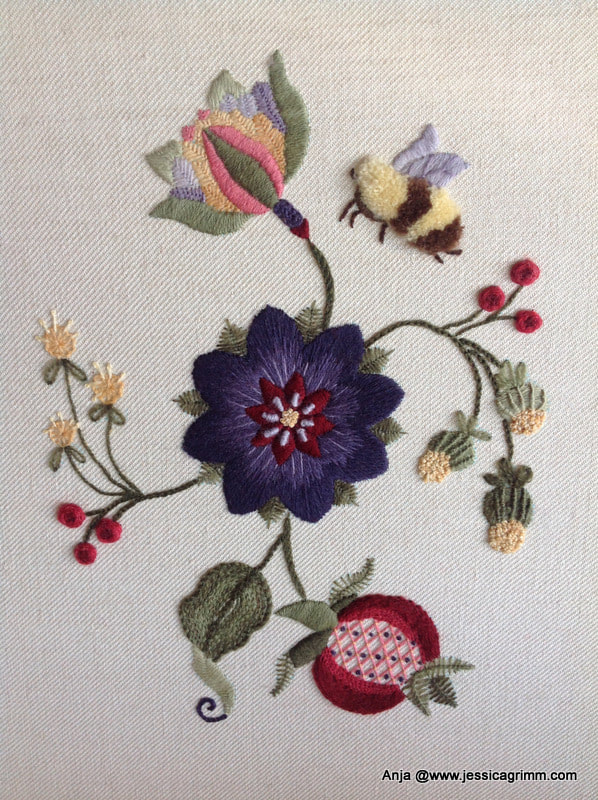
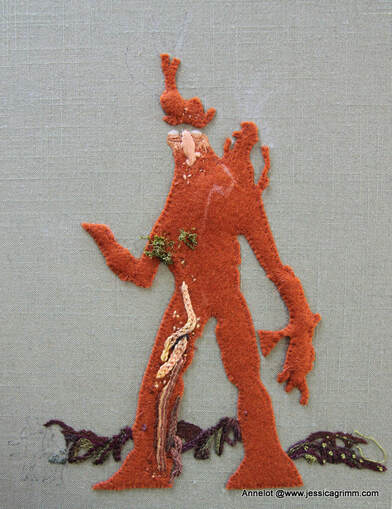
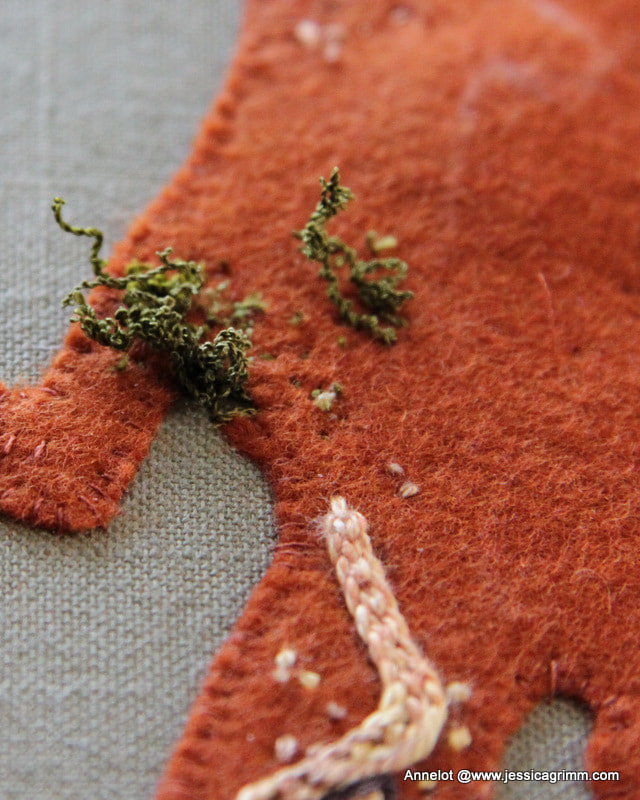
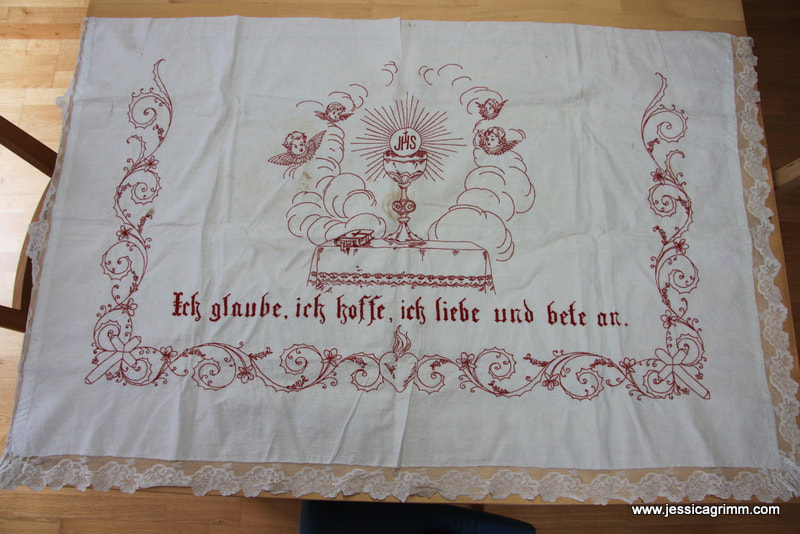
And since it has been quite the year for us, I am going to take a short break from blogging. In fact, this is my last post for this year. Thank you for your support and have a marvellous Christmas and a happy new year! See you on the 8th of January with a brand new blog post. Before I open the candy tin, I would like to voice a big thank you to all who left comments of encouragement on last week's blogpost. I also received many personal emails. Thank you very much! What will happen next? The farm building is beyond help and will be demolished. The cattle will be sold over the next weeks. The Lötschmüllerhof will no longer be a farm. That's a strange idea. As reference to 'the farm' in my family was always to this particular place. However, we are all settling in to our new lives and the help from others is balsam to our souls. On to the eye candy! Remember this piece by Anja from the Netherlands? She started it earlier this year during one of my stitching retreats. I think she did a terrific job! The piece is balanced and the purple flower is such a beautiful centre piece. So proud of her :). Note: I no longer run this course. Next up is a stumpwork piece by Annelot from the Netherlands. She started it last week during my stumpwork stitching retreat. Annelot is creating a stitched version of Treebeard, the oldest Ent from the tales of J.R.R. Tolkien. For his mossy beard we tried the overtwisting method as described by Alison Cole in her great book on stumpwork (you can read my review here). This is a fun method with great texture. Can't wait for the piece to be finished. Over the years, I have learned that embroidery calms and sooths my soul. So I was particularly happy to find the September broderibox by Nordic Needle in my mail last week. With this month's threads I worked a moth from one of Millie Marotta's books. I used Snow by Caron, Watercolours by Caron, Kreinik Silk, Colour variations by DMC, Londonderry linen thread and silver plated spangles. The moth is stitched using a combination of Schwalm drawn-thread work, surface embroidery and stumpwork. And last but not least, this altar frontal or antependium was saved from the fire. It used to adorn the Corpus Christi altar put up in front of the farm every other year. It is a little dirty, so I will try to gently clean it. Since the altar did burn, we need to construct a new one. But the antependium will still adorn it!
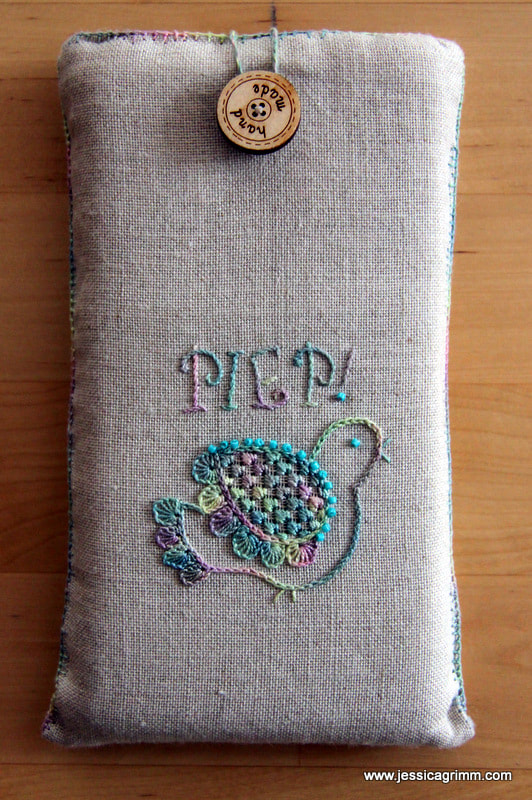
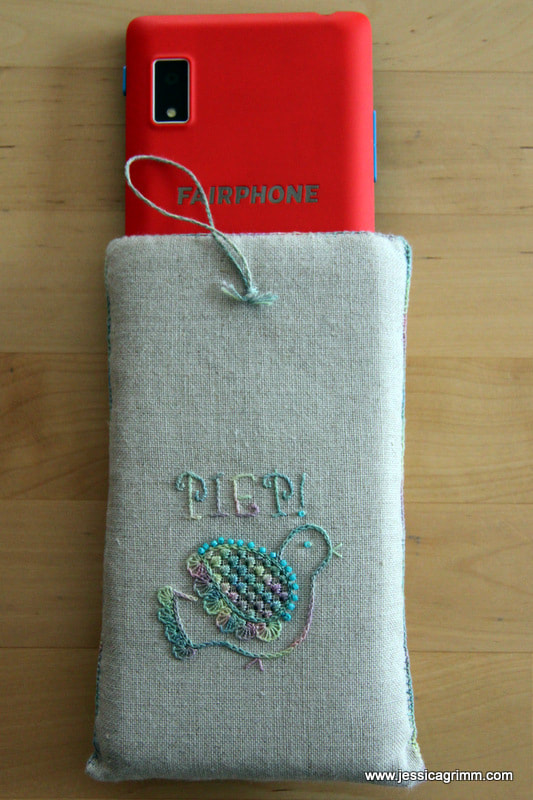
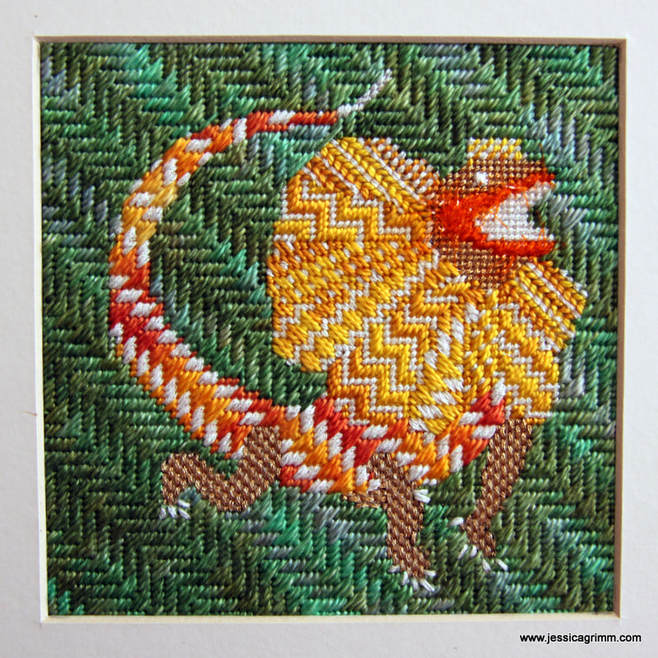
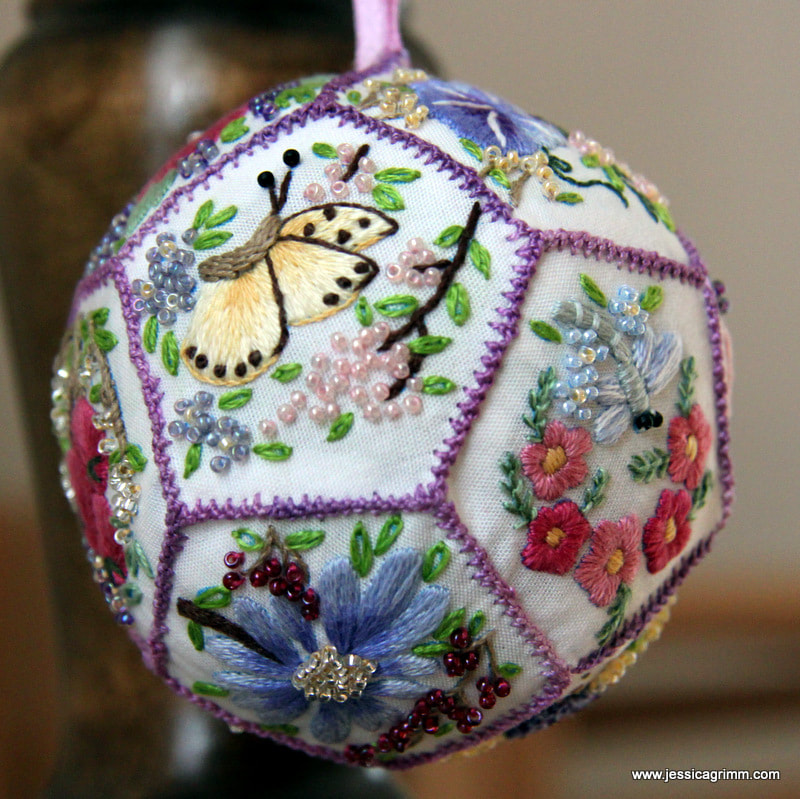
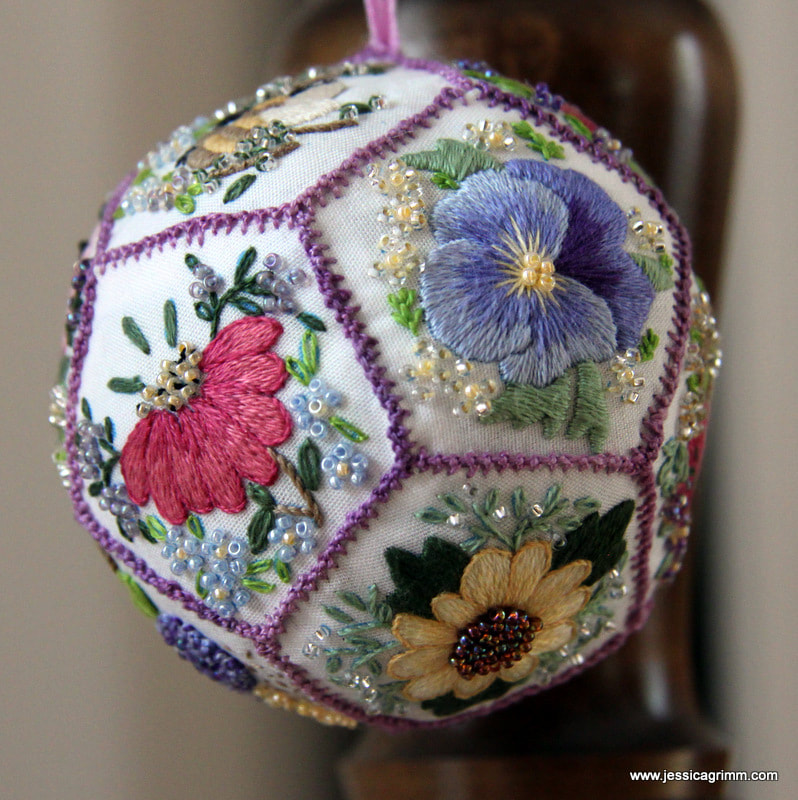
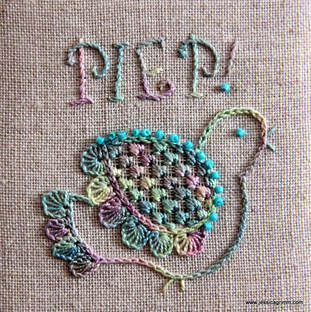
And that's it. All candy distributed :). See you next week! Yup, it is true: I have arrived in the modern area too. It took me years. But when I heard that Fairphone makes smart phones that last, are repairable and don't use blood minerals; I ordered one. So far, I have used it to download (and use!) a 5K running app, WhatsApp with my family, use Google for directions and information AND made the very occasional phone call :). Still much prefer my Ipad and Laptop... Maybe I should seek professional help? Pondering this option, I did make my Fairphone a cozy home to live in. On Zweigart Newcastle natural coloured 40ct linen, I outlined the bird with chainstitch using a #12 variegated House of Embroidery perle colour Grapes C. Then I stitched partial buttonhole wheels for the feathers on the tail and the wing. I added straight stitches for the feet and the beak and attached some blue beads along the upper-edge of the wing. From the back, I withdrew every fourth thread in both directions and then added a Schwalm filling stitch called 'Gefieder'. The lettering was stitched using stem stitch. To make my 'phone home' a bit sturdier, I added wadding and a sheet of template plastic. The seams were then pimped with knotted pearl stitch. So far, my phone seems to be pretty comfy in her new home! I've asked my very talented husband to make a nice clean digital drawing of my scribbled birdy pattern. You can download it at the end of this article. Apart from using it as I did in a Schwalm embroidery way (finished design including lettering H 55mm), there is tons of other possibilities. How about stitching it monochrome on a piece of felt? Or applique with a few simple stitches for embellishment? Surprise me! Next up is another broderibox project using a design of a Chlamydosaurus by Millie Marotta. This amazing creature can impress by unfolding his neck frill. However, it can only do so in opening its mouth widely. The bones in the frill are extensions of the hyoid or tongue bone. Isn't nature amazing?! The lovely people of Nordic Needle had put in a glow-in-the-dark thread made by Rainbow Gallery. I made sure to add it to every canvas stitch I used on the chlamydosaurus (it is the white thread you see). And it glows beautifully at night! Unfortunately, it doesn't translate well in a picture. You have to take my word for it. Last finish for today: the Floral Pomander by Hazel Blomkamp. I really enjoyed this project with all the little flowery scenes using simple embroidery stitches and tiny beads. However, the instructions were a bit messy with tiny pictures of the finished panels. And piecing the pomander together was a little fiddley. That said, it makes a great project if you like miniature embroidery, beads and a different way of finishing your embroidery. Oh, and thanks to the dried lavender mixed in with the toy stuffing, it is my best smelling project ever :)!
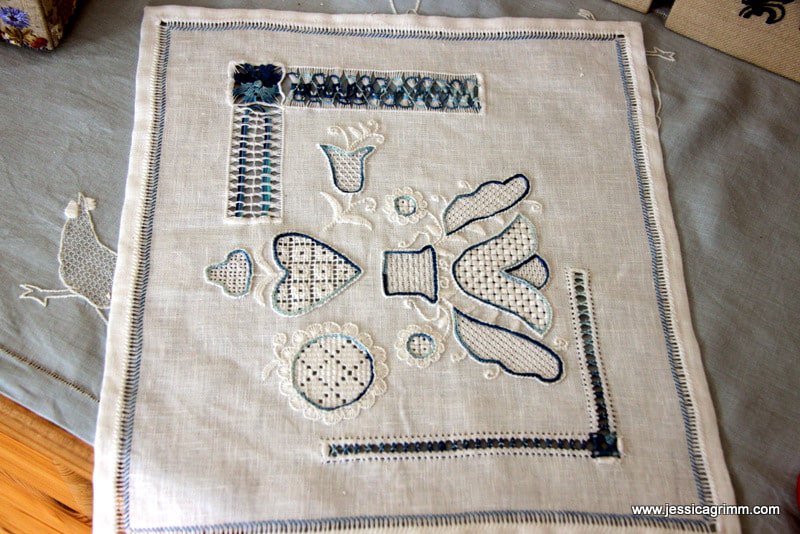
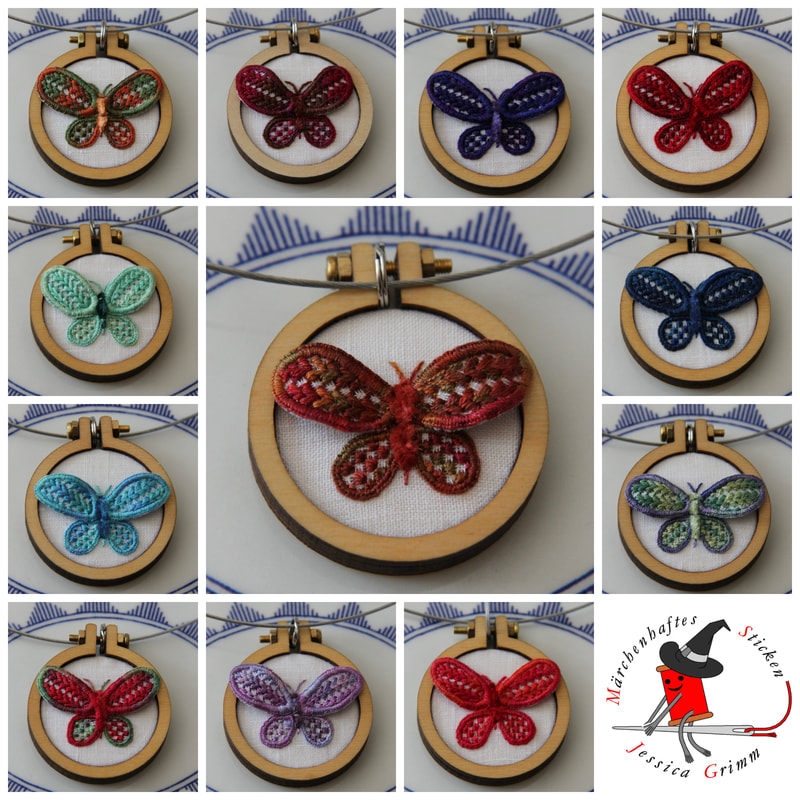
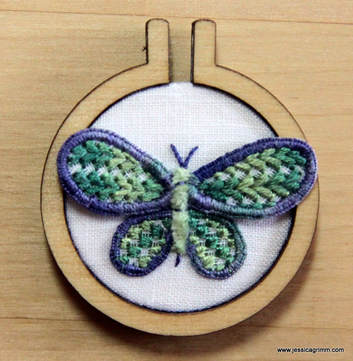
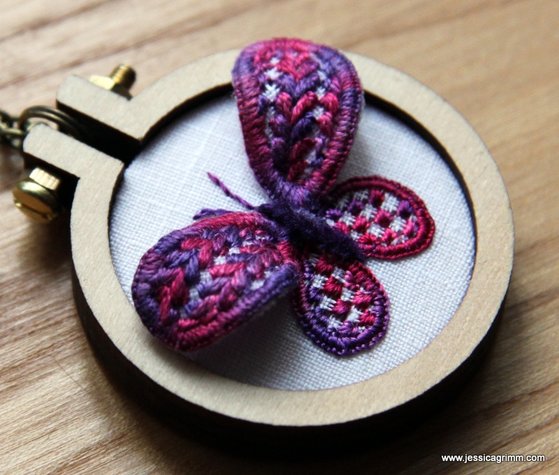
Today I am going to write a bit about my love affair with Schwalm embroidery. You see, I can pinpoint exactly where I encountered this pretty whitework embroidery technique for the first time. Not in its native Hessia, one of the federal states of Germany. Nope. It was Inspirations issue 69 in the spring of 2011. The beautiful 'Sense of Place' by Luzine Happel featured hearts, sunflowers and tulips filled with pretty patterns. I so wanted to learn this embroidery technique! But, I had never done any whitework embroidery other than a huge Richelieu window pane featured in an embroidery special of the Dutch Libelle. Luckily, I had just started my Royal School of Needlework Diploma course. And it happened to include a whitework module. Little did I know that they had never heard of this type of embroidery. And my tutors weren't thrilled at the prospect of teaching me something they were not familiar with. So I ended up with a whitework sampler featuring only a little bit of true Schwalm embroidery. And yes, I didn't like the prospect of an all-white piece either :). Now most of you will by now know that I don't like table cloths. Although, to be honest, there is nothing wrong with these pieces of textile. It is just that when I tell people that I embroider for a living, THEY picture me amidst heaps of neatly stacked embroidered table cloths. Now that gives me goose bumps. But for the wrong reasons. It truly freaks me out. Embroidery is so much more than just a means to adore a table cloth! Instead, one of the Schwalm-things I made was a nativity scene to be hung in front of my kitchen window. It is an ongoing process and I hope to add camels, a donkey and an ox this year. And although I like white, I like colour better. White reminds me of those pretty shoes I once had as a girl. They were lovely, but not so white for long. The same with those pretty lacily white stockings me and my younger sister wore under our Sunday dresses as girls. They attracted dirt like nobody's business. So in came the use of colour in my Schwalm embroidery projects. Now, traditional Schwalm embroidery is done with cotton a broder. A not so shiny non-strandable cotton thread. It is nice, but cotton perle and silk threads are nicer. Or at least in my opinion they are. I especially like to use variegated threads as they form pretty colour patterns when used with the many different Schwalm filling stitches. So, by now, I had changed the colour of things, the materials and the stitching topic. What's next? How about adding a stumpwork technique to the mix? Using wired elements with Schwalm embroidery really tickled my fancy! It looks so elegant and yet isn't too hard to create at all. But I wasn't quite finished yet! How about one shrinks the butterfly? For instance, until it fits a tiny 4cm Dandelyne wooden hoop. Thanks to my training in Appenzeller whitework embroidery, I knew that you can add tiny filling stitches (some the same as in Schwalm embroidery; after all there is only so much you can do with a blank grid) into a tiny grid of withdrawn threads. Born where the elegant butterfly pendants! Still using original heritage skills, but sans the table cloth. After weeks of stitching (one butterfly takes about six hours to create), I now have a colourful bunch of lovely butterfly pendants.
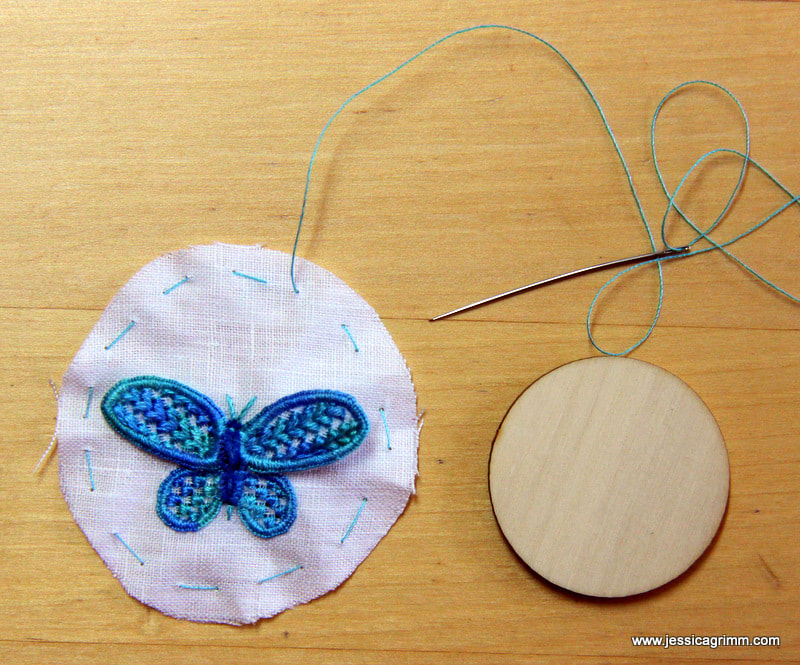
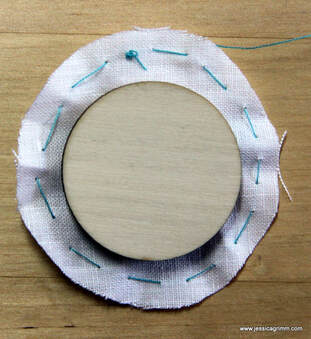
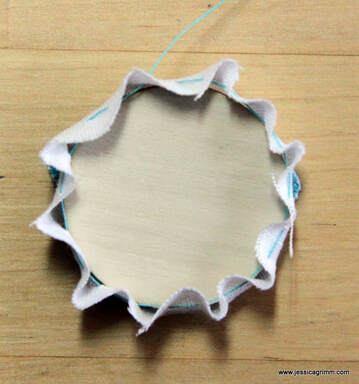
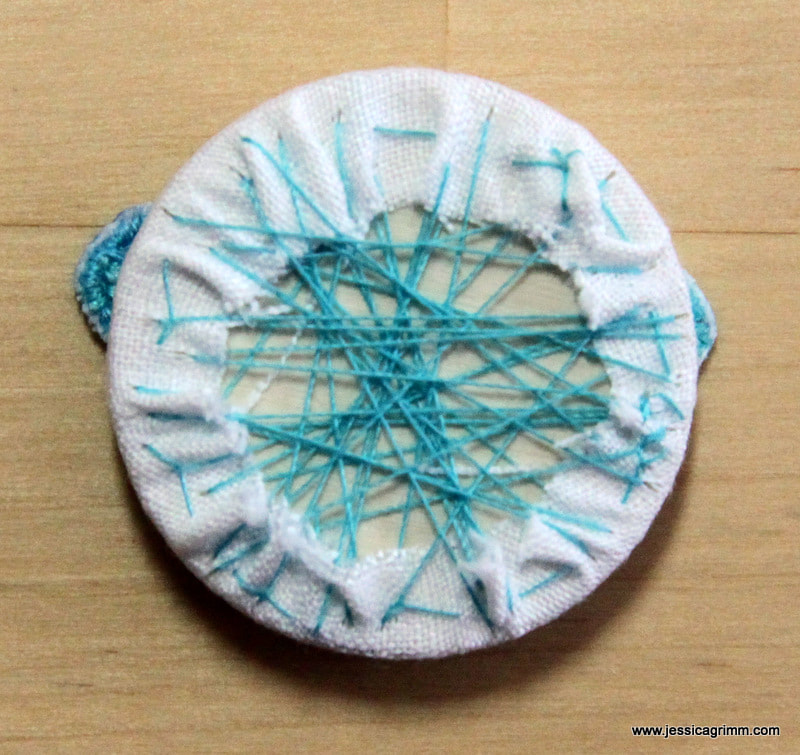
If you would like to know more about the traditional form of Schwalm embroidery (including its use on folk costumes), check out Luzine Happel's website and blog. Also available in English. Luzine self-published a whole library on Schwalm embroidery. These are very good books if you want to learn this pretty whitework technique. I highly recommend them! The books are available in German, English and even French. Happy stitching! As promised in an earlier post, here's how I load-up my tiny masterpieces into those clever Dandelyne mini-hoops. Although your mini-hoop comes with mounting instructions, I did not find them very useful for heavily embroidered pieces. You see, Dandelyne advises you to just push your masterpiece in from the back using the wooden centre piece. Then you glue your excess fabric onto the back of this wooden centre piece. I am sure this works just fine when you use a printed fabric or something quite sturdy like an aida with some cross-stitch embroidery. However, it does not work so brilliantly with heavily embroidered slippery fabric. Fear not! Here's the solution. And it is pretty simple too! Once you've cut out your mini-masterpiece (including the seam allowance!), stitch a running stitch along the edge using sewing thread. Use a knot to anchor your thread and don't place your stitches too close to the fabric edge (fraying!). Place the wooden centre piece on the back of your embroidery. Pull your thread taut so the fabric folds around the wooden centre piece. Check the front, adjust if necessary, then start lacing. I am sure there is a pretty looking orderly way to do this, but that's just not me I am afraid. When sufficiently laced, secure your thread well. Now you can carefully push your mounted embroidery into the Dandelyne hoop from the front. This gives you maximum control over where it is going. And the whole lacing prevents it puckering, especially near the screw at the top. Once your embroidery is in, follow the Dandelyne instructions for adding the screw. Masterpiece finished!
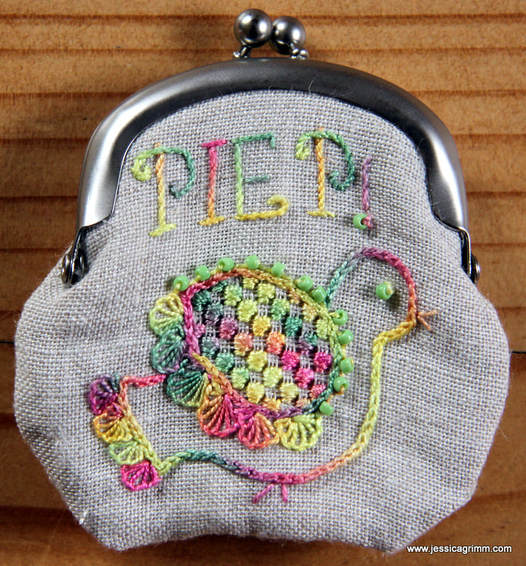
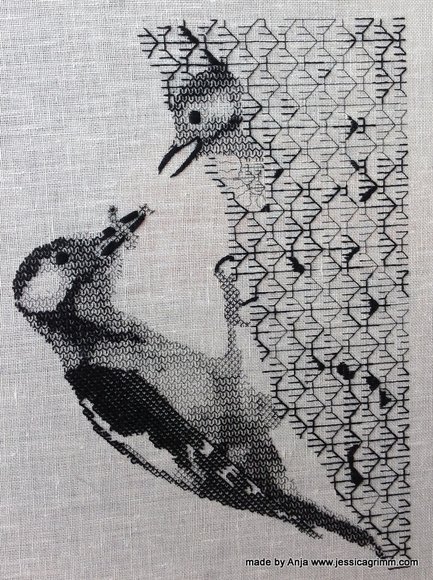
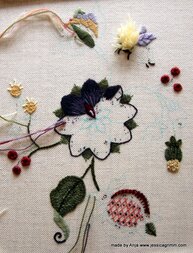
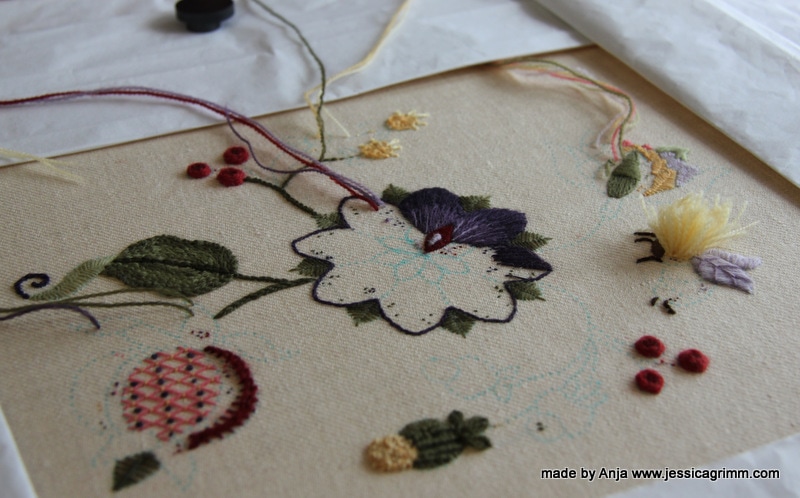
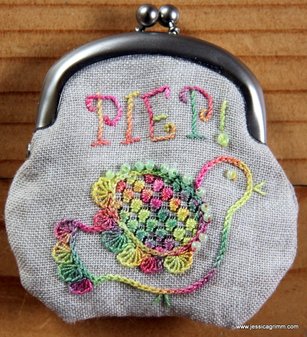
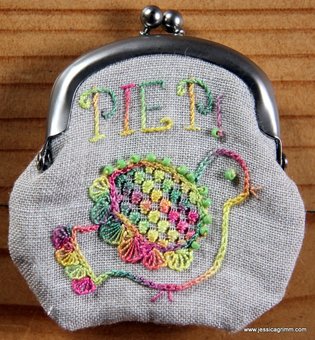
Today I am going to share some lovely embroidery pieces with you. We'll start off with the work of one of my students, then we'll have a look at some new pieces I made and we'll finish with a new initiative to bring Mastercrafts People together. Let's start with a stunning blackwork piece: This piece has been embroidered by Anja from the Netherlands. She started it last year during one of my week-long embroidery retreats. Anja worked from a picture and translated the different textures and shades beautifully into blackwork's geometric patterns. Anja will add some white highlights to the eyes to make the birds even more life-like. I so enjoy seeing a finished piece which started under my tuition! Next up is another piece by Anja. She started it last week during another one of my embroidery retreats. We had great fun designing this piece by using a piece by Hazel Blomkamp as the base. Then we added two flowers from a colouring book by Millie Marotta and a pomegranate from an older embroidery book. Just to illustrate that you don't need to be able to draw your own design from scratch. Mix and match often produces a stunning new design. I have a feeling this piece will turn out great as well! As most of you know by now, I have a subscription to the Broderibox by Nordic Needle. Although I used all threads present in the May box, I wasn't sure what to do with the purse clasp. I am an embroideress and I can mount a finished piece satisfactorily. However, I am not good at finishing. Mainly because I do it so rarely. Time to change that! There are so many lovely products out there to turn your embroidery into something other than a framed picture. Time to become acquainted with the clasp. Luckily for me, there was a website listed on the back of the clasp's packaging: Zakka Workshop. Do visit their website as they have some adorable stuff on there. And best of all, they have a really good Youtube video on how to install the clasp. As I wasn't confident that I could come up with the right size embroidered purse, I ordered their instructions for the simple patchwork pouch. It provided me with a template for the purse and then it was just a matter of adding a cute bird, do some Schwalm embroidery, add some beads and best of all: use a House of Embroidery hand-dyed perle #12 in a colour combination that's totally out of your comfort zone :). Worked a treat so far. Installing the clasp wasn't as easy as the video makes you believe. Especially not as I've probably used the wrong interfacing between the embroidery and the lining of the purse. Mine is probably too thick/stiff. That's the challenge when using instructions from another country. However, I am quite pleased with the result! Another great way to finish your embroidery is to use a tiny wooden hoop by Dandelyne. Since I really like my Schwalm butterfly, I wondered if I could shrink the piece enough to go into a 4cm hoop. Guess what? I could! I used a combination of House of Embroidery hand-dyed fine silk and raw silk as well as paper covered wire to stiffen the upper-wings. I've now worn the piece around my neck for two days straight (I did put it down for sleeping...) and it holds up beautifully. By the way, you can get your Dandelyne hoops here in Germany from the lovely Nadine from Zur lila Pampelmuse. That's where I got mine :).
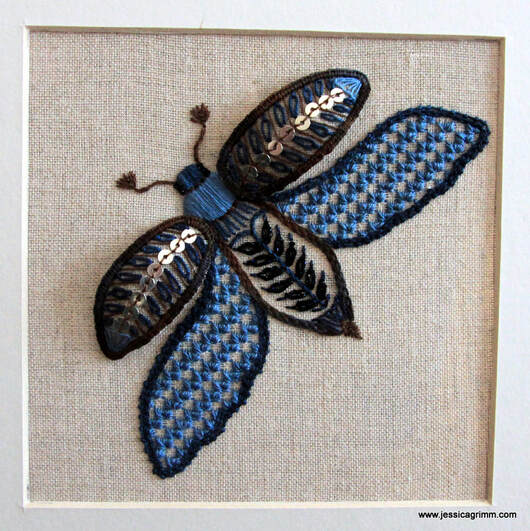
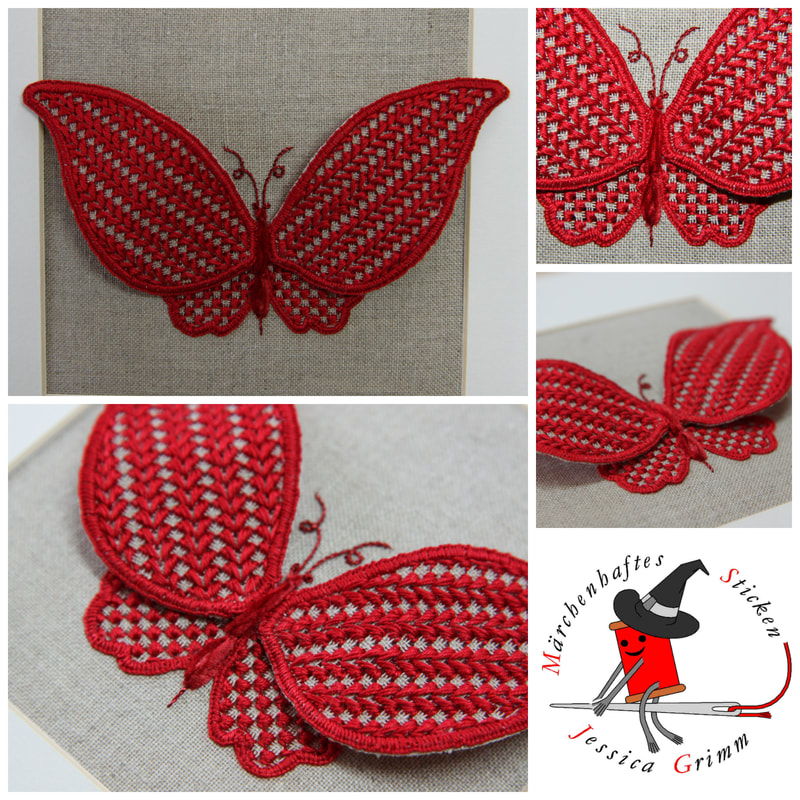
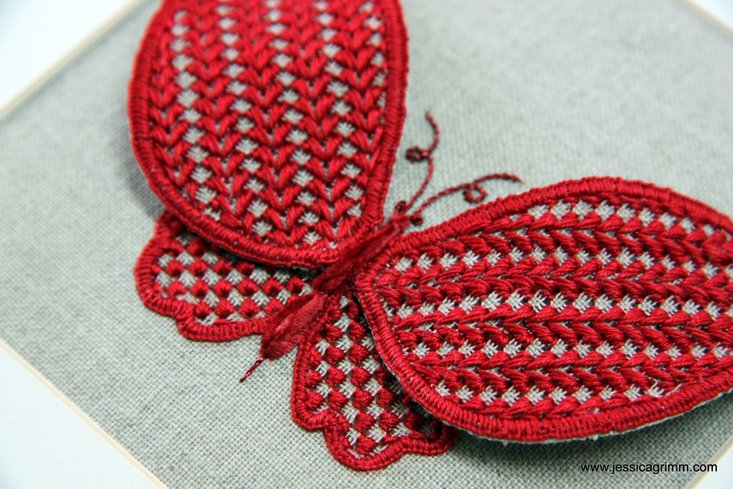
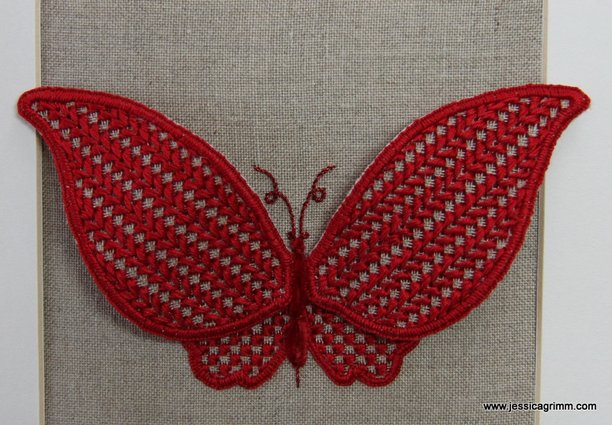
My love for embroidery stems from the fact that I like to work creatively with my hands. But equally important, I love the fact that I am part of a very old tradition. And last but not least, I have a love for beautiful and elegant things. When I teach embroidery, I foremost want to transmit a technique. It is important to me that my students learn to execute the technical part of an embroidery technique well. That's the way I was trained at the Royal School of Needlework and it suits my personality. With my embroidery kits I try to think of an innovative way to use an ancient embroidery technique. I want you to be able to create a stunning piece of embroidery to go up on your wall. My beetle wing goldwork and stumpwork beetles are a good example of this concept. The latest addition to my series of embroidery kits is the 'Elegant Butterfly'. This kit has a modern take on Schwalm embroidery. Originally, Schwalm embroidery is a form of whitework from the Hessian region of Germany. You can read all about it on Luzine Happel's blog. She is a master craftswoman regarding this lovely technique. Don't be put off by the term whitework. It is nothing like the very fine embroidery seen on handkerchiefs or the like. Think more Hardanger embroidery. But then less geometrical in its shapes. Schwalm is usually floral, uses chain stitch, buttonhole stitch and coral stitch extensively. And, best off all in my opinion, comes with hundreds of different geometrical filling stitches! You won't be easily bored and it is relatively easy on your eyes. My elegant butterfly uses the traditional cotton a broder #25 used in Schwalm embroidery. You'll stitch on beautiful 40ct Zweigart Newcastle linen. That's the traditional part of my design. I've also added in DMC Diamant metallic thread and hand-dyed silken chenille by the Thread Gatherer. A perfect opportunity for you to play a little with these speciality threads. Furthermore, I've discovered that traditional Schwalm embroidery and the wired-shapes technique used in stumpwork embroidery are a match made in heaven. Pair your finished and mounted elegant butterfly embroidery with a Ribba frame from IKEA and you have stunning unique and hand-made home-decoration!
|
Want to keep up with my embroidery adventures? Sign up for my weekly Newsletter to get notified of new blogs, courses and workshops!
Liked my blog? Please consider making a donation or becoming a Patron so that I can keep up the good work and my blog ad-free!
Categories
All
Archives
July 2024
|
||||||||
Contact: info(at)jessicagrimm.com
Copyright Dr Jessica M. Grimm - Mandlweg 3, 82488 Ettal, Deutschland - +49(0)8822 2782219 (Monday, Tuesday, Friday & Saturday 9.00-17.00 CET)
Impressum - Legal Notice - Datenschutzerklärung - Privacy Policy - Webshop ABG - Widerrufsrecht - Disclaimer
Copyright Dr Jessica M. Grimm - Mandlweg 3, 82488 Ettal, Deutschland - +49(0)8822 2782219 (Monday, Tuesday, Friday & Saturday 9.00-17.00 CET)
Impressum - Legal Notice - Datenschutzerklärung - Privacy Policy - Webshop ABG - Widerrufsrecht - Disclaimer



 RSS Feed