|
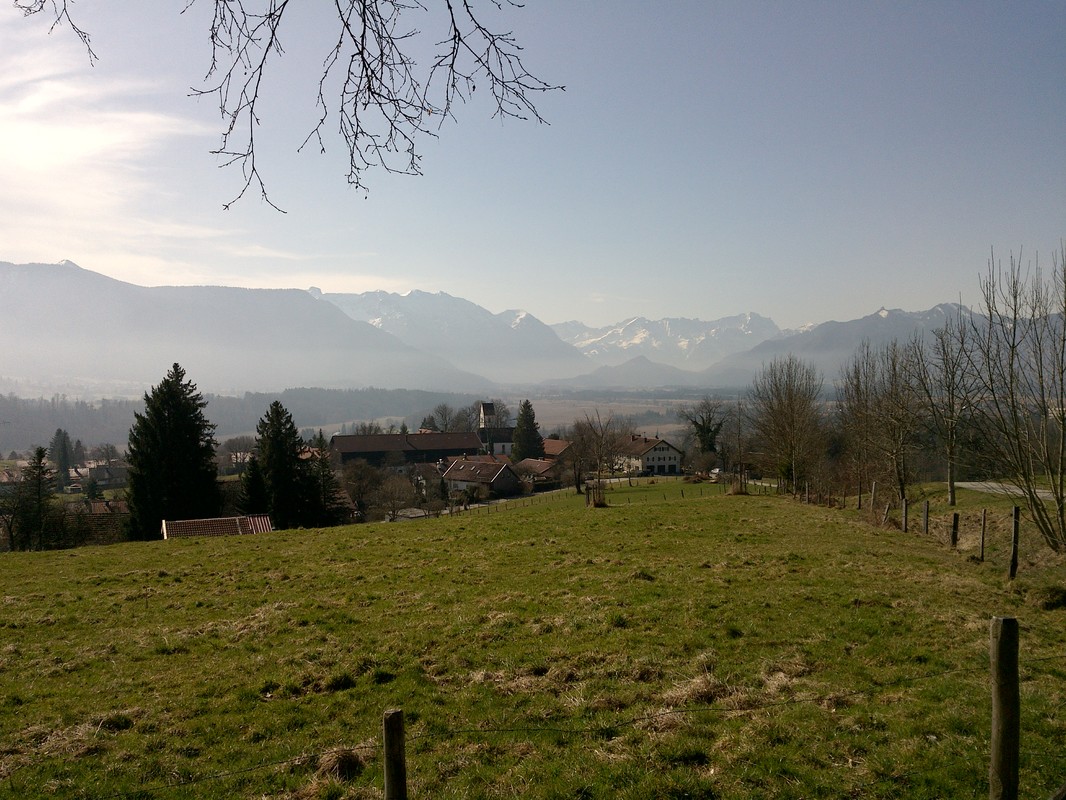
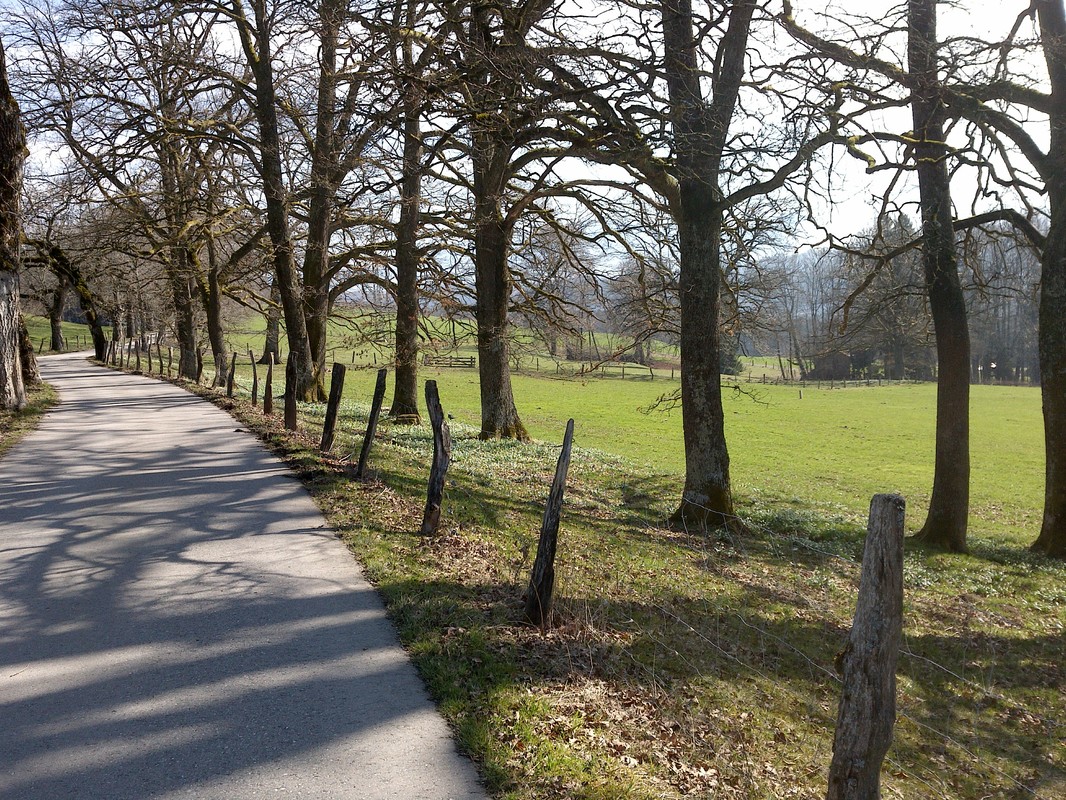
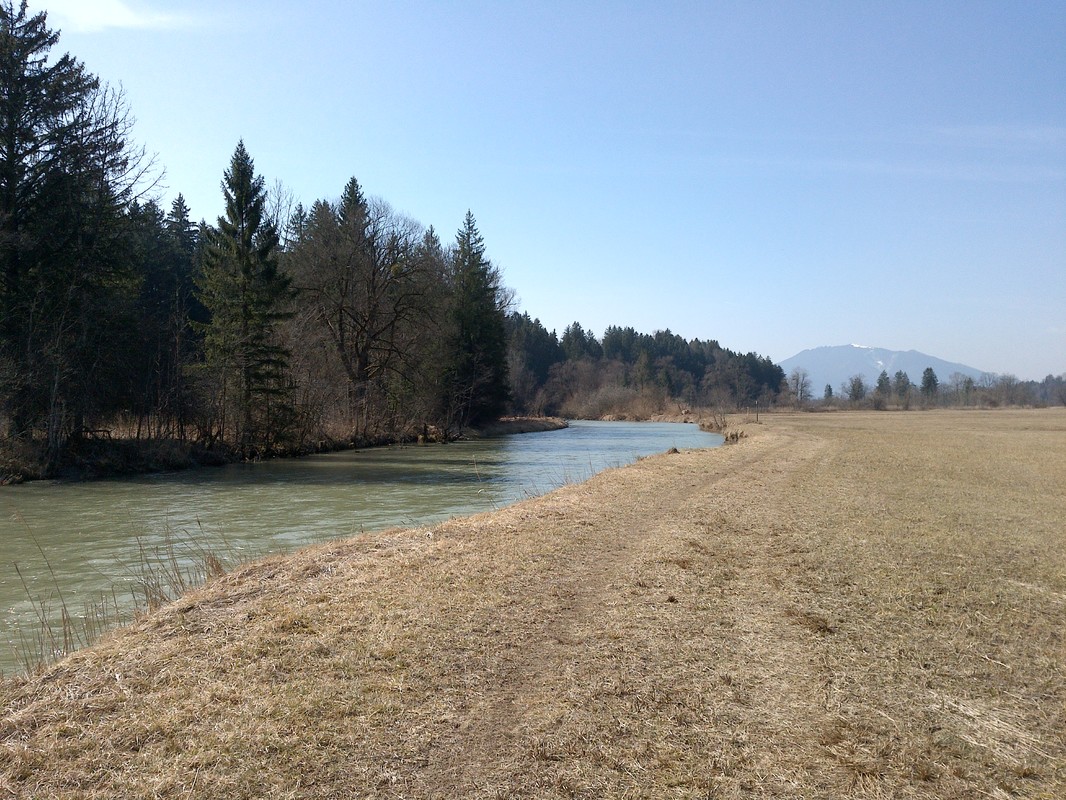
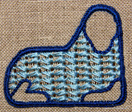
In this part of the world, spring has finally arrived! Time to done my walking boots and stride out. I love to go for long walks in the countryside and I really miss it in winter when there is just too much snow to go for a good walk. So yesterday, I downloaded a circular walk near Murnau and off I went. Mainly along fields, through hamlets, crossing the bog and along the river Loisach. Heaven! Didn't I do any embroidery this week? Of course I did! I just did not take it with me on my beautiful walk :). Last week, another parcel from Nordic Needle arrived: the Broderibox for March inspired by the astrological sign pisces. Fish to you and me. The contents were a bit of a shock to me. I really did not like the colour combination of light pink, purple, cream and minty green. Bummer. However, an embroideress needs to do whatever embroideresses do. Grab those threads by the horns. And grabbing them turned out to be a good thing. It is not at all bad to be pushed out of your colour comfort zone every now and then. I did notice that these month's threads were a little different from the two previous months. They were thinner. In the online information bulletin, it did state that some of them were especially suited to pulled and drawn threadwork. Excellent! I can do that. 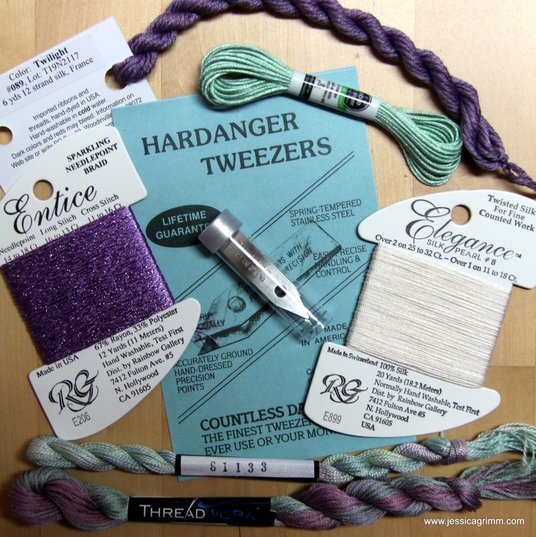 Nordic Needle Broderibox Above are the contents of my Broderibox. I really liked the purple Gloriana silk and the minty green soie de alger at the top. The sparkly purple metallic thread on the left is also well within my likes. The creamy silk perle on the right is the type of thread I am suspicious of. I really can't handle silk perle. No matter how hard I try. Don't get me wrong; I love perle and I love shiny silk. Just not combined, please. I really hate the fact that silk perle is so slippery that it gets untwined faster than I can stitch. This elegant stuff was no exception :). The other two threads at the bottom of the picture are a cotton perle #8 and a stranded cotton by Threadworx. Not my colour combinations. Might have mentioned that before :). And then there was this super-handy pair of tiny precision tweezers. 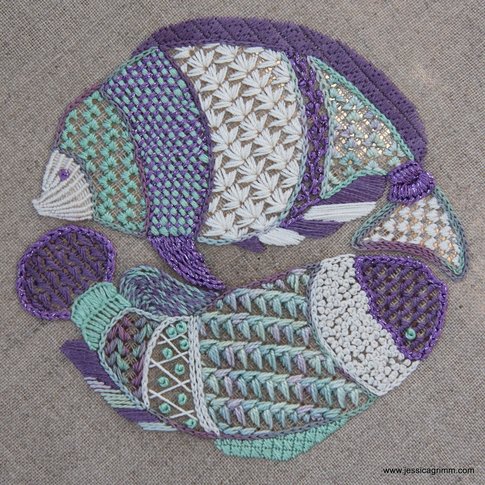 Surface embroidery and Schwalm whitework And this is what I stitched: two fish found in a colouring book by Millie Marotta. I used Zweigart 40ct Newcastle natural linen, a combination of surface stitches and drawn threadwork. In this case: Schwalm whitework embroidery. My aim with these pieces is not to stitch them to perfection. I do not make much of a plan before I thread my needle. Doodles, that's what I call them. Pleasant doodle embroidery. Do you do any doodling with needle and thread?
12 Comments
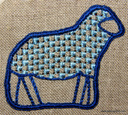
Many people visited the opening, with mulled wine and mince pies, of our Advent window yesterday. During the four weeks of Advent, each evening a decorated window is opened somewhere in Bad Bayersoien. Although refreshments are only served at openings, you can visit the windows until the 10th of January. 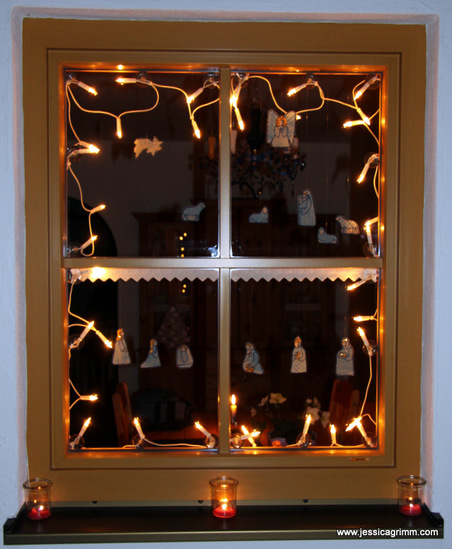 This year, my window also contains a star, two new sheep and an angel. I hope to add a few new figures each year. Ox, donkey and at least one camel for the Magi are next on my list. It was lovely to hear all the praise for my husband's designing skills and my stitching. 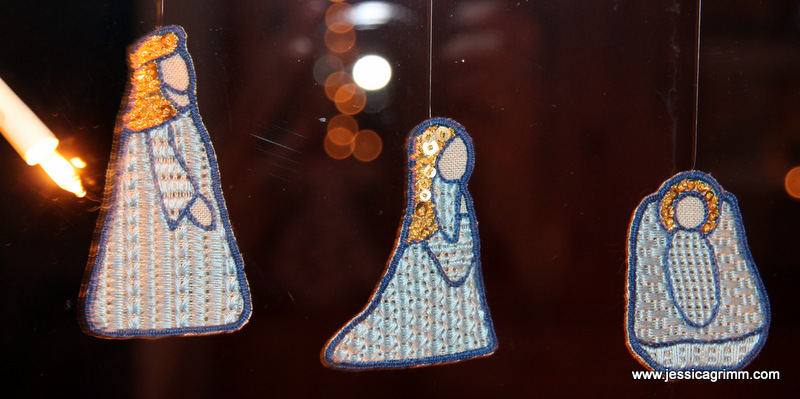 I apologise for the poor photo quality; the window is extremely difficult to capture. Above you can see the Holy Family stitched in a combination of traditional Schwalm white work techniques and goldwork embroidery. If you click 'Nativity' in the categories list on the right, you'll see past blog entries on the making of these figures. They are easy to stitch and the technique can be used to stitch a whole variety of figures. Easter Bunny window anyone? This will be my last blog entry for 2015. Don't worry, I'll be back in 2016! It has been a good year for me, my husband and our two dear cats. The later wracked a few things in the house and killed off a large proportion of the local fauna. Their raffinesse at combining mischief with looking adorable is unsurpassed. Me and my husband very much enjoy thinking up new embroidery designs. You will have the pleasure of seeing two new ones in the first blog post for 2016! This year I made new friends, both personal and through stitching. I very much enjoy the interaction with you, dear reader, through my blog, via email and when I teach. I treasure these pleasurable encounters. After all, blessed memories are the greatest treasure of all, don't you think? Merry Christmas & Happy New Year!
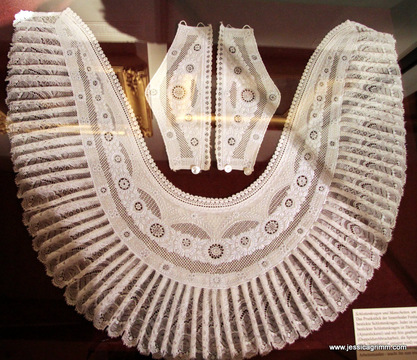
Last week, we examined the basis of Appenzell embroidery: padded satin stitch. This week, we'll have a closer look at other major components: Höhlen or drawn thread work, Lääteli or pulled thread work and Spetzlistiche or needle lace. 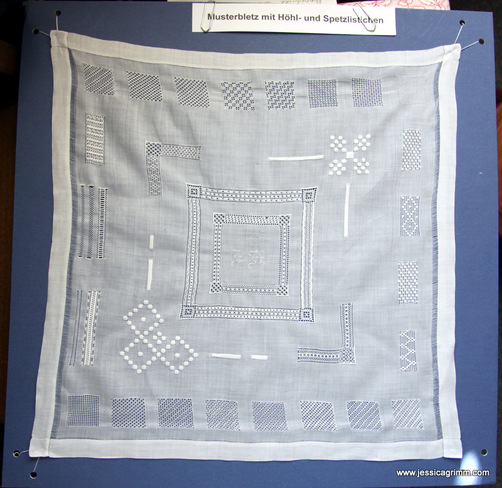 Appenzeller whitework sampler This sampler, made by Martha Ackermann and part of Verena Schiegg's collection, mainly shows pulled thread work. First, the outer line of the design area (in this case squares) is worked in padded satin stitch. Next, threads are taken out from the back to open up the fabric. For instance, every fourth vertical and horizontal thread is cut and taken out. This 'canvas' is now filled with stitches with a thread as fine as the fabric threads. 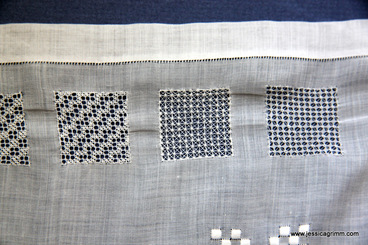 Appenzeller whitework sampler Here is a close up of some of the filling stitches. Today, only about twenty stitch patterns are still in use. However, the Appenzell Museum (well worth a visit!) has a sampler with 124 different patterns. Unfortunately, without taking it apart, it is impossible to tell how these were made. Some patterns are similar or equal to those used in Schwalm embroidery. You can find more on this whitework technique very suitable for beginners on Luzine Happel's blog. 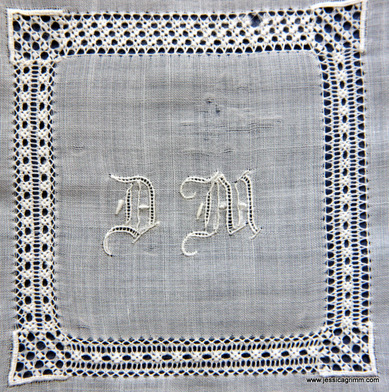 Appenzeller whitework sampler Do you see the ladder-like structures in the above monograms? These are called Lääteli and are a form of pulled thread work made with hem stitch. 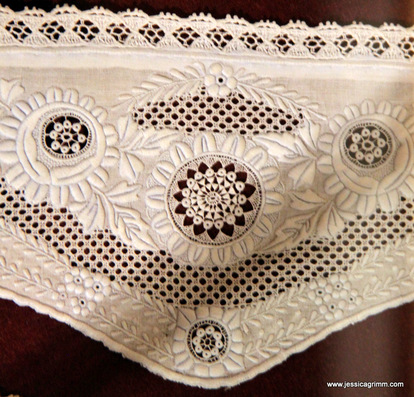 Appenzeller whitework cuff Finally, the creme de la creme of Appenzell embroidery is formed by the Spetzlistiche: very fine needle lace. See the filled roundels on the above cuff? That's the stuff. The outer line of the design element is worked in padded satin stitch. Then the fabric is cut away carefully. Buttonhole stitches are worked over the padded satin stitch to clean up the border. Now a piece of lace is formed by anchoring threads into the buttonhole stitches.
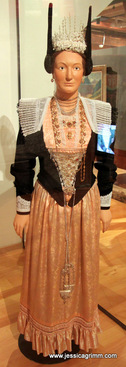
Nowadays, Appenzell embroidery can still be seen on the festive folk costumes of the region. Collar or Schlottechrage and cuffs are elaborately embroidered.
That's all for now folks. Back to packing the last bits needed for the show in Osnabrück at the end of the week. Hope to meet many of you there! 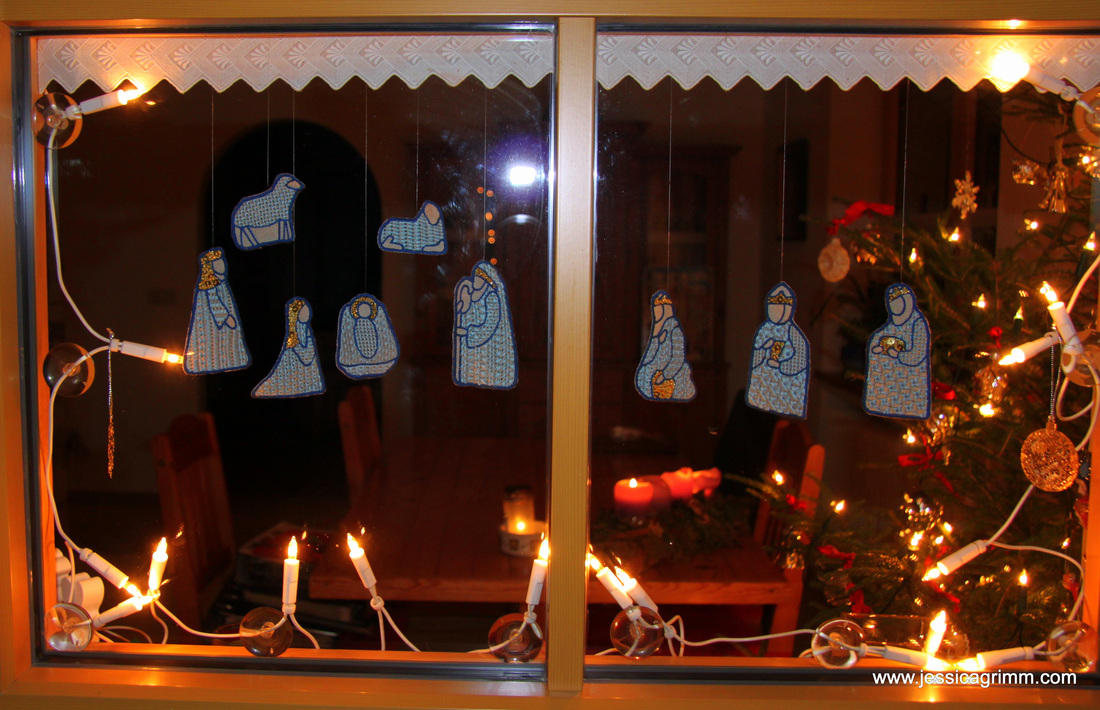 Wow, the year 2014 has flown by. Christmas is upon us and in a few days we welcome the year 2015. And what a year 2014 was! For me personally, it was such a relief after the downright shitty year 2013... This year saw a wish come true when I moved back to Germany. I love my new life in the quintecential Bavarian rural village. Can't wait to up the stakes in my vegetable plot for 2015 (Dear snails, you're warned!). In the past year, I made many new friends and I was fortunate to meet up with some very talented stitchers. Nadel & Faden in Osnabrück was a huge success for which I am very grateful. I worked on a number of lovely stitching projects of which the nativity scene above is the most recent. 2014 also saw the start of a new line of embroidery kits and workshops. I came into contact with the very creative bunch at ArtTextil in Dachau and learned a new thing or two during their workshops. And I set up my own profesional embroidery course in which currently three enthousiastic ladies have enroled. What will 2015 bring embroidery-wise? Well; quite a lot to be honest! There will be at least one more beetle embroidery kit to come out. I will hopefully make my debut as an embroidery tutor for ArtTextil. Me and my husband will man our stand at Nadel & Faden in september. And I will start stitching some larger projects pretty soon so I have something new to show in Osnabrück :). Closer to home, I will host a series of informal stitching workshops in the village. Recent years have seen a renewed interest in the embroidery on the traditional Bavarian costume. I am more than happy to share some insider tips and tricks and pick a few up along the way too! Let's move on to the thank-yous. A huge thank you to all my customers, old and new, who put bread on my table. Please keep up the good work! And another huge thank you to all those people who supported me through the past years with their kind comments on my work. You have no idea how much that is needed every now and then. Please, keep them coming in the new year too! Last but not least, I would like to thank my dear husband for making it all possible. I could not do what I love and do best without his support. Thank you so very much! Merry Christmas & a happy New Year!
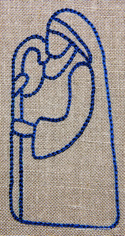
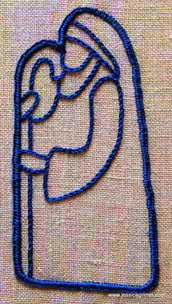
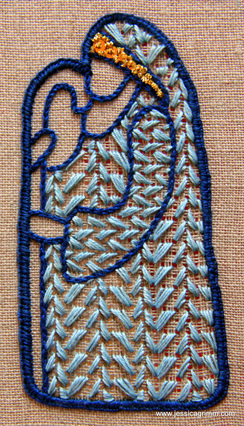
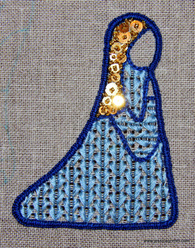
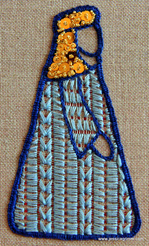
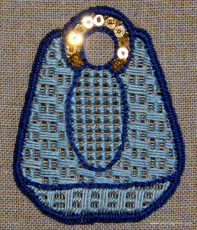
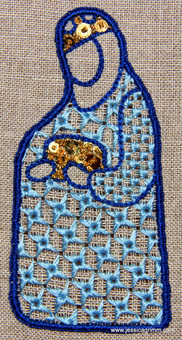
You have seen my lovely nativity figures in the previous post and now you want to make your own? Fantastic! Here are the general instructions. I am using 36ct natural linen even weave from Zweigart as my embroidery fabric. This guarantuees that I get a nice smooth and strong edge for my figures. And once the threads are cut, my embroidery grid is fairly fine so that the filling patterns look like lace. Using an aqua trick marker and a light box, I transferred the patterns onto the fabric. The embroidery is executed with one strand of Anchor coton a broder #25 in navy blue (224) and light blue (237). In order to keep both hands free and my work taut, I am working using a seat frame.
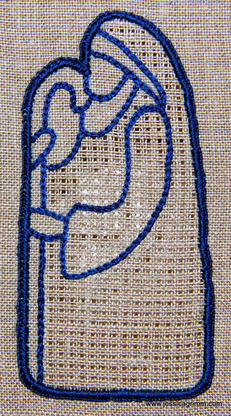
Now it is time to cut out the good shepherd. It is best not to aim for a close cut end result immediately. Cut him out a bit bigger and get closer to the buttonhole edge bit by bit. Again, don't panic if you cut a buttonhole stitch. Keep calm and put some white glue on it. Let it dry and nine out of ten, you don't need to repair it any further by placing a few fresh buttonhole stitches on top. I don't wash my finished figures, but I spray them with a little water to get rid of the aqua trick marker. I hope you liked my blogpost on the making of a Schwalm shepherd. Have you tried anything similar? Please share it below with us! In the future, I would love to write a post on the work of my readers. So please don't be shy! My next blogpost will feature Christmas wishes and a picture of the finished result of my nativity scene.
The idea for my stitched nativity figures was born after seeing Christmas decorations over on Luzine Happel's website. She is a wonderful Schwalm embroideress and scholar. The names for the used filling stitches in each particular figure were taken from her books: Limetrosen 1 & 2 and Wickelstiche 1. In my opinion, Luzine's books are a must have for a well sorted embroidery library. You can order her books through her website. English and French versions are available (how cool is that?!).
I hope you liked my first blog post. In the next one, we'll take a shepherd as example to show you how these figures are embroidered. Until then: Happy Stitching!
P.S. Any comments are greatly appriciated :)! |

Want to keep up with my embroidery adventures? Sign up for my weekly Newsletter to get notified of new blogs, courses and workshops!
Liked my blog? Please consider making a donation or becoming a Patron so that I can keep up the good work and my blog ad-free!

Categories
All
Archives
July 2024
|


 RSS Feed
Contact: info(at)jessicagrimm.com
Copyright Dr Jessica M. Grimm - Mandlweg 3, 82488 Ettal, Deutschland - +49(0)8822 2782219 (Monday, Tuesday, Friday & Saturday 9.00-17.00 CET)
Impressum - Legal Notice - Datenschutzerklärung - Privacy Policy - Webshop ABG - Widerrufsrecht - Disclaimer
Copyright Dr Jessica M. Grimm - Mandlweg 3, 82488 Ettal, Deutschland - +49(0)8822 2782219 (Monday, Tuesday, Friday & Saturday 9.00-17.00 CET)
Impressum - Legal Notice - Datenschutzerklärung - Privacy Policy - Webshop ABG - Widerrufsrecht - Disclaimer