|
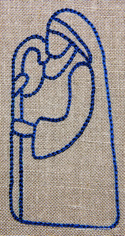
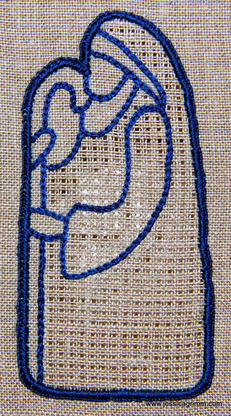
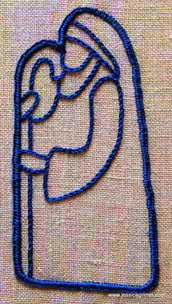
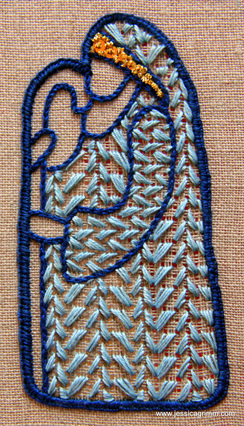
You have seen my lovely nativity figures in the previous post and now you want to make your own? Fantastic! Here are the general instructions. I am using 36ct natural linen even weave from Zweigart as my embroidery fabric. This guarantuees that I get a nice smooth and strong edge for my figures. And once the threads are cut, my embroidery grid is fairly fine so that the filling patterns look like lace. Using an aqua trick marker and a light box, I transferred the patterns onto the fabric. The embroidery is executed with one strand of Anchor coton a broder #25 in navy blue (224) and light blue (237). In order to keep both hands free and my work taut, I am working using a seat frame.
Now it is time to cut out the good shepherd. It is best not to aim for a close cut end result immediately. Cut him out a bit bigger and get closer to the buttonhole edge bit by bit. Again, don't panic if you cut a buttonhole stitch. Keep calm and put some white glue on it. Let it dry and nine out of ten, you don't need to repair it any further by placing a few fresh buttonhole stitches on top. I don't wash my finished figures, but I spray them with a little water to get rid of the aqua trick marker. I hope you liked my blogpost on the making of a Schwalm shepherd. Have you tried anything similar? Please share it below with us! In the future, I would love to write a post on the work of my readers. So please don't be shy! My next blogpost will feature Christmas wishes and a picture of the finished result of my nativity scene.
0 Comments
Your comment will be posted after it is approved.
Leave a Reply. |
Want to keep up with my embroidery adventures? Sign up for my weekly Newsletter to get notified of new blogs, courses and workshops!
Liked my blog? Please consider making a donation or becoming a Patron so that I can keep up the good work and my blog ad-free!
Categories
All
Archives
July 2024
|
Contact: info(at)jessicagrimm.com
Copyright Dr Jessica M. Grimm - Mandlweg 3, 82488 Ettal, Deutschland - +49(0)8822 2782219 (Monday, Tuesday, Friday & Saturday 9.00-17.00 CET)
Impressum - Legal Notice - Datenschutzerklärung - Privacy Policy - Webshop ABG - Widerrufsrecht - Disclaimer
Copyright Dr Jessica M. Grimm - Mandlweg 3, 82488 Ettal, Deutschland - +49(0)8822 2782219 (Monday, Tuesday, Friday & Saturday 9.00-17.00 CET)
Impressum - Legal Notice - Datenschutzerklärung - Privacy Policy - Webshop ABG - Widerrufsrecht - Disclaimer


 RSS Feed