|
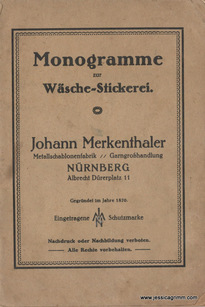
A few years ago, I became fascinated by the sheet metal monograms for whitework embroidery. At needlework events I bought my first ones featuring my own monogram. That's how I came across the brand name Johann Merkenthaler. From 1870, Johann had a small stencil business in Nürnberg. He wasn't very happy with the quality of the stencils that were already on the market. Later, Fritz Merkenthaler inherits the company and, after many failures, he becomes the first one to produce the metal sheet stencils mechanically. His son Karl Merkenthaler enters the family business and it really prospers. Until 1961, the Merkenthaler Schablonenfabrik was situated on the Albrecht Dürer Platz 11 in Nürnberg. Today, there's still a Johann Merkenthaler near Nürnberg selling stencils for painting and signing documents.
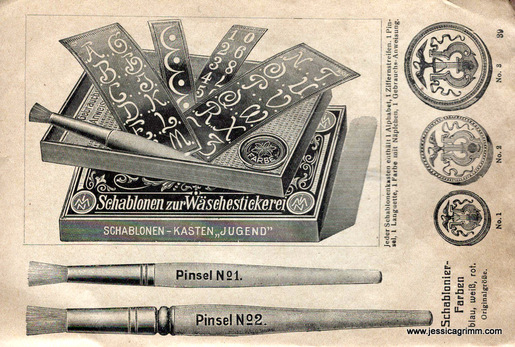
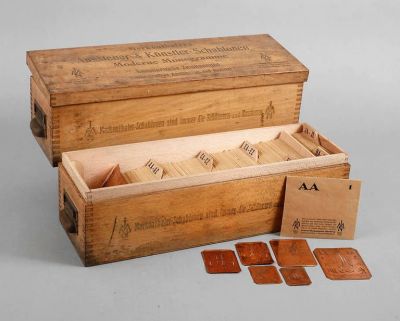
My internet research led me to a catalogue published after 1911* by Johann Merkenthaler stencils (click on the icon above to download a PDF version). It is a lovely little gem! Not only does it feature all the different monogram stencils available from Merkenthaler, it gives valuable pieces of advice to the embroideress. She should only buy the best materials available on the market or else her embroidery will look shoddy. Now that's a sound piece of advice still holding up today. On one of the last pages, a picture of how the stencils were offered to the costumers can be found. The most common little box called 'Jugend' (youth or is it short for Jugendstil?) contained one alphabet sheet, one sheet of numbers, a brush, one sheet with Languette (to produce sculptured edges) and one small cup of stencil paint. The later was available in three colours: blue, white or red. From the paint remains on the stencils I have, I've got the impression that blue was used the most. It does contrast nicely with the white linens to be monogrammed. Larger, more elaborate or entwined monograms were sold as single sheets. They came in these beautiful wooden boxes stored alphabetically in special envelopes. The costumer could pick the monogram needed. How I would love to be able to afford one of these!
In a future blog post you will be able to read all about my experiments involving these charming stencils. * Thanks to Florian Hardwig for dating the typeface on the cover of the catalogue!
5 Comments
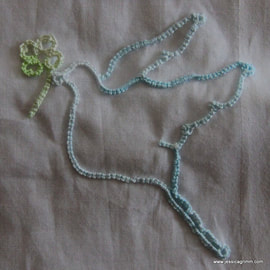
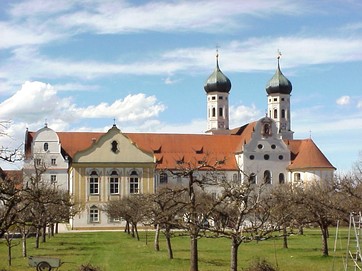
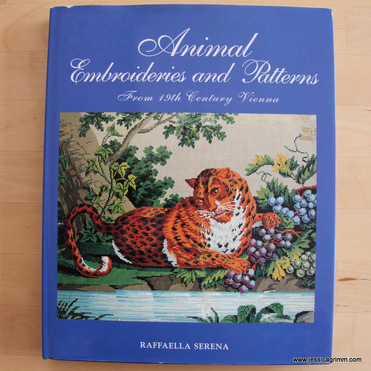
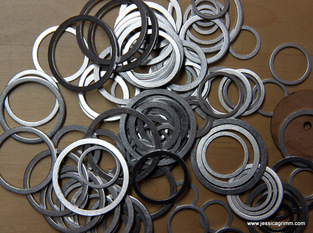
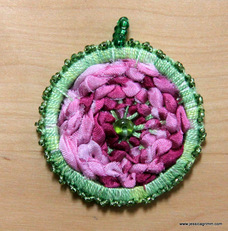
The weekend was full of beautiful textiles and needlework. It all started with me teaching the goldwork pomgranate workshop on Saturday. My friend and fellow needle workaholic Mari-jan traveled all the way from the Netherlands to attend. Together with 'locals' Monika and Sabine we had a really great time together. Mari-jan even gave me a beautiful handkerchief. The charming dove and clover are made of tatting lace with a variegated thread. Very elegant, don't you think? On Sunday, we visited the textile fair at Benediktbeuern abbey. As you can imagine, it is a beautiful location for such an event. Even the rain, didn't bother us one bit as most of the participants had built up their stands inside one of the large agricultural buildings on the site. It is a really 'high-end-of-the-market' textile fair for people with elastic wallets. Beautiful one of a kind pieces of clothing are sold. Clever colourful accessories and good sturdy hand-made shoes and boots. But then there is also a stand selling all sorts of needlework books: Antiquariat Held. Both new and second-hand. I've bought a book on berlin wool work patterns by Raffaella Serena. They will come in handy when I'll need to design another Bavarian set of braces. And Mari-jan and I became really good costumers at the stand of the Posamentenknopf Manufaktur. This bubbly young couple sold these 'washers' to turn into Dorset lace buttons and wooden 'raws' to turn into possamenterie buttons. We both have attended several workshops on these techniques and felt our creative juices starting to flow. So much so that I woke in the middle of the night with a new idea. Yeah, my brain is really good when I am asleep. So I played a little with my washers, silk ribbon and pearls this morning. The idea isn't ripe to go forth in the world and be multiplied, but I just needed to make a first proto-type. I will now let it sit at the back of my mind and mull it over a bit before I'll attempt a second prototype. And what will you be stitching this week?
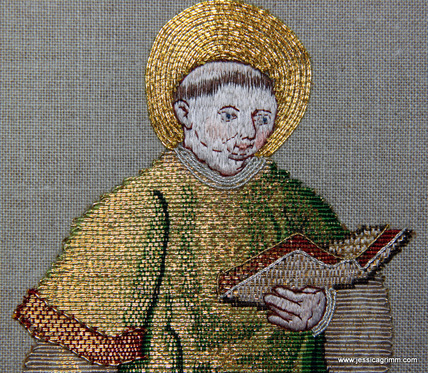
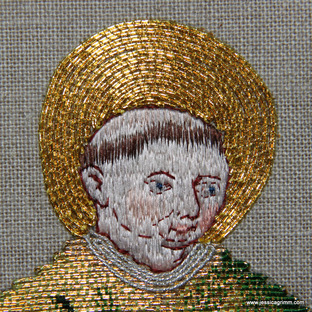
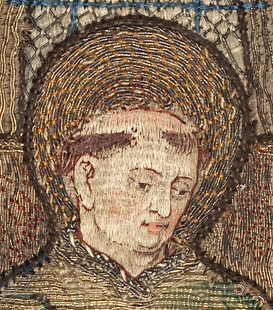
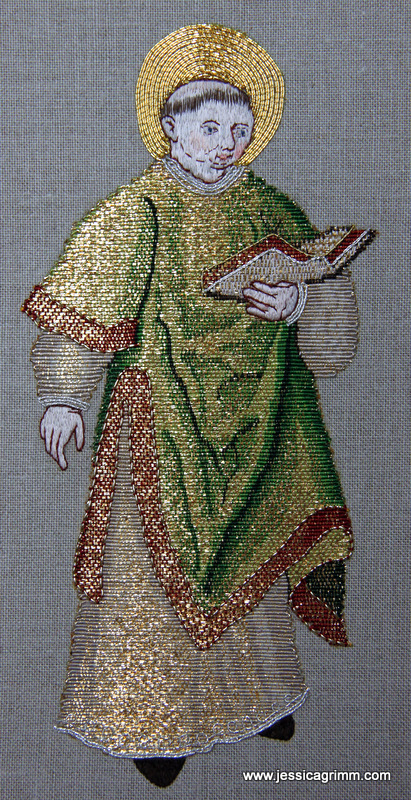
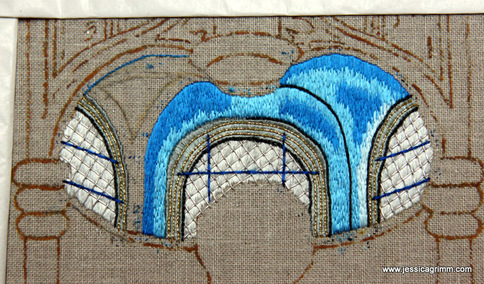
The most daunting task about the whole St. Laurence goldwork project, are his face and his hands. You don't want to end up with a deacon with an 'oh-no-it's-Sunday-again' look. Equally, you don't want him to have a size hands not matching up with the rest of his body. And then there is the whole technical side to the face and the hands, as well. Let's start with a detailed picture of his face and the 'problem' hand holding the book. The hand holding the book is actually silk shading over and through the laid gold threads forming his or nue clothing. It soon turned out that just leaving them un-couched and then covering them with the silk shading, didn't work. The gold threads just started to roll away, gaping and even affecting the nice or nue of the book and the green dalmatic. Time for a 21st century trick: linen batiste, bondaweb and glue. Yes, you read that correctly, I used glue. Only a tiny amount :). I traced the hand onto the bondaweb, ironed it onto the linen batiste, peeled the paper off and glued it onto the gold threads. From there on, silk shading as usual. I used two shades of skin tone and a dark ox blood red for the detailing. Faces. Probably the hardest thing in embroidery, or indeed any other art form. As you can see from the detailed pictures above, my face is totally different from the original one. For starters, I used a different technique: silk shading, as I am most familiar with this way of thread painting. The original piece uses encroaching satin stitch in horizontal rows. Both faces are similar in size and use the same amount of shades. The detailing in the original is absolutely breath taking. My eye-sight is still very good, but I am not able to stitch this amount of detail without magnification. I suspect, my medieval counterpart must have needed the same. That said, I was able to see the details when I removed my contact lenses. Just stitching with your nose almost touching the fabric, is not much fun. Next problem: my linen is too coarse. Adding so many tiny stitches in such cramped space, needs a tightly woven ground fabric. Also, the prick-and-pounce transfer system does not allow for such detailed facial features to be transferred accurately. That's why Laurence ended up with a completely different shaped head in the first place. How would I circumnavigate this problem in the future? I would use the same trick as I used for the hand holding the book. First carefully transfer the face onto the linen batiste and then glue in place. Add a few tiny tacking stitches to make it stay put and then start the silk shading. It would definitely improve the result. However, I get the suspicion that stitching the face was a specialised step in medieval times. Done by a professional 'face-only' stitcher. Research has found that the figure and the background were stitched by two different people. And I think we can add a third one: the face stitcher. And this is what Laurence looks like now. It is impossible to capture the movement of the figure in a photograph. These or nue saints must have looked magical on the priest's chasuble in the candle light. Almost as if they were alive or floating on the background. Stitching the details with all sorts of gold and silver threads over the or nue, was a treat. This step was so much fun as it really put some dimensionality to his robes. And it wasn't hard at all to stitch through the dense or nue. And not having to plunge your threads, but simply tightly over sew them, is a real time saver too! A big thank-you to my medieval counterparts for pointing this out. I have now moved on to stitching the background. These are the windows and dome above Laurence's head. I particularly like the layered way of working. Putting in the laid work (grey silk) for the windows first. Put the trellis on top using silver passing thread and anchoring the crossing points with silk. Then stitch the window's stone work in dark grey silk using satin stitch. Cover the line between glass and stone work with a tiny row of chain stitch in anthracite silk. Then add the gold check thread to the stone work and finally couch the dark blue silk bars in place. A similar thing will happen to the blue ceiling. It looks quite 'spotty' for now, but that will all be over in a couple more hours of stitching.
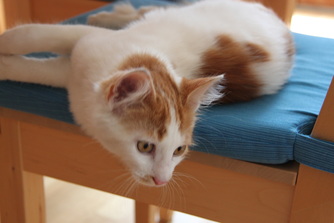
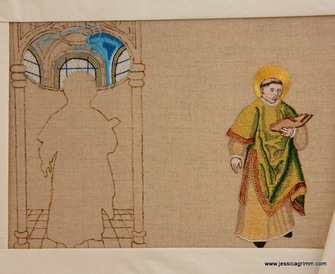
After the window area, I will continue with the tiled floor. Before tackling the cloth of gold covering most of the area behind Laurence. But that's stuff for a future blog post. Hello again! I hope you had a wonderful summer with lots of nice, typical holiday activities. I should have had one too. Alas, life came in between. Some of you know that our village lost its village shop earlier this year. Since then, we have been trying hard to start up a village shop cooperative. Although I have been involved from the start, I now hold a more senior position which is naturally involved with more work. But I don't mind at all! It is really important that we get our village shop back. Not only for us locals, but also for our guests. And indeed my students who are on my week-long courses. Self-catering apartments are great, but only work when you can buy your groceries reasonably locally. However, I hope we are nearing completion of the bureaucratic side of things. For the time being however, writing up new embroidery kits and workshops take a backseat. And then this entered our lives: His name is Rocky. Looks more like Pebbles to me... He should live with his parents at #79 not with us at #79a. However, he really likes Timmie and Sammie. They don't like him one bit. But he is unnerved and keeps coming. In the mornings, I am greeted by three cats waiting for their food and then three cats retire to my bed. By the way, he loves embroidery too. Apparently, it tastes good. Didn't I do any embroidery? Of course I did! This is current progress on Saint Laurence. More on the technical hiccups in a future post. I also visited Appenzell again to learn more of their famous fine whitework. That I'll keep for a future post too. And today, Monika started on her crewelwork piece. Not a traditional one, but it is going to be beautiful none the less.
And in the back of my mind, new workshops and kits are taking shape. At least two goldwork kits and a series of simple 'not so white' whitework designs. And I am planning a nice online stitch along. So, the bottom line is: keep coming back to this blog! |
Want to keep up with my embroidery adventures? Sign up for my weekly Newsletter to get notified of new blogs, courses and workshops!
Liked my blog? Please consider making a donation or becoming a Patron so that I can keep up the good work and my blog ad-free!
Categories
All
Archives
July 2024
|
||||||||
Contact: info(at)jessicagrimm.com
Copyright Dr Jessica M. Grimm - Mandlweg 3, 82488 Ettal, Deutschland - +49(0)8822 2782219 (Monday, Tuesday, Friday & Saturday 9.00-17.00 CET)
Impressum - Legal Notice - Datenschutzerklärung - Privacy Policy - Webshop ABG - Widerrufsrecht - Disclaimer
Copyright Dr Jessica M. Grimm - Mandlweg 3, 82488 Ettal, Deutschland - +49(0)8822 2782219 (Monday, Tuesday, Friday & Saturday 9.00-17.00 CET)
Impressum - Legal Notice - Datenschutzerklärung - Privacy Policy - Webshop ABG - Widerrufsrecht - Disclaimer



 RSS Feed