|
When I saw a picture of the beaded easter egg on the Fire Poppies website, I was immediately charmed by the pretty design. I had never seen anything like it. When my kit arrived, I found out that the company who makes them is called Riolis from Russia. The actual designer is called Anna Petrosyan. Pardon my ignorance, but I had never heard of either. I do however know that embroidery is huge in Russia and that there are many talented designers living there. I just wished there wasn't such a language barrier! 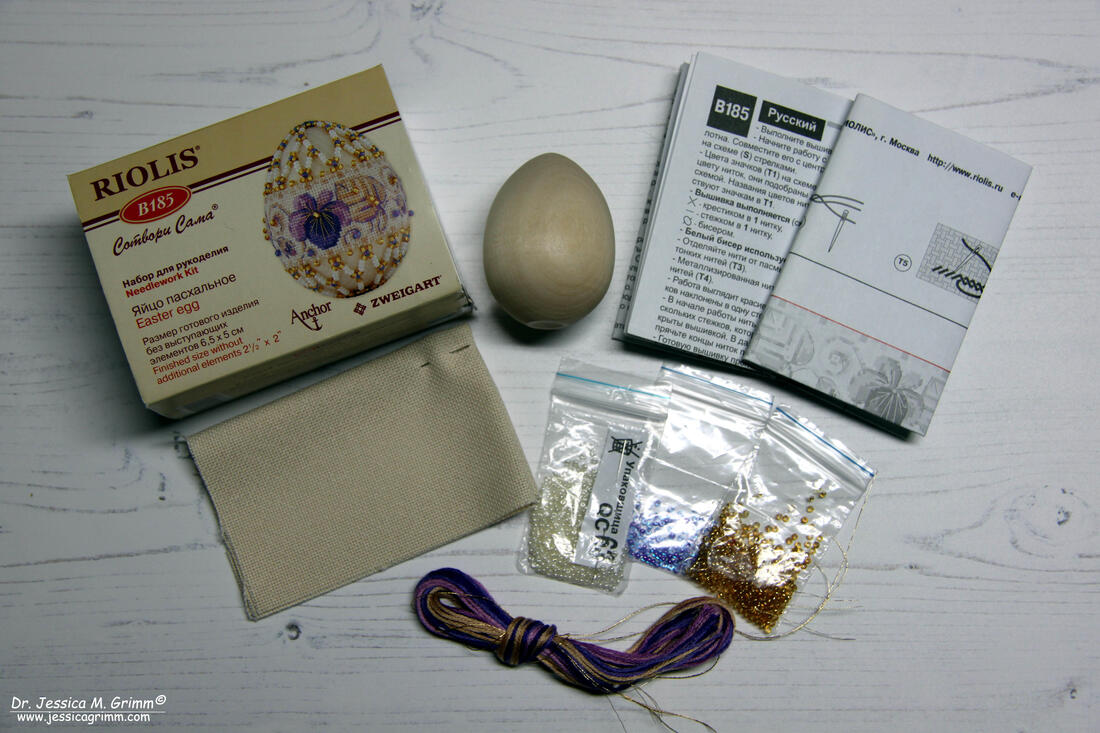 Easter egg kit by Riolis embroidery My easter egg kit came with most of the materials needed to finish the design. I just needed to add sewing thread and beading thread. Fabric, floss, beads, needles and wooden egg were all included. And everything was very good quality too. Fabric came from Zweigart and Anchor supplied the floss. The instructions were very good too. With clear diagrams and an adequate translation into English. Not perfect, but very doable if you are anything other than an absolute beginner. 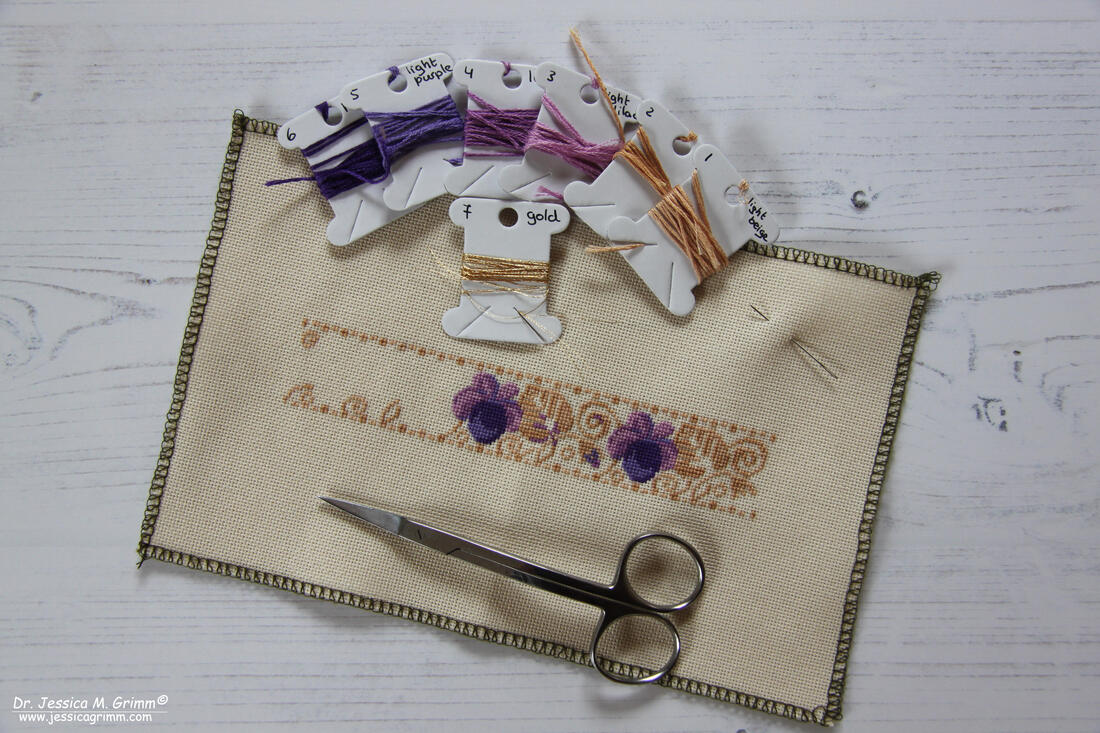 Easter egg kit by Riolis embroidery As always, I started by locking my fabric to prevent fraying. I also wrapped my floss onto some paper bobbins. The actual embroidery was very straight forward working with one strand of floss over one fabric thread (Zweigart Lugana). This explains why the finished embroidery looks so very refined. 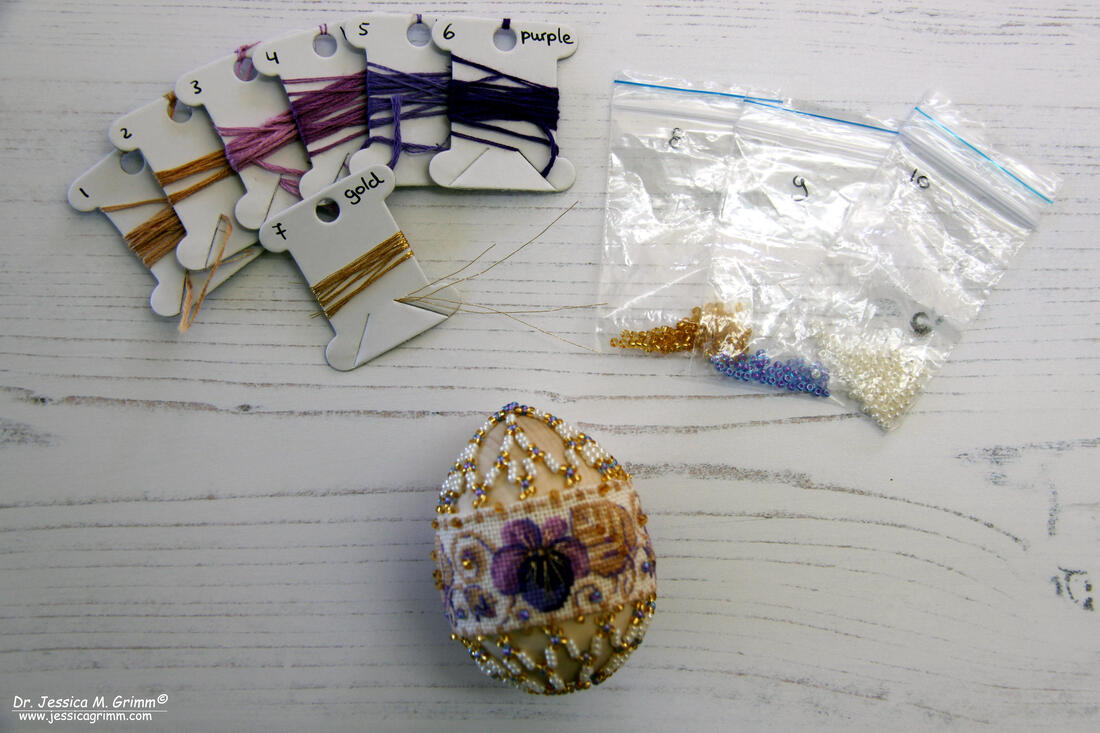 Easter egg kit by Riolis embroidery When it came to the construction of the actual egg, I had some minor difficulties. The translation isn't very good here. When you follow it to the letter, you will find that one of your seams shifts when you pull your finished embroidery over the wooden egg. The upper and lower seams are only fastened at the central seam at the back. If I were to stitch another one of these eggs, I would prevent this by sticking the seams to the back of my embroidery with the help of some Vlisofix/Bondaweb. Or, more likely, I would only stitch half cross-stitches for the border. When turning the seams, I would fasten them by finishing the border cross-stitches (i.e. put the other half cross-stitch in). This would secure the seams perfectly and would prevent shifting. The actual beading was great fun! I certainly learned a new skill. And I am very pleased with the result. Not as perfect as the pictures shown in the kit, but pretty good for a first attempt. And being an embroidery designer, I am already thinking of improving the finishing on these eggs (or Christmas baubles?). How about using linen banding? That would eliminate the whole drama with the seams :). If you would like to stitch your own Riolis easter egg, then please ask Google. The kit was released in 2014 and has sold out on the Fire Poppies' website. The design number is 'B185'. However, I hope my review has shown that embroidery kits from Riolis are high-quality, contain plenty of materials and are well worth a try! But beware: I have now stitched another egg in this series (the one with the red flowers) and here the measurements are all wrong. The design is not long enough to wrap around the egg. DO NOT follow the size recommendations for the seam allowence as you will end up with a piece of cloth that is too short. Instead place your finished embroidery on the egg and take your seam allowance from there. P.S. Did you like this blog article? Did you learn something new? When yes, then please consider making a small donation. Visiting museums and doing research inevitably costs money. Supporting me and my research is much appreciated ❤!
12 Comments
|

Want to keep up with my embroidery adventures? Sign up for my weekly Newsletter to get notified of new blogs, courses and workshops!
Liked my blog? Please consider making a donation or becoming a Patron so that I can keep up the good work and my blog ad-free!

Categories
All
Archives
July 2024
|

 RSS Feed
Contact: info(at)jessicagrimm.com
Copyright Dr Jessica M. Grimm - Mandlweg 3, 82488 Ettal, Deutschland - +49(0)8822 2782219 (Monday, Tuesday, Friday & Saturday 9.00-17.00 CET)
Impressum - Legal Notice - Datenschutzerklärung - Privacy Policy - Webshop ABG - Widerrufsrecht - Disclaimer
Copyright Dr Jessica M. Grimm - Mandlweg 3, 82488 Ettal, Deutschland - +49(0)8822 2782219 (Monday, Tuesday, Friday & Saturday 9.00-17.00 CET)
Impressum - Legal Notice - Datenschutzerklärung - Privacy Policy - Webshop ABG - Widerrufsrecht - Disclaimer