|
The lovely Sarah from LoveCrafts sent me some embroidery threads to play with. And since I am a self-proclaimed thread-addict, I was up for the challenge. Browsing the LoveCafts website, I came across the beautiful hand-dyed stranded cotton by the Roumanian brand Valdani. Now I had heard that name before but never seen these threads, let alone played with them. So I picked some reds and pinks as I already had a design in mind: a Millie Marotta crab. You see, not only do I love her designs, but I and my husband happen to be Cancerians. 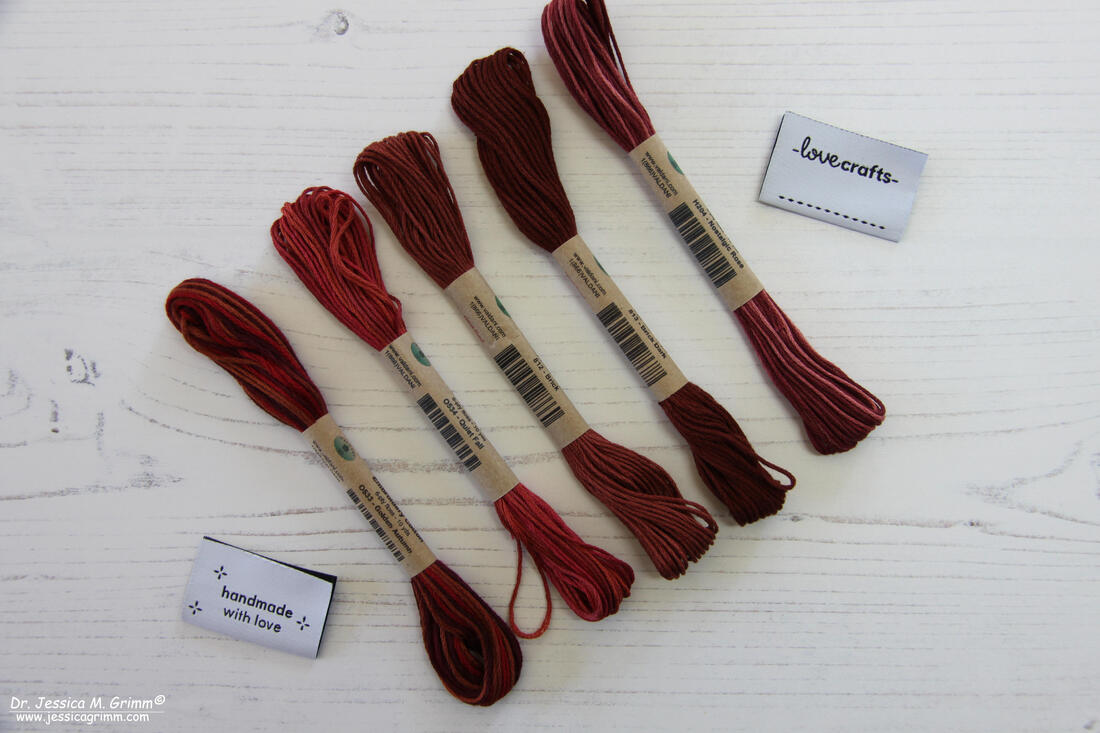 Valdani stranded cotton These are the lovely variegated threads I picked: 0533 Golden Autumn, 0534 Quiet Fall, 812 Brick, 813 Brick Dark and H204 Nostalgic Rose. Even the two 'bricks' are ever so subtly variegated. These would be perfect for those of you who recreate historical samplers. And what I really like about theses skeins? The wrapper is made of recycled paper. Not those horrible plastic wrappers the more modern DMC skeins have. We all need to do our bit to preserve our planet and I am glad Valdani does their bit. 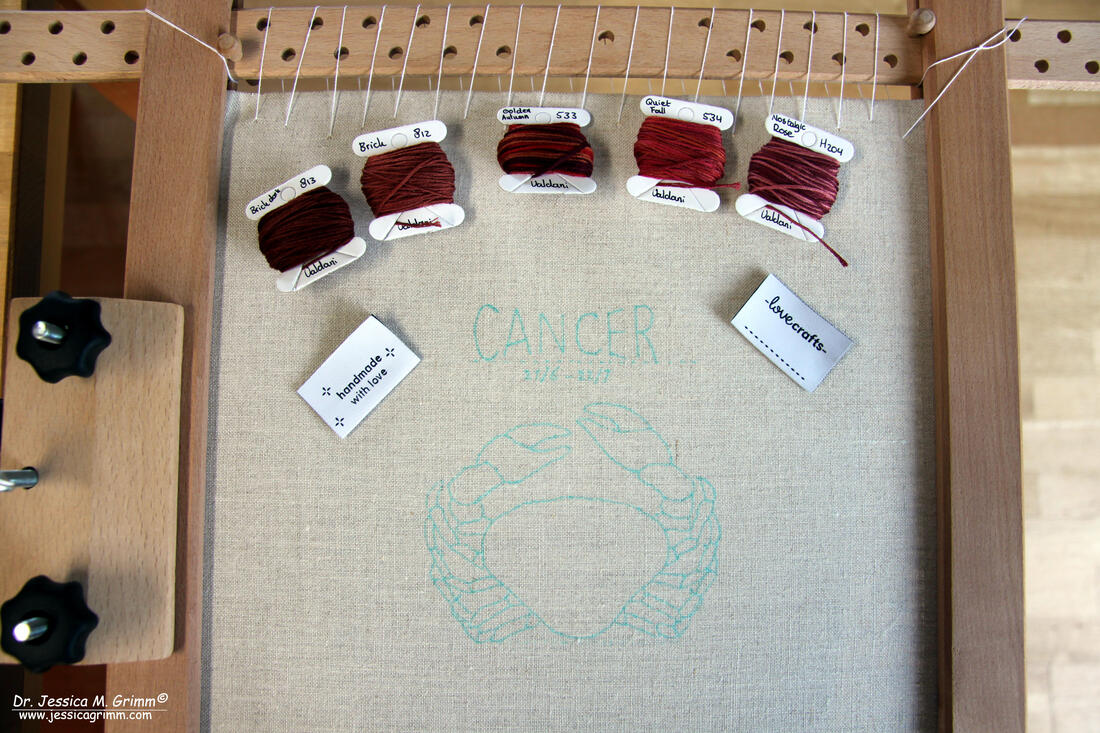 Valdani stranded cotton So how does one go from the intricate Millie Marotta drawing to a stitch-able pattern? In this case, as I approach the whole project as a doodle rather than a thoroughly pre-planned affair, I simply copied the outlines of the crab. I decided upon the size of the project (I like to use a particular brand of frames, so I decided on 14 x 14 cm) and I added some lettering. Apart from wanting to use some Schwalm embroidery on the main body of the crab and simple surface embroidery for all the other parts, nothing was planned. The combination of Schwalm and surface embroidery determined the fabric I was going to use: not too fine, as that would make the cutting of threads for the Schwalm too much of a challenge, but not too coarse either so as not to hamper the surface embroidery. I settled for 40 ct (16 threads/centimetre) Zweigart Newcastle natural coloured linen. As the label says that the Valdani threads are colourfast, I used an aqua-trick marker for the pattern transfer. And here are my stitching steps: - lettering 'Cancer' chain stitch with three strands Brick Dark - lettering dates simple backstitch with two strands Brick - outline body of the crab in the classic Schwalm way of doing things: chain stitch with three strands of Quiet Fall followed by coral stitch with three strands of Quiet Fall - preparing the grid for the Schwalm filling pattern by cutting out every fourth fabric thread in both directions - filling the grid with the Schwalm filling pattern 'Pfauenauge' (from Limetrosen I by Luzine Happel) using two strands of Quiet Fall. I've picked this particular pattern as it mimics the shape of the crab's body - filling the first segment of the legs with satin stitch using two strands of Brick - the second segment is filled with fly stitch using two strands of Quiet Fall - the third segment is filled with Cretan stitch using two strands of Golden Autumn - the fourth segment on the lower legs is filled with Van Dyke stitch using two strands of Quiet Fall - the claws were filled with chain stitch using two strands of Nostalgic Rose - at this point, I realised that the bottom parts of the upper claws would lend itself well to being filled with Schwalm embroidery too - again I made sure that the Schwalm filling pattern resembled the shape I was filling: 'Rippen nach links' and 'Rippen nach rechts'. I used two strands of Nostalgic Rose 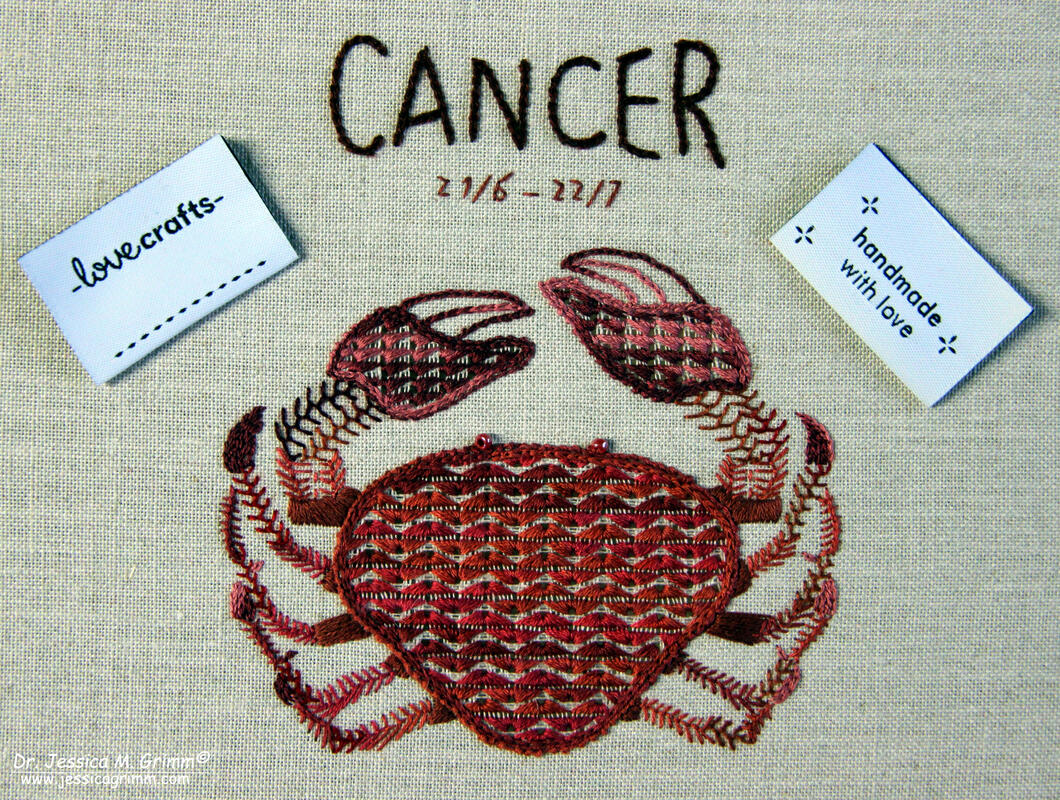 Schwalm embroidery made with Valdani stranded cotton Behold the result: I added two matching beads for the crab's eyes. So what do I think of Valdani stranded cotton? Firstly, I really like the colours of these hand-dyed variegated threads. Nostalgic Rose and Quiet Fall were my favourites. Secondly, I love the more environmentally friendly packaging compared with other brands. Thirdly, each skein holds 10 yards consisting of six strands. That's over a meter more than DMC or Anchor :).
Any disadvantages? Unfortunately, yes. I have found that the single strands of the stranded cotton are a bit more irregular and a bit fuzzier than those of either DMC or Anchor. This was especially noticeable with the darker colours: Brick Dark and Golden Autumn. Although I switched to a bigger needle, the appearance of my stitching is slightly fuzzy. This becomes especially noticeable when you compare the chain stitch + coral stitch edge around the Schwalm filling of the crab's main body. The stitches look dull on the edge, but there is a nice sheen on the filling stitch. As the filling stitch is worked in a grid, friction is much less and the thread keeps its sheen. Furthermore, you definitely can't re-use a thread when you made a mistake and stitches needed to come out. The thread will shred. What are your experiences with Valdani stranded cotton? Have you used other Valdani threads? I've seen that they do perle and silks as well. How do they compare to the leading brands? Do let me know in the comments below! Once again a huge thank-you to the lovely people of LoveCrafts.com who were kind enough to let me play with the Valdani stranded cotton! Be sure to check out their website for lots of embroidery threads, embroidery kits and amazing free inspiration.
7 Comments
When I saw a picture of the beaded easter egg on the Fire Poppies website, I was immediately charmed by the pretty design. I had never seen anything like it. When my kit arrived, I found out that the company who makes them is called Riolis from Russia. The actual designer is called Anna Petrosyan. Pardon my ignorance, but I had never heard of either. I do however know that embroidery is huge in Russia and that there are many talented designers living there. I just wished there wasn't such a language barrier! 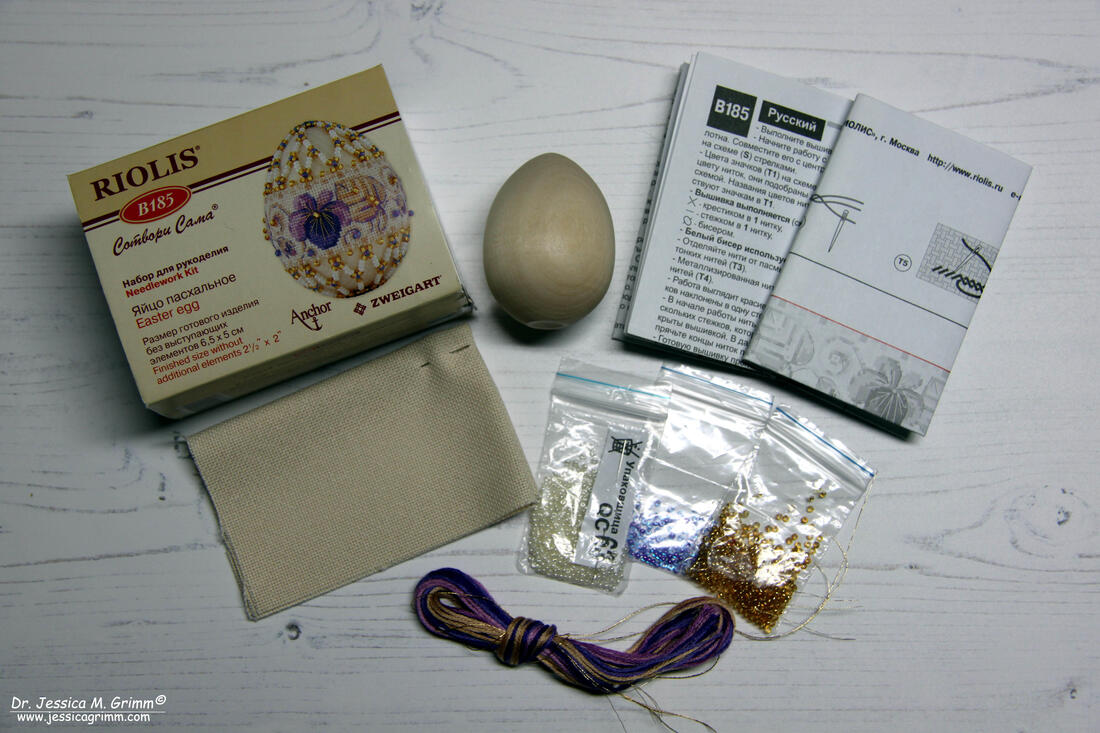 Easter egg kit by Riolis embroidery My easter egg kit came with most of the materials needed to finish the design. I just needed to add sewing thread and beading thread. Fabric, floss, beads, needles and wooden egg were all included. And everything was very good quality too. Fabric came from Zweigart and Anchor supplied the floss. The instructions were very good too. With clear diagrams and an adequate translation into English. Not perfect, but very doable if you are anything other than an absolute beginner. 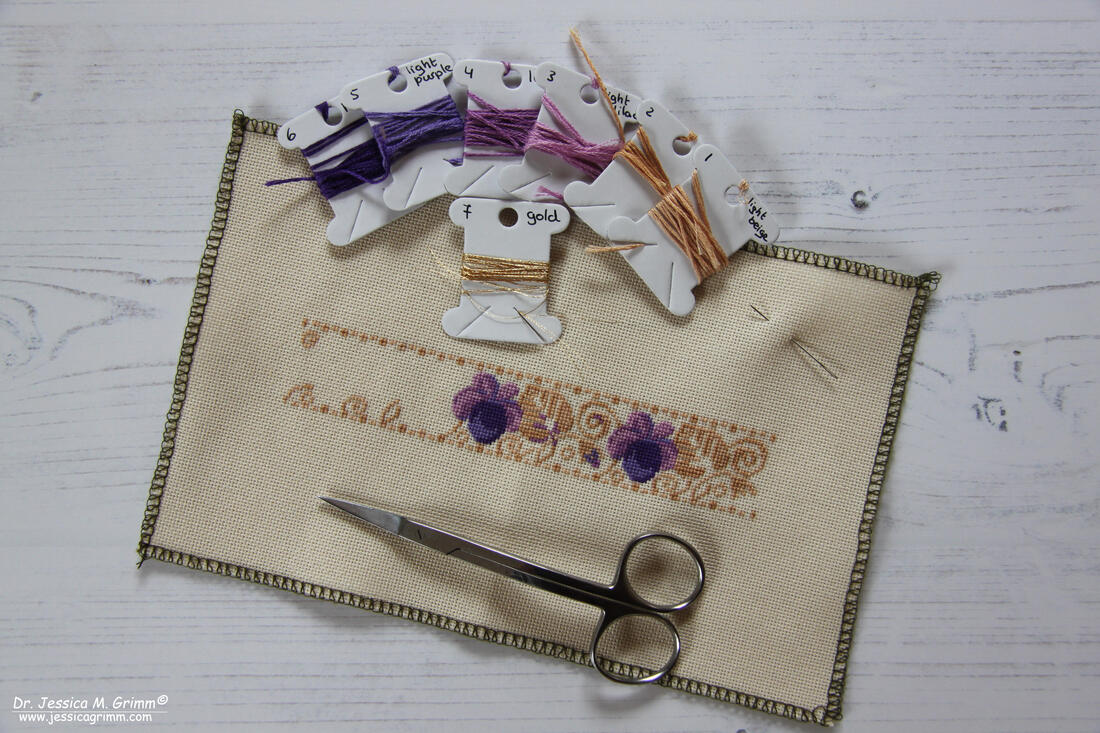 Easter egg kit by Riolis embroidery As always, I started by locking my fabric to prevent fraying. I also wrapped my floss onto some paper bobbins. The actual embroidery was very straight forward working with one strand of floss over one fabric thread (Zweigart Lugana). This explains why the finished embroidery looks so very refined. 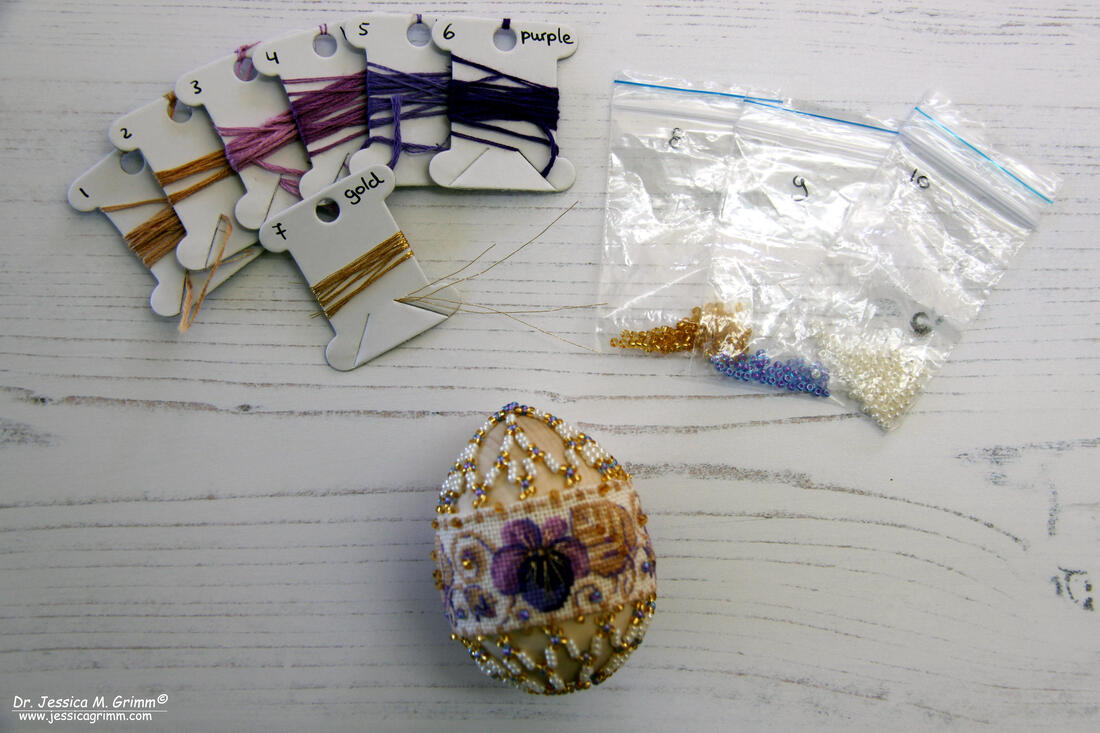 Easter egg kit by Riolis embroidery When it came to the construction of the actual egg, I had some minor difficulties. The translation isn't very good here. When you follow it to the letter, you will find that one of your seams shifts when you pull your finished embroidery over the wooden egg. The upper and lower seams are only fastened at the central seam at the back. If I were to stitch another one of these eggs, I would prevent this by sticking the seams to the back of my embroidery with the help of some Vlisofix/Bondaweb. Or, more likely, I would only stitch half cross-stitches for the border. When turning the seams, I would fasten them by finishing the border cross-stitches (i.e. put the other half cross-stitch in). This would secure the seams perfectly and would prevent shifting. The actual beading was great fun! I certainly learned a new skill. And I am very pleased with the result. Not as perfect as the pictures shown in the kit, but pretty good for a first attempt. And being an embroidery designer, I am already thinking of improving the finishing on these eggs (or Christmas baubles?). How about using linen banding? That would eliminate the whole drama with the seams :). If you would like to stitch your own Riolis easter egg, then please ask Google. The kit was released in 2014 and has sold out on the Fire Poppies' website. The design number is 'B185'. However, I hope my review has shown that embroidery kits from Riolis are high-quality, contain plenty of materials and are well worth a try! But beware: I have now stitched another egg in this series (the one with the red flowers) and here the measurements are all wrong. The design is not long enough to wrap around the egg. DO NOT follow the size recommendations for the seam allowence as you will end up with a piece of cloth that is too short. Instead place your finished embroidery on the egg and take your seam allowance from there. P.S. Did you like this blog article? Did you learn something new? When yes, then please consider making a small donation. Visiting museums and doing research inevitably costs money. Supporting me and my research is much appreciated ❤!
Today I am going to share some more medieval eye-candy with you. This time we are going to explore some of the goldwork embroideries made in France during the 13th-15th centuries. Particularly Paris enjoyed a boom in embroidery during the 13th-14th centuries as the royal court resided there. Written guild regulations from 1292-1295 and 1316 suggest that female embroiderers were the norm and that the apprenticeship lasted eight years. However, the embroiderers attached to the King and the princes have names such as Robert de Varennes or Sandre Lappert. So was the situation in medieval Paris really so different from that in the Low Countries? I doubt it. Prestigious commissions from the French King and his princes were likely given to male embroiderers. The first piece I would like to draw your attention to is a mitre worn by the abbot of the ancient abbey of Sixt, Upper-Savoy. The very fine silk- and gold embroidery is executed on white silk (either samite or serge) backed by linen. The silk embroidery is executed in split stitch and stem stitch. The goldwork embroidery is all done in couching. Although the embroidery was executed by embroiderers from Paris, the drawings were likely made by Jean le Noir, a famous illuminator who had a daughter, called Bourgot, who assisted him. I particularly like how the wings of the angel are placed so that they fit the sloping side of the mitre just perfectly. Another piece that blew my mind was the mitre created for Sainte-Chapelle around 1375-1390. There's so much going on on this relatively small object. And the scenes are adorable. Look at the ox and the ass. They make me smile :). The amount of padding on this piece is rather incredible too. And I just love the tiny seed pearls. It makes it all looks so over the top, yet so coordinated. The treatment of the garments is quite different from the usual or nue or pattern couching seen on so many of these pieces. Instead, the different parts (folds) of the garments are created by laying separate pairs of passing thread in different directions. The folds are accented with couched dark brown silk. Very clever indeed. The last pieces of embroidery I would like to draw your attention to are known as the embroidered cycle of the legend of Saint Martin. This impressive, but incomplete, collection of embroidered orphreys was made for a single altar in a church or chapel. They thus show the medieval opulence when it comes to liturgical vestments. Due to the fact that these pieces were created at the court of Rene of Anjou (1409-1480) we know the painter of some of the designs: Barthelemy d'Eyck and the embroiderer who executed them: Pierre du Billant. It probably helped that both men were related.
The embroidered orphreys are now dispersed over four museums in Paris, Lyon, Baltimore and New York. Their original layout has been lost due to more modern up-cycling. Have a look at the very fine silk shading on the drapery of the clothing on some of the figures (there's definitely more than one embroiderer at work as there are marked differences in quality between the orphreys). The brightness of the colours after nearly 600 years is simply incredible! Literature Descatoire, C., 2019. L'art en broderie au moyen age. Musee de Cluny. ISBN: 978-2-7118-7428-6 . P.S. Did you like this blog article? Did you learn something new? When yes, then please consider making a small donation. Visiting museums and doing research inevitably costs money. Supporting me and my research is much appreciated ❤! |

Want to keep up with my embroidery adventures? Sign up for my weekly Newsletter to get notified of new blogs, courses and workshops!
Liked my blog? Please consider making a donation or becoming a Patron so that I can keep up the good work and my blog ad-free!

Categories
All
Archives
July 2024
|

 RSS Feed
Contact: info(at)jessicagrimm.com
Copyright Dr Jessica M. Grimm - Mandlweg 3, 82488 Ettal, Deutschland - +49(0)8822 2782219 (Monday, Tuesday, Friday & Saturday 9.00-17.00 CET)
Impressum - Legal Notice - Datenschutzerklärung - Privacy Policy - Webshop ABG - Widerrufsrecht - Disclaimer
Copyright Dr Jessica M. Grimm - Mandlweg 3, 82488 Ettal, Deutschland - +49(0)8822 2782219 (Monday, Tuesday, Friday & Saturday 9.00-17.00 CET)
Impressum - Legal Notice - Datenschutzerklärung - Privacy Policy - Webshop ABG - Widerrufsrecht - Disclaimer