|
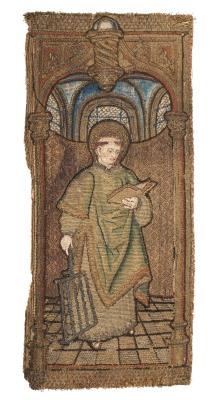
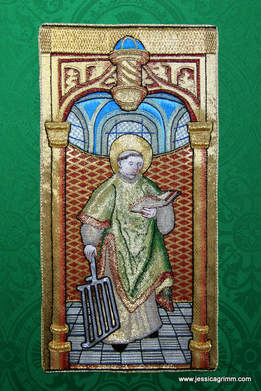
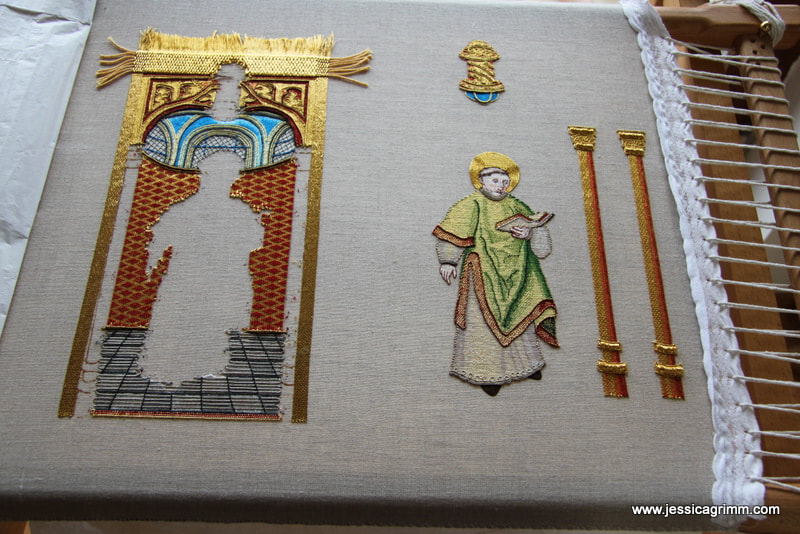
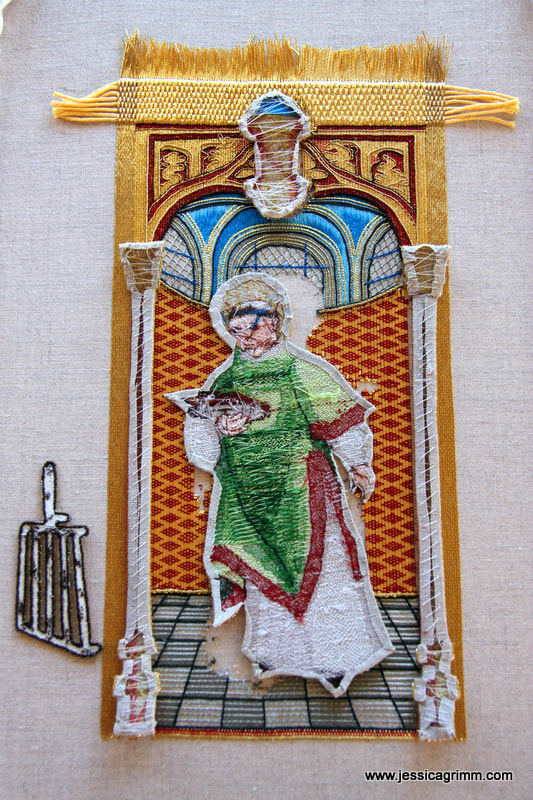
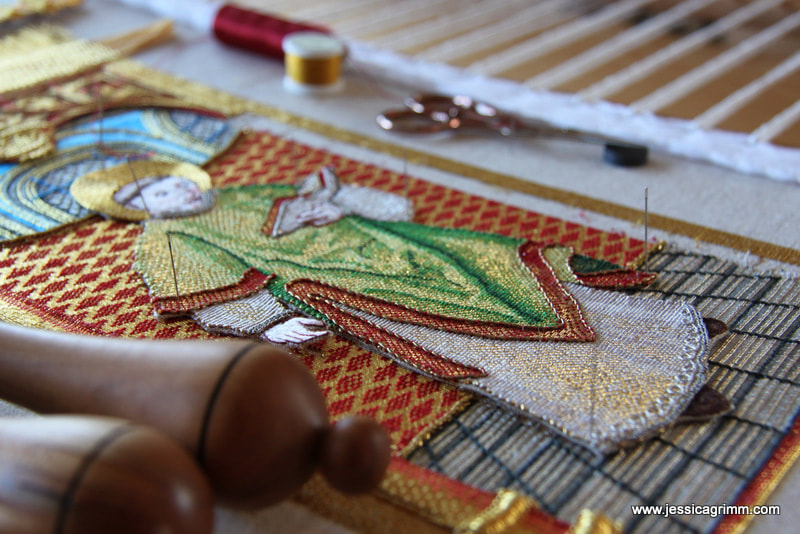
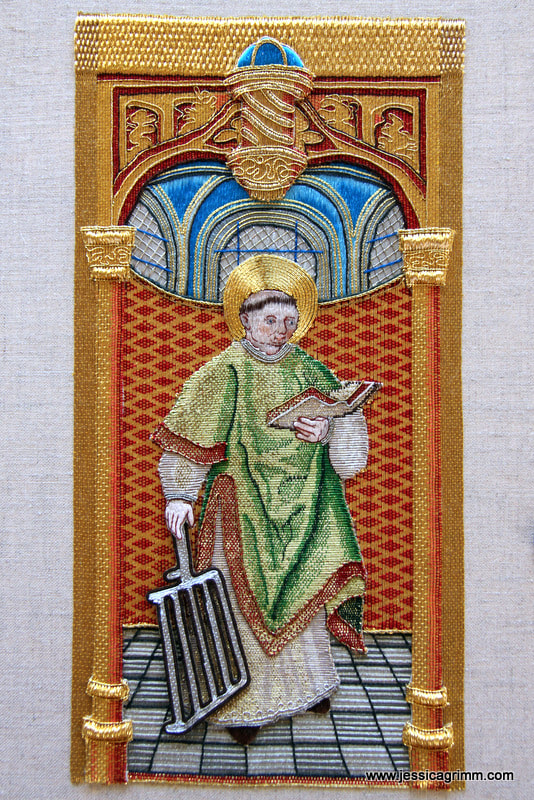
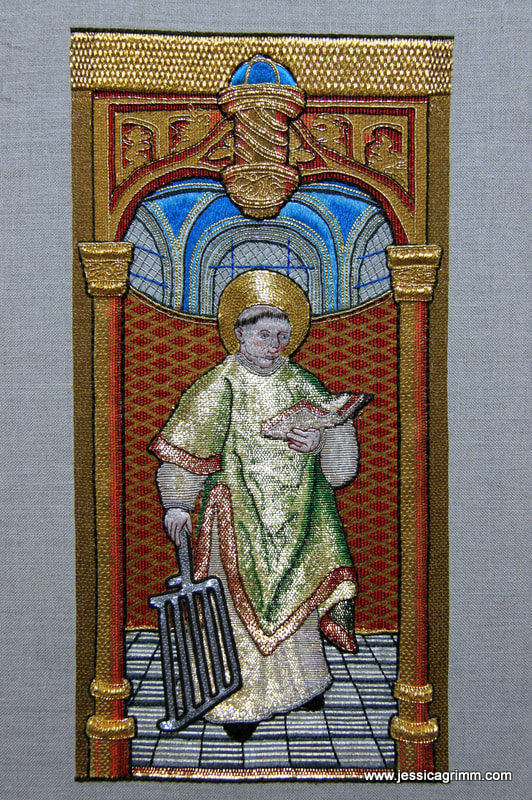
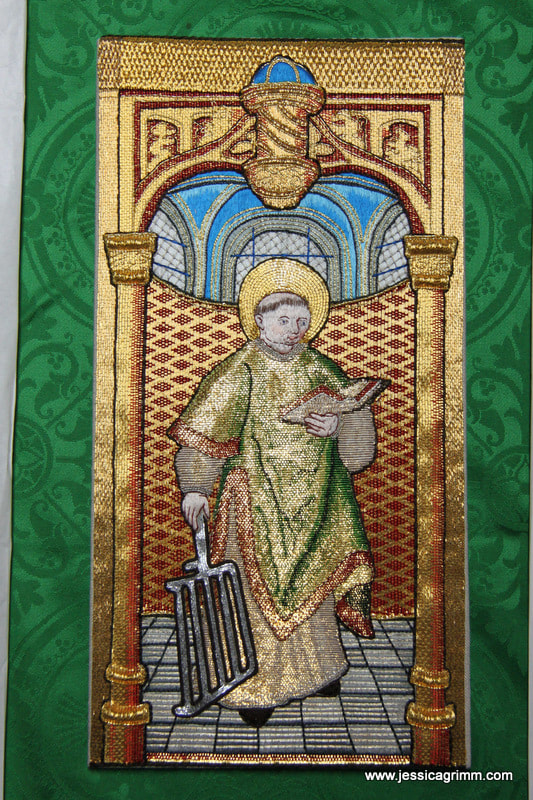
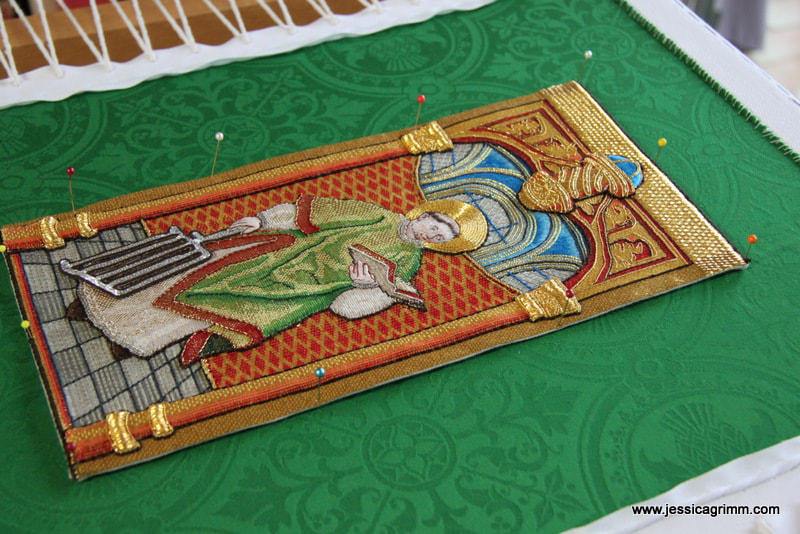
Since St. Laurence was grilled to death, I thought the above a fitting blog post title. After almost two years of on and of working on this goldwork piece, St. Laurence can finally be revealed in all his glory. The piece is a near perfect copy of the orphrey held under catalogue number ABM t2107h at the Museum Catharijneconvent, Utrecht in the Netherlands. The original orphrey was made between AD 1520-1525 and measures c. 28.5 x 17 cm. I have covered this project in earlier blog posts too, in case you'll want to read the whole story. Above on the left the original museum piece and on the right my version. However, last time you saw the piece, I was still working on the background. So let's explore how I assembled all the different pieces. Apart from the background and St. Laurence, I also worked both columns and the ceiling keystone on the same Zweigart 40ct natural linen. I worked his bbq separately in a small embroidery hoop on a piece of calico. It is in essence a wired slip filled with silver plated Japanese Thread #8. Cutting away the calico between the bars, was challenging! So I used a dark brown textile paint marker to stain the remaining calico fibres. Then it was time to cut out St. Laurence, the keystone and both columns. I took the whole piece of the slate frame and redressed it only with the background. As you can see in the picture above, I cut the other items out with a bit of a seam allowance. I folded the seam under and laced the back. This worked particularly well for the straight columns. It was less successful for the keystone and proved impossible for St. Laurence himself. So...., I used conservation glue. And it worked a treat! Since you only want the seam to stay put as long as you are appliqueing, you don't need huge amounts of glue, i.e. you are not soaking your embroidered fabric. Before I attached any of the elements, I made sure my fabric wasn't drum taut. I started with the keystone, then did the left-hand column, then St. Laurence and then the right-hand column. Although I worked my background a little further than needed so it would go under St. Laurence, the fit wasn't perfect on all sides. I figure this is due to the whole piece being worked on a drum taut slate frame and once you release this tension completely, your elements shrink a bit. Note to self: work the background more generously on the next piece! Appliqueing the elements onto the background was rather straight forward. As you can see in the above picture, I pinned the element in place and then couched around the edge with matching silks. Only for the columns, I used a different method. I noted that my long vertical rows of tightly packed Japanese thread gaped when couched down at the edges. Instead, I sew in a straight line between the last and the before last row of Japanese thread. With all elements couched down, it was time to add the dark brown edging around all the elements. It adds a sense of depth to an otherwise near flat piece of embroidery. I used four to six strands of a dark brown silk perle. They were offcuts from a weaving project by a fellow local artisan. Don't you love it when you can recycle things?! My original plan was to mount the goldwork first and then applique it onto the green chasuble fabric. This would support the heavy gold embroidery better. However, I didn't like it one bit. The embroidery was too high up from the fabric for my taste. As I have worked this piece mainly during demonstrations, it did mean that I hadn't been as accurate as I would have wished. The piece is 1,5 linen threads too high on the top left and 1,5 threads too short on the lower right side. This happens when you chat to people and/or work in improper light. No worries, I can perfectly live with these minor discrepancies! However, it did mean that my initial mounting had to go. I ended up cutting out the whole orphrey with a seam allowance and couching it in place directly onto the green chasuble fabric. It worked a treat! As it should have done, since my medieval counterparts did it the same way. With the orphrey in place, I couched a gilt Twist #3 and a large gilt Roccoco around the edge to hide most of the linen background fabric. Today I mounted the whole piece and weather permitting, will bring it to the framer's tomorrow.
Working on this project certainly had its challenges, but I loved it immensely! During demonstrations and through this blog people from all over the world were able to follow the process. I will certainly make another one in the future! But for now, I can't stop looking at my achievement and enjoy this splendid piece :).
34 Comments
Maria Mulder
28/11/2017 16:54:01
Jessica, wat een geweldig stuk borduurwerk, petje af.
Reply
Sarah
28/11/2017 17:00:00
Beautiful work and thank you for showing the finishing process.
Reply
28/11/2017 17:38:41
Thank you Jane! I never knew about your blog; you're in my reading list now :).
Reply
Anja
28/11/2017 17:50:20
Ik was al heel lang heel nieuwsgierig hoe het er uiteindelijk uit zou zien. Wat is het mooi geworden!
Reply
Mary Jo Neyer
28/11/2017 17:54:59
Very, very beautiful. I am in awe of your embroidery skills.
Reply
Shirley Smith
28/11/2017 18:27:35
As an ecclesiastical embroiderer myself I really appreciate all the work you have put in to achieve such a stunning piece. Brilliant!
Reply
28/11/2017 20:43:00
Thank you Shirley! Can we see pictures of your work somewhere?
Reply
Wendy Holt
28/11/2017 19:14:40
Jessica this is just wonderful - I'm now going to go backwards and read every post that you have relating to this fantastic piece - talk about knock your socks off gorgeous goldwork!!!!!!!
Reply
Erica in Alaska
28/11/2017 20:03:01
Congratulations on your epic finish! I've really enjoying reading about your progress. Thank you for sharing!
Reply
Sue Knight
28/11/2017 20:04:15
Jessica,
Reply
28/11/2017 20:47:36
Thank you Rachel! And I am pretty sure Akhenaten will turn out just fine. And if not; try adding a halo :)!
Reply
Well done Jessica! I have really enjoyed watching this piece come to life. Thank you for such detailed explanations of your finishing. The hours you have put into this! I’m not surprised you just want to look at him now. I hope you have emailed the museum a copy of your interpretation!
Reply
28/11/2017 20:59:19
Thank you Catherine! Yes, I just emailed the person from the museum who sent me the picture. They are so helpful there!
Reply
Ginette
28/11/2017 21:24:25
Incredible Jessica, I keep enlarging the photos to admire all the details. I can only imagine all the hours of work you have put into this masterpiece, I have a lot of respect for your skills! Well done lady! Congratulations,
Reply
29/11/2017 07:56:36
Thank you Ginette! And, eh, when are you starting one? ;)!
Reply
Irene
28/11/2017 23:16:31
A wonderful piece of work. So intricate! You have every right to feel proud.
Reply
Monica
29/11/2017 07:23:47
Schitterend! De andere heiligen zullen stinkend jaloers zijn op Sint Laurentius. En die bruine draden voor de dieptewerking maken inderdaad een enorm verschil. Prachtig werk!
Reply
Erica
2/12/2017 05:11:49
Wow! Oh Wow! Jessica, you have really outdone yourself this time. St. Lawrence is stunningly beautiful. Congratulations and do enjoy him.
Reply
Your comment will be posted after it is approved.
Leave a Reply. |
Want to keep up with my embroidery adventures? Sign up for my weekly Newsletter to get notified of new blogs, courses and workshops!
Liked my blog? Please consider making a donation or becoming a Patron so that I can keep up the good work and my blog ad-free!
Categories
All
Archives
July 2024
|
Contact: info(at)jessicagrimm.com
Copyright Dr Jessica M. Grimm - Mandlweg 3, 82488 Ettal, Deutschland - +49(0)8822 2782219 (Monday, Tuesday, Friday & Saturday 9.00-17.00 CET)
Impressum - Legal Notice - Datenschutzerklärung - Privacy Policy - Webshop ABG - Widerrufsrecht - Disclaimer
Copyright Dr Jessica M. Grimm - Mandlweg 3, 82488 Ettal, Deutschland - +49(0)8822 2782219 (Monday, Tuesday, Friday & Saturday 9.00-17.00 CET)
Impressum - Legal Notice - Datenschutzerklärung - Privacy Policy - Webshop ABG - Widerrufsrecht - Disclaimer



 RSS Feed