|
As promised in last week's post, this week we'll explore some of my students' embroidery projects. First up is Elizabeth's stumpwork piece she started last week. She brought along with her a beautifully illustrated children's book. The colourful and witty illustrations are by Lilo Fromm. Do check out her website (and scroll down a bit as it starts rather 'grey'!) as there is inspiration to be had. Her illustrations would be wonderful as canvas embroideries too! 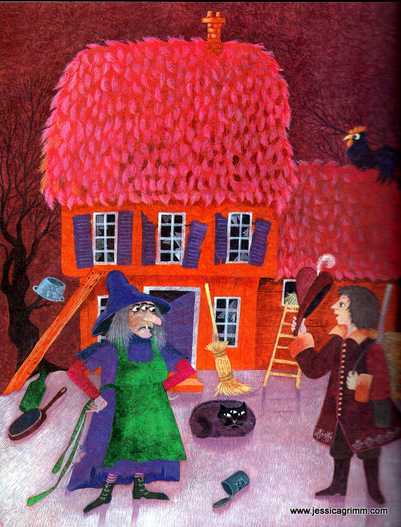 Elizabeth choose this lovely illustration of the witch's house. It is a nicely layered picture, ideal for stumpwork embroidery. It does however mean, that you'll need to do a lot of stitching before you can start the nice lady and the gorgeous chap in the foreground. That said, stitching a witch's house is never dull! 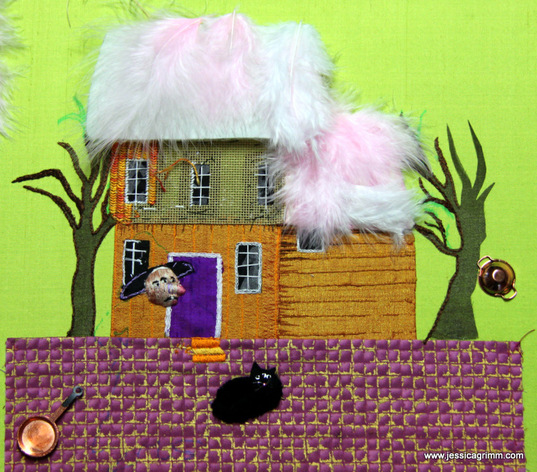 This is progress after five days of stitching. We had particular fun with the broken glass windows. We opted for black silk with white sheer fabric 'glass sherds' fused with bondaweb. Cleverly stitching the partitions and the frame over the fused fabrics should ensure that they'll stay put even when the bondaweb disintegrates with time. 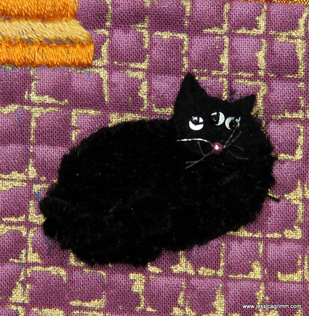 And what do you think of our cat with the three eyes? He, or are three-eyed cats female?, has been created by covering a black felt base with black silk chenille. He then got a felt head adorned with three silver plated spangles and tiny black beads for his eyes. I think he is an adorable witch's cat. 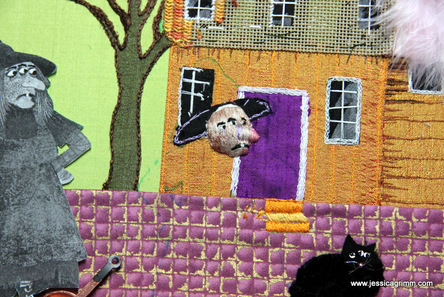 Although we only barely touched upon stitching the witch, we did manage to stitch her face. You can tell she is the cats mother, as she has three eyes too! Elizabeth now has lots of fun homework to do. And once she gets stuck for inspiration, I'll get to help her on her way again. I am very much looking forward to see this lovely piece grow. 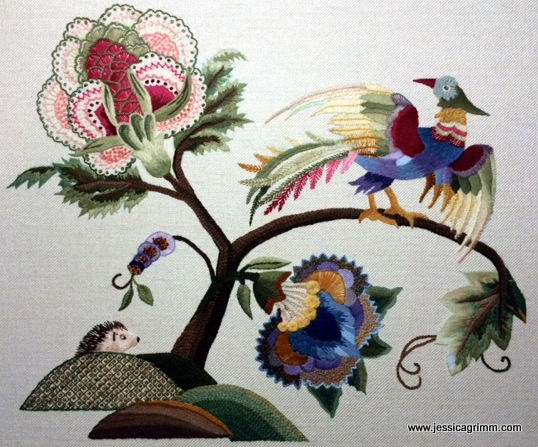 And then there is this fantastic crewel piece by Ellen. She started it in February and finished it a couple of weeks ago. It is always so nice to see how a piece eventually turns out. Five days of stitching is rarely enough to finish projects of this scale, so I am always very pleased when I find pictures in my inbox!
16 Comments
As I wrote before, I am taking Tricia's class 'Cabinet of Curiosities' to learn more about 17th century embroidery techniques. In the end, I am hoping to successfully recreate an embroidered casket. The first supplies have arrived; amongst which is a small trinket box to practise on. You can see all the yummy contents of the first kit in the picture below: 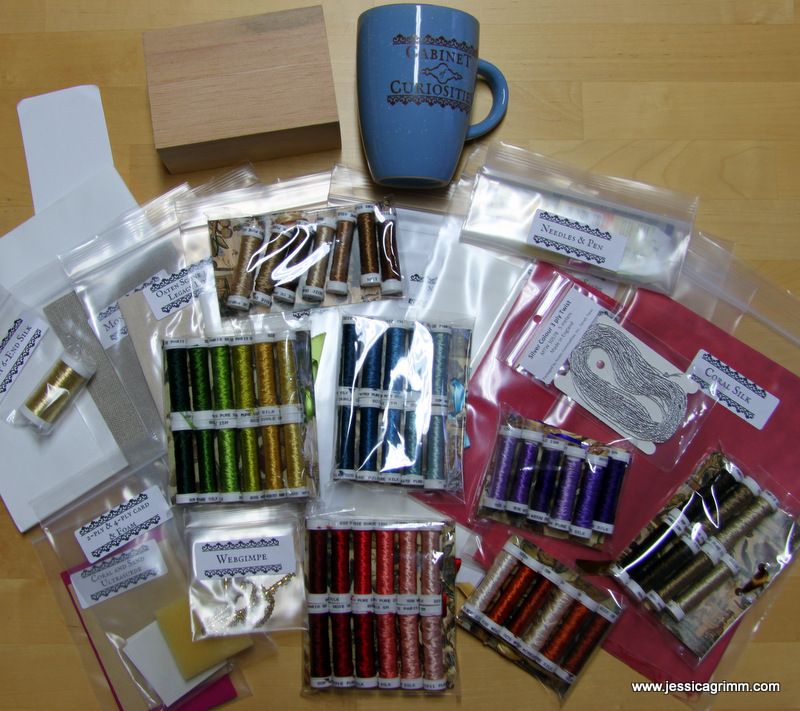 Contents of the Cabinet of Curiosities kit All these lovely colours of silk threads and the fabulous silk fabrics make me want to dive straight into making my casket! However, I've only just finished the second lesson of 18 in total. My current homework consists of coming up with a design for my casket. Easy peasy. What better than to use scenes from my favourite historical novel: De leeuw van Vlaanderen by Hendrik Conscience? A totally over the top romantic, historically inaccurate account of the battle of the golden spurs in AD 1302. It has everything: beautiful lady, mysterious knight, good king, evil queen, brave citizens. Combine this with my fantastically graphically talented husband and the design for my double casket is as good as nailed :)! 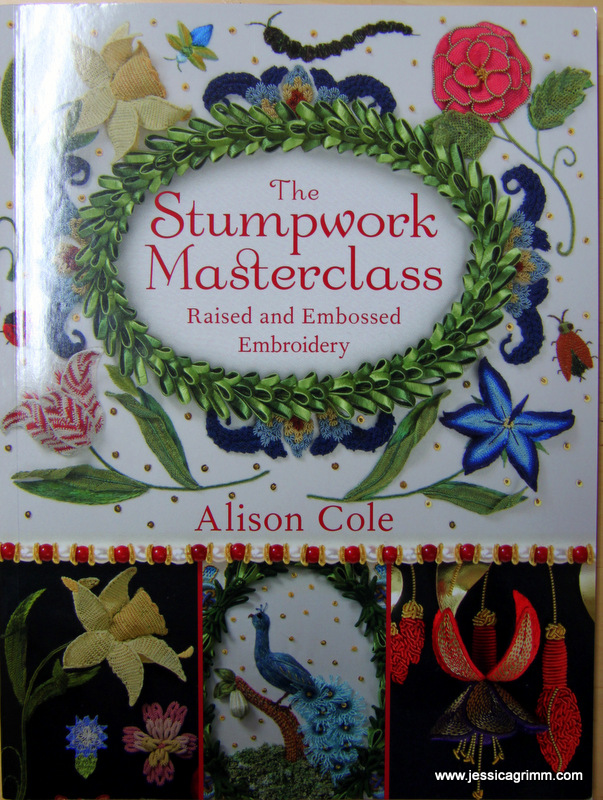 Book 'The Stumpwork Masterclass' by Alison Cole At about the same time my cabinet of curiosities kit arrived, the above book arrived as well: The stumpwork masterclass by Alison Cole. It is the first ever embroidery book I've read from cover to cover. Normally, I flick through embroidery books and read parts of it here and there, even out of order and skip those parts not of immediate interest. Not with this one. It sucked me right in. And got me very excited. It sparked so many ideas in my head. So many 'oh-I-need-to-try-thats'. 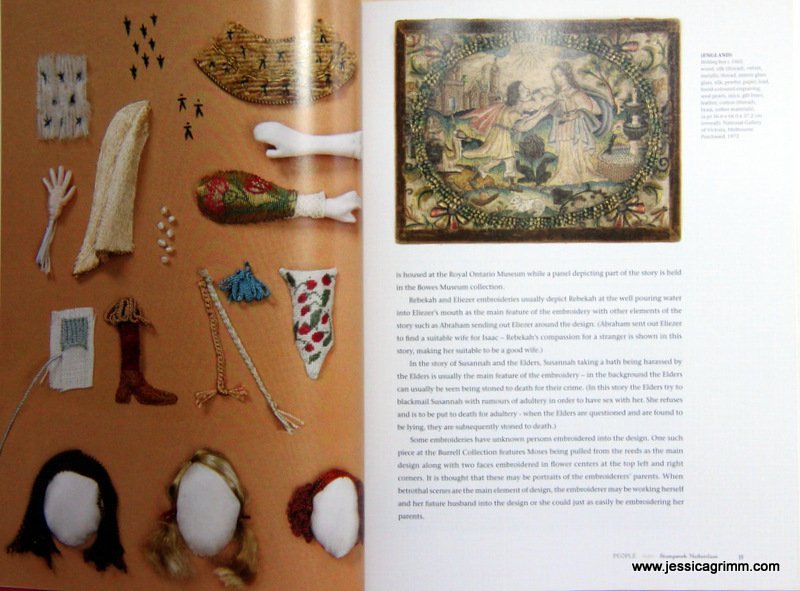 Book 'The Stumpwork Masterclass' by Alison Cole As you can see from the above sneak peek, the book isn't a step-by-step instruction on how to do stumpwork. It isn't a starting point for the novice embroiderer either. As the cover says, it truly is a Masterclass. With lots of detailed photographs of modern pieces by Alison and historical pieces as well. Each chapter takes on a design element rather than a technique. You'll have people, animals, flowers & leaves, skies, fillings & signatures, grounds, trees, birds, grottoes & fountains, buildings, bugs and borders. Interspersed with chapters on the history of stumpwork, padding techniques and needle lace. Alison both describes the techniques per design element found on historic pieces and how you can give a more modern twist to these elements. As not all historical threads are readily available, she even provides recipes on how to make your own silk wrapped purls, wire wrapped silks, silk gimp and flattened spirals. 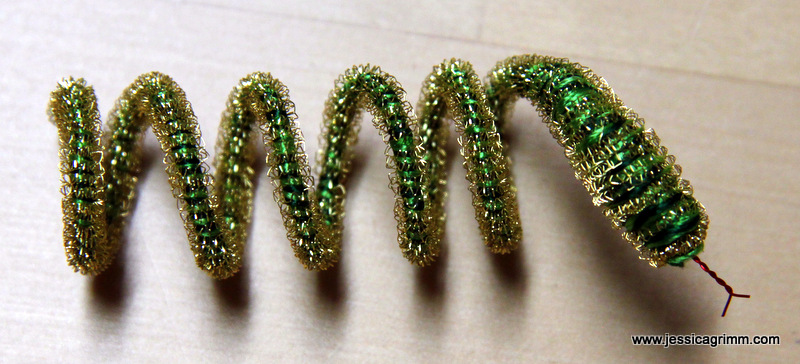 Bullion snake Only reading about embroidery, however good the book or course materials are, is a bit dull in the end. So, when Tricia announced a new needlework nibble on her blog, I jumped right in. Apparently, those embroidered caskets held casket toys. Wired animals, poseys and whatnots. The snake was great fun to make and the techniques remind me of those used in traditional Klosterarbeiten.
As I am taking a blogging break in August, I've packed this post full of links to tide you over until September. Time for me to host family visits and to work on new embroidery kits and workshops. Have a lovely summer and please join me again in a couple of weeks' time! Before I'll tell you about two upcoming course possibilities here in Bad Bayersoien, let's take a look at some 'work in progress'. Remember Ellen and Elisabeth who did a crewelwork embroidery course way back in January? They have graciously allowed me to share their progress with you all. Note: I no longer offer these courses. 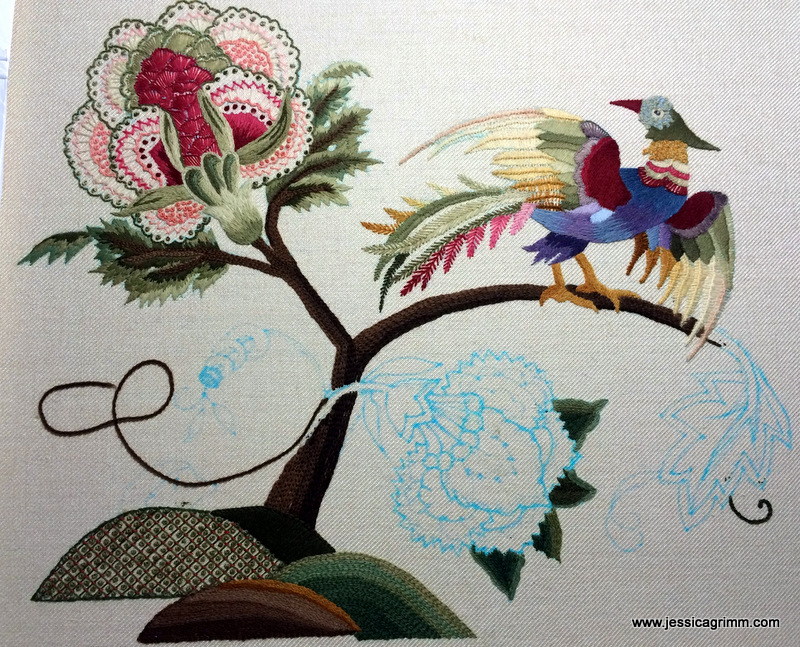 First up is Ellen her piece. The design was made up of all things 'crewel' Ellen came across and liked. Eclectic, colourful, vibrant and fun. Perfect for trying out many different stitches and colour combinations. The shading on the green leaves of the pink and coral flower has been worked very nicely!
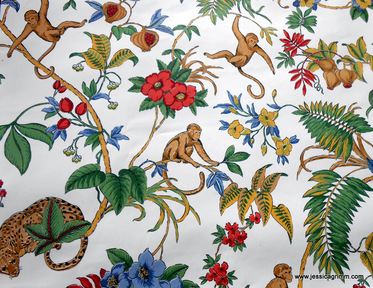
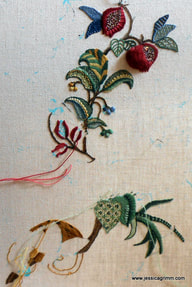
Next up is Elisabeth's piece. She used a designer piece of jungle wall paper as her design source. Her piece takes a modern approach on Jacobean crewel as she incorporates stumpwork elements and beads. Below is a detail of the pomegranates. 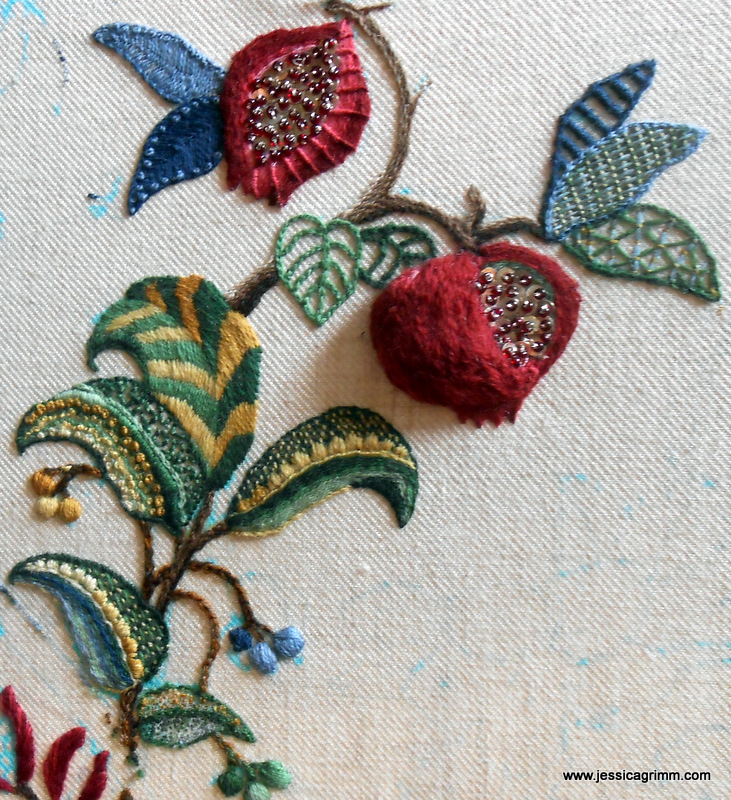 I love both pieces and think the ladies have made great progress! Five days are nearly always too short to finish a piece of embroidery. This blog is a great way of keeping track of each other's progress; especially as both ladies live 675 kilometres apart.
I finished stitching Millie Marotta's fox yesterday evening late (quite late, that is...). A few months ago this whole project started when Mary Corbet mentioned Millie Marotta's new colouring book 'Animal Kingdom' on Needle 'n Thread. Me and the fox had an instant connection. Waiting for the book to arrive at the bookstore was a tantalluskwelling. Patience is not one of my virtues. Of course, no one buys this as I am an embroideress and embroiderers are patient. Yeah right. 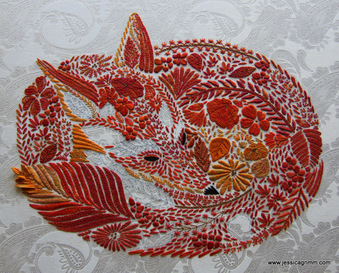 Here you'll see the fox finished bar the stumpwork elements. I've used House of Embroidery perle #12 in shades: Wildlife A, Marigold C, Maple A & C, Strelitza A, Harvest C, Sri Lanka C, Berries B and Brass A & B. Sparkly highlights were stitched using Madeira Metallic embroidery thread #40 Colour 28 and DMC Diamant #301. I love DMC Diamant. It is not your average badly behaving metallic embroidery thread. It is much nicer.  And here are some of the wired stumpwork elements. I used the same threads with a red linen background. Why red? Well after cutting them out, you do tend to see a wee bit of the background fabric. Using a background fabric corresponding with your stitching thread makes thus a lot of sense. 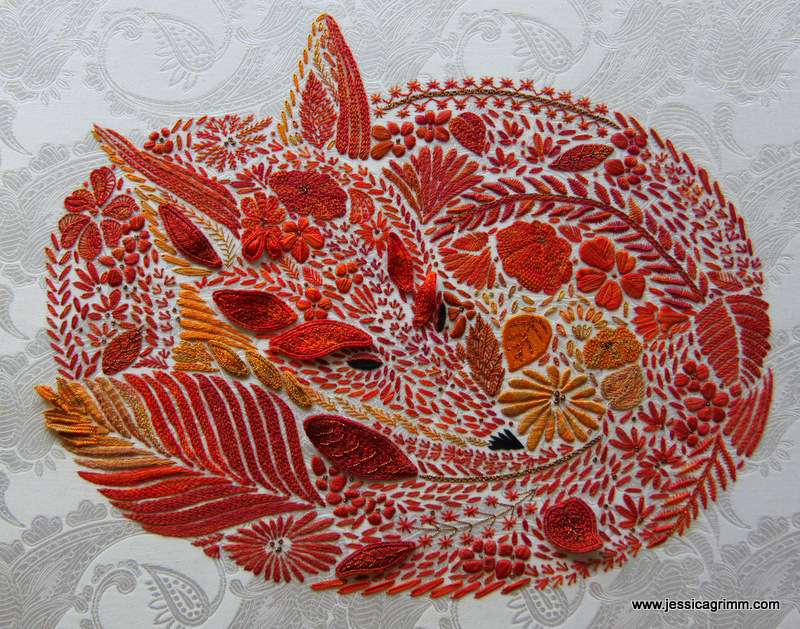 And here is the finished piece! Needless to say: I love it to bits. Can't wait to mount the piece (oh gosh, did I really write that? Wow, I've come a long way since my first mounting instructions at Hampton Court Palace...). It will then be framed in a white IKEA frame until I can scratch together enough money to have it properly framed. 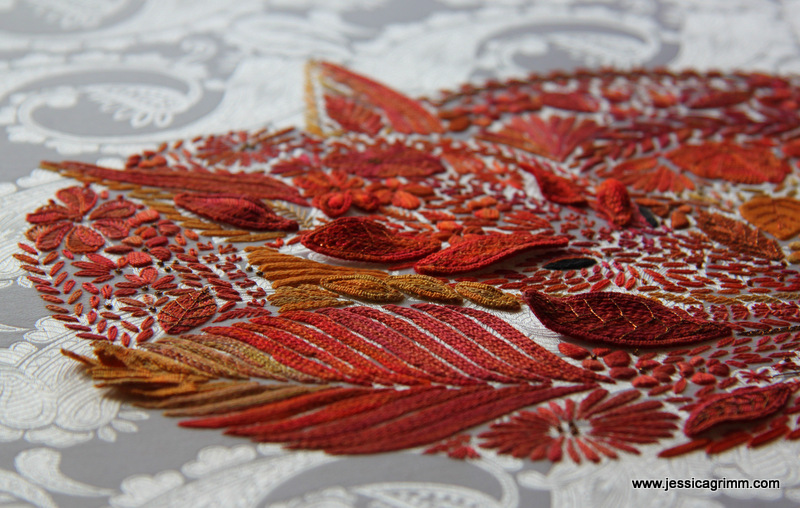 Here's an angled picture so one can appreciate the 'stumpiness' of the stumpwork elements better. For those of you planning to visit Nadel & Faden in Osnabrück in September, the fox will be on display!
So what's next? A wee bit of homework. And then I am going to play with my Elizabeth Ward tiny container bead storage solution tray. You can read all about this genius system on Mary Corbet's Needle 'n Thread. See you next week! |

Want to keep up with my embroidery adventures? Sign up for my weekly Newsletter to get notified of new blogs, courses and workshops!
Liked my blog? Please consider making a donation or becoming a Patron so that I can keep up the good work and my blog ad-free!

Categories
All
Archives
July 2024
|

 RSS Feed
Contact: info(at)jessicagrimm.com
Copyright Dr Jessica M. Grimm - Mandlweg 3, 82488 Ettal, Deutschland - +49(0)8822 2782219 (Monday, Tuesday, Friday & Saturday 9.00-17.00 CET)
Impressum - Legal Notice - Datenschutzerklärung - Privacy Policy - Webshop ABG - Widerrufsrecht - Disclaimer
Copyright Dr Jessica M. Grimm - Mandlweg 3, 82488 Ettal, Deutschland - +49(0)8822 2782219 (Monday, Tuesday, Friday & Saturday 9.00-17.00 CET)
Impressum - Legal Notice - Datenschutzerklärung - Privacy Policy - Webshop ABG - Widerrufsrecht - Disclaimer