|
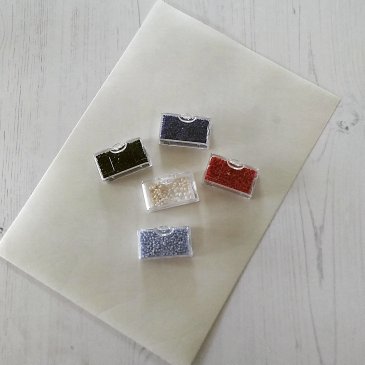
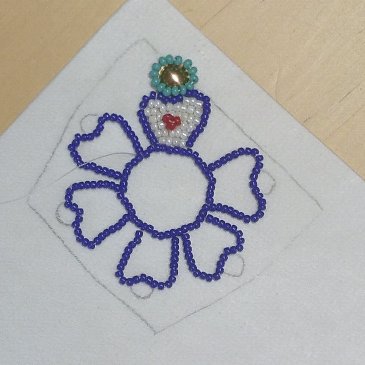
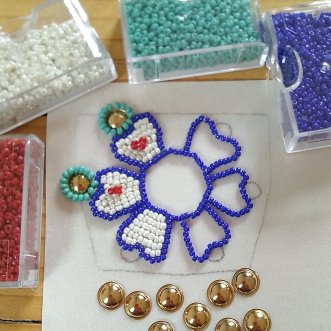
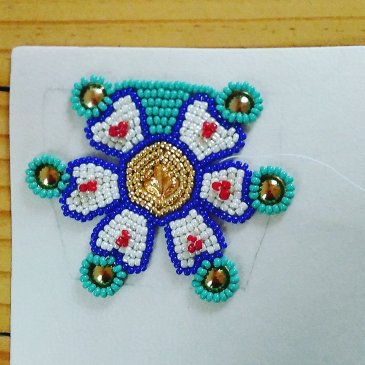
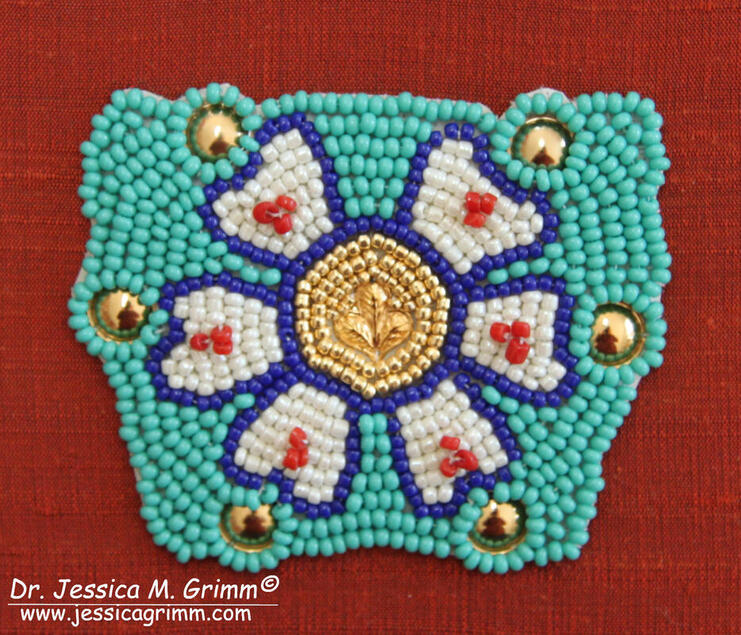
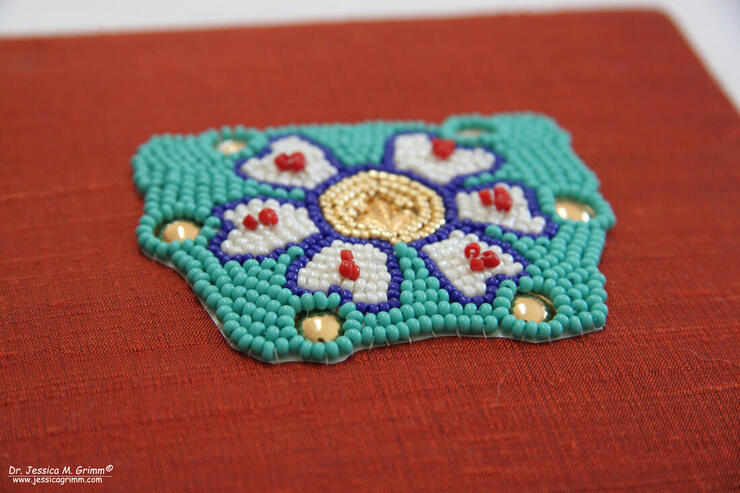
Ever since my visit to Cheb in the Czech Republic earlier this year, when we went to see the Egerer antependium, I wanted to try my hand at a small replica. Since the beading on the antependium is done on parchment/vellum, that was easier said than done! However, I finally managed to recreate a small portion of this stunning medieval beadwork. And I am going to share my journey with you in this blog post. The first thing I needed for my efforts was a piece of parchment/vellum. Luckily there is a German online-shop (run by archaeologists!) who sell all sorts of re-enactment stuff. And they do parchment/vellum too. I ended up buying good quality parchment rather than vellum, I think. They are in essence the same material: thinly scraped animal skin. Vellum is the absolute premium version made of the skins of young animals. For months I was actually afraid to start the stitching. On the one hand my fingers were itching to start, but on the other hand I did not quite know where to begin. So my sheet of parchment sat on the shelves, patiently waiting. The main question I needed to get answered was how to work with the parchment. Does one hold it in hand and stitch or does one put it in some sort of embroidery frame? Searching the internet, I came across a blog entry of a re-enactment lady. She just stitched a small motive in the hand and was successful. I decided to do the same and worry about the framing of a larger piece of parchment later :). The parchment is actually so stiff that you can hold it comfortably in hand whilst stitching. The second main component would be the beads. On the original, the beads are quite small but irregular. Using some of my collection of perfectly formed Japanese high-quality beads would just not be the same. Luckily, I hade some, otherwise crappy, cheap hobby beads in about a size 9 and a size 10. Perfectly irregular :). The original beads are more like a size 11. I even had these in roughly the right colours: sea-green, dark blue, pearly white and coral red. The third component proved to be quite difficult and partly impossible to get. In amongst the beadwork on the original are stamped metal decorations. The closest I could get were those gilt 'folien' used to make a bundle of grapes in goldwork embroidery. Whilst they worked fine for some parts of the capital motive I had chosen to replicate, it did not work for the centre. I ended up using a fancy 'folie' and filled in the empty space with small golden-coloured beads. On to the stitching! But first, I transferred my chosen motive onto the parchment using a pencil. From my pictures and the written information I had on the antependium, I was able to deduce that the capitals of the columns between the saints were about 5.4 cm in height. That's what I based my pattern on. I then started by stitching the design lines of the petals first using my blue beads, a number 10 needle and Coats Dual Duty glaced hand-quilting thread made of polyester and cotton. In the original piece they probably used a linen thread. According to the written sources and from what I could see in my pictures, the appropriate number of beads were strung first and then couched down with a separate thread and needle every two beads or so. At first, this felt as if I needed an extra pair of hands! Holding the parchment in one and manipulating two working threads with the other wasn't easy. Especially not as the needle only pierces the parchment when a certain amount of force is applied. However, after struggling for a while, I changed my method slightly. Firstly, I did away with the couching thread. Instead, I laid out the strung beads carefully on the design-line, go down with my needle in the appropriate spot, and then couched between the beads using the same thread. In this way I could eliminate the extra pair of hands :). As it proved very hard to hit the exact spot from the back of the parchment (parchment is surprisingly slippery stuff), I ended up making holes from the front and subsequently finding them from the back. Much, much easier! To attach my 'folien', I carefully punched two small holes in the rim using a larger needle and a normal hammer. Usually only one hole turned out successfully, but that proved to be enough to hold the piece in place long enough until I had couched the beads around it. As the folien have a small flat rim or lip, the couched ring of beads keeps it in place. Once all the beading was done, I cut out the beaded element as close to the beads as I dared. In my embroidery hoop, I stretched a piece of terracotta dupion silk over 36ct even-weave linen (the original has a linen support too) and appliqued the beaded element in place using the Coats Dual Duty thread. Last but not least, I mounted my small replica onto acid-free cardboard and added a linen backing. I am planning on sending it to the museum so they can use it for educational purposes. As I used slightly larger beads than were used in the original, my motive measures 6.2 cm in height.
I hope you liked my foray into medieval bead embroidery. At some point I would like to attempt one of the saints. However, I will need to find a solution for framing the parchment as that will be too large to hold in hand. I would also like to find a source for larger stamped metal decorations such as were used in the original. If you know of a source, please let me know!
10 Comments
Nancy B
10/9/2019 11:18:47
What an interesting post -- thank you for experimenting in this technique. I wonder if vellum is less stiff when in use for this purpose? I don't know if that would be an advantage or not.
Reply
10/9/2019 12:01:08
Thanks for your thoughts on the topic Nancy! I am not sure how vellum and parchment actually differ in their properties other than that vellum is thinner. That might be an interesting experiment! I just have to find a piece of vellum :). And I was thinking of your way of framing up too. The parchment did not tear when I stitched through it, so I am hopeful it won't when I put tacks through it!
Reply
Nancy Anne White
10/9/2019 15:21:44
Watching the recreation of this motif was a lovely journey into the past.
Reply
10/9/2019 20:34:52
It sure was Rachel! And the parchment is a rather strange medium; sometimes the needle goes through really well and sometimes you'll need more force. I suspect it has all to do with the hair follicles.
Reply
Alessandra
11/9/2019 03:13:19
I wonder if you could use the stands that are used for paper embroidery? They also use a pointy stiletto to make the holes for the needle.
Reply
11/9/2019 08:25:51
Hi Alessandra! Would you know of a source for these stands? I can't seem to find them using Google :(. Thanks! Jessica
Reply
Jo
12/9/2019 08:41:58
Such an interesting post Jessica. I hope you decide to tackle a saint - that would be amazing adventure. Love it.
Reply
Your comment will be posted after it is approved.
Leave a Reply. |
Want to keep up with my embroidery adventures? Sign up for my weekly Newsletter to get notified of new blogs, courses and workshops!
Liked my blog? Please consider making a donation or becoming a Patron so that I can keep up the good work and my blog ad-free!
Categories
All
Archives
July 2024
|
Contact: info(at)jessicagrimm.com
Copyright Dr Jessica M. Grimm - Mandlweg 3, 82488 Ettal, Deutschland - +49(0)8822 2782219 (Monday, Tuesday, Friday & Saturday 9.00-17.00 CET)
Impressum - Legal Notice - Datenschutzerklärung - Privacy Policy - Webshop ABG - Widerrufsrecht - Disclaimer
Copyright Dr Jessica M. Grimm - Mandlweg 3, 82488 Ettal, Deutschland - +49(0)8822 2782219 (Monday, Tuesday, Friday & Saturday 9.00-17.00 CET)
Impressum - Legal Notice - Datenschutzerklärung - Privacy Policy - Webshop ABG - Widerrufsrecht - Disclaimer



 RSS Feed