Today I am going to write a bit about my love affair with Schwalm embroidery. You see, I can pinpoint exactly where I encountered this pretty whitework embroidery technique for the first time. Not in its native Hessia, one of the federal states of Germany. Nope. It was Inspirations issue 69 in the spring of 2011. The beautiful 'Sense of Place' by Luzine Happel featured hearts, sunflowers and tulips filled with pretty patterns. I so wanted to learn this embroidery technique! But, I had never done any whitework embroidery other than a huge Richelieu window pane featured in an embroidery special of the Dutch Libelle. Luckily, I had just started my Royal School of Needlework Diploma course. And it happened to include a whitework module. Little did I know that they had never heard of this type of embroidery. And my tutors weren't thrilled at the prospect of teaching me something they were not familiar with. So I ended up with a whitework sampler featuring only a little bit of true Schwalm embroidery. And yes, I didn't like the prospect of an all-white piece either :). Now most of you will by now know that I don't like table cloths. Although, to be honest, there is nothing wrong with these pieces of textile. It is just that when I tell people that I embroider for a living, THEY picture me amidst heaps of neatly stacked embroidered table cloths. Now that gives me goose bumps. But for the wrong reasons. It truly freaks me out. Embroidery is so much more than just a means to adore a table cloth! Instead, one of the Schwalm-things I made was a nativity scene to be hung in front of my kitchen window. It is an ongoing process and I hope to add camels, a donkey and an ox this year. And although I like white, I like colour better. White reminds me of those pretty shoes I once had as a girl. They were lovely, but not so white for long. The same with those pretty lacily white stockings me and my younger sister wore under our Sunday dresses as girls. They attracted dirt like nobody's business. So in came the use of colour in my Schwalm embroidery projects. Now, traditional Schwalm embroidery is done with cotton a broder. A not so shiny non-strandable cotton thread. It is nice, but cotton perle and silk threads are nicer. Or at least in my opinion they are. I especially like to use variegated threads as they form pretty colour patterns when used with the many different Schwalm filling stitches. So, by now, I had changed the colour of things, the materials and the stitching topic. What's next? How about adding a stumpwork technique to the mix? Using wired elements with Schwalm embroidery really tickled my fancy! It looks so elegant and yet isn't too hard to create at all. If you would like to have a go, why not try my 'Elegant Schwalm Butterfly' pattern or full kit? A great way to learn the basics of Schwalm embroidery without ending up with a (partly-stitched UFO) table cloth :). But I wasn't quite finished yet! How about one shrinks the butterfly? For instance, until it fits a tiny 4cm Dandelyne wooden hoop. Thanks to my training in Appenzeller whitework embroidery, I knew that you can add tiny filling stitches (some the same as in Schwalm embroidery; after all there is only so much you can do with a blank grid) into a tiny grid of withdrawn threads. Born where the elegant butterfly pendants! Still using original heritage skills, but sans the table cloth. After weeks of stitching (one butterfly takes about six hours to create), I now have a colourful bunch of lovely butterfly pendants for sale in my webshop.
If you would like to know more about the traditional form of Schwalm embroidery (including its use on folk costumes), check out Luzine Happel's website and blog. Also available in English. Luzine self-published a whole library on Schwalm embroidery. These are very good books if you want to learn this pretty whitework technique. I highly recommend them! The books are available in German, English and even French. Happy stitching!
12 Comments
Last week, I received my copy of Inspirations Magazine #95. And wow what a beautiful issue it is! Packed with great embroidery projects exploring a wide range of embroidery techniques. Clear favourite for me: Strawberry Fayre, a heart-shaped sewing necessaire designed by Carolyn Pearce. Carolyn is one of my favourite embroidery designers. A couple of years ago, I stitched her famous Home Sweet Home needlework box. The sewing necessaire is packed full of lovely stitched details in green, pink and blue. This projects uses 40 embroidery stitches ranging from the well-known French knot to the more exotic cable plait stitch. Equally, it uses a whole array of yummy embroidery threads in cotton, silk, rayon and metallic. And the design uses beads as well! A perfect project to learn new embroidery skills. Not unlike a sampler, but then way more useful. Inside the sewing necessaire there is ample room for your scissors, stiletto, tape measure, needle pages, pincushion and thread rings. The heart-shaped necessaire closes with a pretty Dorset button. Another pretty technique you will learn from this project! Dangling from the necessaire are exquisite little needlework essentials: a pinwheel, an emery strawberry and a thimble holder.
I so love this new Carolyn Pearce design, that I ordered the kit as my birthday present (I'll turn 39 on Friday!) from Stitchology. As an Inspirations subscriber, I paid €146 + €26 shipping. Yup, that isn't cheap. However, Carolyn Pearce is known for using many different components in her designs. Trying to gather them yourself from suppliers all over the world isn't necessary any cheaper. That said, if you have a large stash and you don't mind swapping things out, you will be perfectly fine stitching this necessaire with your own supplies! As the kit is on pre-order at the moment (it will probably ship at the end of July) and will take 3-4 weeks to arrive in Germany, enough time to see if there are others who plan on stitching this project. Wouldn't it be great to hook up online and stitch this project together? Like a Stitch Along (SAL)! Please leave your comment below if you are up for the game. Looking forward to start... My love for embroidery stems from the fact that I like to work creatively with my hands. But equally important, I love the fact that I am part of a very old tradition. And last but not least, I have a love for beautiful and elegant things. When I teach embroidery, I foremost want to transmit a technique. It is important to me that my students learn to execute the technical part of an embroidery technique well. That's the way I was trained at the Royal School of Needlework and it suits my personality. With my embroidery kits I try to think of an innovative way to use an ancient embroidery technique. I want you to be able to create a stunning piece of embroidery to go up on your wall. My beetle wing goldwork and stumpwork beetles are a good example of this concept (although shelved as a kit, you can still purchase the instructions). The latest addition to my series of embroidery kits is the 'Elegant Butterfly'. This kit has a modern take on Schwalm embroidery. Originally, Schwalm embroidery is a form of whitework from the Hessian region of Germany. You can read all about it on Luzine Happel's blog. She is a master craftswoman regarding this lovely technique. Don't be put off by the term whitework. It is nothing like the very fine embroidery seen on handkerchiefs or the like. Think more Hardanger embroidery. But then less geometrical in its shapes. Schwalm is usually floral, uses chain stitch, buttonhole stitch and coral stitch extensively. And, best off all in my opinion, comes with hundreds of different geometrical filling stitches! You won't be easily bored and it is relatively easy on your eyes. My elegant butterfly uses the traditional cotton a broder #25 used in Schwalm embroidery. You'll stitch on beautiful 40ct Zweigart Newcastle linen. That's the traditional part of my design. I've also added in DMC Diamant metallic thread and hand-dyed silken chenille by the Thread Gatherer. A perfect opportunity for you to play a little with these speciality threads. Furthermore, I've discovered that traditional Schwalm embroidery and the wired-shapes technique used in stumpwork embroidery are a match made in heaven. Pair your finished and mounted elegant butterfly embroidery with a Ribba frame from IKEA and you have stunning unique and hand-made home-decoration!
You can stitch your own elegant butterfly purchasing either a full kit or, if you want to start immediately and you have a rather large stash, the instructions for direct download. Both are available in either German or English. Not ready to start stitching on your own? I am offering the elegant butterfly as a workshop on 18th of November 2017. Happy Stitching! P.S.: I love to receive pictures of your finished pieces made with my kits or instructions! First of all, thanks to you all for the many supportive comments regarding my husband's job hunt! So very kind of you. We'll keep working on it and I am sure somewhere a door will open again. And secondly: I received my prize today from the Stitch your heart out competition of Inspirations Magazine. The lovingly wrapped parcel contained a copy of the book 'The redwork circus' by Jenny McWhinney, one of my favourite embroidery designers and the ONLY book I didn't already have by her on my shelves :). Furthermore, the parcel contained the 'Robin' embroidery kit by the very talented Nicola Jarvis. And to top it off, I also received a packet of postcards and a tea towel with the 'Frosty Garden' design by Nicola Jarvis. It really felt like Christmas. The fox itself is still down-under enjoying the warm sunshine. Inspirations is planning a really wonderful thing for you all; fingers crossed it will come to fruition! Thirdly (this is the last point, I promise): I've opened my own Etsy-Shop to sell my hand-stitched pendants. Normally, I sell these when I demonstrate embroidery at the museum in Oberammergau. However, as the museum is closed during the winter months, I figured I might as well try to sell them online. A permanent link to my Etsy-Shop can be found on my shop page. So, let's now explore the main objective of this blog post, shall we? As many of you know, I love exploring different embroidery techniques. A couple of weeks ago, I wrote about French boutis embroidery and my good friend and fellow embroidery tutor Marina Berts from Switzerland suggested that I'll give Glazig embroidery a go. When you say Glazig you say Pascal Jaouen. He is a designer and embroiderer from France who developed historical Glazig surface embroidery from Brittany into a vibrant modern art form. Do explore his website as the beautiful pictures of his haute-couture creations are stunning! So, as I really liked his designs and was up for a new challenge, I ordered one of his kits. Thanks to Google translate and my very rusty school French, I managed the ordering process just fine. A couple of days later, my shiny kit arrived. Now I had to tackle even more French :). The kit contains a piece of linen with the design screen-printed on. I am not a huge fan of this as it means that I'll need to cover all the lines and can't adapt the design much (in fact, when I started stitching I soon noticed that there are design lines on my fabric, that are not to be found on the photograph of the design...). It further contained a piece of thick woollen cloth, a needle, a crystal cabochon, pre-cut silk #12 perle threads and instructions. All prettily packed in a super handy tin. I started by translating the instructions. There isn't much there. Apart from a short note on Pascal and Glazig embroidery, it only tells you that you shouldn't use a hoop, you should baste the two layers of fabric together, keep your threads short, start with the chain stitches and don't wash afterwards as the wool will shrink. And that's it. On the back of the instructions is a clear picture of the finished design (the one that doesn't exactly exactly match the lines on my pre-printed fabric) and a working sketch detailing which stitches go where. The instructions to the 10 different stitches used in the design can be found on separate cards also packed into the kit. This is of course a clever solution to keep your kits, and especially your instructions, economical. And this is how far I've come after I sorted the threads and cut them to the recommended length. And yes, I do use a hoop :). The fact that I can't wash the piece after I've embroidered it, made me decide to use a hoop. This will mean that I am not exactly following Pascal's instructions as apparently you stitch the chain stitches only through the linen and not through the wool. I can't quite envisage this, not even when I would hold the piece in my hands. I suspect that you do scoop up some wool every now and then.
The wool is a mystery to me, to be honest. In the instructions it says that the wool prevents puckering and gives a dimensional effect to the embroidery. Hmmm, actually, the non-puckering and the dimensional effect exclude each other, in my opinion. And looking at the picture of the finished design, it doesn't quite work. What I suspect is that using the linen onto the wool recreates the original feeling of stitching on traditional clothing. Glazig embroidery was used to adorn the men's clothes of the Quimper region in Brittany. And see all the thread tails hanging on my piece? Although the instructions say that you should start with the chain stitches and then commence into the more complicated stitches, I could tell from the picture that one and the same thread was used in going from one type of stitch to the next. So, I will finish all my chain stitches first, but will still be able to continue into the next type of stitch with the same thread. And I do like the stitching! The colours are so vibrant and the design is so much fun. I can't wait to start some of the stitches specific to this type of embroidery! I'll keep you posted on my progress in a further post. Meanwhile, would this kit be for you? Not being fluent in French isn't a problem as Google translate provides you with a decent enough translation. However, if you are used to step-by-step instructions, this kit doesn't provide that. You have to figure out a lot for yourself and fix a few flaws here and there. So, if you like Pascal's vibrant designs as much as I do, you love an interpretational challenge and you are prepared to fork out between €35 and €75 plus pricey shipping, then go for it! In the meantime, I would love to hear if you know of other embroidery designers offering kits in a special 'old' embroidery technique. Please do leave a comment below! After a nice long walk through the beautiful Bavarian landscape on Thursday, me and my husband came home to an overflowing mail box. What had happened? Mary Corbet of Needle 'n Thread reviewed my crewelwork kit 'Carol's Rose'. I have been over the moon ever since. But it had some unexpected consequences... Due to Mary's lovely review, I sold more Roses in a couple of hours than I did in the past 18 months :). No complaining here. It just meant that I ran out of kits. No problem, or so I thought. Printing new instructions in large quantities upset the printer. It wanted a new image drum. Never heard of the part, but a new one was delivered to my home. Then it was time to overlock the edges of the fabric to go into the kits. My overlock machine thought NOW would be a fine moment to stop working. Yes, you read that correctly. She STOPPED. How dare she.
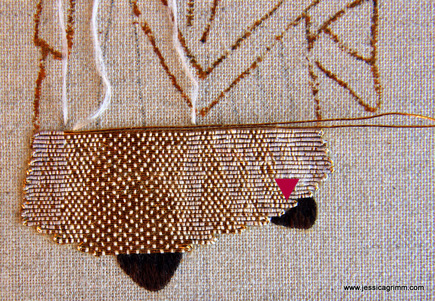
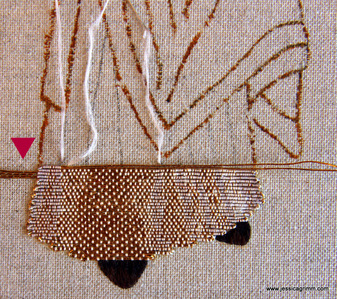
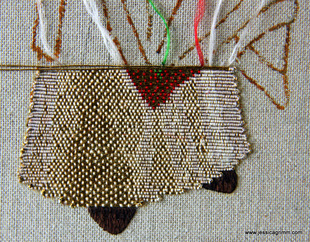
Me and my handy husband took the whole machine apart. They look pretty archaic on the inside, by the way. Cleaned her and oiled her and put her back together again. We were pretty good as she does work again and we were only left with one extra washer.... :). And then all Rose kit making had to grind to a halt. Even though I have a rather large stash to make new kits from, by now I had run out of the correct shades of wool. So a HUGE THANK YOU to all the lovely patient people who have pre-ordered the kit. As soon as the wool arrives, I'll start making kits again and mail them out. Oh, yes, and I will start regular blogging again early September. See you then! As several people have enquired after Laurence, I figured that I should make him the star of this week's blog post. Do you think a saint from the Roman period should get media training first before he makes an online appearance? After previously stitching his feet with Chinese flat silk, I've now made a start on his alb. An alb is worn by clergy under other garments such as the dalmatic or chasuble. As the Christian faith developed during the Roman Empire, many of its organisational structure and costumes are Roman. The alb, from the latin albus, meaning white, is a Roman tunica. Laurence's alb is stitched in or nue technique. Which means that, in this case, Japanese Thread #8 is covered by couching stitches of Chinese flat silk in two off-white tones. To give the impression of folds, the couching stitches are placed closer together or spaced out. It is not unlike silk shading or black work as taught at the Royal School or Needlework. As you can see, I have several needles on the go at the same time. Not bad for a first attempt. See the pink arrow in the picture above? There is a little bit of fabric showing between the alb en Laurence's left shoe. I'll mend that with a few extra stitches. And make a mental note to self that in the future I should go over the design line when working such areas. Medieval stitchers stitched their goldwork quite differently than how I was taught at the Royal School of Needlework. Normally, at the end of a row, we would turn our threads in such a way that the upper thread becomes the lower thread and the lower thread becomes the upper thread. This ensures a smooth rim on the curve. Not the medieval way to do it. The medieval embroiderer crossed the threads; lower thread stays at the bottom and upper thread stays at the top. They placed two anchoring stitches in the curve. I haven't figured out what the benefit of these crossing threads is. Does anyone have a clue? Oh, and just as modern gold embroiderers, our medieval counterparts didn't like plunging. So they just didn't. Really, they didn't! They just couched the thread till the desired design line and then snipped it off. As a good Royal School of Needlework girl, I was a little sceptical at that. However, no guts no glory. Below the pink arrow in the above picture, you see the tails of my old threads and the tails of my new threads. I ignored the fact that they are tails and just couched over them as my design required. I took the picture just before I snipped the tails off. Laurence has been brave too; after snipping he was still fine... And this is what Laurence looks like after 16 hours of stitching. I made a start on his green cloth of gold dalmatic with the red trim. Past and future blog posts on this project can be easily found by selecting 'St Laurence' in the category list to the right of this post. This weekend, I should have been attending another workshop with Verena Schiegg in Switzerland. However, my train journey ended in Munich due to track closure after a suicide. So I decided to work during this unexpected free weekend. I translated the instructions for all my major embroidery designs into English. Many of you might have seen the interesting post and the resulting discussion on embroidery designs and kits on Mary Corbet's Needle 'n Thread. For those of you who haven't, I can highly recommend it! One of the outcomes was that, if I want to sell my kits internationally, German instructions won't do. I've also found a loop hole in the German postal system making it possible to send my kits worldwide for a small shipping fee.
So please honour my hard work and check out my embroidery kits and downloads. My kits come with ample supplies, needles and an instruction booklet with many detailed pictures and drawings. And when you get stuck or the materials are not quite sufficient, then email me and I'll sort it out as soon as possible and of course free of extra cost! Wow, what a week it has been! The fox has attracted quite a bit of attention around the globe thanks to Mary Corbet mentioning the project on her website. So here is a very warm welcome to all my new readers. Millie Marotta was also very impressed with the stitched version of her fox. Has anyone else stitched something inspired by Millie's wonderful drawings? If so, do share your story below. This is the latest kit available from my webshop: Bird Song an introduction to Elizabethan embroidery for the intermediate stitcher. The design uses several different surface stitches and two forms of needle lace along with a little added bling. The piece is almost entirely stitched using the gorgeous hand-dyed perle #8 from House of Embroidery. The background fabric is a pale minty green high quality dupion silk. The kit comes with instructions in either German or English and features over 30 pictures and illustrations. Also new is this silk ribbon (and stumpwork) beginner's kit: Autumn Bounty. This kit features the equally gorgeous hand-dyed House of Embroidery silk ribbons. And this is the beginner's surface embroidery kit 'Erica' mentioned in last week's newsletter. A simple, yet stunning design stitched with House of Embroidery perle #12. Both kits feature instructions in German and English. So you are not only learning a new stitching skill, you can also brush up on your languages :).
Please do let me know what you think of these new kits! It is sometimes hard to guess what you, the stitcher client, want. So here is your chance to put me to work. Don't miss it! Not much stitching last week. Instead, I have started to translate the instructions for my embroidery kits into English. It takes me about a day each to come up with a proper translation and to make them available to you online. In my webshop, you can now find the kits John's Sun Flower - crewel embroidery for beginners and Wilhelmina Beetle - advanced goldwork in either German or English. Apart from the detailed instructions, my kits contain fabric, threads, needles and all other sundries to complete the embroidery. Usually, you will also need a 20cm embroidery hoop, scissors, an aqua trick marker and a light box or window. As I know that many of you have a lot of stash lurking in your homes or want to save on postage, you now also have the option of only buying the detailed instructions. John's Sun Flower and Wilhelmina Beetle are now available in either English or German for direct download. A word on postage: I use a very simple and therefore cheap website platform. The lower my running costs, the less you pay at the checkout :)! However, being a very simple platform, combined with an intriguingly complex German postage system, the webshop is not able to accurately predict your postage. It gets it right for German customers most of the time. There also seems to be a good fix for EU costumers. However, oversees is a mess. Currently, you get standardly charged for a parcel up to 2 kilos. Since my post office clerk, a very nice young man, has the last word, I often only know at the post office what the real costs will be. That's not tragic, just a little bit inconvenient. Since you all pay through PayPal, I'll return any surplus immediately. The system is set up in such a way that underpayments do not happen. Over the next months, I will add more kits and direct downloads. However, it will be busy weeks with teaching commitments and demonstrations at the museum. So please be patient!
Tomorrow starts my course with the very talented Elisabeth Roulleau at ArtTextil in Dachau, Germany. Elisabeth was trained at the famous Lesage school of embroidery in Paris. I will attend a three day beginner's course in tambour embroidery. Learning how to attach spangles and beads onto fabric. I am very much looking forward to this CPD opportunity! I'll tell you all about it in next week's post. |
Want to keep up with my embroidery adventures? Sign up for my weekly Newsletter to get notified of new blogs, courses and workshops!
Liked my blog? Please consider making a donation or becoming a Patron so that I can keep up the good work and my blog ad-free!
Categories
All
Archives
December 2023
|