|
As most of you know, I do love cross-stitch. For me, it is the perfect antidote to working goldwork replicas of medieval pieces. Especially when that cross-stitch comes in the form of a kit. After all: somebody else has done all the thinking for me. I just need to follow the instructions. So when I saw the gingerbread mice by 'Just Nan' on Janet Granger's blog, I knew this was going to be the beginning of a new collection :). For those interested: I also collect the Mill Hill Santas. Since Janet showed off the gingerbread mice, I am going to show you the snow mice. Not care for snow nor gingerbread? Do not worry! 'Just Nan' has birthday mice and Halloween mice too. And a whole lot of other beautiful cross-stitch designs that are quite unusual. My mice came from 'Create Nostalgia' in the UK. Owner Mary Gittins provides a terrific and speedy service. 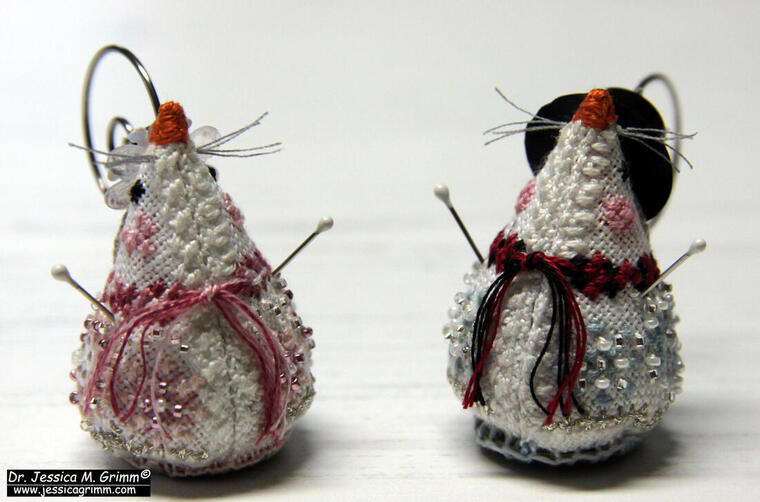 Mice designed by 'Just Nan' These are Mr and Mrs snow mouse. However, they have posher names too: Crystal Snowlady Mouse and Frosty Chillingsworth Mouse. Mrs mouse is the more intricate one to stitch and takes a bit longer. If you set your hands to it, you can stitch and finish a mouse a day. The finishing is easy, but a bit fiddly. After all, the mice are only 4,5 cm tall. Apart from cross-stitching (over two and over one!) on 32 ct linen, you will do some beading too. I think these designs are pretty genius and intricate.  Mice designed by 'Just Nan' Now, these mice are not sold as complete kits. And to me, that's a bit of a downside. For starters, my stash does not include a range of white and coloured 32 ct linen. That's too coarse for medieval goldwork embroidery. So I started by ordering pre-cuts for all my mice. After all, this is going to be a collection :). I did not bother with ordering the correct numbers of DMC stranded cotton or Kreinik metallic threads. I happen to have quite a few of them. Seldomly the correct numbers. However, I had a pretty clever stitching grandma who once told me that since Santa is primarily red, white and black, it does not matter if you use 321 or 666. Very good stitching advice indeed and works well for mice too. 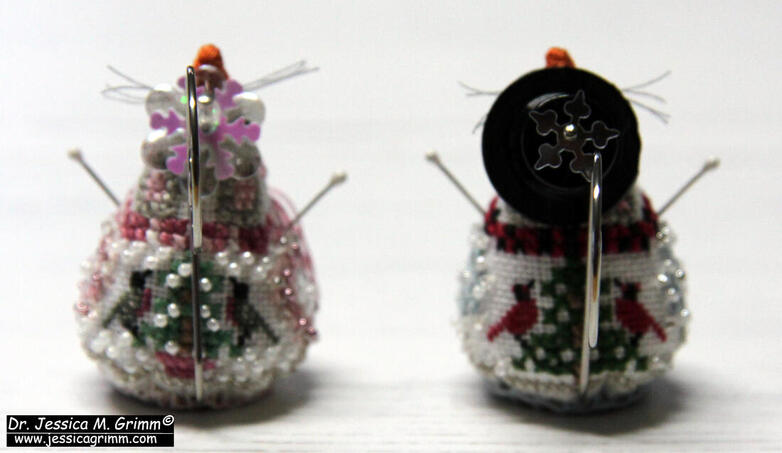 Mice designed by 'Just Nan' The patterns do include the beads, sequins, tails, stick arms, button and hats. Whilst there are enough beads in the package, the other elements only make you one mouse. And these are potentially parts that are not so easy to source. But I am pretty sure that there will be people in my inner circle who see my mice and start begging for one too. Since I am not going to give my prized collection away, I will have to come up with some clever substitutes. My husband will probably transform from head graphics to head mice tail maker :).
Whilst I really think these mice are pretty cleverly designed, there is one part on them that I am not too sure about: the mouse's bottom. It consists of a decorated metal button. You are supposed to attach it over the stuffing opening (this is getting hilarious!) with whipping stitches. As the button is shaped irregularly, your stitches cannot be regular. That bugs me. Buttonhole stitches with a thicker thread such as perle #12 or #8 look a bit better. However, it is still not the prettiest part of the mouse. I have had mice butts on my mind for days by now, but have not found a better solution yet. Any advice?
7 Comments
These are cute! I suppose you could weave around the buttonhole stitch with thread (or tiny ribbon) to fill it in just under the mouse. Or, try the Venetian Lace edging stitch to add scalloping along the bottom (maybe that would hide the unevenness a little?). I am curious what others may suggest. 23/11/2020 16:26:29
That's a great idea! I was thinking along that line too. The thing is, the mice do need a bit of weight to their bottom for stability. So I was thinking about making Dorset buttons (needle lace buttons) to go on their bottoms. The metal ring should give a bit of weigth and I could than attach the needle lace button with a buttonhole edge :). Stitching time would increase a lot, however!
Kimberly
23/11/2020 16:34:43
What about a washer from you local hardware store? This would have weight, it is flat. With its doughnut shape it can be stitched around.and there is space for the gathered fabric on the bottom ;) 23/11/2020 16:41:29
Good thinking, Kimberly! Those washers are even a bit heavier than the rings used for Dorset buttons. In this case, that's perfect! And I can still make a modified Dorset button to cover the mouse's bottom :).
Sheila
23/11/2020 17:19:10
I have quite a few mice now. The bottom bothers me too and I have finished some but not made them up yet. 23/11/2020 22:42:35
I like the magnet idea, Sheila! And I am glad I am not the only one fussing about mice bottom's :). Your comment will be posted after it is approved.
Leave a Reply. |

Want to keep up with my embroidery adventures? Sign up for my weekly Newsletter to get notified of new blogs, courses and workshops!
Liked my blog? Please consider making a donation or becoming a Patron so that I can keep up the good work and my blog ad-free!

Categories
All
Archives
July 2024
|

 RSS Feed
Contact: info(at)jessicagrimm.com
Copyright Dr Jessica M. Grimm - Mandlweg 3, 82488 Ettal, Deutschland - +49(0)8822 2782219 (Monday, Tuesday, Friday & Saturday 9.00-17.00 CET)
Impressum - Legal Notice - Datenschutzerklärung - Privacy Policy - Webshop ABG - Widerrufsrecht - Disclaimer
Copyright Dr Jessica M. Grimm - Mandlweg 3, 82488 Ettal, Deutschland - +49(0)8822 2782219 (Monday, Tuesday, Friday & Saturday 9.00-17.00 CET)
Impressum - Legal Notice - Datenschutzerklärung - Privacy Policy - Webshop ABG - Widerrufsrecht - Disclaimer