|
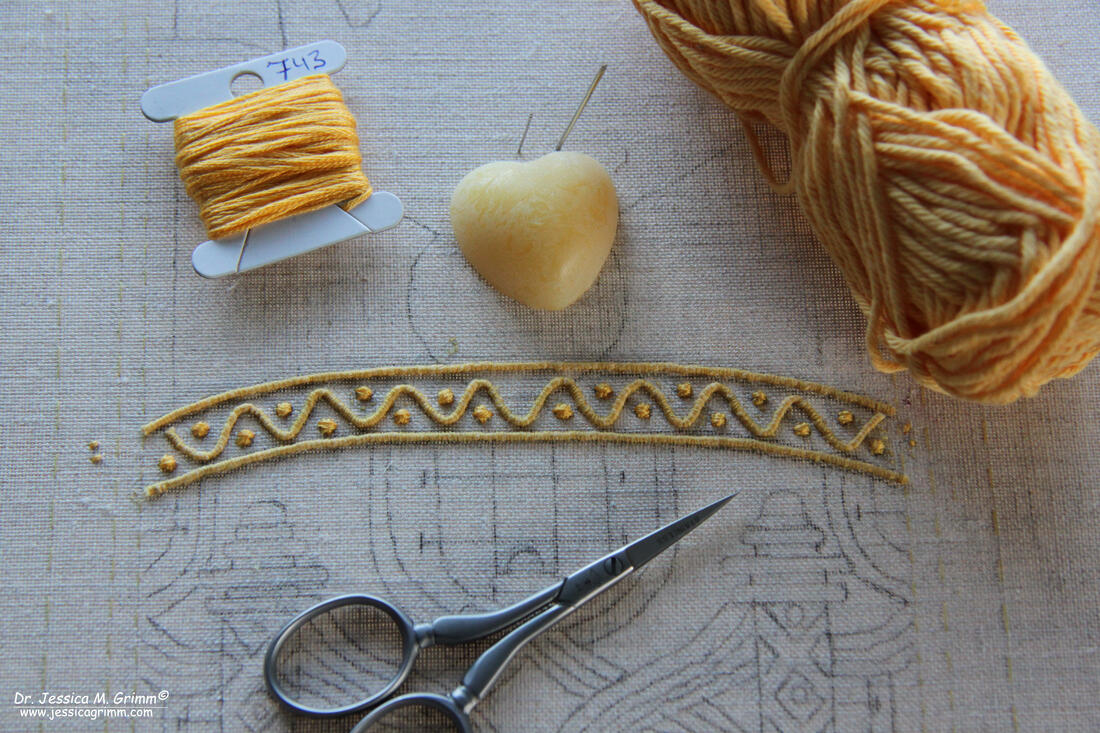
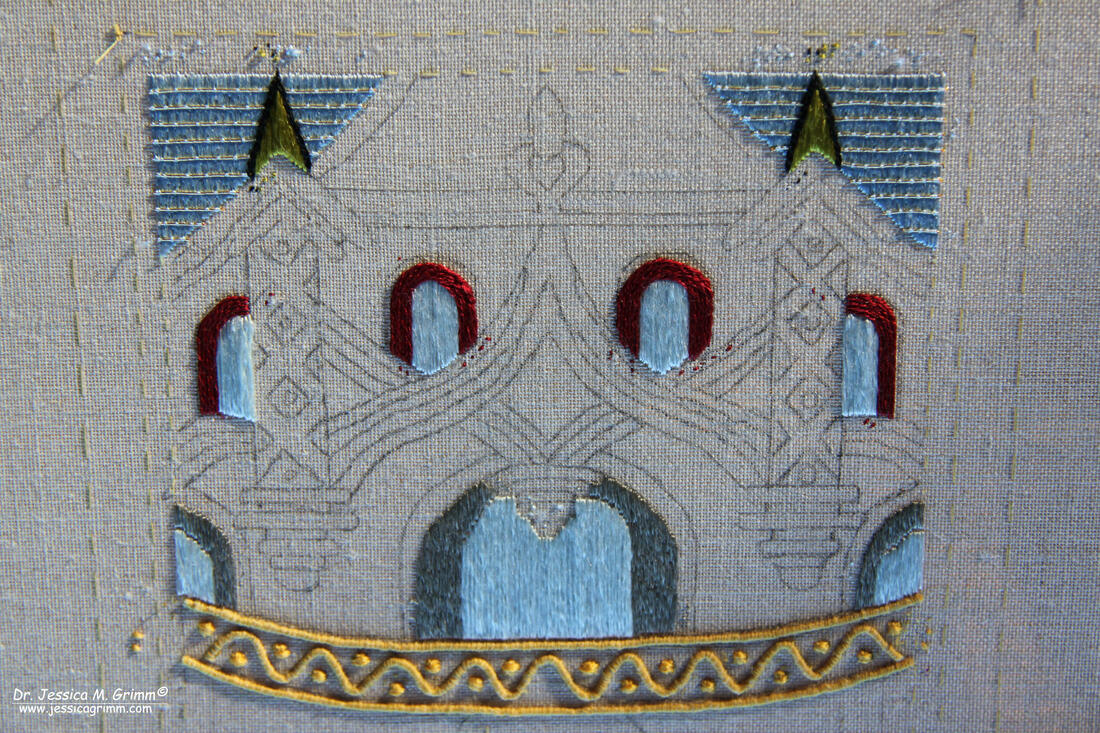
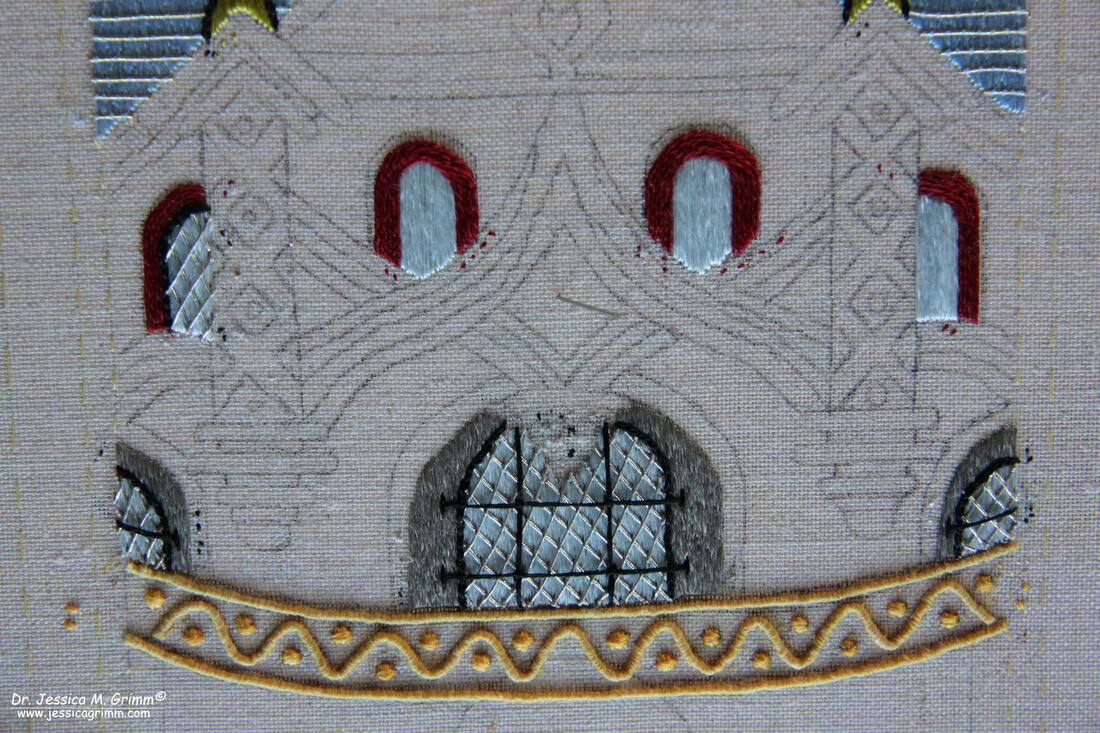
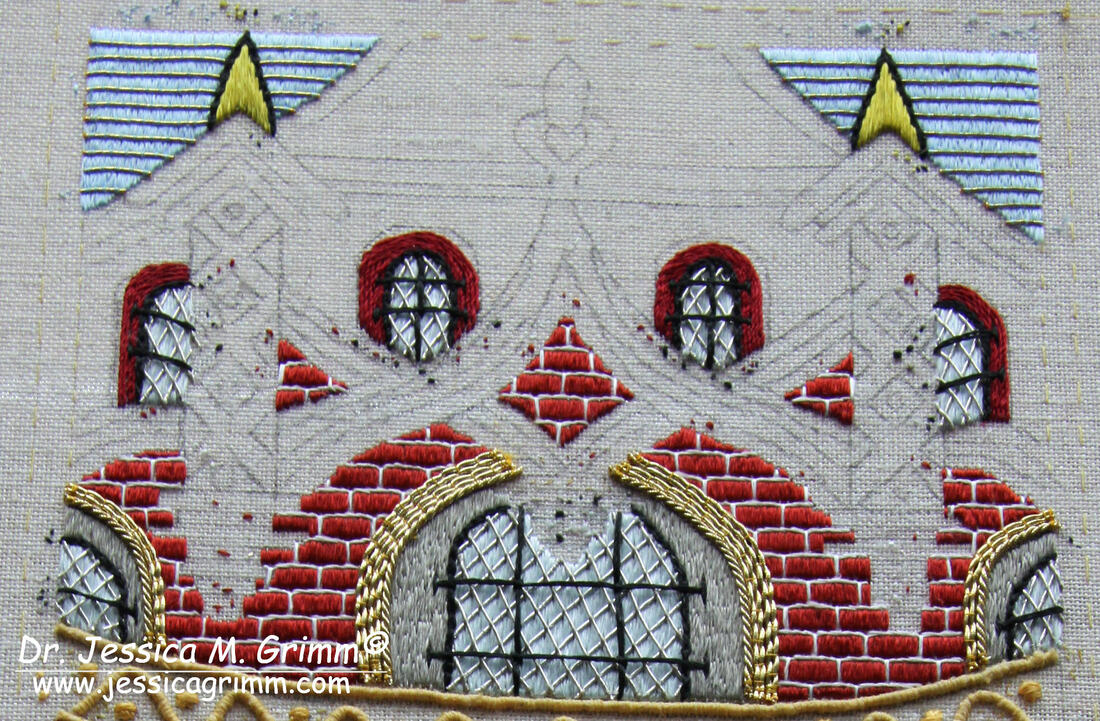
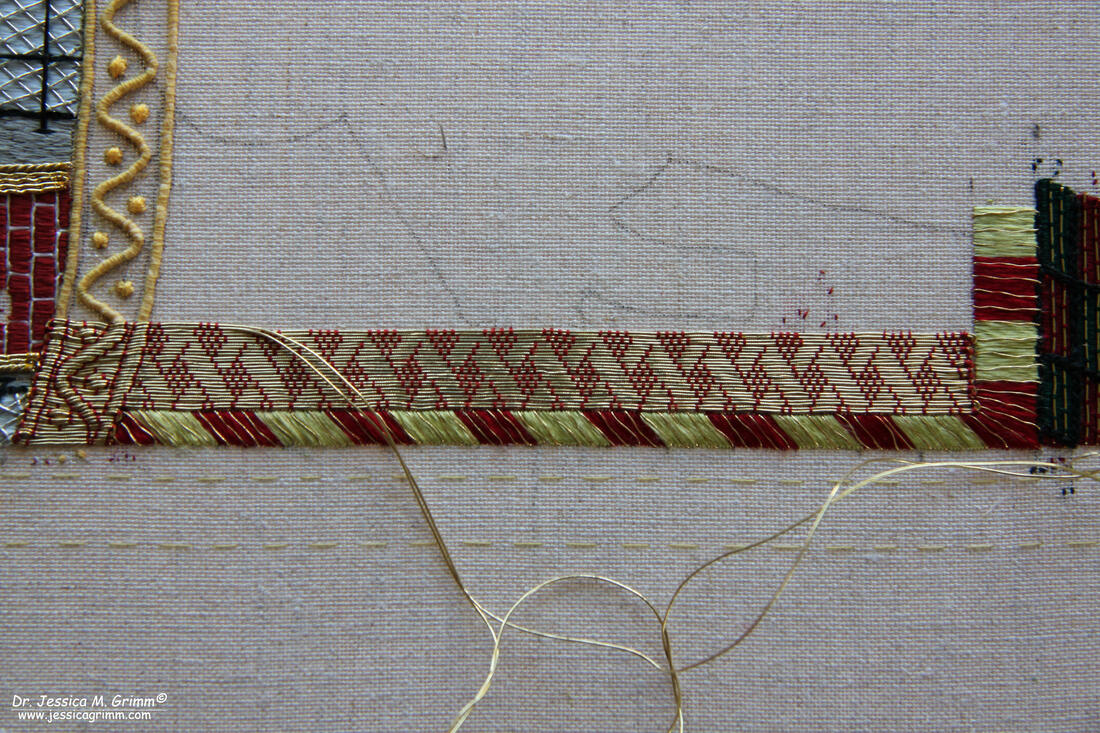
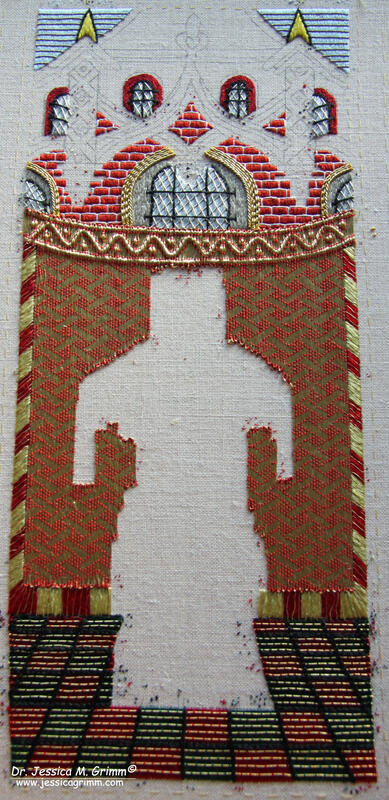
Let's check in with my goldwork project to see what progress I made. First I put the string padding in for the goldwork that sits at the top of the tapestry behind Pope Francis. I used yellow cotton yarn and a matching yellow stranded cotton. I waxed the cotton yarn with pure beeswax to make it firm. I then couched the waxed yarn into the desired position. For the little dots, I made a double cross (at angles) with a full strand of stranded cotton. In the picture below, you also see my favourite embroidery scissors made by Dovo, a German company. Whilst I don't use them to cut my goldwork threads, I do use them for all the silks I am working with. They are super sharp and cut very clean and precise. Next up were the windows. I started by satin stitching the glass using a light blue Chinese flat silk. The grey lintels are stitched in long-and-short stitch using a grey Chinese flat silk. The red lentils are made of rows of stem stitches using stranded silk (#3093 Campari Soda) by the Silk Mill. Next, I put in the "lead" for the leaded windows. I used silver plated smooth passing #5. The first layer I couched in place with a grey (LT1322) superfine silk made by Langley Threads. The second layer was then couched in place at the intersections using the same grey Chinese flat silk as was used in the grey lentils. Since you just cut off the passing thread at the border between lentil and glass (i.e. no threads are plunged), you need to hide the ends under a layer of chain stitch using Silk Mill stranded silk. I used the same (near) black silk thread to stitch the dividers between the window panes. I really loved putting in the red bricks! I just happened to have the ideal colour of Chinese flat silk to do the counted satin stitch with. The white grout is made with stem and straight stitches using a white Chinese flat silk. The lentils were finished by couching Gilt Twist #3 and Gilt Rococo in place. Note how I left a tiny gap between the window/bricks at the bottom and my yellow string padding. I will need this gap later when putting in the passing thread to form the top decorative border of the tapestry hanging behind the pope. You can also see that the gold threads are just cut off and not plunged as we tend to do in modern goldwork. One of the challenges of recreating these Late-Medieval orphreys is finding out what threads were used. In the original piece, the fringe of the ceremonial tapestry hanging behind the figure has wavy streaks of very fine gold thread. No idea what it is! However, I have noticed that when the ends of Gilt Twist unwind, they look wavy. What would happen when you intentionally unwind a length of twist? Yup, you end up with three strands of very fine wavy gold thread :). So, over my base layer of green and red satin stitches made with Chinese flat silk, I carefully stitched with my "home-made" gold thread. The trick is to use a big needle and not pull to hard as otherwise the waves come out. And yes, I did stitch through the fabric with my gold thread using the same motion as with laid stitch. Next up was the tapestry itself. For the St. Laurence project I used Japanese thread for this part. However, this would not work well with the intricate padding of the decorative top border. I decided to use Gilt passing thread #6/Stech vergoldet 140/150 CS instead. It is a stiffer and thicker thread than what was used originally. However, I am trying to finish this piece quickly so that I can start the next one for my upcoming exhibition in August. Using a finer thread would mean hours of extra work! And this already took 20 hours... The good news is, it works much better for the red diaper pattern than the original thinner thread works in the original piece. There is a lot of gaping in the original piece. The downside? It doesn't flow well over my padding; here I have gaping. Especially over the little dots. And I learned something else: framing up both the figure and the background on one frame, make stitching difficult. My arms are too short sometimes. I noticed that I was able to stick to the counted diaper pattern best when turning my frame in such a way that I worked horizontally (as you see in the picture). I couldn't do this for the other half of the background. Instead, I worked vertically. The diaper pattern is not nearly as crisp. However, the couching over the padding is much nicer when I am working vertically. Lesson learned. Next time I will make sure that I can reach my embroidery equally well from all FOUR sides of my slate frame. For the moment, the blank that will eventually be filled with the figure of Pope Francis looks more like a zombie...
P.S. You can find the first two blog posts on this project by clicking the "Pope Francis" category on the right.
11 Comments
Jill Hall
4/2/2019 11:36:47
Just to say what a fabulously instructive site this is - when you’ve finished this piece, please publish in book form!
Reply
4/2/2019 11:51:49
Thank you Gill! That's always nice to hear. However, I don't think there is a market for such a book :). I tried before with the Italian laid silk work and there wasn't really a market for it...
Reply
Maureen Troake
21/2/2019 21:42:48
Hi Jessica. What fabulous work you do! I can't stop looking at these pictures. I would also be interested in written instructions for this work (I'm from South Africa). Is the Italian book to which you refer still for sale? 22/2/2019 08:39:58
Thank you Maureen! You can find my ebook on Italian laidwork in the section for downloads in my webshop. Alternatively, you'll find the ebook with various options for materials in the kits section. Regarding written instructions for my goldwork projects: what would you like to see included in such an ebook? I write with great detail about these projects in the various blog posts, but what do you still miss? Thanks for your input!
Reply
Maureen
23/2/2019 12:37:17
Hi Jessica 4/2/2019 13:34:54
Wow! That is looking so good already!
Reply
4/2/2019 17:42:09
Thank you Rachel! Oh yes, done quite a bit with my left hand. Or standing up and killing my back in the process...
Reply
6/2/2019 14:32:10
Thank you Catherine! I was also really suprised how different my stitching looked depending on how I worked it direction-wise :).
Reply
Your comment will be posted after it is approved.
Leave a Reply. |
Want to keep up with my embroidery adventures? Sign up for my weekly Newsletter to get notified of new blogs, courses and workshops!
Liked my blog? Please consider making a donation or becoming a Patron so that I can keep up the good work and my blog ad-free!
Categories
All
Archives
July 2024
|
Contact: info(at)jessicagrimm.com
Copyright Dr Jessica M. Grimm - Mandlweg 3, 82488 Ettal, Deutschland - +49(0)8822 2782219 (Monday, Tuesday, Friday & Saturday 9.00-17.00 CET)
Impressum - Legal Notice - Datenschutzerklärung - Privacy Policy - Webshop ABG - Widerrufsrecht - Disclaimer
Copyright Dr Jessica M. Grimm - Mandlweg 3, 82488 Ettal, Deutschland - +49(0)8822 2782219 (Monday, Tuesday, Friday & Saturday 9.00-17.00 CET)
Impressum - Legal Notice - Datenschutzerklärung - Privacy Policy - Webshop ABG - Widerrufsrecht - Disclaimer



 RSS Feed