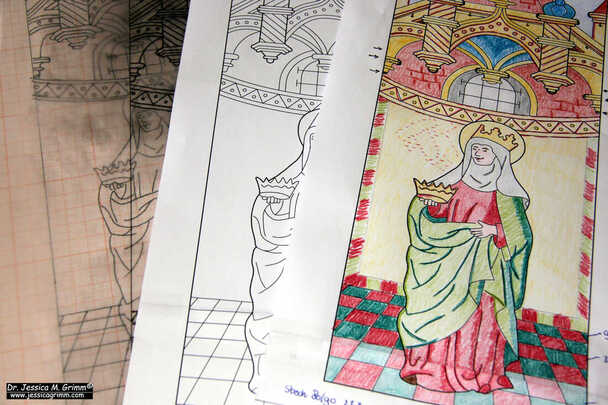
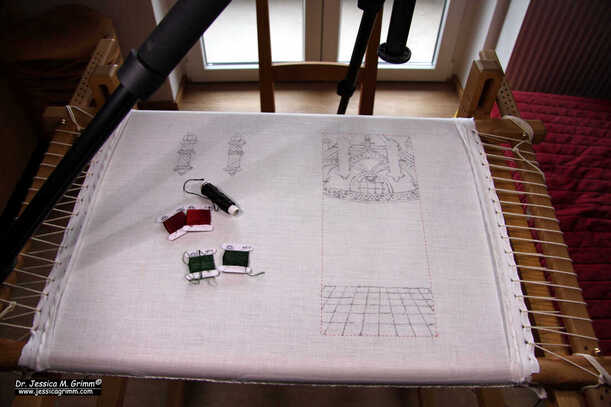
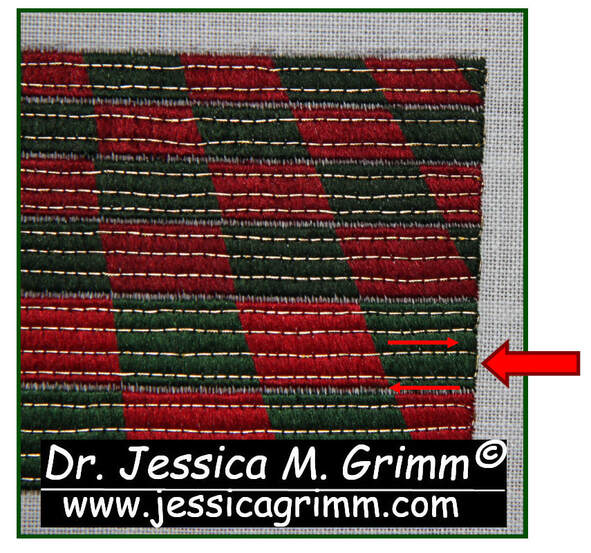
With me moving house last year, I just wasn't settled enough to start stitching on the orphrey background for the Alpine Experience any earlier. I knew what I wanted to stitch and knew which colours to use. Finding the right mindset to start stitching, took a little longer. But I finally bit the bullet! So, expect regular update posts on the orphrey in the coming months. Today we'll start with the design, frame setup and the first bit of stitching. My Journeyman Patrons can download PDF instructions for the stitching part. The design is a combination of elements found on a series of orphreys on a chasuble held at Museum Catharijne Convent in the Netherlands. Although this time, I will only teach the orphrey background, it can be combined with the or nue figure of Elisabeth of Thuringia which I taught last year. However, both projects can be stand-alone embroideries. To reflect this, my stitched version of the orphrey background will completely omit the space for a figure. I've set up my slate frame with a piece of 46 ct even-weave linen. The design has been transferred using traditional prick and pounce. Instead of paint, I have used ink and a brush to connect the pounce dots. Although ink spreads a little, I prefer it above paint. In most cases, paint will flake off during stitching. Getting the consistency just right so it doesn't, is extremely difficult. Ink seeps into the fabric and thus cannot flake. The first element I have stitched is the famous tiled floor. It is easy embroidery and perfect for the start of such a large project! Medieval embroidery often consists of several layers of stitching worked on top of each other. The tiled floor is no exception. On the one hand, this helps with adding a sense of depth. The finished embroidery is less flat. On the other hand, it allows the embroiderer to hide the ends of his threads. Exposed thread-ends, however well secured, might with time unravel. In the name of durability, having as few starts and stops of the gold threads as possible is also important. Our tiled floor is a prime example of how this was achieved. The rows of gold thread consist of a single thread of passing thread. There are only two tails or exposed thread-ends: one at the start and one at the end. The thread 'travels' on the front along the edge of the tiled floor. By making sure that you have this 'turn' laying nice and flat, you can hardly see it in the finished piece. In addition, this edge is covered with a red ribbon in the original medieval piece. Clever, isn't it?
8 Comments
Agne
13/3/2023 16:03:57
Why, why, why... Why are you using patreon? I canceled my patreon account one year ago and I do not want to go back. But I want to read your posts. You created such a big problem for me :D If only you were in contribee.
Reply
13/3/2023 16:05:54
Because most readers had trouble finding the donate button in the right-hand column :).
Reply
Linda Hadden
13/3/2023 19:49:46
Hi Jessica, WOW thank you for that, also just subscribed to Journeyman Patron. Thank you for all what you do and for sharing xx
Reply
Victoria Wood
13/3/2023 22:21:27
Wow! Thanks for sharing this -- I'm becoming a Journeyman Patreon now.
Reply
15/3/2023 19:08:02
Yes, there are more options than just plunging!
Reply
Your comment will be posted after it is approved.
Leave a Reply. |
Want to keep up with my embroidery adventures? Sign up for my weekly Newsletter to get notified of new blogs, courses and workshops!
Liked my blog? Please consider making a donation or becoming a Patron so that I can keep up the good work and my blog ad-free!
Categories
All
Archives
October 2023
|