|
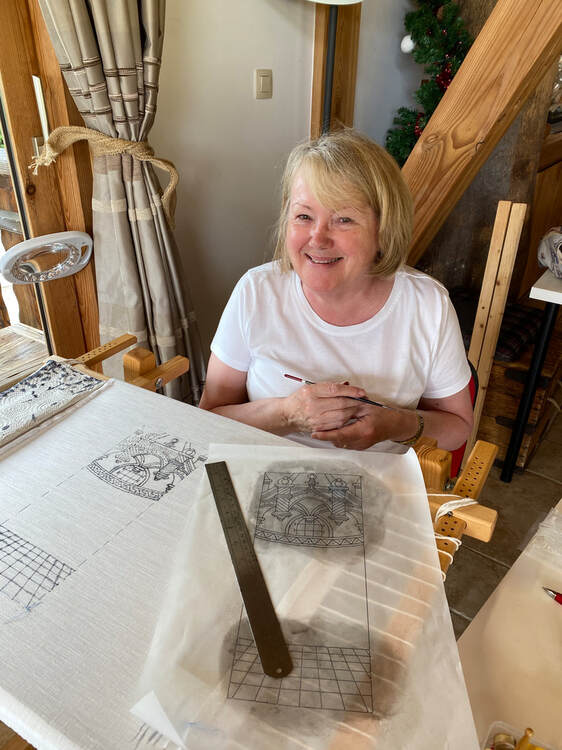
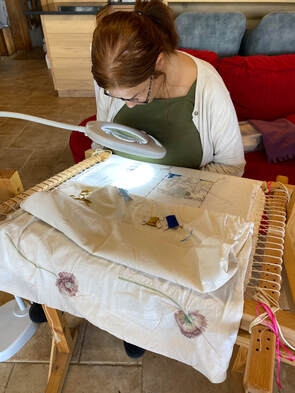
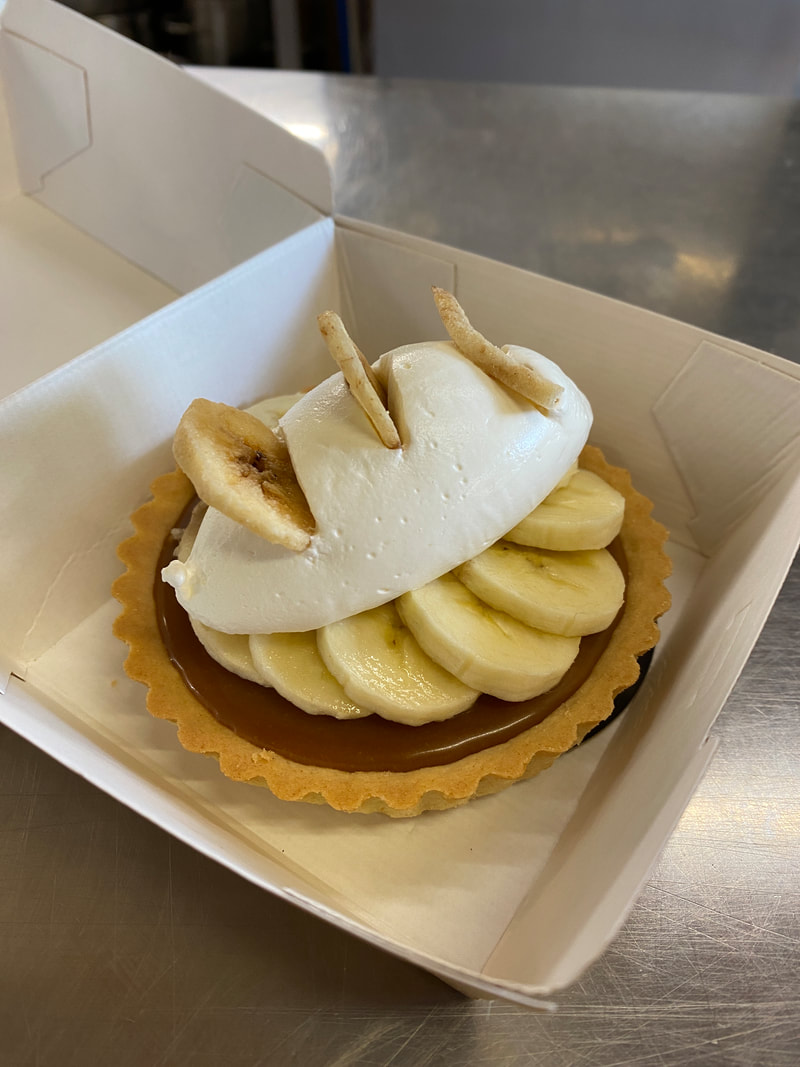
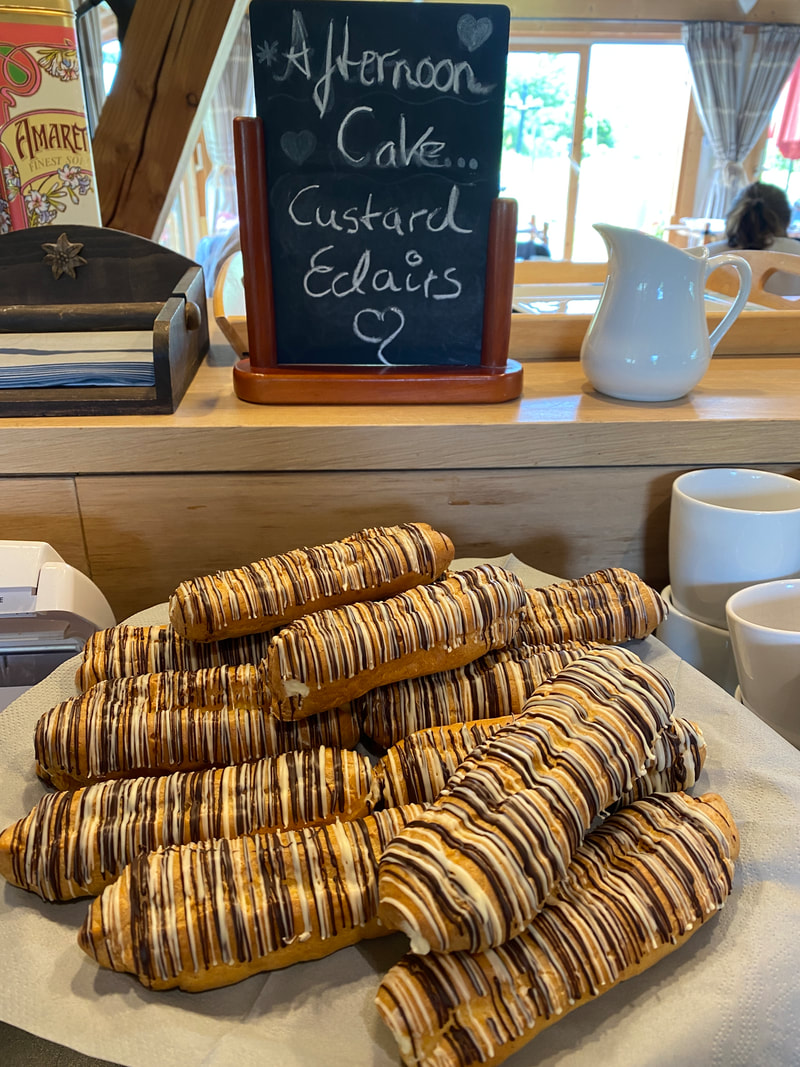
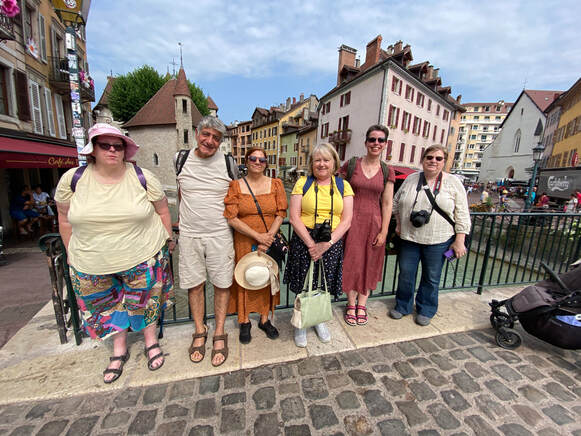
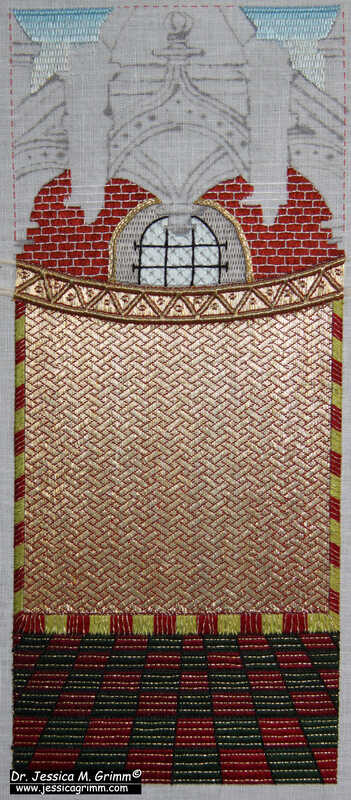
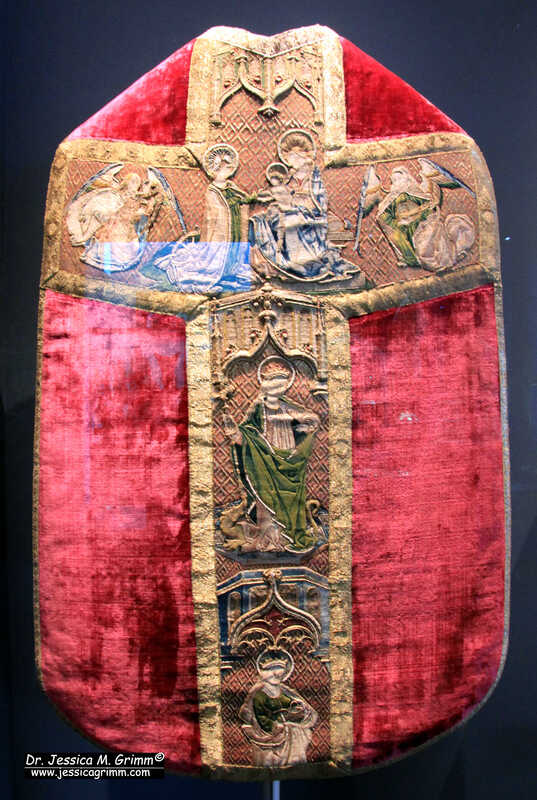
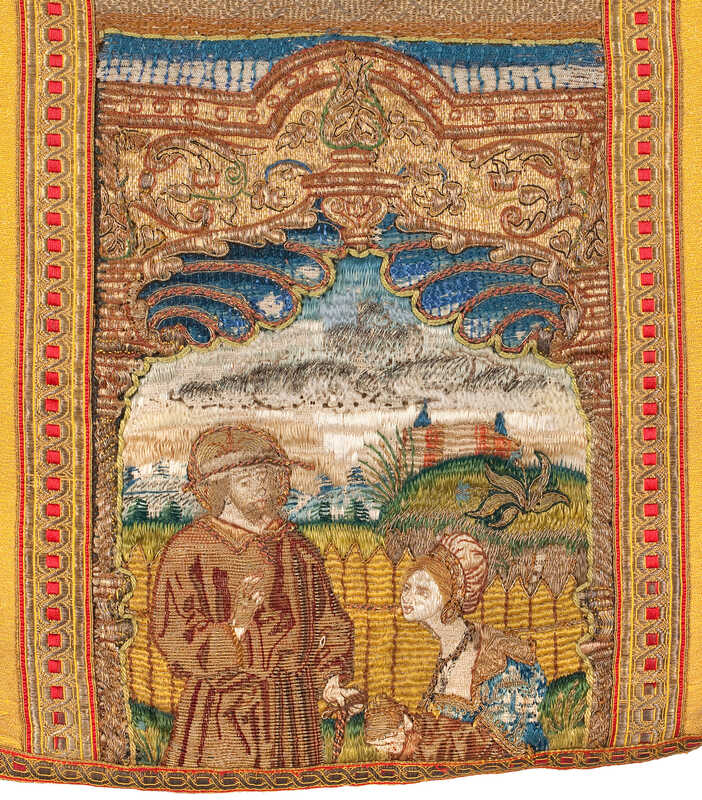
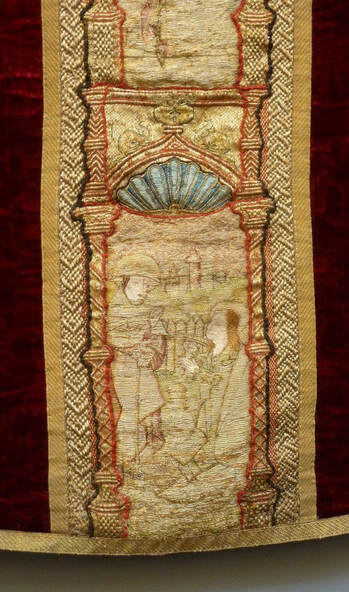
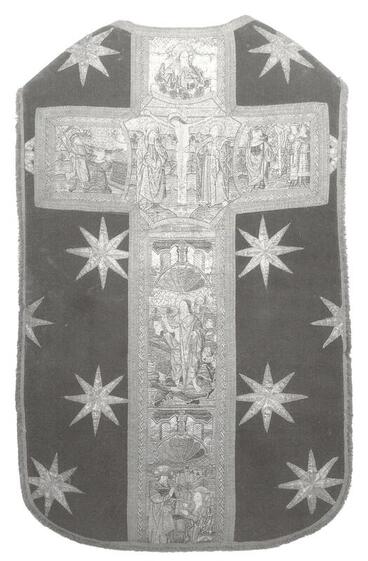
Two weeks ago, I travelled by train from Oberau to Geneva Airport to be picked up by Nadine for a week of teaching embroidery at the Alpine Experience. Door to door, it takes me about nine hours to arrive at Le Carroz in a more environmentally responsible way. Not bad at all. Why it still costs about twice as much as taking a plane will always be beyond my logic. Anyway, this year, nine students worked the background of an orphrey. The design combines two orphreys found on this late-medieval chasuble in the collection of Museum Catharijneconvent in the Netherlands. In my embroidery courses, I always try to work with procedures, materials and tools that were also commonly used in the medieval period. In this way, I am able to study how these things might have worked back then. After all, regrettably, I cannot time-travel to ask Jacob van Malborch how he pulled it off at his late-medieval embroidery workshop in Utrecht. This means that students usually will need to make their own prickings and paint on the design with paint or ink. You will also always use a professional slate frame. Not only are they medieval, but they also ensure the best results when creating goldwork embroidery. Being able to dress a slate frame and transfer the design in a traditional way is a valuable skill to master when you want to progress as an embroiderer. A whole week of embroidery sounds like you can really make a head start with your new project. At the Alpine Experience, you have about 30 hours of tuition in between meals and a day-long excursion :). However, as most students are not used to embroidering all day, this actually isn't a lot of time. After all, you are learning new skills. This means that, with a large project such as my orphrey, you will embroider the majority on your own at home. To ensure that you are well equipped to master this, I touch upon all techniques used in the project during the 30 hours of tuition. In addition, students have access to instruction videos and downloadable PDFs. And I am only an email away when they get stuck! As you need a lot of energy to keep going for a whole week, Mark makes sure that there is plenty of delicious food to keep you fuelled. The desserts are absolutely fabulous and my personal favourites. No surprises there for those who also know my father. I am genetically handicapped :). As mentioned before, we take a break from stitching on excursion day. The area around Les Carroz is very beautiful and you can easily go for a walk in nature after class. On excursion day, however, you might visit a charming medieval small town, an area of outstanding natural beauty or a typical French market. I joined the excursion to Annecy this year. Mainly because they have something very rare there: an embroidery shop! I have plenty of natural beauty at home. However, I have no idea where my nearest true embroidery shop is located now that the London Bead Company has sadly closed. I love going through the boxes with cross-stitch designs by Le Bonheur des Dames. This year, I came away with a beautiful sampler of summerly designs. If you are thinking of joining me (again) for a lovely embroidery retreat under the expert guidance of Mark and Nadine, then mark your calendar. I will return to Les Carroz from the 15th until the 22nd of April next year. More information will appear soon on the new website of Creative Experiences, the new name for the Alpine Experience. Hope to see you next year!
4 Comments
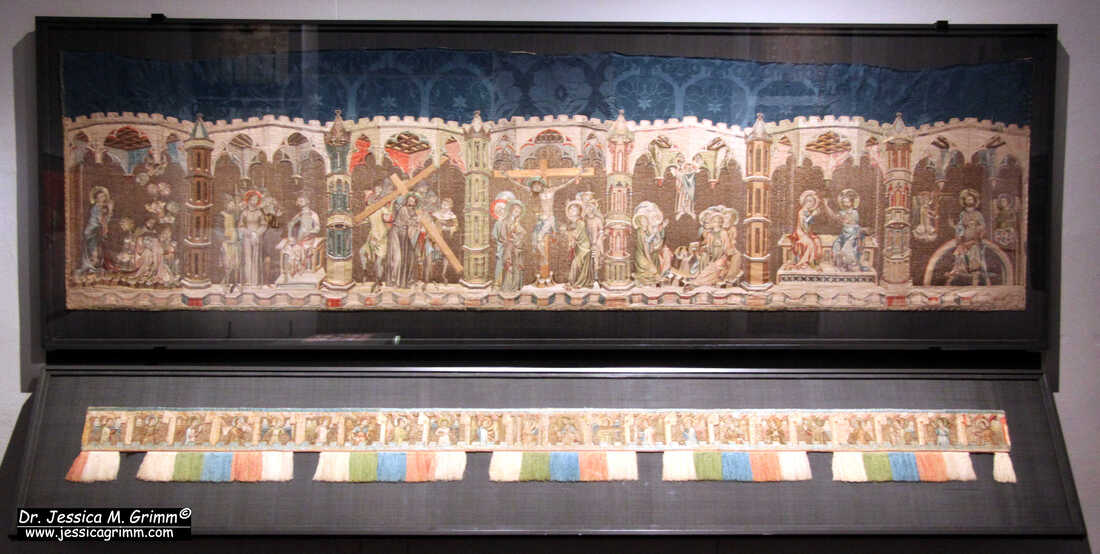
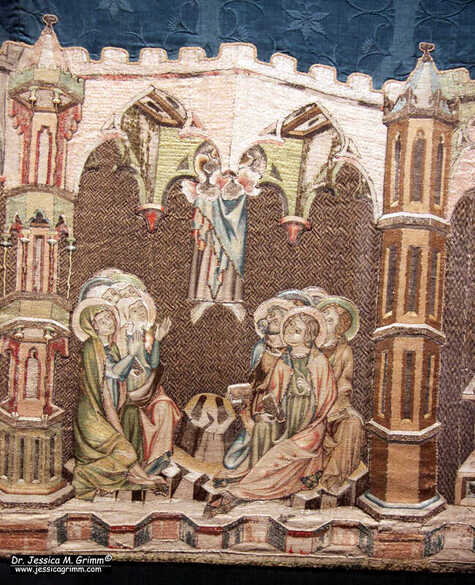
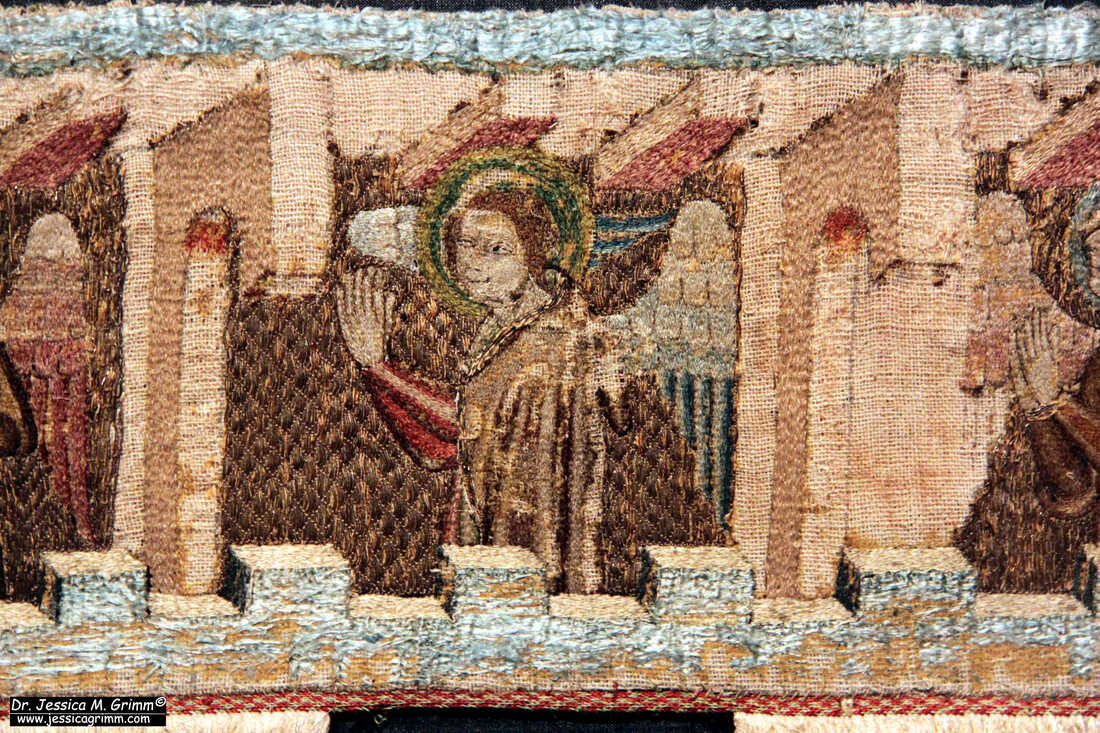
Last year, I visited the CIETA conference in Switzerland and we made a field trip to the Bernisches Historisches Museum. It has a large permanent display of medieval textiles well worth a visit. One of the many beautiful pieces is a large two-part antependium made in Vienna around AD 1340-1350. It was gifted by Albert II, Duke of Austria (AD 1298-1358) to the abbey of Königsfelden (now in Switzerland) where his sister, Agnes of Austria (AD 1281-1364) resided. Very kind of him, indeed. It is a stunning piece of embroidery and very well preserved. Let's explore! The antependium consists of a larger part (90 x 318 cm) with seven scenes from the life of Jesus. From left to right we see: Gethsemane, Christ in front of Pilate, Christ carrying the cross, Crucifixion, Ascension, Crowning of the Virgin and Christ in Majesty. And a smaller band (18 x 292 cm (cut)) with angels surrounding Mary and Jesus in the middle. My personal favourite is this Ascension scene. I just love the naive way this is depicted in medieval art. And this is a particularly detailed depiction. We even have the footprints :). The smaller band with the angels is really lovely. Two of the angels are playing string instruments. Two others are carrying what looks like a tall white candle. The rest is having a blast. They seem to dance and clap their hands to the music. They form a rich resource for anyone looking to work a medieval musical angel.
The embroidery itself is very fine. The under drawing on the linen is of high quality. The faces of the angels are worked in very fine directional split stitch in untwisted silk. The same technique is used in Opus anglicanum. The other parts of the angels are worked in slightly longer split stitches. Probably because they don't need to be as detailed as the faces. The noses seem to be a little bit padded. And I think they used a knotted stitch for the hair. And it seems that the silk in the halos is laid flat and then couched down. A few additional embellishments on the clothing are stitched in couched gold thread on top of the silk. The background is formed by couching down parallel rows of gold thread with a light-coloured silk. The diaper patterns are relatively simple for the angels but more elaborate for the scenes of the life of Jesus. All in all, the embroidery reminds me a lot of the embroidery made in Bohemia at the same time. This isn't too surprising as Vienna and Prague are relatively close. The Habsburg rulers and the Bohemian kings were also related by marriage and fighting for supremacy in the region. If you ever have the chance, do visit the Bernisches Historischen Museum in Bern, Switzerland. My Journeyman Patrons will have access to many more pictures of this gorgeous embroidery. Please note: I will take a two-week blogging pause whilst teaching for the Alpine Experience. A fresh blog post will go up on the 10th of July. Literature Schuette, M., Müller-Christensen, S., 1963. Das Stickereiwerk. Wasmmuth, Tübingen. Stammler, J., 1891. Königsfelder Kirchenparamente im historischen Museum zu Bern, Berner Taschenbuch 40, p. 26-54. Currently, I am mainly working on my orphrey background. I will be teaching this design at the Alpine Experience in June. For the past couple of years, I have always combined written instructions with video. This seems to work well for my students. However, as the apartment next door is being gutted and then put back together again, my stitching and recording are very dependent on when the workmen are quiet :). So, let's check in on my progress. As you can see, the tiled floor is in, the wall with the window has been completed, the sky was added and the basis of cloth of gold with the diaper pattern is in. The cloth of gold needs some minor further embellishment. I was going to do that today, but alas, the workmen are plastering, and it sounds like they are standing right next to me :(. Let's aim for tomorrow! The diaper pattern has been a terrific candidate for demonstrating goldwork embroidery at my local open-air museum Glentleiten. People were fascinated by the simplicity of it and the lovely effect achieved. I even managed to get people hands-on involved. Two young girls, aged 8 (!), plunged right in and happily stitched a row on my orphrey. In the beginning, they stabbed around a bit before they found the correct hole with their needle. But I kid you not, after about 5 stitches their hand-eye coordination caught up and it all went very smoothly. By the way, I am happy for interested people to work on my orphrey. They can't really break anything. And it is much more fun than when you stitch a mock-up row on the side somewhere. Equally, I don't believe in doodle cloths. But that's a different story :). Would you be happy for strangers to have a go at your embroidery project? My orphrey background also contains a technique I had not tried before: Burden stitch over gold thread. It is used in the sky. I was familiar with Burden stitch but was a bit sceptical about the gold thread. When you are working the stitch it almost completely disappears below the silk. So, my thought was: "at least the texture is pretty". However, when the Burden stitched area catches the light it really glows! It never ceases the amaze me how little light, natural or artificial, goldwork embroidery needs to reveal its full potential.
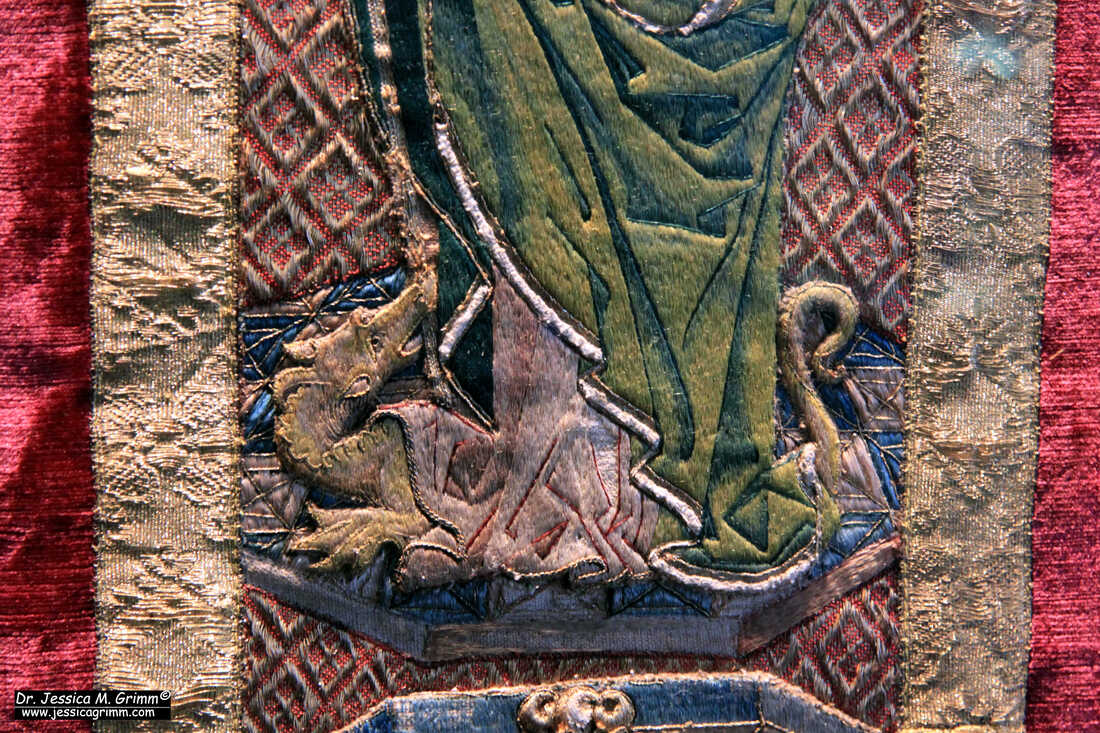
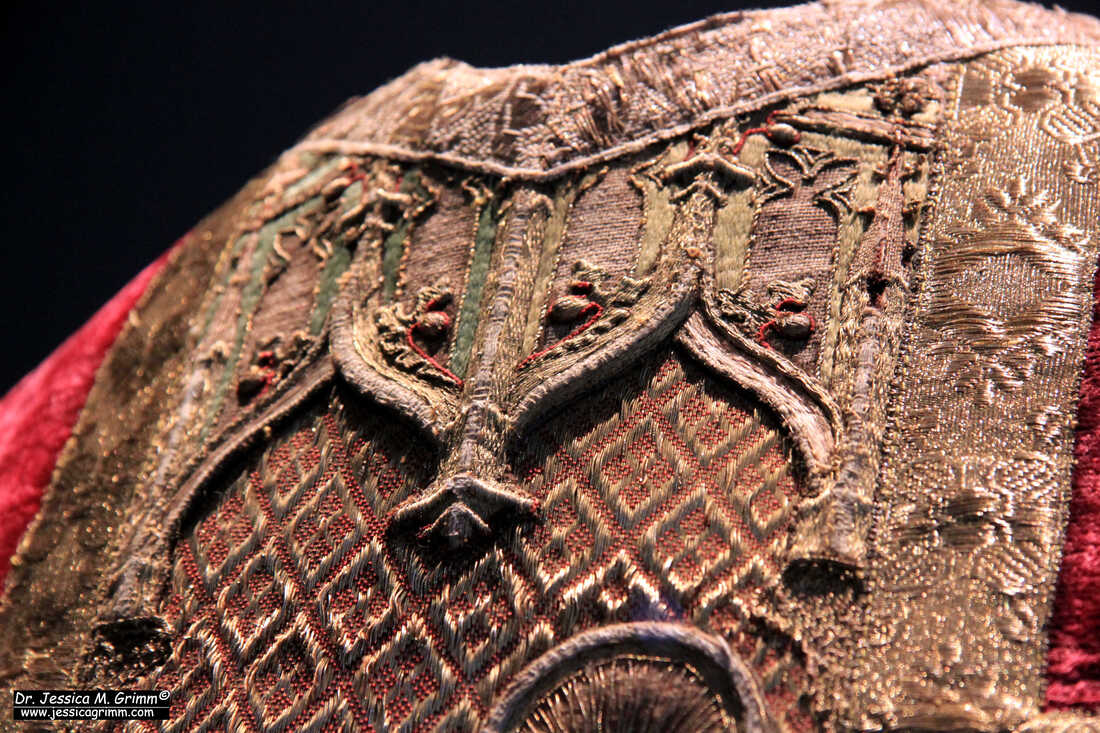
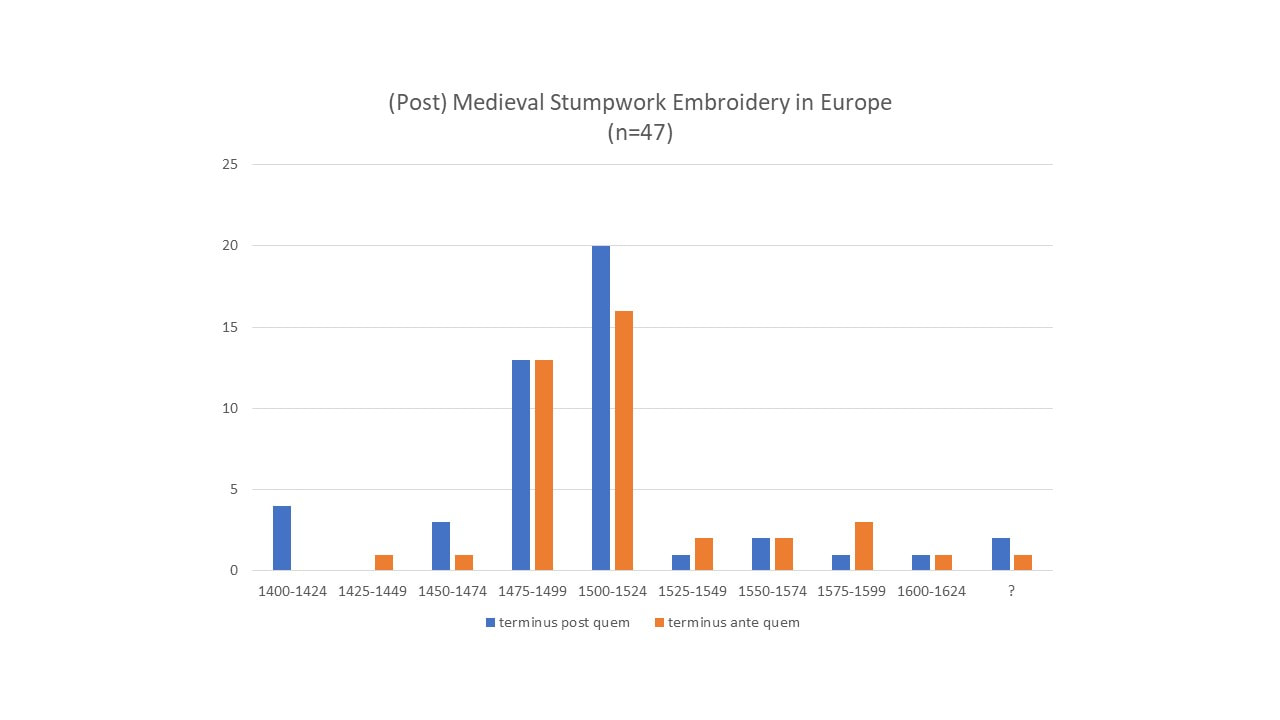
Have you ever worked Burden stitch over a gold thread in any of your projects? Would you like to have a go? My Journeyman Patrons find handy PDF instructions on my Patreon page! Earlier this year, the Diocesan Museum Freising opened its doors again after extensive remodelling. As it is not too far from where I live, I decided to check it out in case any medieval embroidery was on display. It turned out that they have a stunning chasuble with very high-end embroidery on it. Unfortunately, there were no captions in the museum. I emailed them and wrote an official letter. To no avail. They never answered. Frustrating as this is, it is unfortunately, a reality when it comes to European museums. Museums in the UK or the USA are usually very helpful. Museums in Europe usually do not even bother to answer, let alone host me for a research visit. This undoubtedly is the result of how museums were and are financed in the respective countries. And with the 'distance' between lay people and experts. Despite having a doctorate in archaeology, being a professional embroiderer and having studied medieval goldwork embroidery for a number of years, this does not always make me an expert :). So, let's see what we can find out on our own about this stunning piece of embroidery! The chasuble cross on the back shows an interesting scene at the top: the mystical marriage of Saint Catherine. As far as I am aware, this is the only embroidered version of this particular episode. There are more embroidered scenes of the life of Catherine, but this one seems unique. The scene is flanked by two angles. One playing the harp and the other a lute. Below the central scene, Saint Margaret is depicted with the dragon. The beast playfully bites into her standard. The Saint at the bottom is Dorothea with her basket of flowers. Catherine, Margaret and Dorothea are known as the virgines capitales. As you can see, the orphrey has been cut at the top and at the bottom. Furthermore, we cannot see the front of the chasuble which might also have an orphrey. But the fact that the virgines capitales are usually four saints gives us an idea of what is missing: Saint Barbara with the tower. A further likely candidate is Mary Magdalene. As said, the embroidery is very high-end. The silk-shading is very finely executed. Both in the actual shading and in the regularity of the stitches. There's no or nue, which gives us our first hint of where the orphrey was made. Or nue is typically something of northwestern Europe (the Low Countries and Northern France) and Southern Europe. It was not really used in England or in Central Europe. As the stitching is very high-end and England does not seem to produce outstanding medieval embroideries after the heyday of Opus anglicanum, we can rule out England as the place of origin. This leaves Central Europe as the most likely candidate. The diaper pattern used in the background of all three sections of the orphrey is unusual too. I know of only one other instance where this pattern has been used: on an Italian orphrey with Bartholomew the Apostle in the Indianapolis Museum of Arts. Those orphreys are clearly Italian and date to AD 1500-1550. The orphreys on the chasuble from Freising are clearly not Italian. And the strong red couching stitches also support this (yellow is preferred in Italy). Another important characteristic of the embroidery on this orphrey is the padding. Especially the arches above the central scene and above Saint Margaret are very highly padded. It would not surprise me if a little bit of wood is hiding in the most-padded parts. In contrast, the figures and the rest of the scenes show very little padding. There's a relatively short period in the history of Central European goldwork when voluminous padding techniques (think stumpwork) really take off. Pieces belonging to this form of embroidery date from about AD 1400 until 1600 (some have a really wide date range assigned to them). However, when the dates are plotted for the 47 pieces in my database, we see that they cluster on either side of AD 1500. I, therefore, think that the orphreys on the Freising chasuble probably date between AD 1475 and AD 1525.
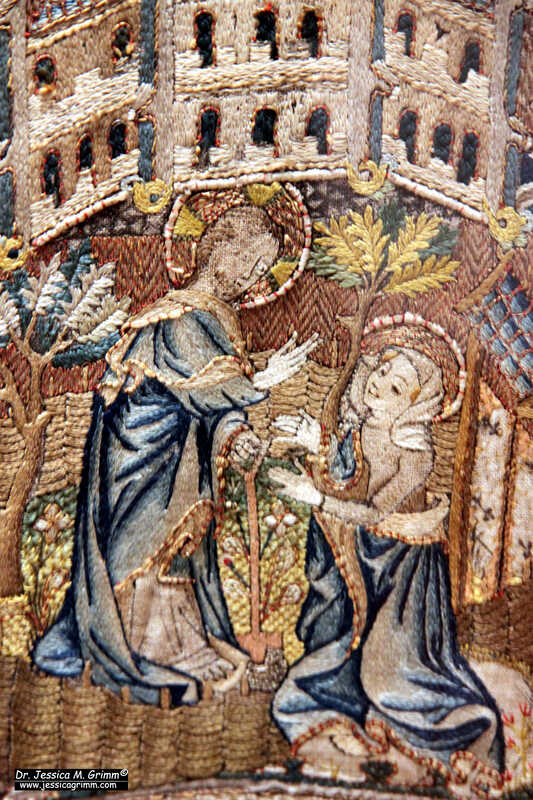
It is thus probably safe to say that the beautiful orphrey on the Freising chasuble was made somewhere in Central Europe around the turn of the 16th century. If you would like to see more pictures of this piece, please consider becoming a Journeyman Patron. As a Journeyman Patron you'll have instant access to a further 12 pictures of this piece. The monthly support of my Patrons enables me to keep this website running! In the last few years, there's been an increased focus on the benefit of needlework on your mental health. However, 'modern' principles of good mental health are sometimes also depicted in medieval embroidery itself. One such famous depiction is the scene of 'Noli me tangere' (cease holding on to me). It is based on a biblical story in the gospel of St John. Mary Magdalene returns to the grave site. She talks to a man whom she thinks is the gardener. He tells her not to hold onto him when she finally recognises him to be Jesus. Their former relationship has to change. Depending on what you believe, this is either because Jesus has died or because he just became responsible for the salvation of mankind and is now kinda busy. Either way, they need to let go of what has been. Being able to properly let go is a sign of good mental health. Let's have a look at the different depictions of this intimate encounter. Among the 1650 pieces of medieval goldwork embroidery, only 21 depict this particular scene. It is clearly not overly popular, but also not completely rare. The oldest pieces date to the 13th century and the youngest to the 16th century. By pulling them together, you start to observe some interesting things. Firstly, most of the embroideries depict Jesus as the risen Christ and not as a gardener. The first 'gardener-Jesus' is depicted on a cope from the St Marienkirche in Danzig (now Gdansk, Poland) (kept at St Annenmuseum Lübeck). It dates from after AD 1460 (but probably not long after). Between AD 1520 and 1530, the 'gardener-Jesus' becomes the norm. And you can clearly tell that the embroiderer knew what a gardener looked like and what equipment they used. In fact, the depiction of Jesus' shovel is so accurate, that medieval archaeologists have no trouble matching them to excavated originals. In the above picture, the brown silk embroidery represents the wooden part of the shovel and the silver threads depict the iron 'shoe' which protects the wooden edge and hardens it for digging. Neat, don't you think? Putting the 21 embroideries in chronological order also shows developments in embroidery techniques and materials. The two oldest pieces from the 13th century are very different. One is a case of Opus florentinum from Italy (kept in the Aachener Domschatz, inv. nr. T 01001). It shows this characteristic treatment of the golden background: string padding in the form of foliage. The gold threads have been couched over it to create an embossed look (as I don't own a picture of this piece, please compare it with this piece from the MET 60.148.1). The other piece, the so-called Hedwigkasel (now kept in the Muzeum Archidiecezjalne we Wroclawiu, nr inw. 23/29a), is very different indeed. It is worked on red silk and reminds a bit of the earlier Opus anglicanum pieces. The figures are completely worked in metal thread embroidery. Many different, often very intricate, diaper patterns have been used to fill in the different parts of the figures. It even looks like the embroidery is done in underside couching. In the later pieces, we see an increased use of the or nue technique. In the beginning (late 15th century), it is only used on parts of the clothing of the most important figure in the scene. Pieces from the 16th century, often show the use of or nue for the full width of the orphrey. Only bare skin is voided. Figures and background are worked in one go. And whilst the youngest piece is also one of the finest when it comes to the execution of the embroidery, two slightly younger pieces show the decline likely caused by the Reformation. And then there was this absolutely thrilling discovery of another 'twin image'. A chasuble (inv. nr. 138) held in the Frankfurter Domschatz shares an identical depiction of Noli me tangere with a chasuble (inv. nr. BMH t2912a) from the Museum Catherijneconvent. The embroidery techniques used differ a bit, but the design drawing is identical. I have alerted both museums to the discovery just in case they are unaware. As there seems to be little known about the piece in the Netherlands, finding a twin on a piece with known provenance is always very nice!
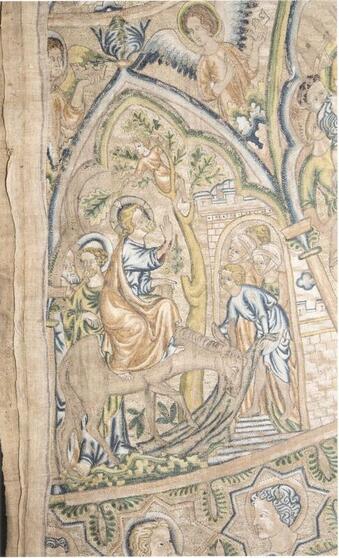
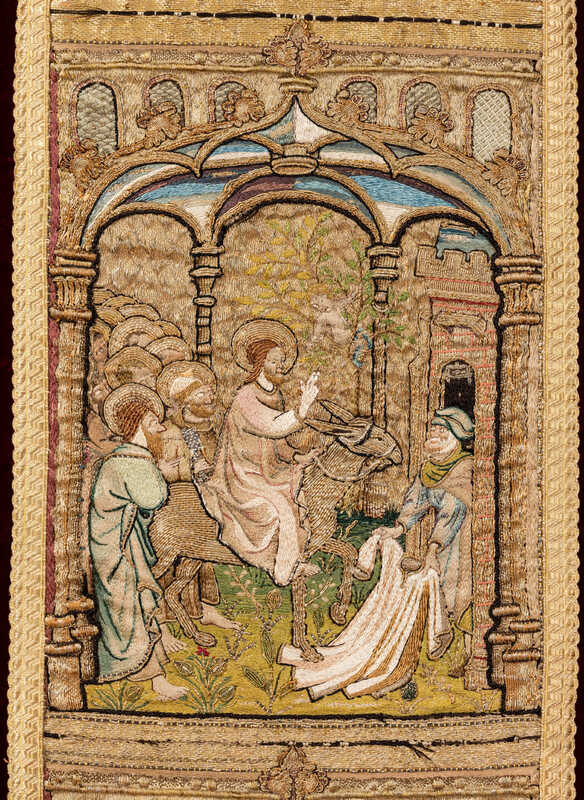
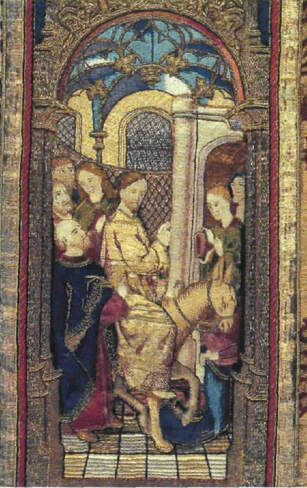
My Journeyman Patrons have access to a Padlet on which all 21 pieces are introduced. Sometimes a question pops up in my mind in the middle of the night. These questions usually develop into delightful rabbit holes the next day. My latest 'in the middle of the night question' concerned the embroidered depiction of Palm Sunday. You see, some scenes were hugely popular in the medieval period, and we have many embroidered depictions of them. And then you have scenes that are very rare. Palm Sunday turns out to be one of these rare scenes. By now, I have looked at over 1650 pieces of medieval goldwork embroidery. That's about 4480 orphreys. Only three (!) of those depict the Triumphal entry into Jerusalem. But those three have a rather interesting story to tell. Let's hop down the rabbit hole! Two of the three orphreys depicting the Triumphal entry into Jerusalem look very, very similar. Above on the left is the scene as depicted on the Bologna cope. This is a famous cope made in the style of Opus anglicanum and it dates to the early 14th century. On the right, you see an orphrey on the chasuble of a Belgian bishop who reigned around the middle of the 15th century. That one was made between about 133 and 157 years later. Yet, the compositions of both scenes are eerily similar. Only the clothing of the Jerusalem citizen spreading a garment onto the street has adapted to the correct fashion of the time. Fascinating, isn't it? I think that both embroideries are based on the same image. Maybe from a famous illuminated manuscript or from a painting in a church. An image that was clearly widely known in Western Europe in the 14th and 15th centuries. Both embroideries are also testimony that the embroidery techniques can be very different and still produce two very similar pictures. Do click on the image on the right as it will take you to the KIK-IRPA database with many more pictures of the chasuble of bishop Chevot. The third image is clearly different. It comes from a chasuble belonging to an ornate associated with bishop David of Burgundy of Utrecht in the Netherlands. The chasuble is now kept in the Cathedral treasury of Liege. Gone is the delightful chap sitting in the tree. And the Jerusalem street is suddenly paved. Interestingly, this chasuble was made around the same time as the chasuble of bishop Chevot. However, although now both chasubles are kept in Belgium, originally the one made for bishop David of Burgundy was made in the Northern Netherlands. Possibly in Utrecht, his bishopric see.
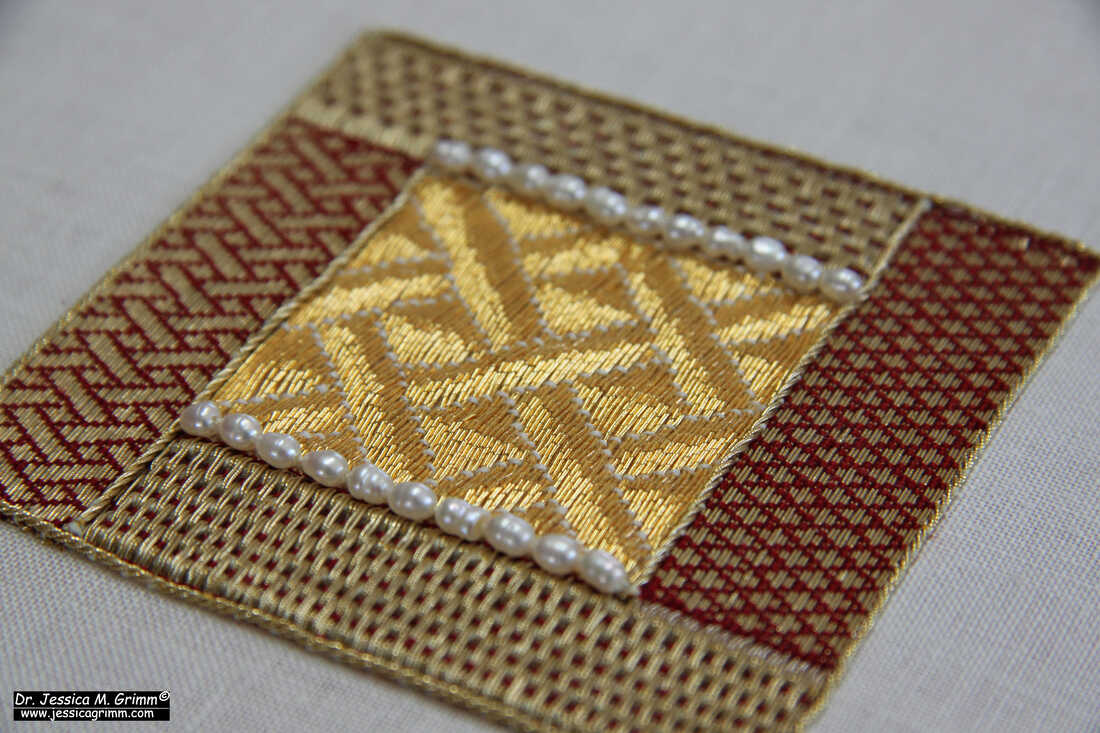
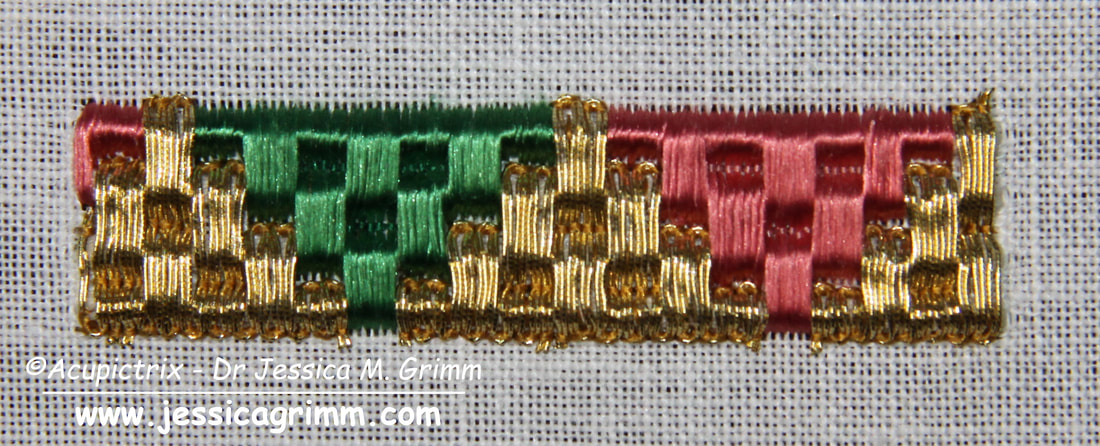
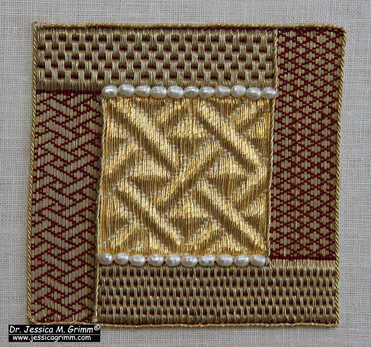
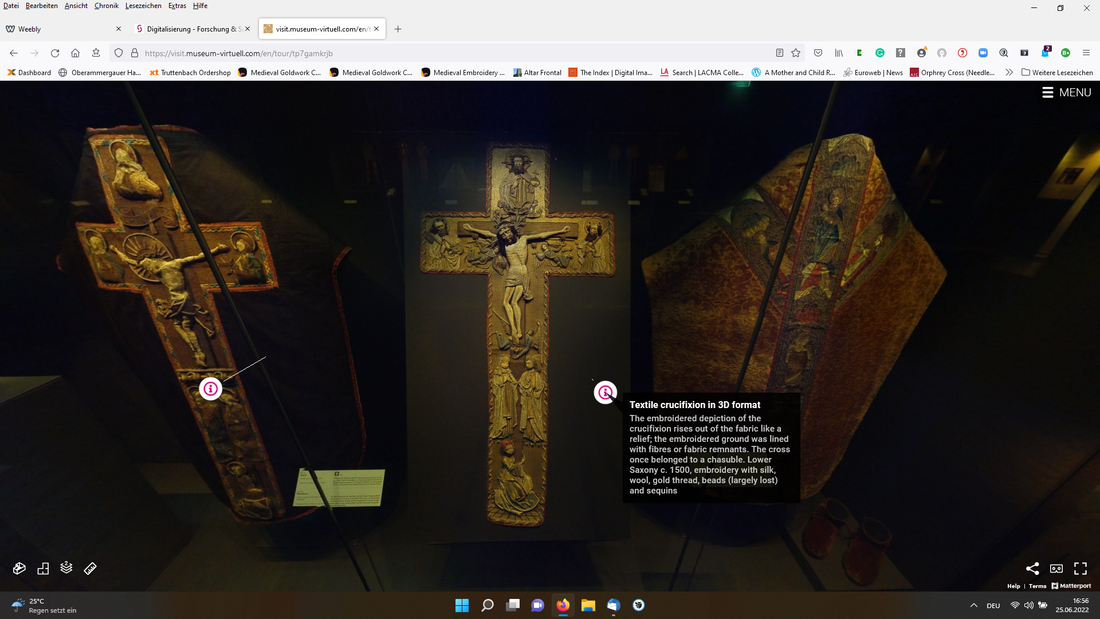
The Opus anglicanum piece has obviously no or nue. The orphrey made in the Southern Netherlands (bishop Chevot) has a kind of rudimentary or nue in the donkey and for the house/gate of Jerusalem. Contrary, the orphrey made in the Northern Netherlands (bishop David of Burgundy) has Jesus completely rendered in very fine or nue. Throughout the orphreys on this chasuble, Jesus is the only figure wearing clothing (partly) stitched in or nue. That's just in case an onlooker missed who was the most important figure in the embroidered story. The question remains: why is this particular scene so rare in medieval goldwork embroidery? Did embroiderers not like to stitch donkeys? They seem to do okay-ish when it comes to the Nativity. Was it a part of the Passion story that did not appeal so much to Joe Average medivialis? I do not know enough about medieval liturgy to determine if Palm Sunday was perhaps less significant back than? Or maybe other parts of the Passion were just more popular and appealed more? Trying to get into the heads of people who lived more than 700 years ago is fun, but never quite satisfactory! In the fall, I will be teaching a very special workshop in a spectacular location. And for those who cannot attend, do read on as you can virtually visit the exhibition any time you like. In this blog post, I'll tell you a bit more about the workshop itself. And I'll show you some screenshots of the virtual exhibition so you'll know what is on display and where you will stitch, should you attend. My plan is to offer more of these workshops on location. They are a unique opportunity to stitch where the actual medieval embroidery is kept. You can study the originals and try to recreate them at the same time! And you get to explore different parts of the world as well. Halberstadt, for instance, is a very charming medieval town with many original buildings still standing. You do not want to mis this! First things first. You will be stitching a small sampler (c. 8.8 x 8.8 cm) of (padded) goldwork embroidery techniques. The central square consists of a diaper pattern over string padding. Such backgrounds were very popular in stumpwork embroidery from Central Europe. Simple to make, but with a high wow-factor. The border consists of two different very popular diaper patterns (open quare and open basket weave) and two versions of simple basket weave over string padding. The seams between the different areas are covered with twist and fresh-water pearls to give the sampler a proper medieval look. More information on materials can be found here. This workshop is ideal if you want to explore the most common medieval goldwork embroidery techniques. We will be stitching in the cloisters of Halberstadt Cathedral. The Cathedral was built between 1236 and 1491 and has preserved its medieval character. You will have full access to the museum and the Cathedral during the two-day workshop. I will bring magnifier lamps and Lowery workstands for you to use. A good place to stay is the Halberstädter Hof. It dates to 1662 and is very charming. This hotel is in walking distance from the Cathedral. Halberstadt has a train station and can be reached from Berlin Airport in about 3,5 hours. The cathedral houses one of the most important cathedral treasures in Europe. It is probably also one of the museums with the largest permanent display of medieval textiles. Over 70 pieces, from luxurious patterned silks, to amazing goldwork embroidery to stunning whitework and huge tapestries, can be seen. There is a beautiful publication (Meller, H., Mundt, I., Schmuhl, B.E.H. (Eds.), 2008. Der heilige Schatz im Dom zu Halberstadt. Schnell + Steiner, Regensburg) which has beautiful colour pictures and detailed descriptions of about 60 pieces. It even contains many close-up pictures where you can literally see every stitch. There is also a full collection catalogue underway which will be published through the Abegg Stiftung. In my personal opinion, their publications are the gold standard when it comes to embroidered textiles.
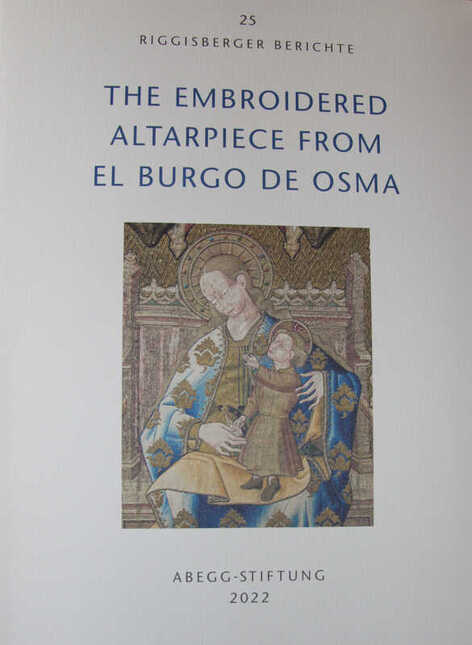
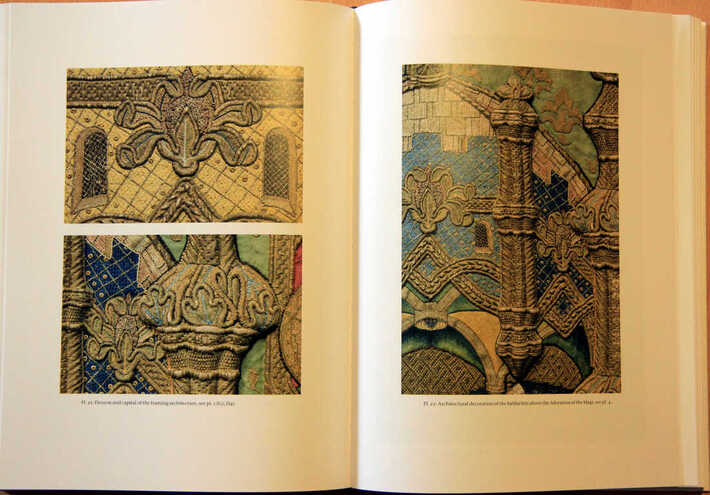
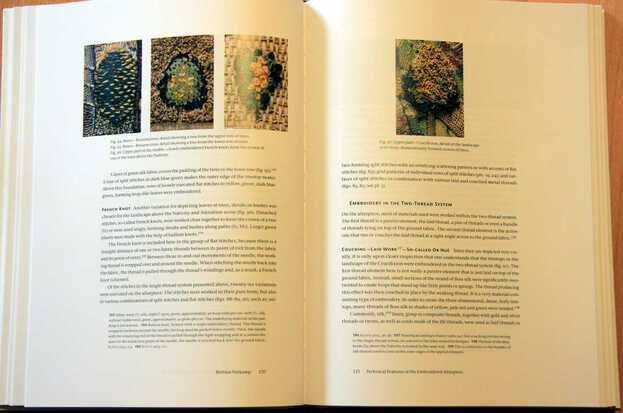
Have I whet your appetite? Brilliant! I hope to see you later this year in Halberstadt for this truly unique experience. You can book your place on the workshop page. For my Journeyman Patrons: I have prepared a short video in which I'll leaf through the above mentioned book. Maybe this blog post should come with the warning that there is a severe chance that you will spend money after reading it ... The Abegg-Stiftung has published a new book. In English this time! Some years ago, they conserved the altarpiece from El Burgo de Osma and the new book describes in incredible detail what they have found out about the embroidery. From the materials used to the order of work. It is so detailed that a skilled embroiderer or group of embroiderers could make a copy. Now that's a book worth having on your shelf. Even if it means that you will have to eat dry bread for some time to be able to afford it. We are still in the season of Lent so you will fit right in :). Let's explore! The embroidered altarpiece from El Burgo de Osma is the only one of its kind that has survived to the present day. It was made around AD 1460-1470 in Castille (Spain) for bishop Pedro the Montoya. The altarpiece is currently housed in the Art Institute of Chicago (Inv. no. 1927.1779a-b) and consists of two pieces. The top part shows four scenes: the Nativity on the left, Mary with baby Jesus in the middle with the Crucifixion above and the Adoration of the Magi on the right. The bottom piece shows the Resurrection in the middle flanked by three Apostles on each side. The top part measures 161,5 x 200,5 cm and the bottom part measures 89,5 x 202 cm. Both parts are all-over embroidered with gold and silver threads, coloured silks, spangles and seed pearls. The main part of the book consists of a 100-page chapter on embroidery materials and techniques written by Bettina Niekamp. She has identified over 200 different combinations of threads and stitches/techniques on the altarpiece. And she describes them in great detail. Together with the many detailed pictures in the book, you are able to identify them all. It will take you a while but it can be done. Amongst the embroidery techniques is the over-twisted silk technique for rendering realistic tree tops, grassy areas and dirt. This technique is well-known from 17th century English stumpwork. The many padding techniques are also intriguing. There are tubes made of linen fabric and then stuffed with wool to turn them into the base layer of columns. String is then added for extra texture before the actual goldwork embroidery commences. The embroidery is mainly executed in very skilfully shaded split stitch. But there is a form of or nue too. And for a more realistic depiction of certain details, multi-coloured threads were used. They were made by blending different silk filaments in the needle. The embroidery is also embellished with twists made of different numbers and combinations of passing thread. The book also has a whole section with full-page plates of the different parts of the embroidery. You can spend hours looking at the amazing detail. Further chapters describe the times and the life of bishop Montoya, its art historical context, the iconography in relation to the material and embroidery techniques used, late medieval embroidery in Aragon and a case study on vestments from Barcelona. With 427 pages, there is a lot to explore!
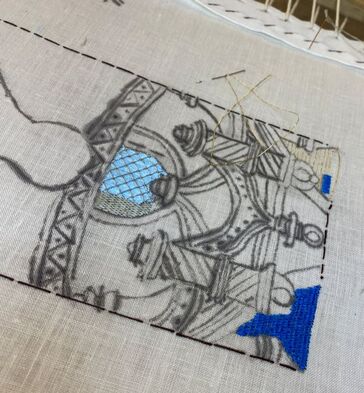
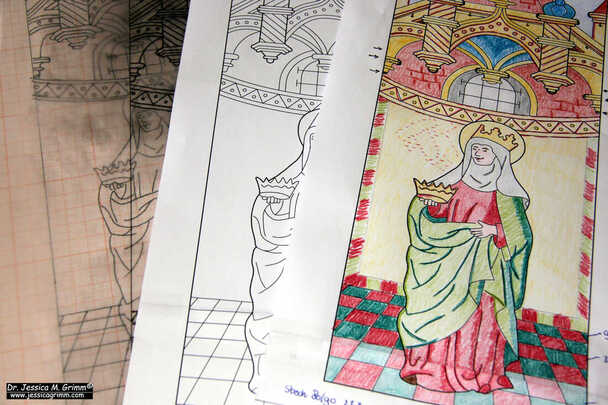
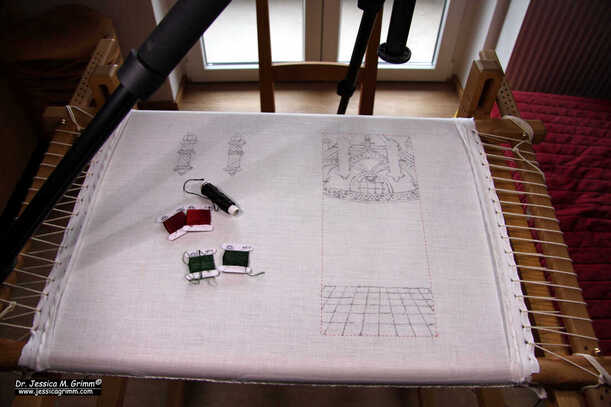
The book can be ordered directly from the Abegg-Stiftung in Switzerland. It costs CHF 85 + shipping. It does not seem to be available from the Art Institute of Chicago. The fact that this book was published in English instead of German is a real plus. Please let the Abegg-Stiftung know that we like more of that when you are ordering. They might end up translating some of their equally stunning older publications. My Journeyman Patrons can view a short video in which I flick through the book. Also note: Katherine Diuguid is giving a MEDATS lecture on her sampler, which features embroidery techniques seen on the altarpiece, this coming Sunday. With me moving house last year, I just wasn't settled enough to start stitching on the orphrey background for the Alpine Experience any earlier. I knew what I wanted to stitch and knew which colours to use. Finding the right mindset to start stitching, took a little longer. But I finally bit the bullet! So, expect regular update posts on the orphrey in the coming months. Today we'll start with the design, frame setup and the first bit of stitching. My Journeyman Patrons can download PDF instructions for the stitching part. The design is a combination of elements found on a series of orphreys on a chasuble held at Museum Catharijne Convent in the Netherlands. Although this time, I will only teach the orphrey background, it can be combined with the or nue figure of Elisabeth of Thuringia which I taught last year. However, both projects can be stand-alone embroideries. To reflect this, my stitched version of the orphrey background will completely omit the space for a figure. I've set up my slate frame with a piece of 46 ct even-weave linen. The design has been transferred using traditional prick and pounce. Instead of paint, I have used ink and a brush to connect the pounce dots. Although ink spreads a little, I prefer it above paint. In most cases, paint will flake off during stitching. Getting the consistency just right so it doesn't, is extremely difficult. Ink seeps into the fabric and thus cannot flake. The first element I have stitched is the famous tiled floor. It is easy embroidery and perfect for the start of such a large project! Medieval embroidery often consists of several layers of stitching worked on top of each other. The tiled floor is no exception. On the one hand, this helps with adding a sense of depth. The finished embroidery is less flat. On the other hand, it allows the embroiderer to hide the ends of his threads. Exposed thread-ends, however well secured, might with time unravel. In the name of durability, having as few starts and stops of the gold threads as possible is also important. Our tiled floor is a prime example of how this was achieved. The rows of gold thread consist of a single thread of passing thread. There are only two tails or exposed thread-ends: one at the start and one at the end. The thread 'travels' on the front along the edge of the tiled floor. By making sure that you have this 'turn' laying nice and flat, you can hardly see it in the finished piece. In addition, this edge is covered with a red ribbon in the original medieval piece. Clever, isn't it?
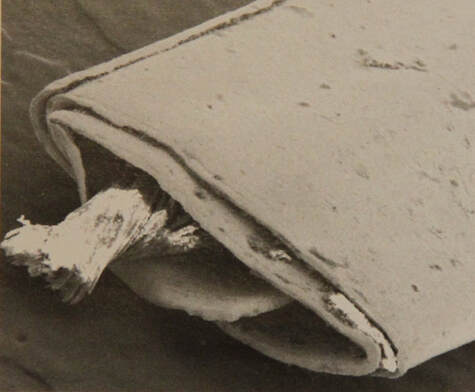
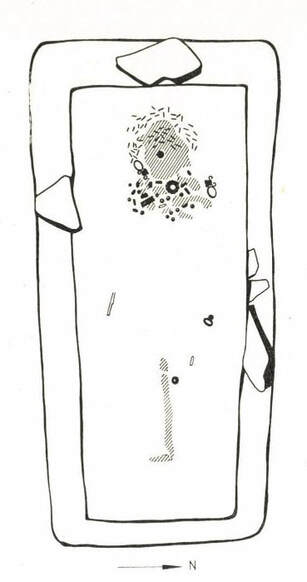
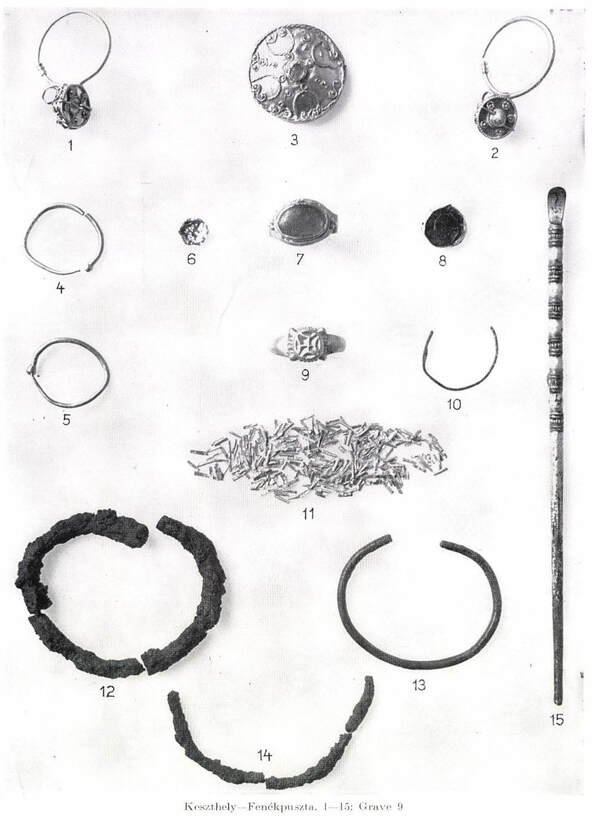
A couple of weeks ago, I showed you a curious piece of 12th century goldwork embroidery from Palermo, Sicily. It was made by sewing down golden tubes and then flattening them. In the meantime, I was able to find a bit more information on the embroidery. These golden tubes are not as rare as one might think. However, they were originally probably not used for embroidery, but for making hair nets in the sprang technique. Let's visit a couple of sarcophagi in Rome and some 'dark age' graves in Hungary! But first back to the fascinating golden tubes used in the royal workshops in Palermo in the 12th century. Above, you see a REM-picture of one of these little tubes. It was likely made by wrapping a sheet of pure gold foil around a 1mm thick wire. The wire was then carefully removed, and the resulting golden tube cut in smaller 'beads'. Each 'bead' is about 1.4 x 0.8 mm in size. They were sewn onto the samite fabric with a white thread (no specification mentioned, but probably silk). When the embroidery was completed, the tubes were hammered flat to probably achieve a continuous flat and shiny surface. This 'hammering' can also be observed on some of the Imperial vestments kept at Bamberg. It is not possible with modern gold threads. Similar golden tubes are regularly found in Roman burials in Italy and the wider Roman Empire. Some female burials contain up to 800 of these tiny golden elements. Sometimes fragments of fibres have also survived (linen and possibly silk). Comparing these finds with contemporary literary sources and wall-paintings has led to identifying them as the remains of reticulli (singular: reticulum). These were elaborate hair nets made in the sprang technique and either embellished with small golden tubes or made from gold thread all together. Although the Roman Empire ends in the West in AD 480, this isn't the end of the golden tubes. Burials dating to the 6th century on the territory of the Roman castellum of Keszthely-Fenékpuszta in Hungary contain the same golden tubes as seen in the earlier Roman graves from Italy. Interestingly, the Italian researchers seem to think that this particular hairstyle with a hair net originates in the Middle East. This fits well with the known Arab embroiderers stitching in the Royal workshops in Palermo in the 12th century. Maybe the use of golden tubes as beads in goldwork embroidery originates in the Middle East too. Maybe someone experimented with the golden tubes used in traditional hair nets and developed the embroidery technique. It would be worthwhile to investigate Middle Eastern goldwork embroidery from before the 12th century to see if pieces exist with these golden tubes. If anyone has additional information or ideas, please comment below! On a different note: I have started a Patreon page. You can show your support for this blog by buying me a coffee a month. Alternatively, you can give a little more to receive additional information with each blog post published. This week it will be my English translation of the Italian research paper. Future benefits will also include additional pictures of medieval goldwork embroidery and anything else I can come up with. The additional income generated through Patreon will allow me to visit more museums, read more books and pass the information on through future blog posts. Thank you very much for your support! Literature
Barkóczi, L., 1968. A 6th-century cemetry from Keszthely-Fenékpuszta. Acta Archaeologica Academiae Scientiarum Hungaricae 20, 275–311. This reference can be donwloaded from this website. Bedini, A., Rapinesi, I.A., Ferro, D., 2004. Testimonianze di filati e ornamenti in oro nell'abbigliamento di eta'romana, in: Alfaro, A., Wild, J., Costa, B. (Eds.), Purpureae Vestes. Actas del I Symposium Internacional sobre Textiles y Tintes del Mediterráneo en época romana. Universiat de Valencia, Valencia, pp. 77–88. This reference can be downloaded from the Academia page of one of the authors. Járó, M., 2004. Goldfäden in den sizilischen (nachmaligen) Krönungsgewändern der Könige und Kaiser des Heiligen Römischen Reiches und im sogennanten Häubchen König Stephans von Ungarn - Ergebnisse wissenschaftlicher Untersuchungen, in: Seipel, W. (Ed.), Nobiles Officinae. Die königlichen Hofwerkstätten zu Palermo zur Zeit der Normannen und Staufer im 12. und 13. Jahrhundert. Kunsthistorisches Museum Wien, Wien, pp. 311–318. |
Want to keep up with my embroidery adventures? Sign up for my weekly Newsletter to get notified of new blogs, courses and workshops!
Liked my blog? Please consider making a donation or becoming a Patron so that I can keep up the good work and my blog ad-free!
Categories
All
Archives
April 2024
|
Contact: info(at)jessicagrimm.com
Copyright Dr Jessica M. Grimm - Mandlweg 3, 82488 Ettal, Deutschland - +49(0)8822 2782219 (Monday, Tuesday, Friday & Saturday 9.00-17.00 CET)
Impressum - Legal Notice - Datenschutzerklärung - Privacy Policy - Webshop ABG - Widerrufsrecht - Disclaimer
Copyright Dr Jessica M. Grimm - Mandlweg 3, 82488 Ettal, Deutschland - +49(0)8822 2782219 (Monday, Tuesday, Friday & Saturday 9.00-17.00 CET)
Impressum - Legal Notice - Datenschutzerklärung - Privacy Policy - Webshop ABG - Widerrufsrecht - Disclaimer




 RSS Feed